Ombre Oreo Cake Recipe with New COOL WHIP Mix-Ins, Oreo

This post has been sponsored by COOL WHIP. All thoughts and opinions are my own.

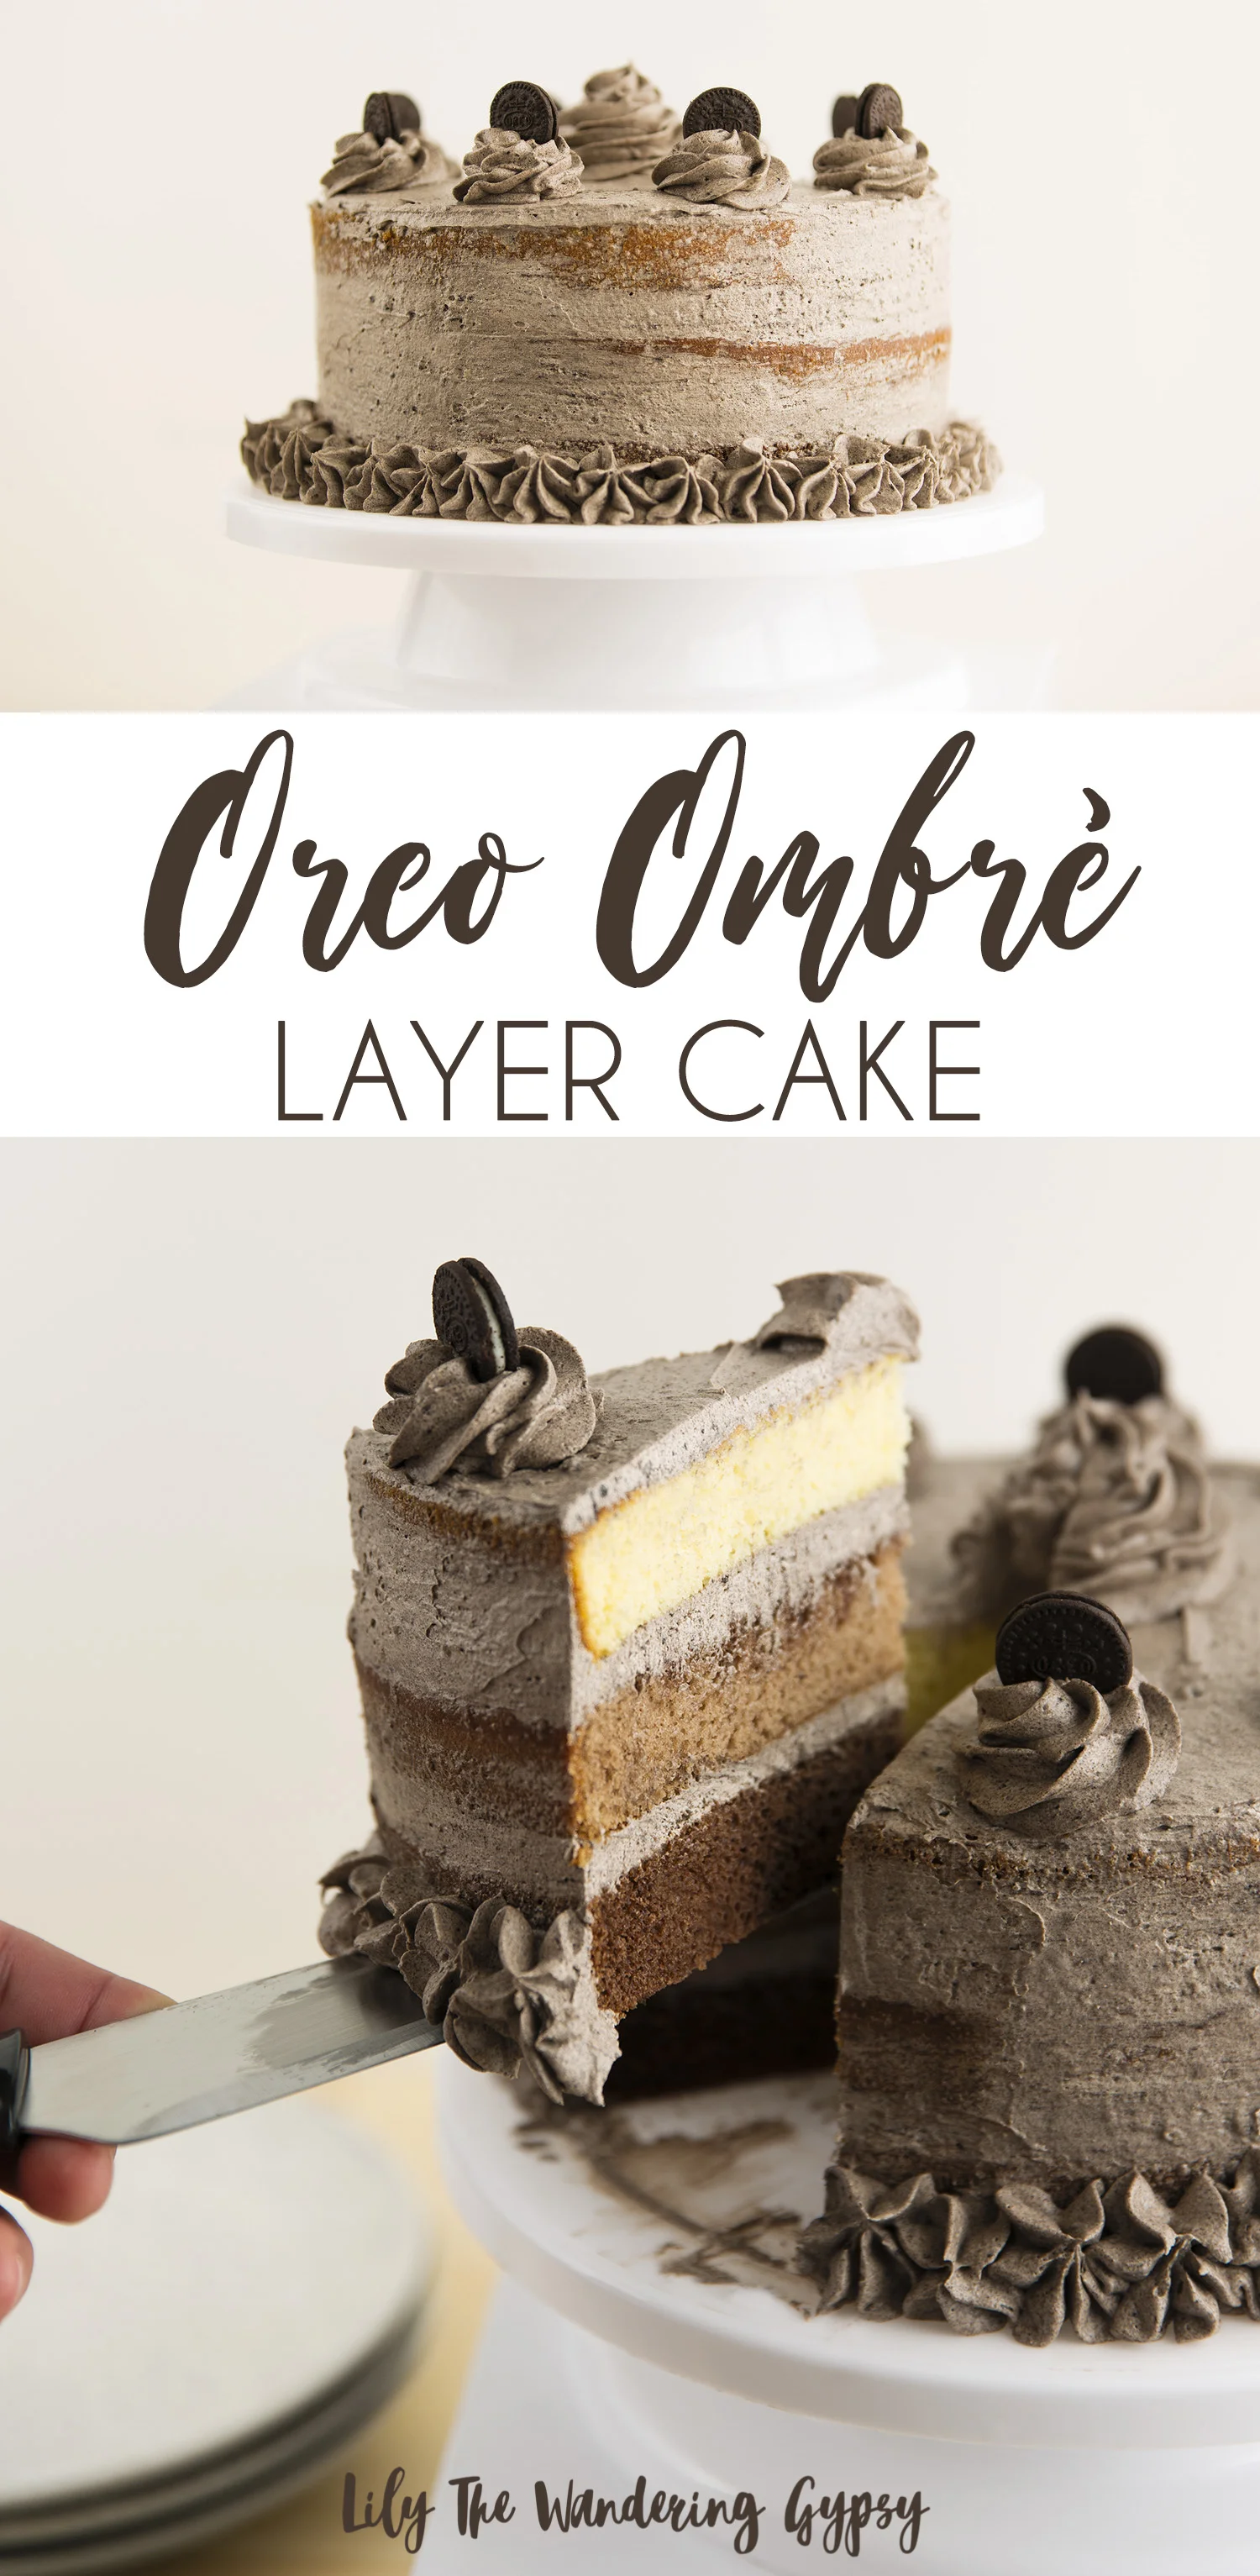
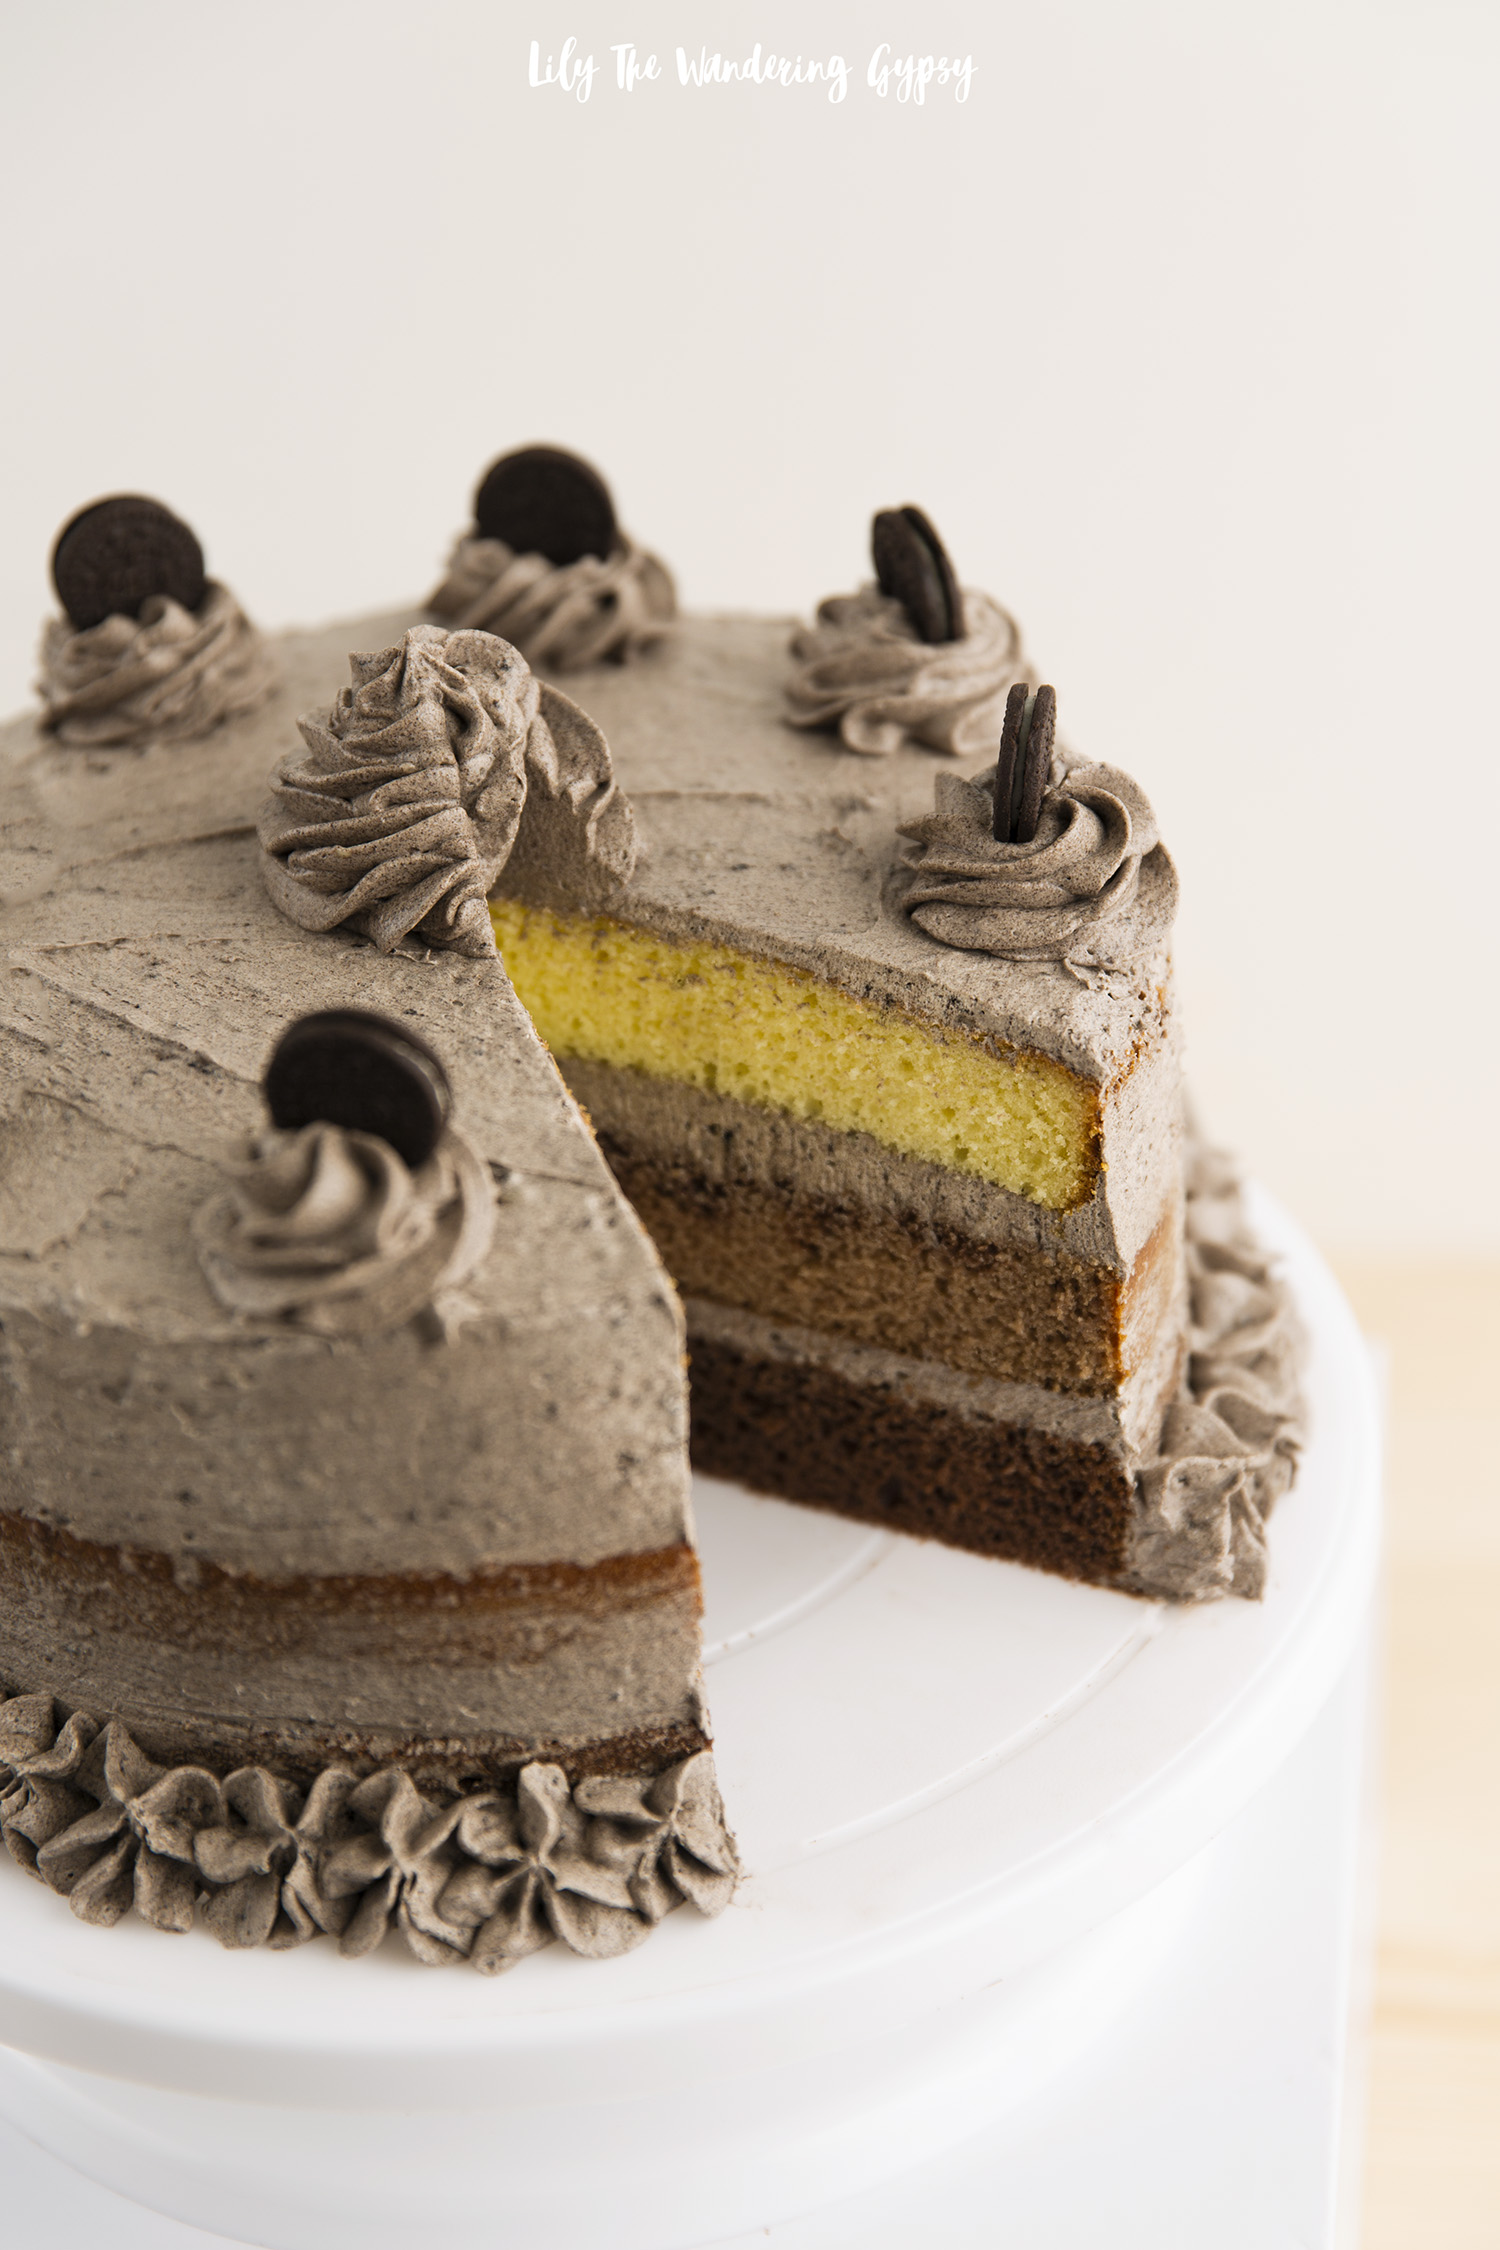
Oreo is one of my favorite flavors of all time. I would always go for a cookies and cream cone in a store with a million flavor options. I was extremely excited to be able to create a decadent, three layer ombre cake to show my love for all things Oreo!

FULL VIDEO INSTRUCTIONS:

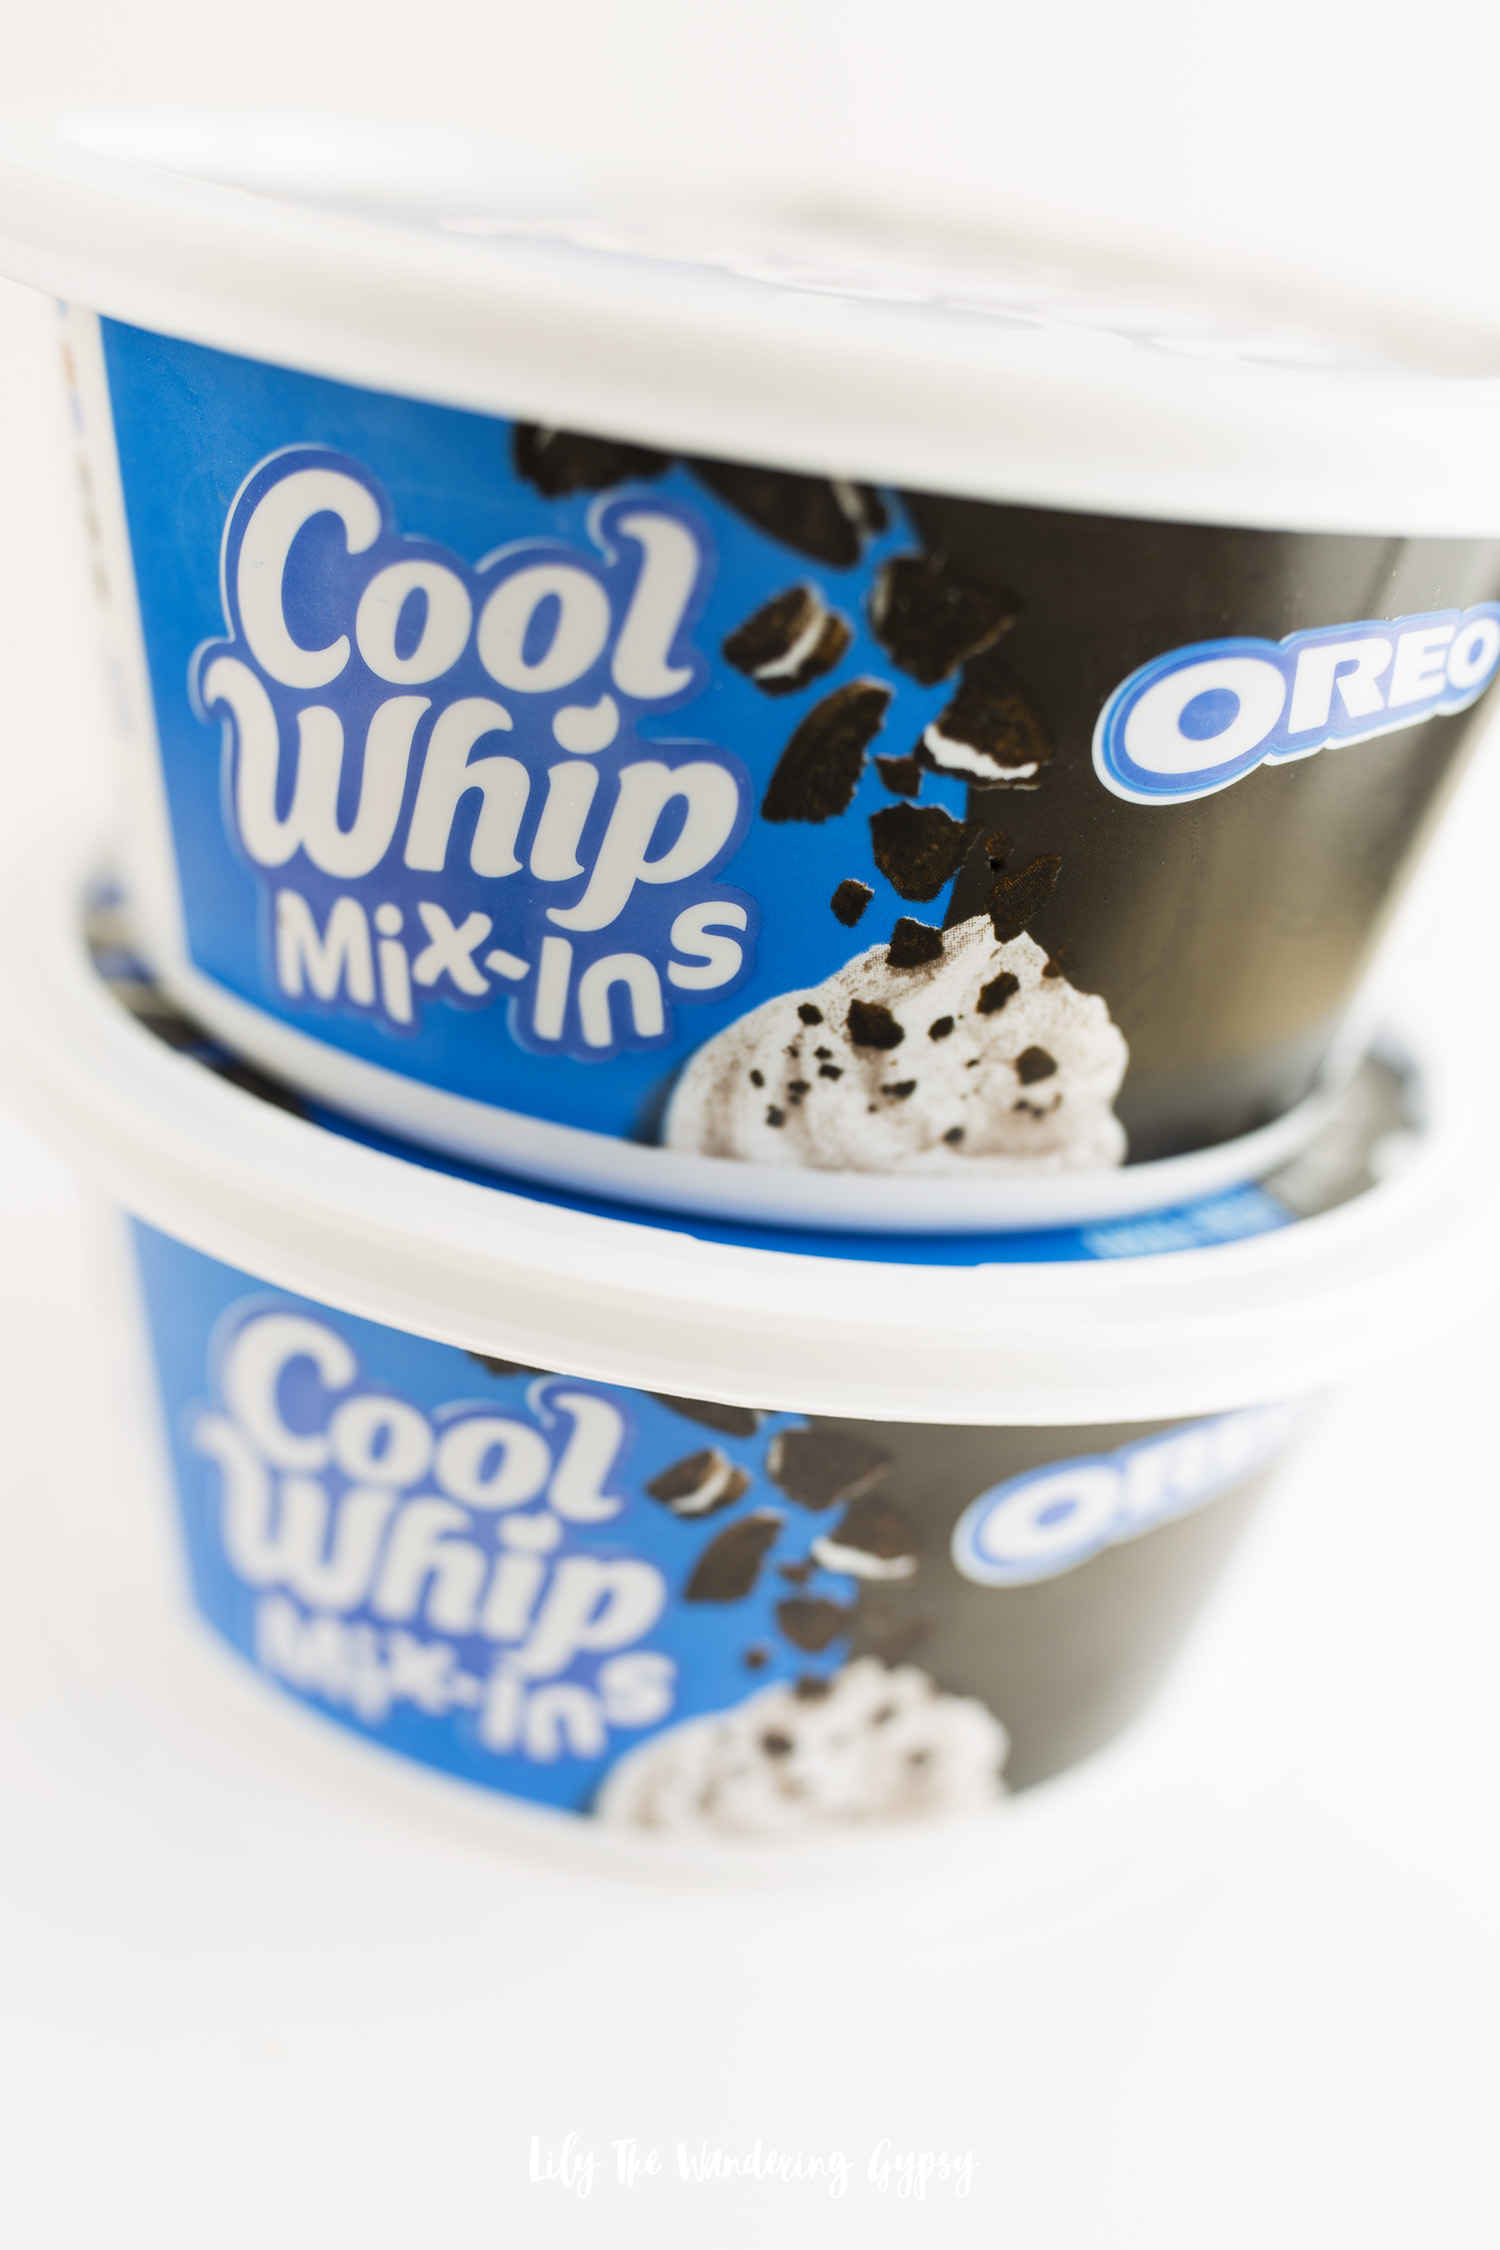
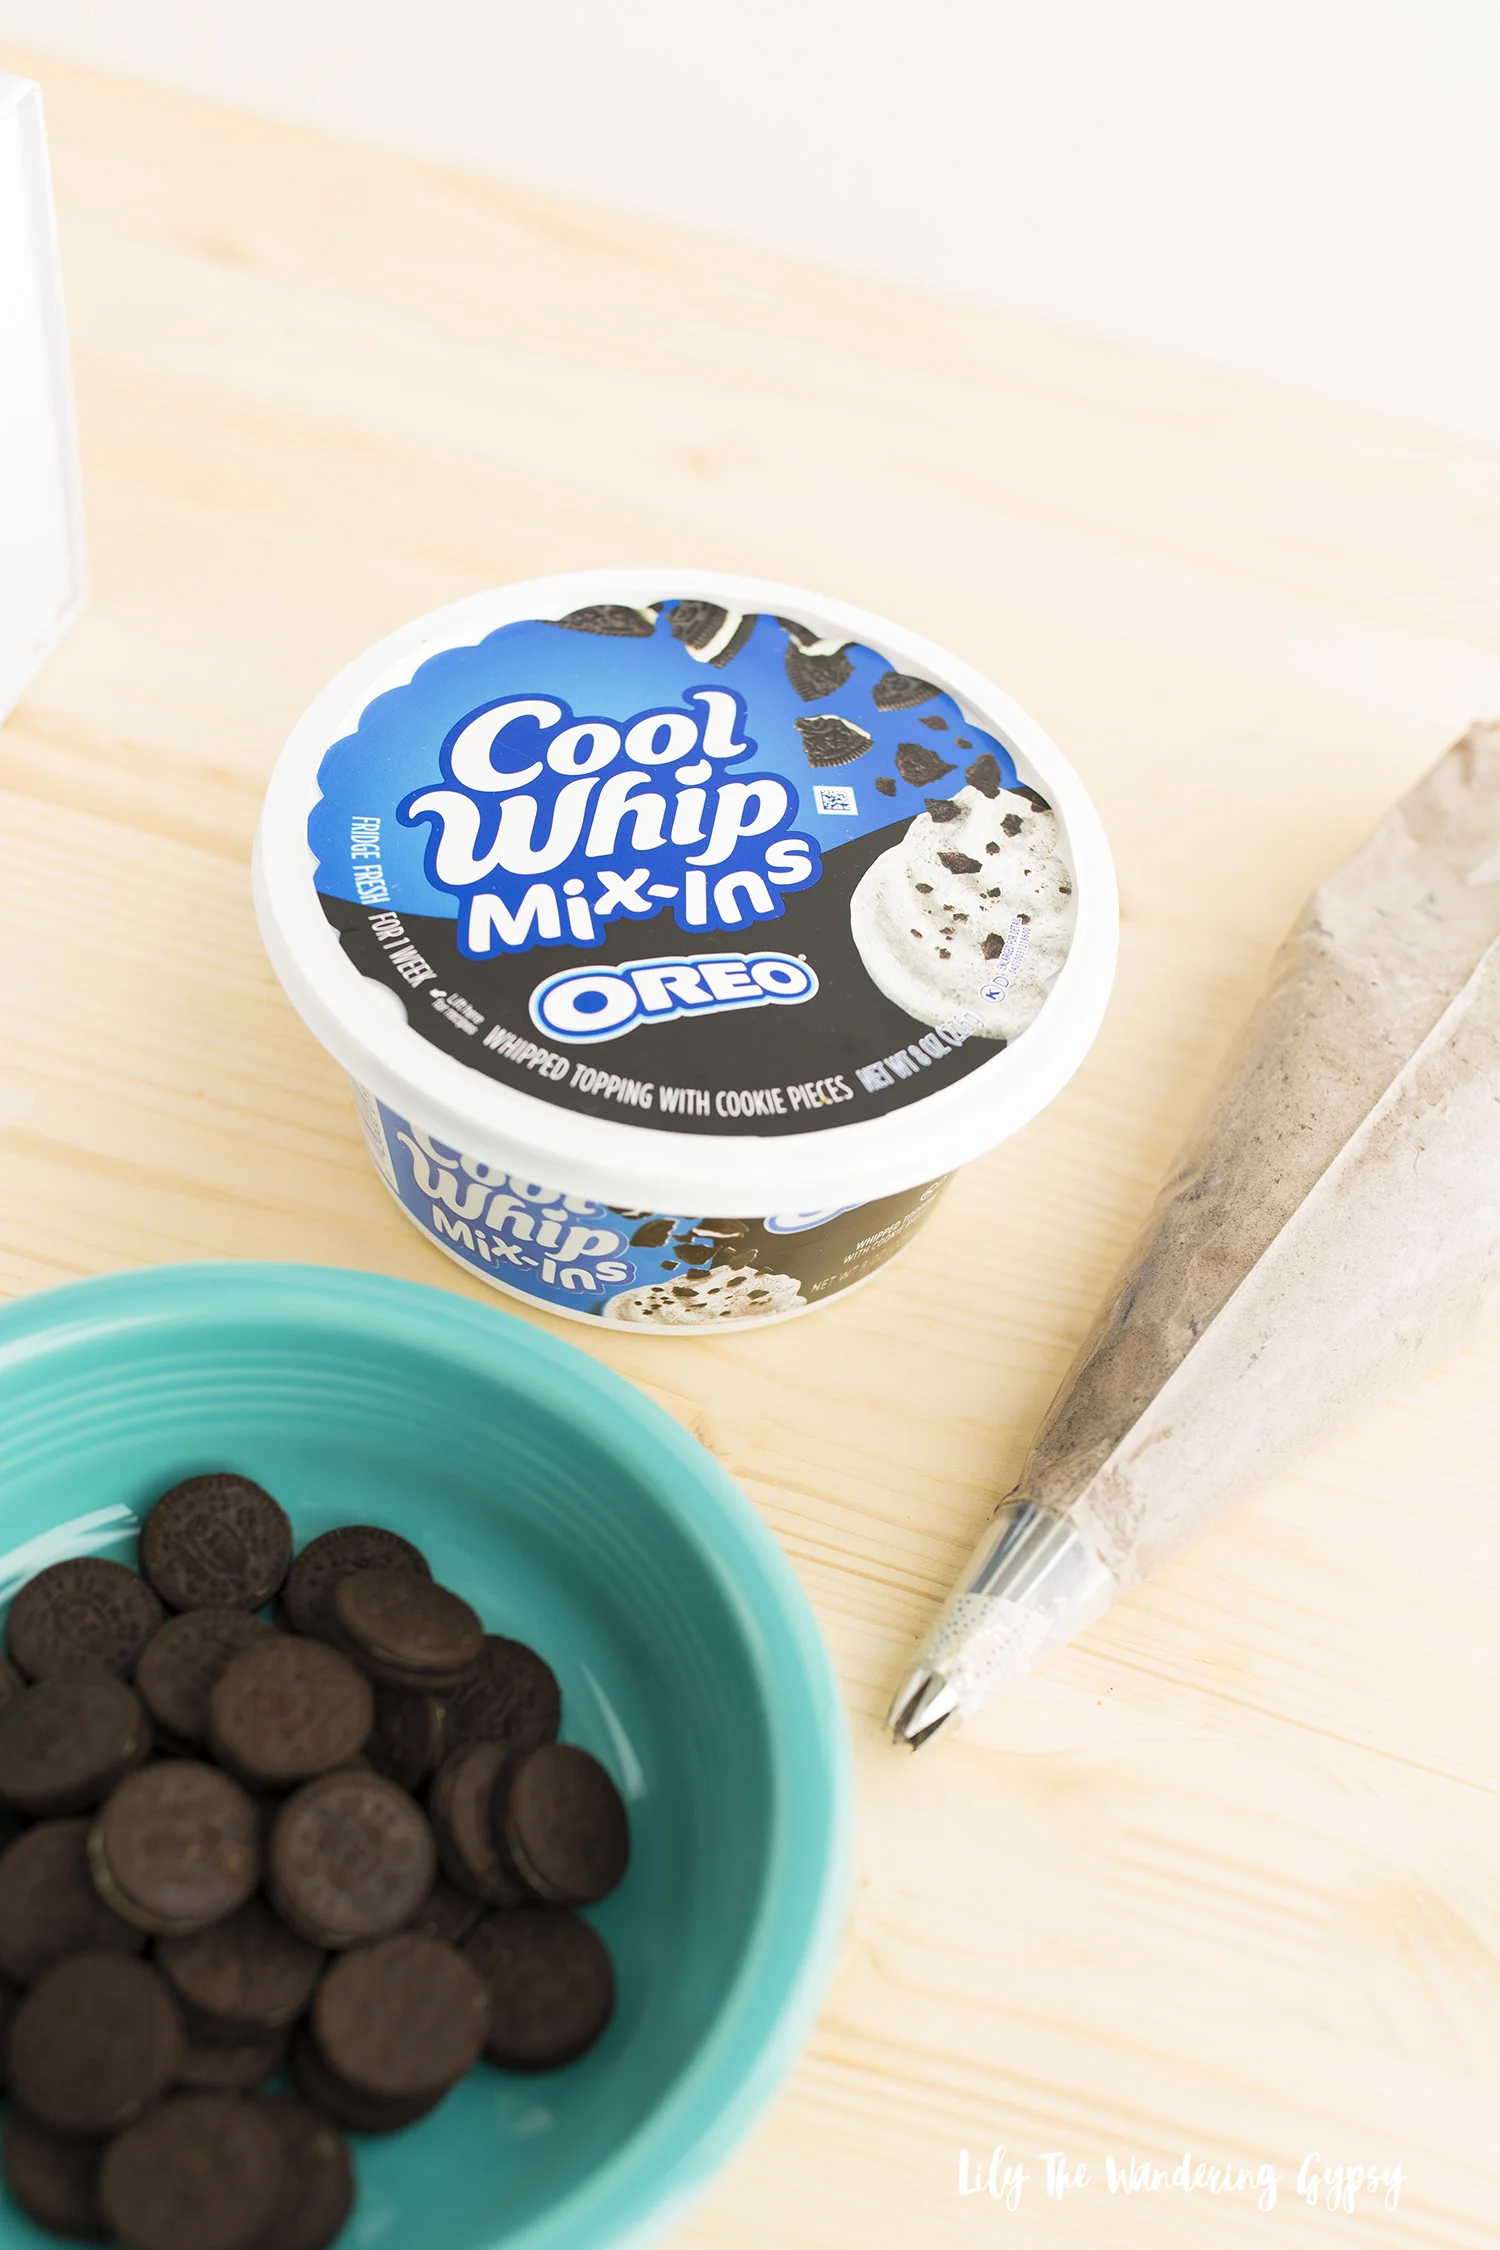
Two iconic foods – COOL WHIP and Oreo are mixing together for the ultimate dessert! I am considering this my new “secret ingredient” because it tastes like something that an upscale bakery would use. Everyone who tries this cake is definitely going to ask what makes it taste so delicious and unique.

If I had created this layer cake with traditional icing, it would be very heavy and not anywhere near as delicious. The light, airy texture of new COOL WHIP Mix-

Ins, Oreo makes you feel like you can indulge a little without the calories.

I was extremely impressed with this product, it’s going to become a staple ingredient in my home!

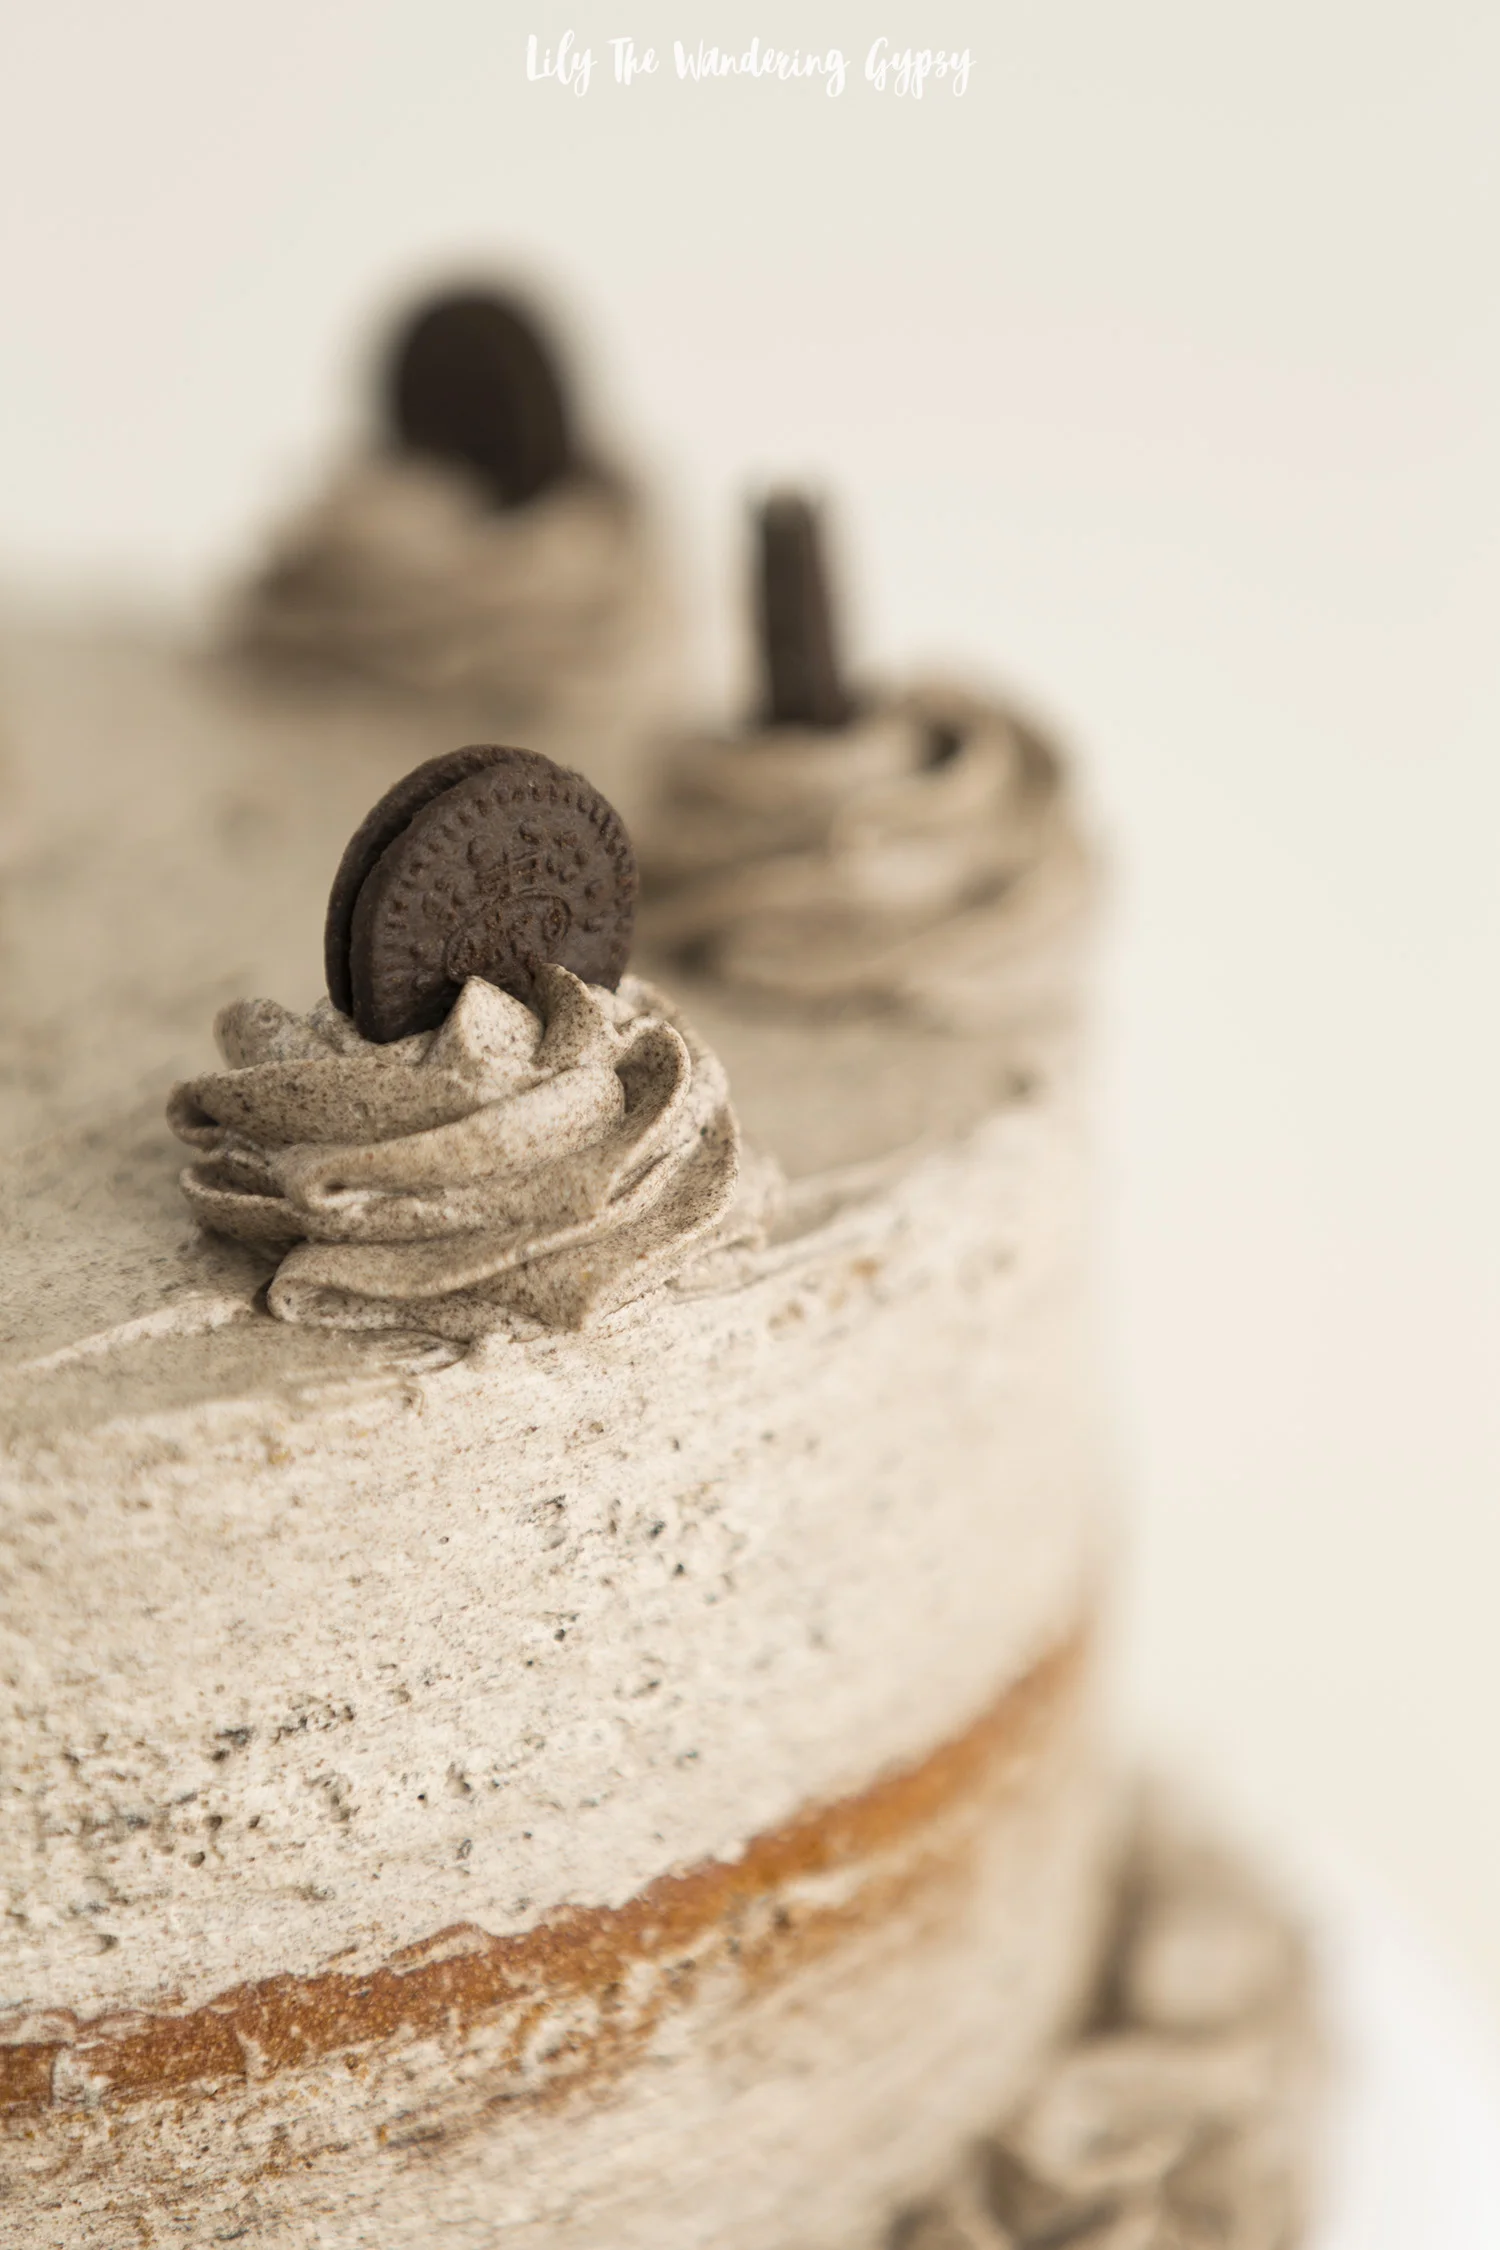
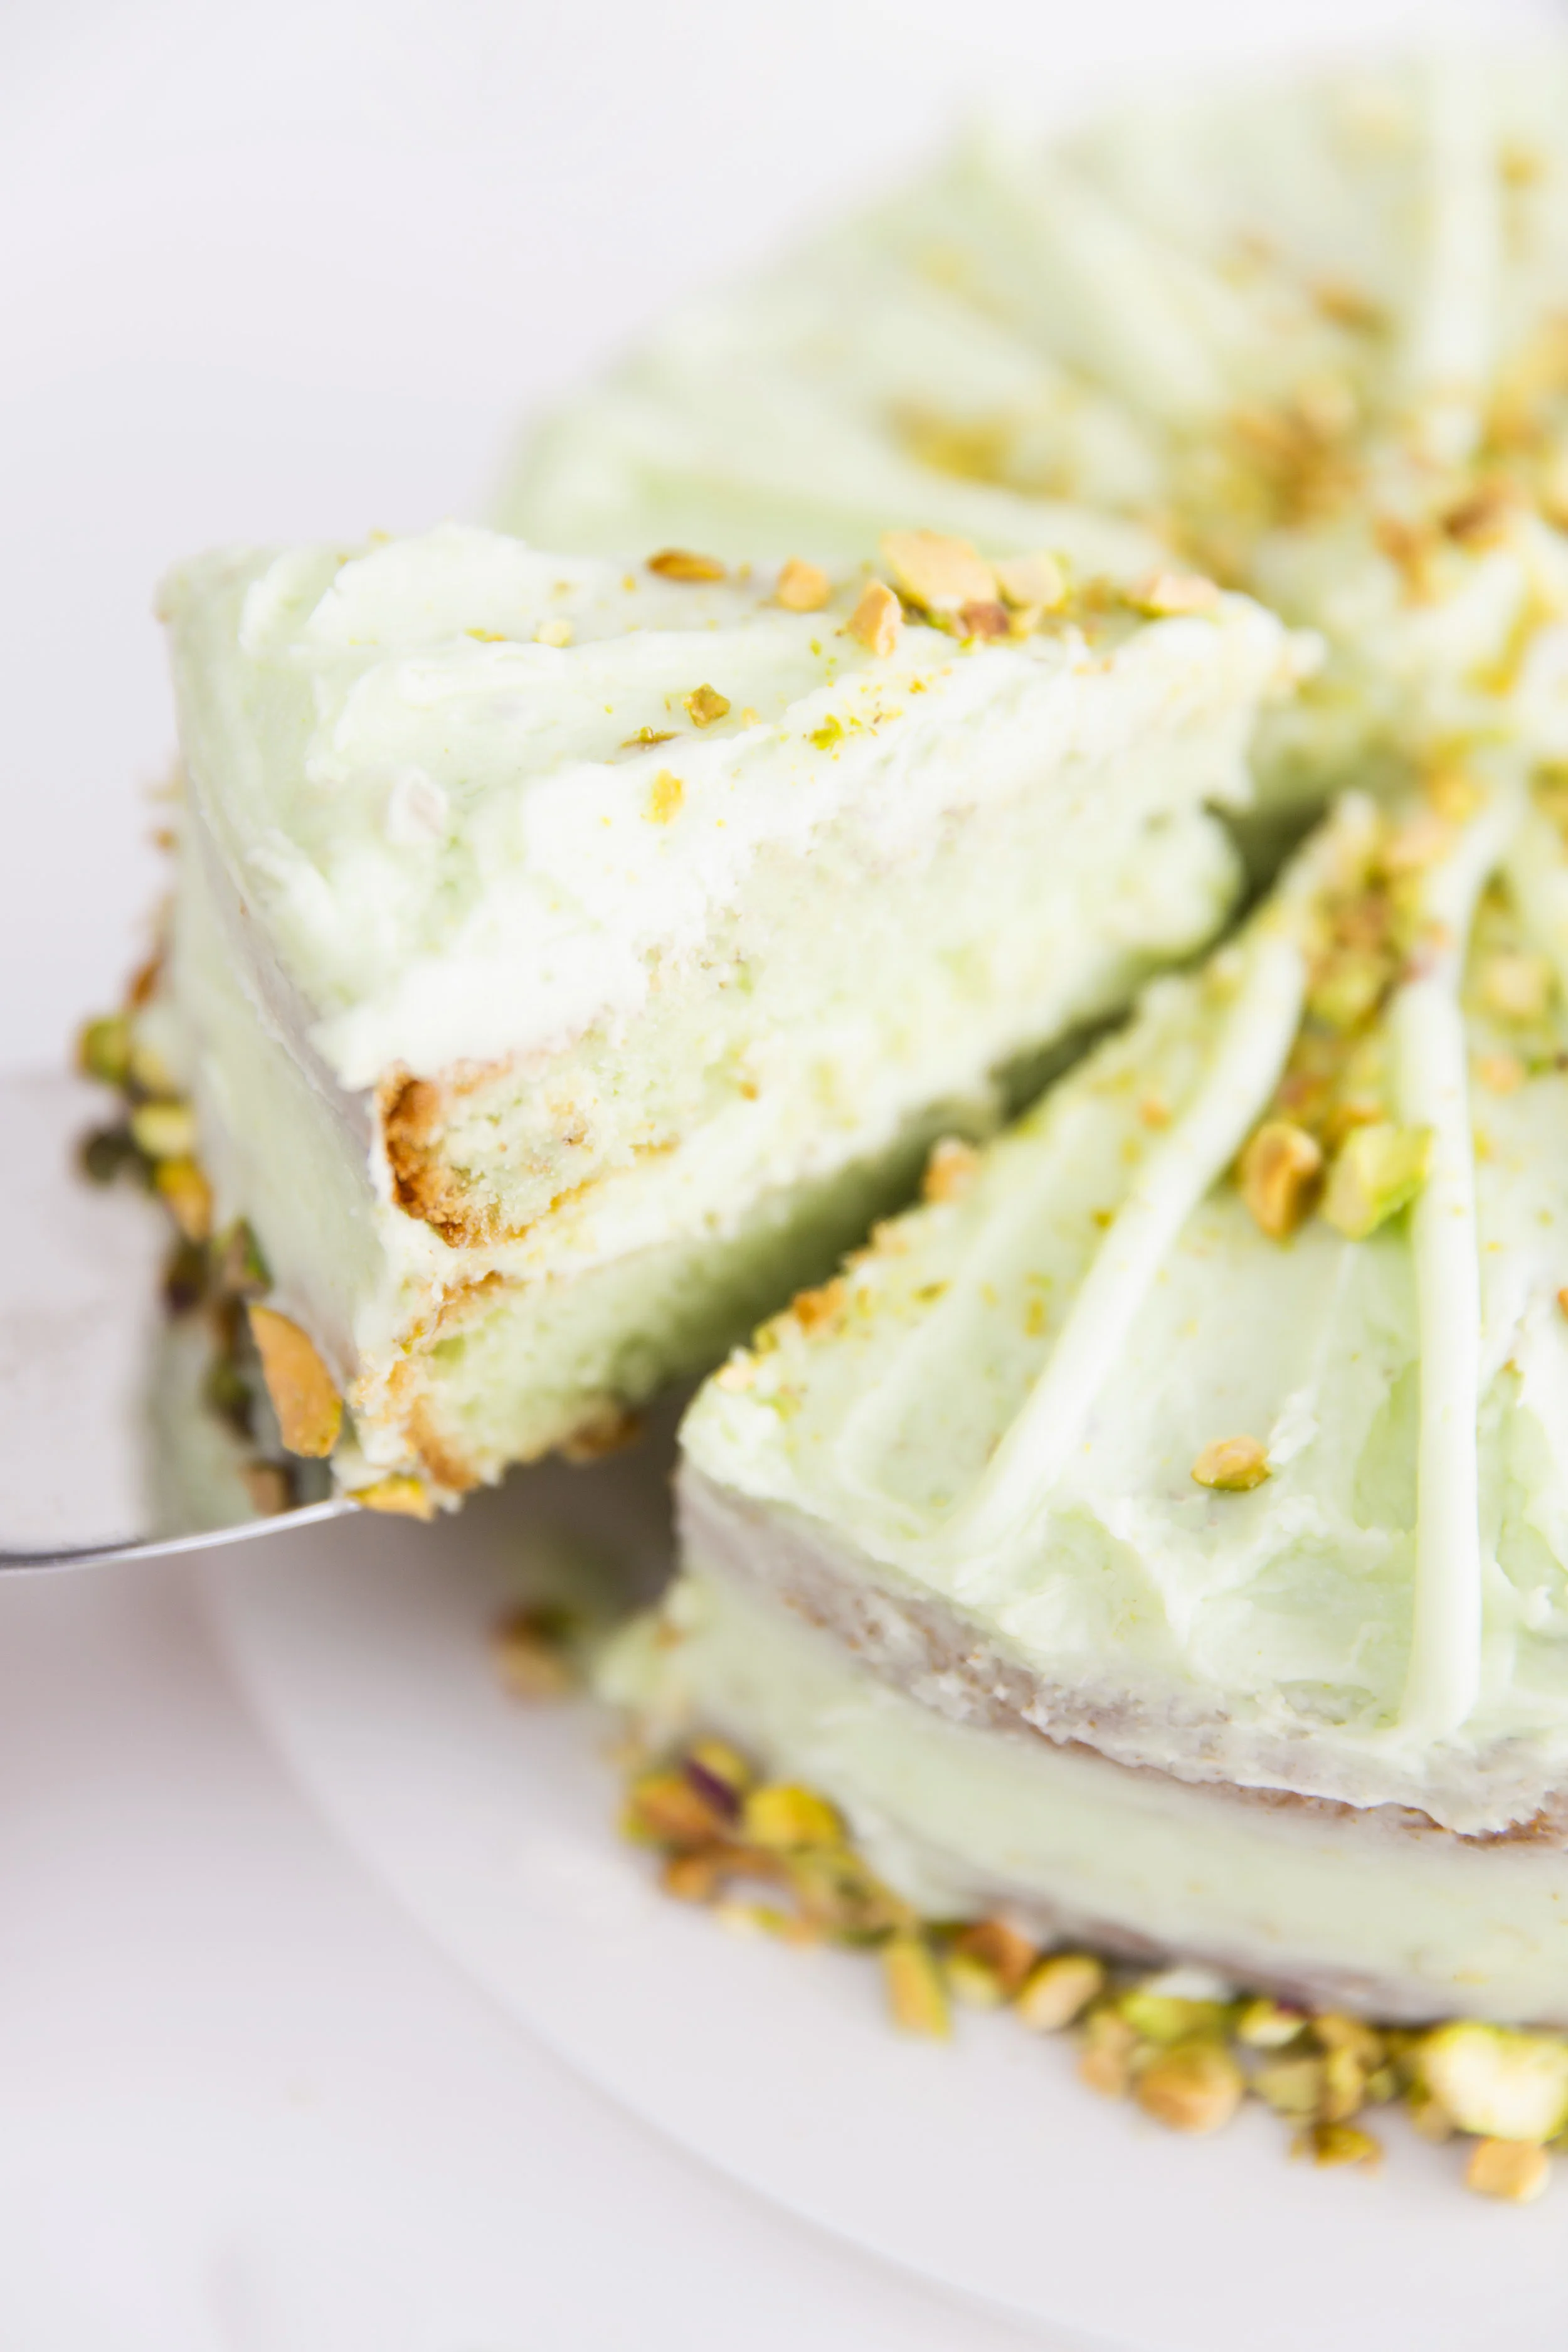
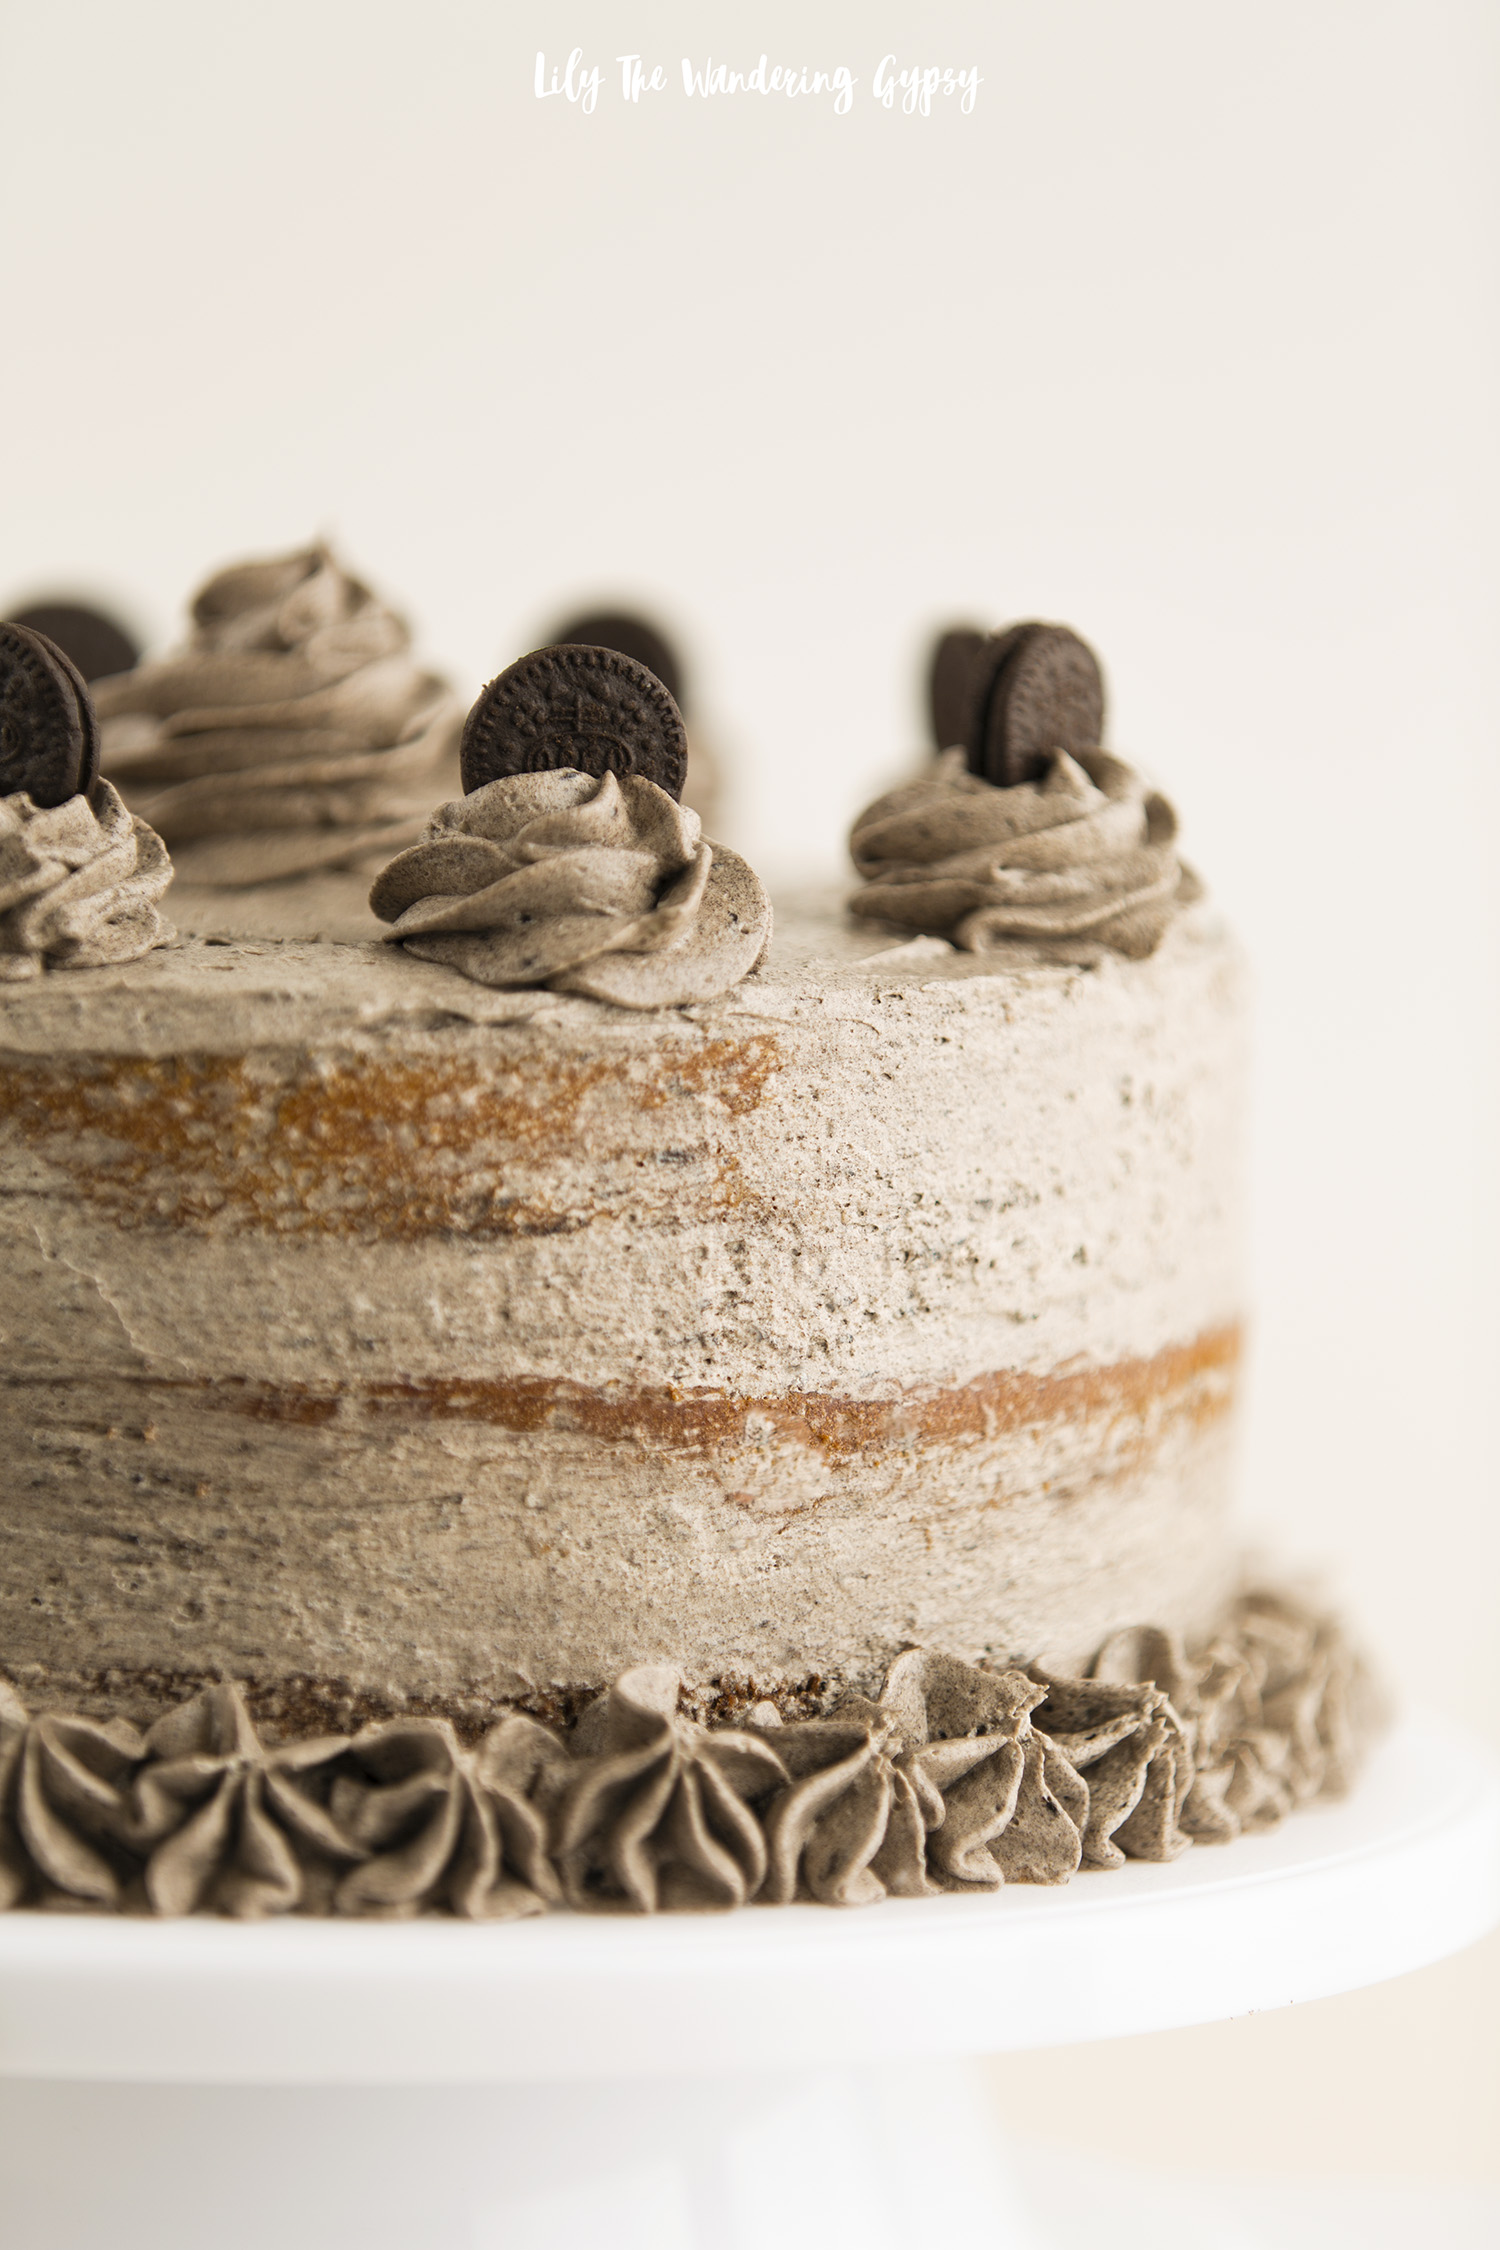
The Oreo Mix-Ins worked so well to add the finishing touches to my cake – I used an icing bag fitted with a star tip and added little dollops around the bottom of the cake. Next, I added a few dollops on top and finished with a mini Oreo cookie! What a perfect homage to my favorite cookie ever!

This cake reminds me so much of the birthday cakes that my grandparents would treat me to each year as a child. They came from an Italian bakery in the Chicagoland area, and was something I looked forward to each year, and now I can nourish that tradition in my own family and friends. I am seriously excited for whichever one of my friends has the next birthday because I cannot wait to make another one of these cakes already.

I hope you enjoy this cake as much as I did. This cake tastes like it was made from scratch, when in reality, this cake took just around an hour to make!

OMBRE OREO CAKE

PREP TIME: 30-40 minutes

TOTAL TIME: 1 hour – 1.5 hours depending upon decorating time

INGREDIENTS:

3-4 containers of COOL WHIP Mix-Ins, Oreo (found at Walmart or your local retailer)

1 box of white cake mix, plus ingredients to make cake

1 box of Devil’s food cake mix, plus ingredients to make cake (use the same brand for both)

Mini Oreo cookies to decorate cake

OTHER MATERIALS:

3 round cake pans

Hand Mixer

Parchment paper, cut into circles to fit into round pans

Rotating cake decorating stand

Flat icing spatula

Icing Bag + Large Star Icing Tip

INSTRUCTIONS:

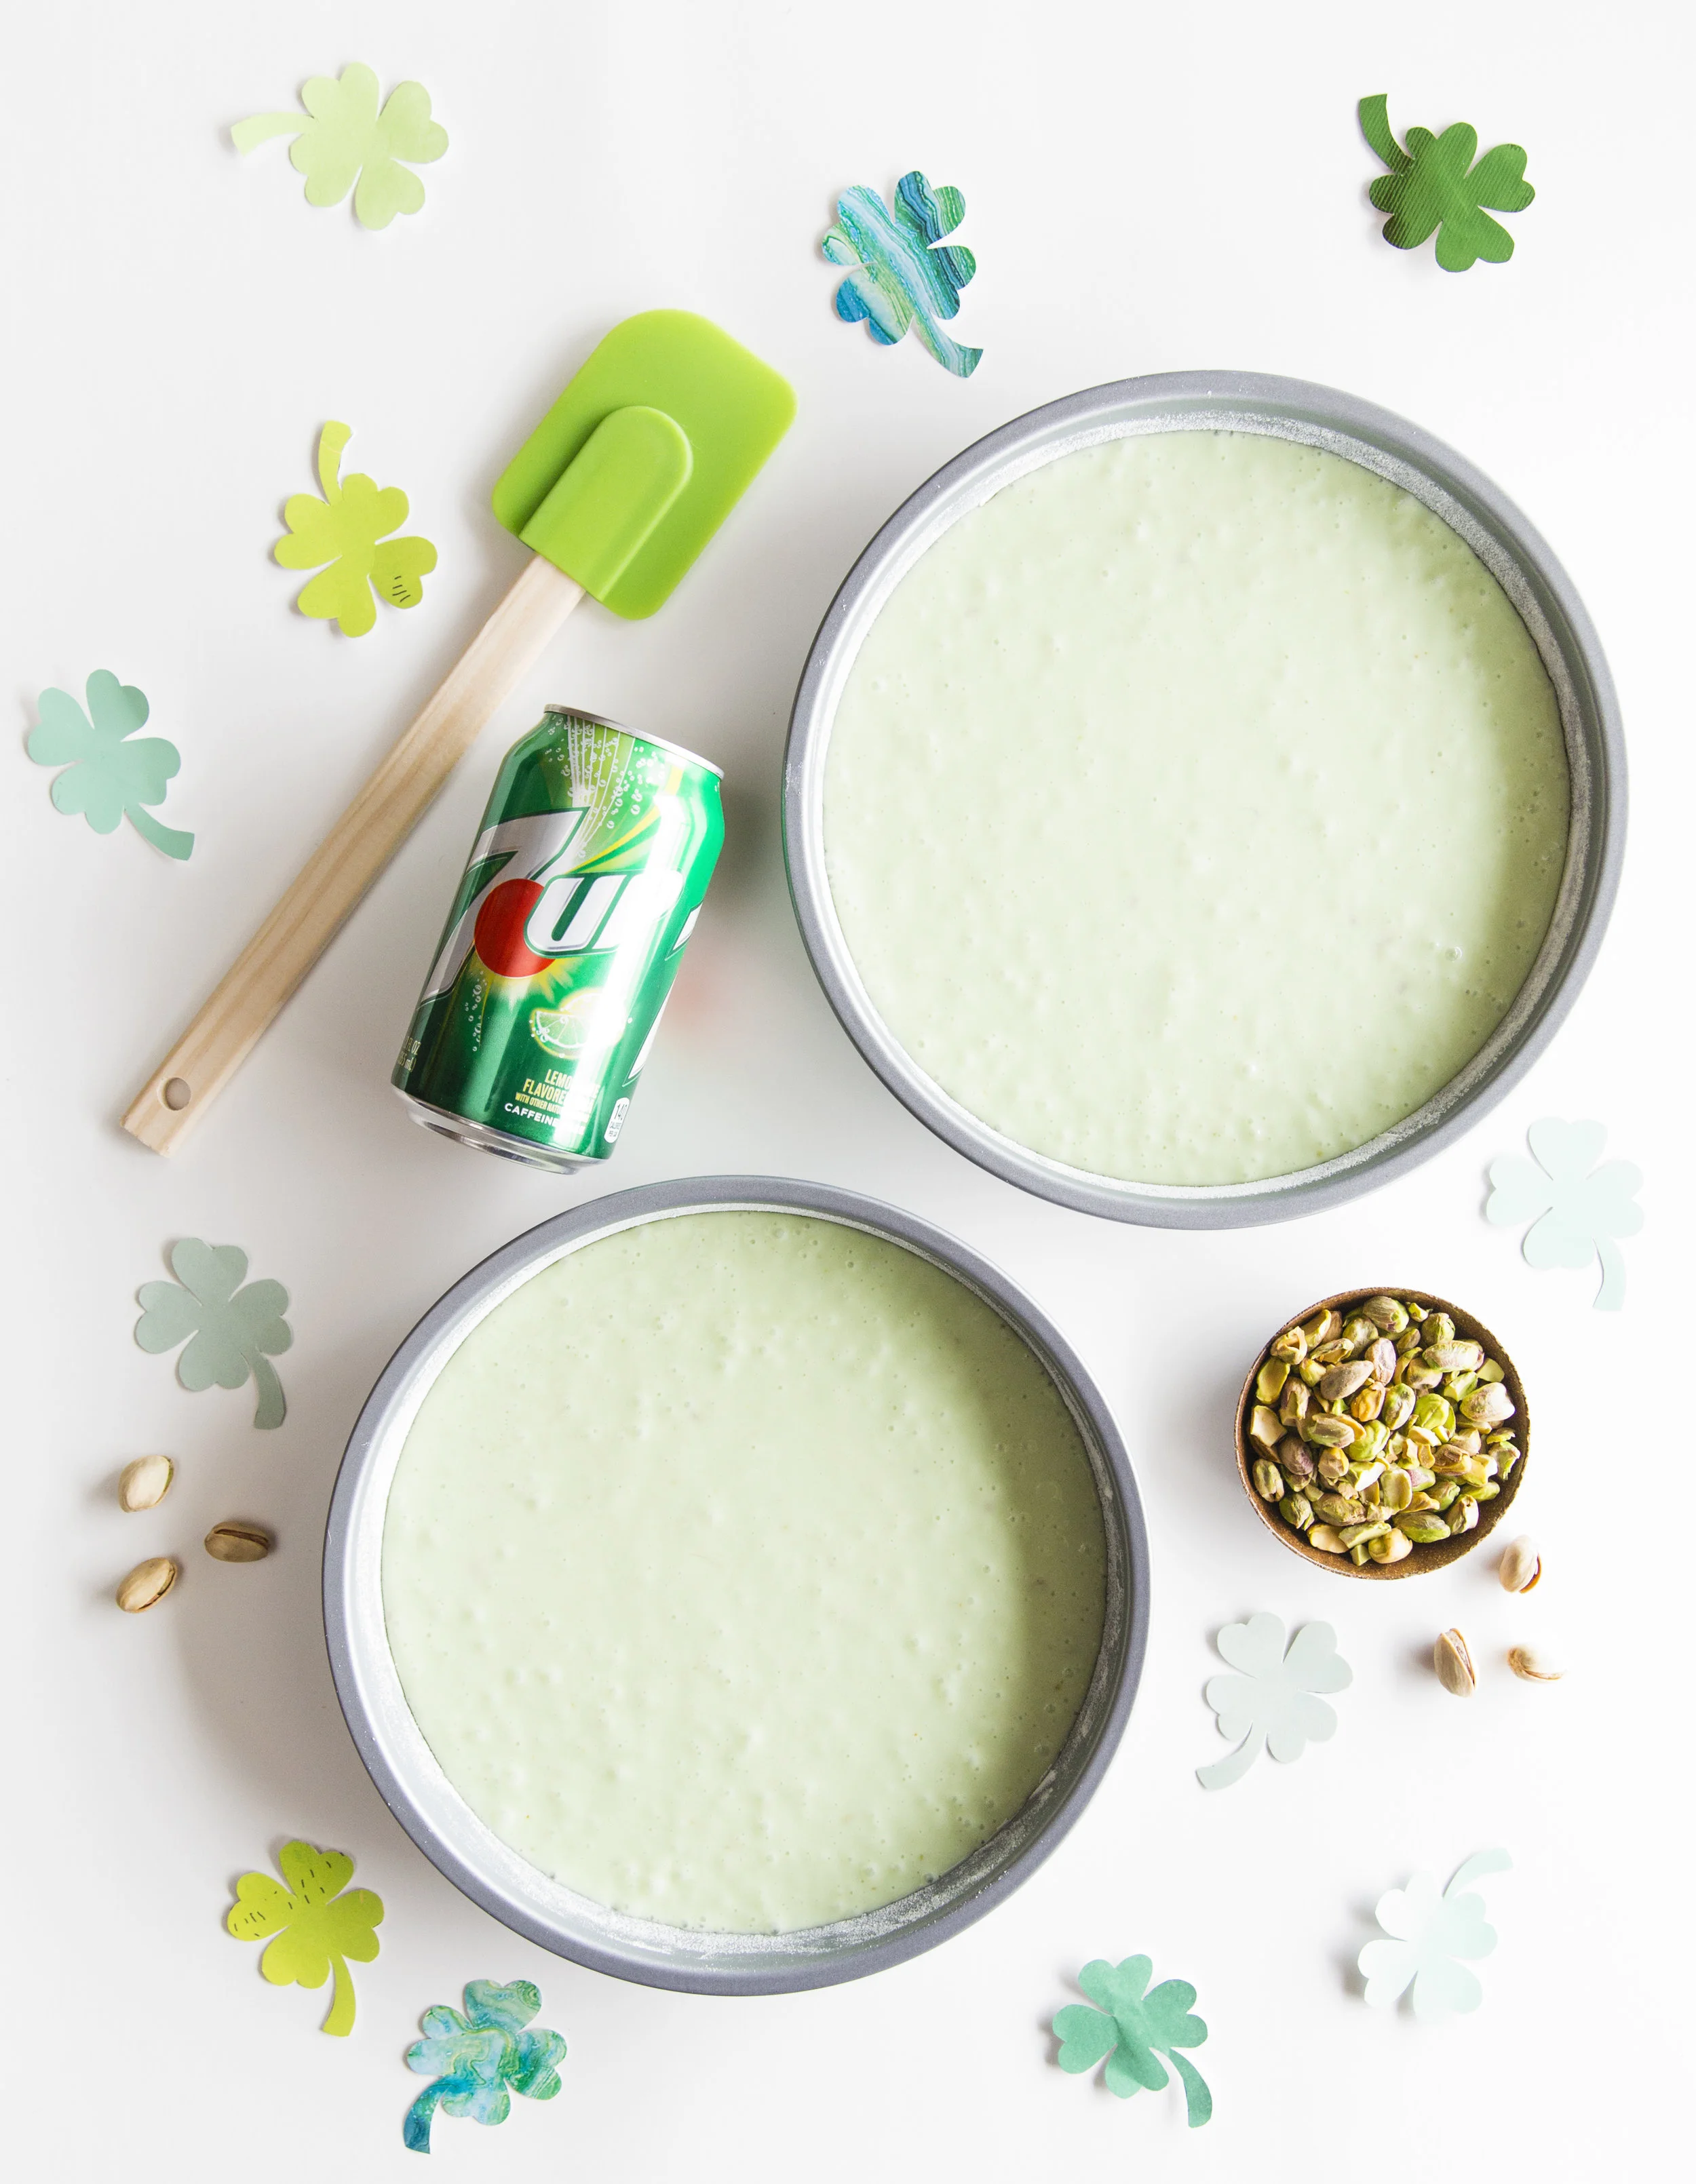
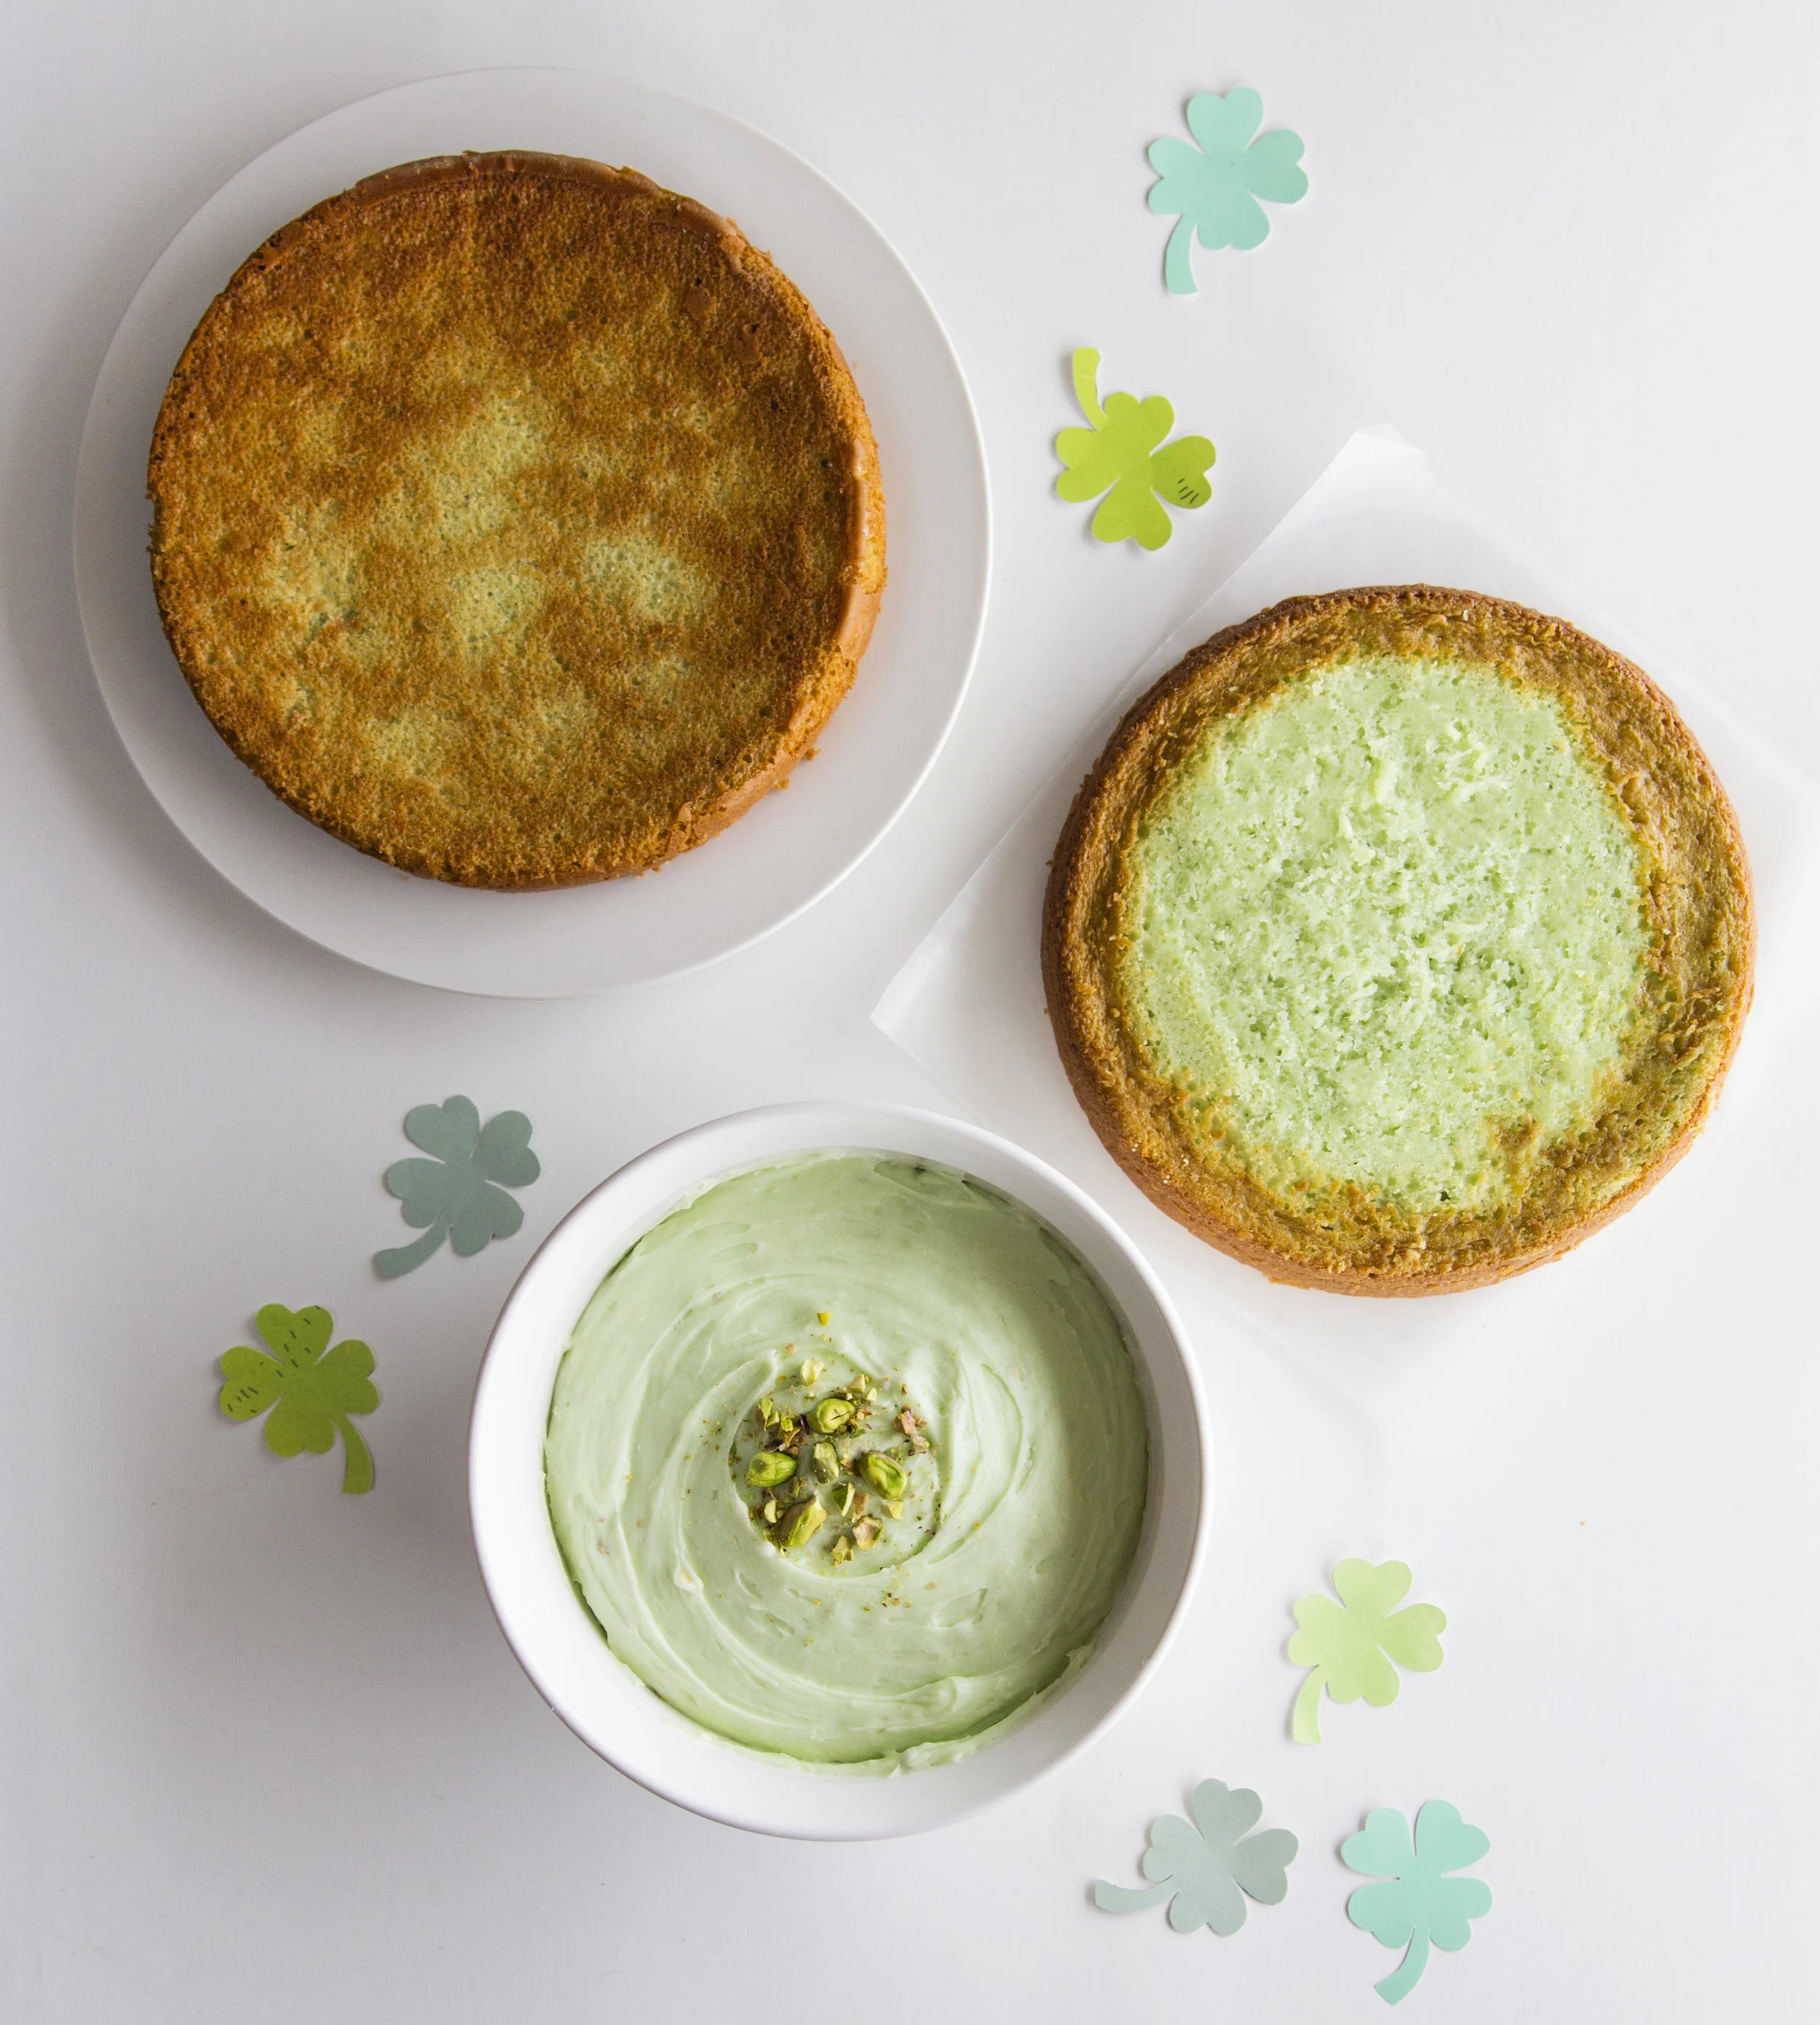
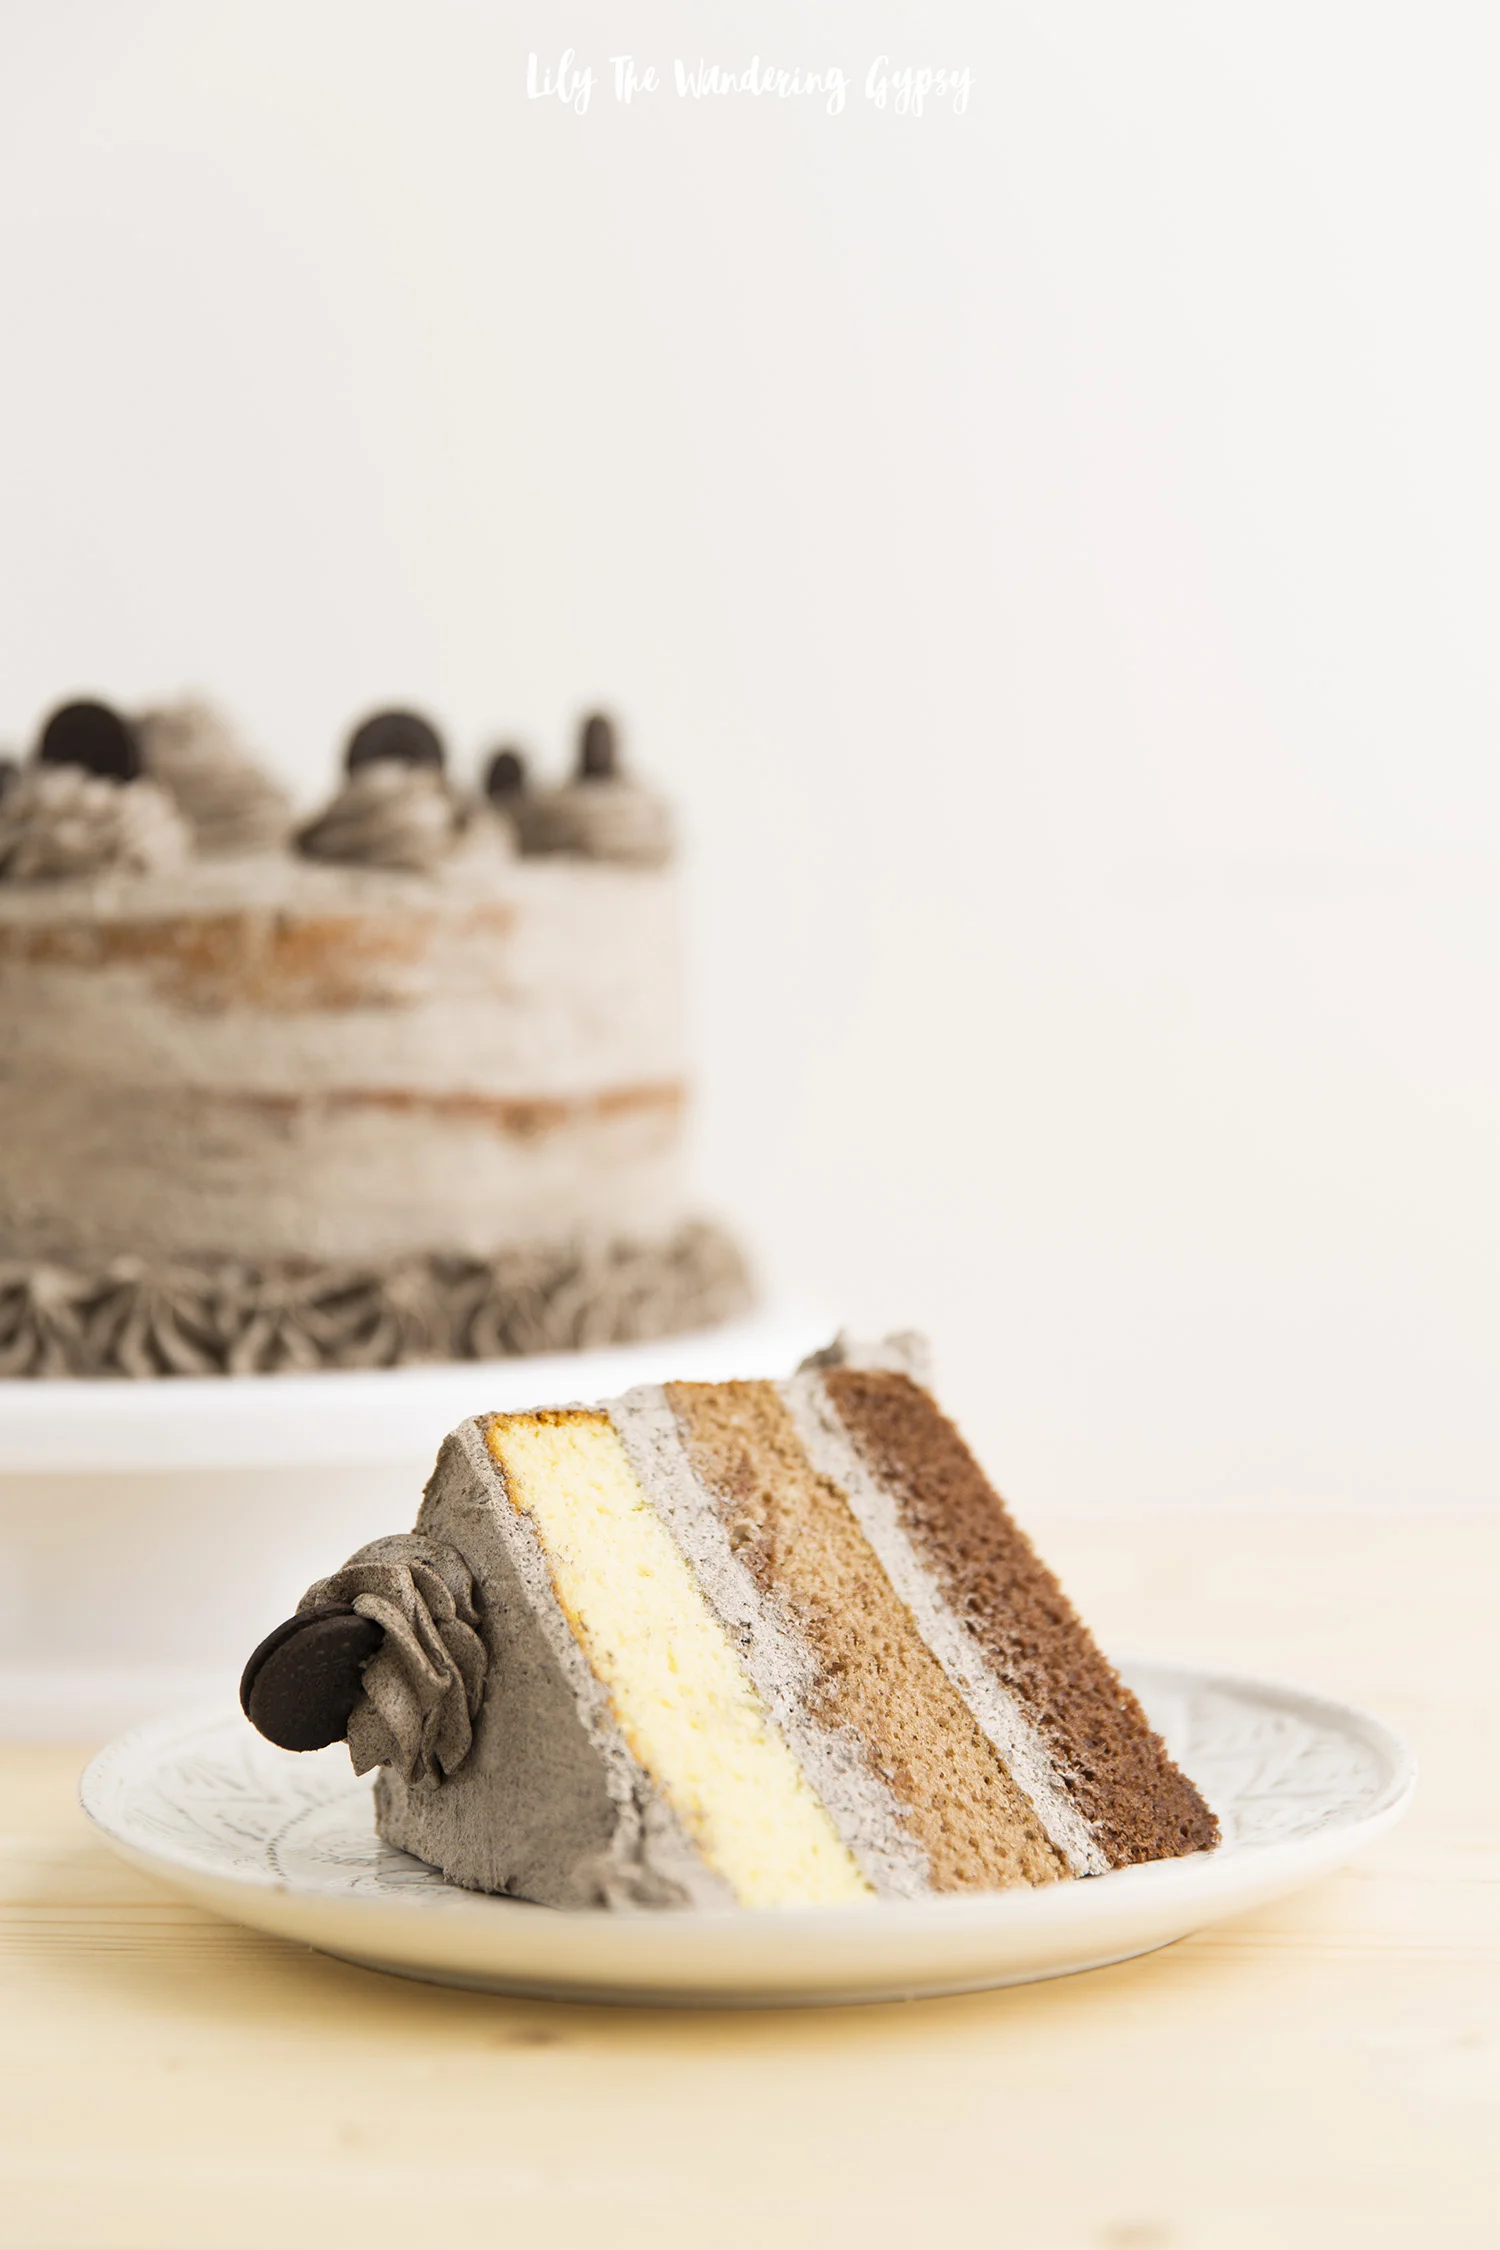
  1. Bake cakes. To create the ombre effect, I mixed up both of my cake mixes according to the packages, then added 3 cups of vanilla batter to one pan, 3 cups of chocolate batter to another pan, then in my third pan, I swirled the remaining batters. It created a gorgeous middle layer. I made sure to use two cake mixes of the same brand so that they contained the same ratio of ingredients for each layer.

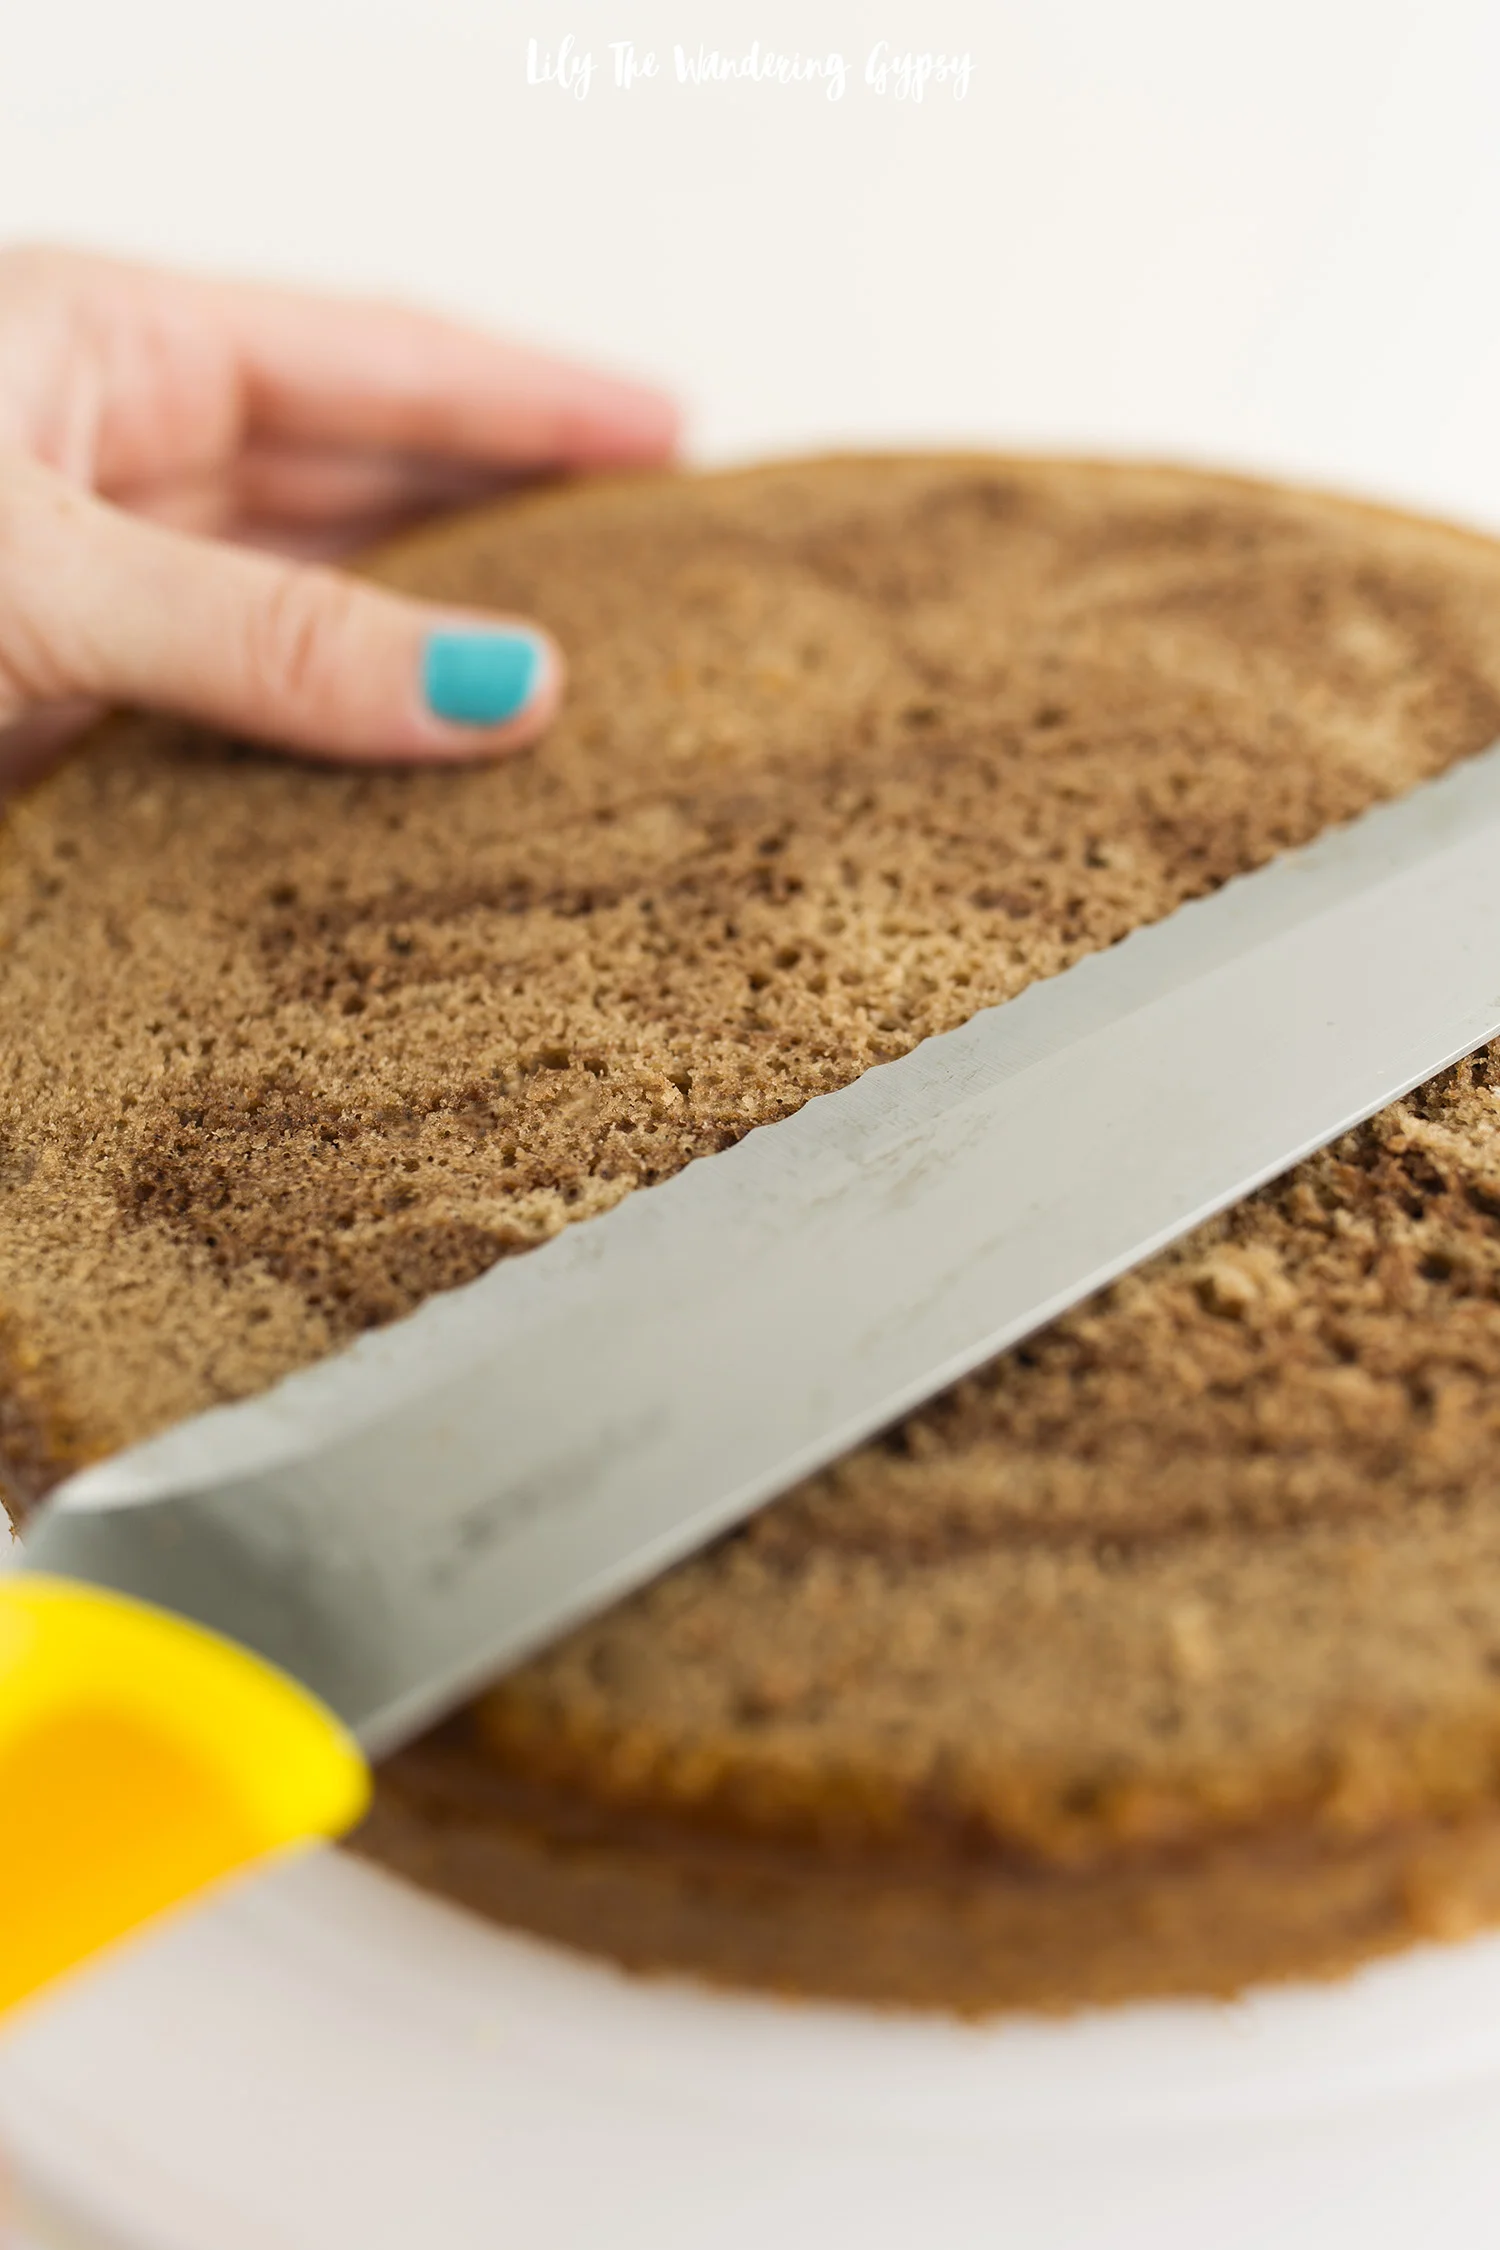
  2. Once cakes have completely cooled, carefully slice the cakes so they are flat on top (they tops will have rounded during baking). I used a serrated bread knife and it worked super well.

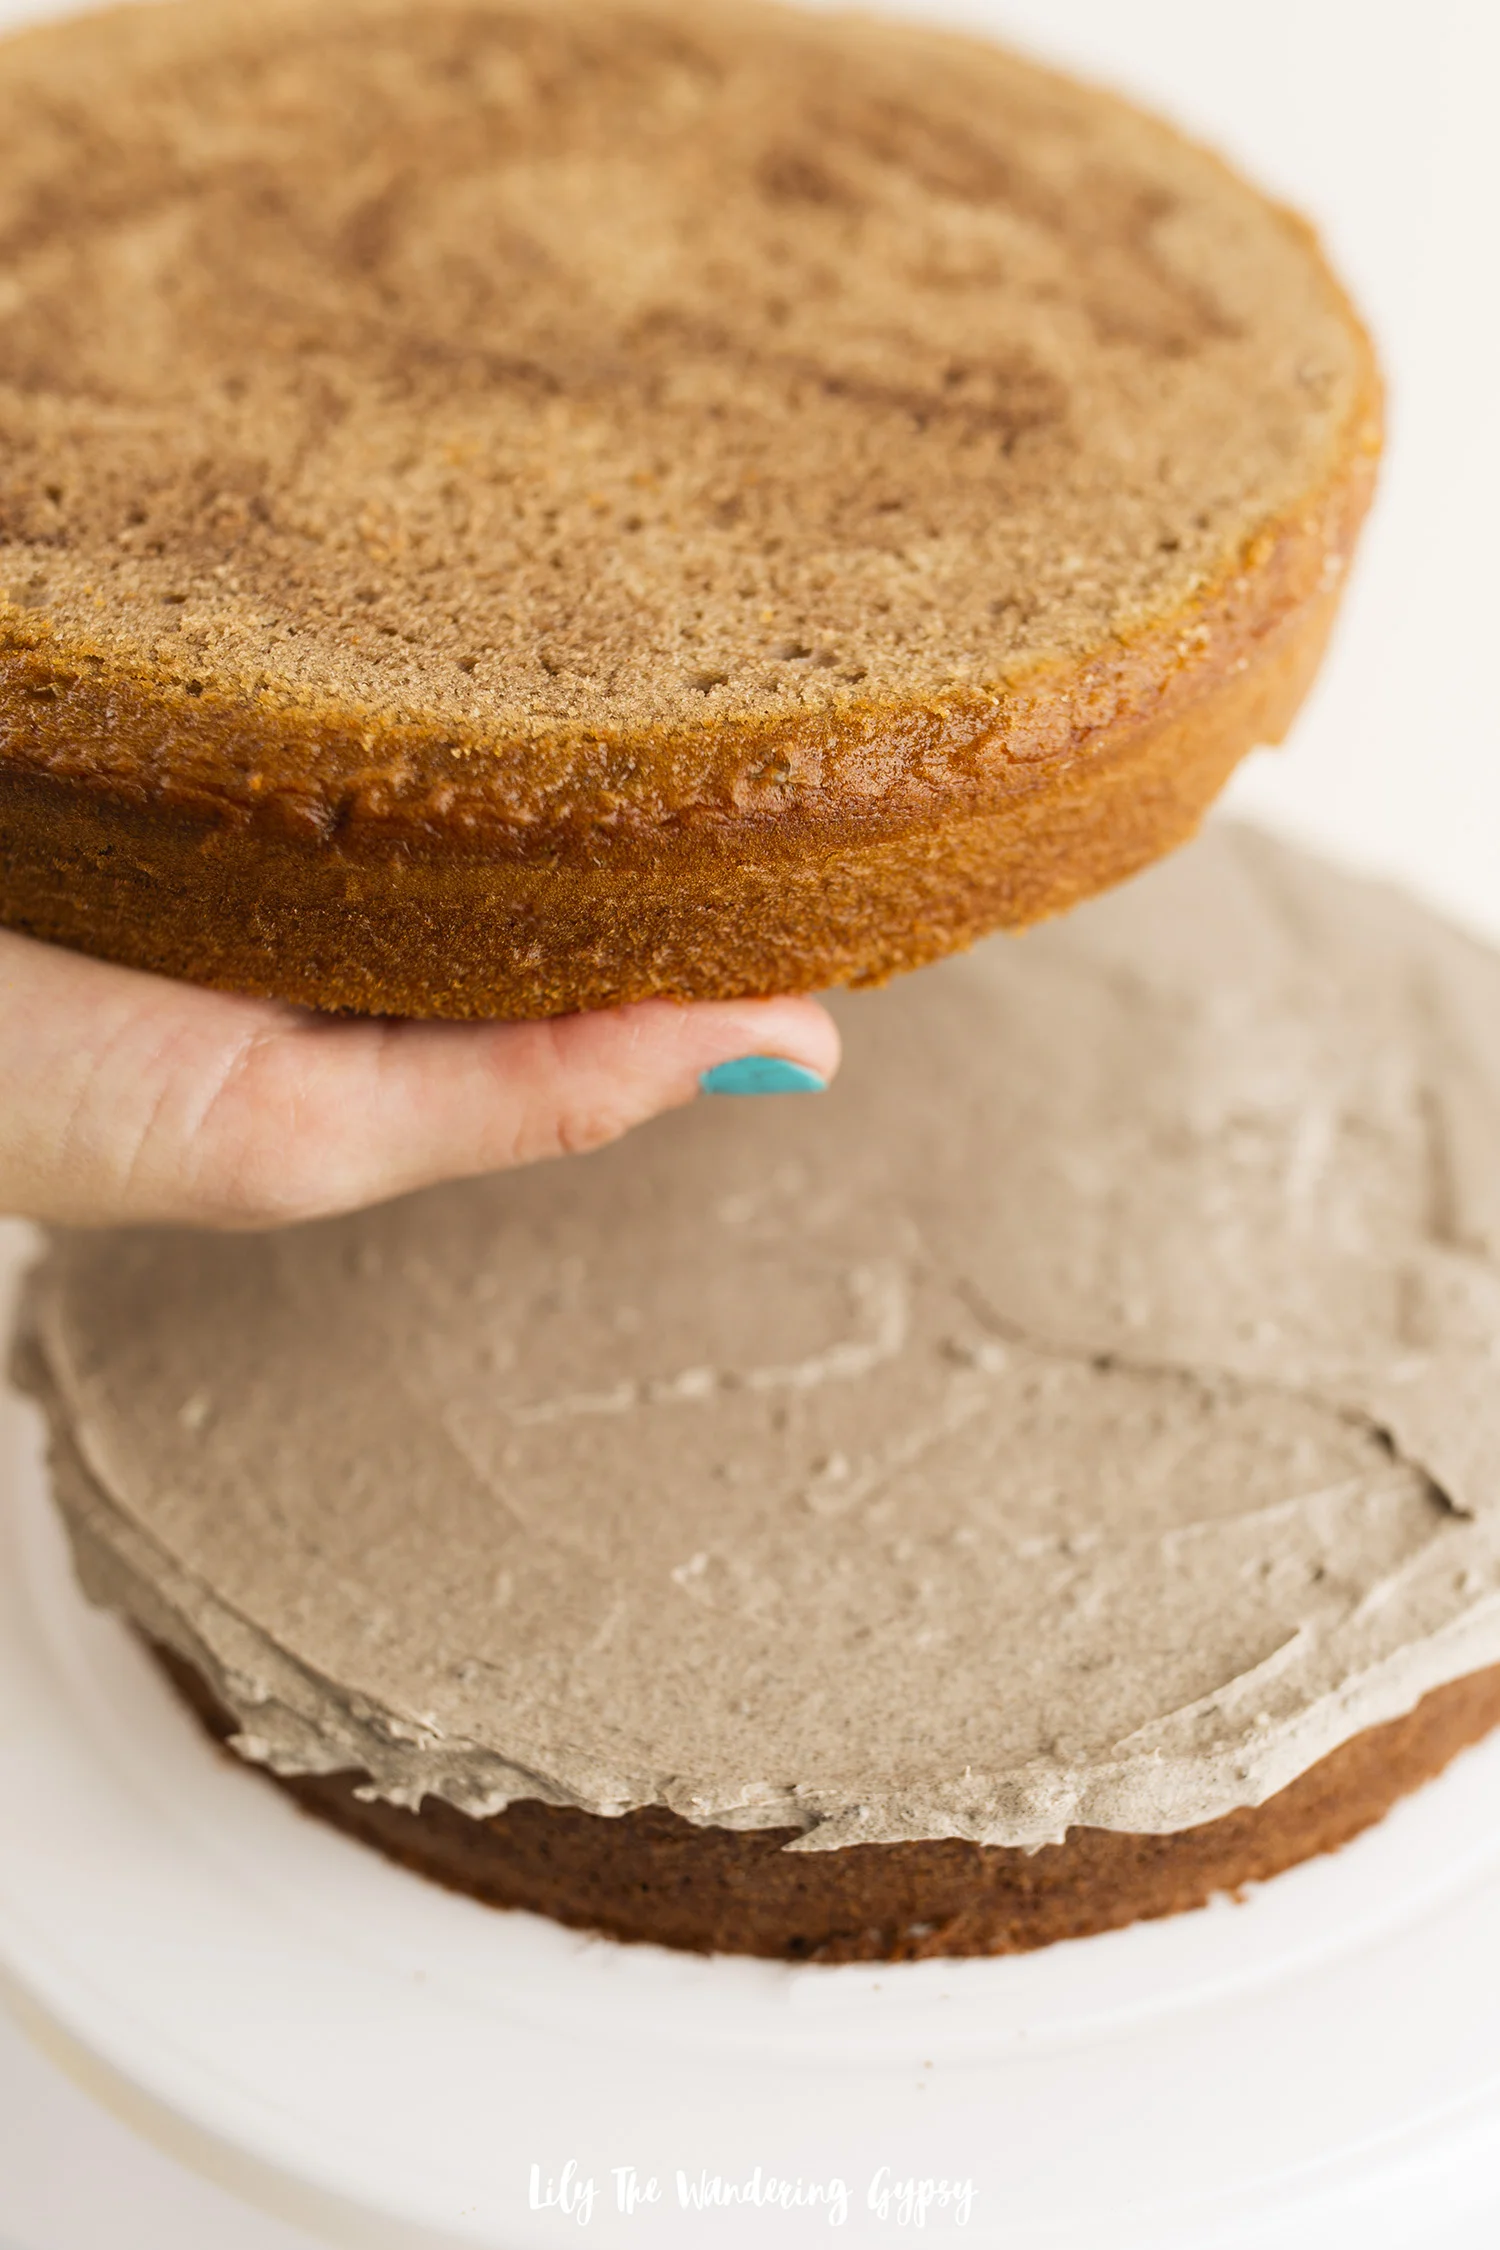
3. Remove the paper from the first layer, and place the chocolate layer onto the cake stand, upside down. Cover that layer with ½-1 container of Cool Whip Mix Ins Oreo. Smooth out the Oreo Mix-Ins and place the second “swirled” middle layer onto that. Again, cover the top of the second layer with Oreo Mix-Ins, then place the vanilla layer on top UPSIDE DOWN, to ensure a flat cake on top. Note – when I first opened the product, it had a lot of fluffy light texture. Once I stirred it and started icing the cake with it, the COOL WHIP got a lot smoother.

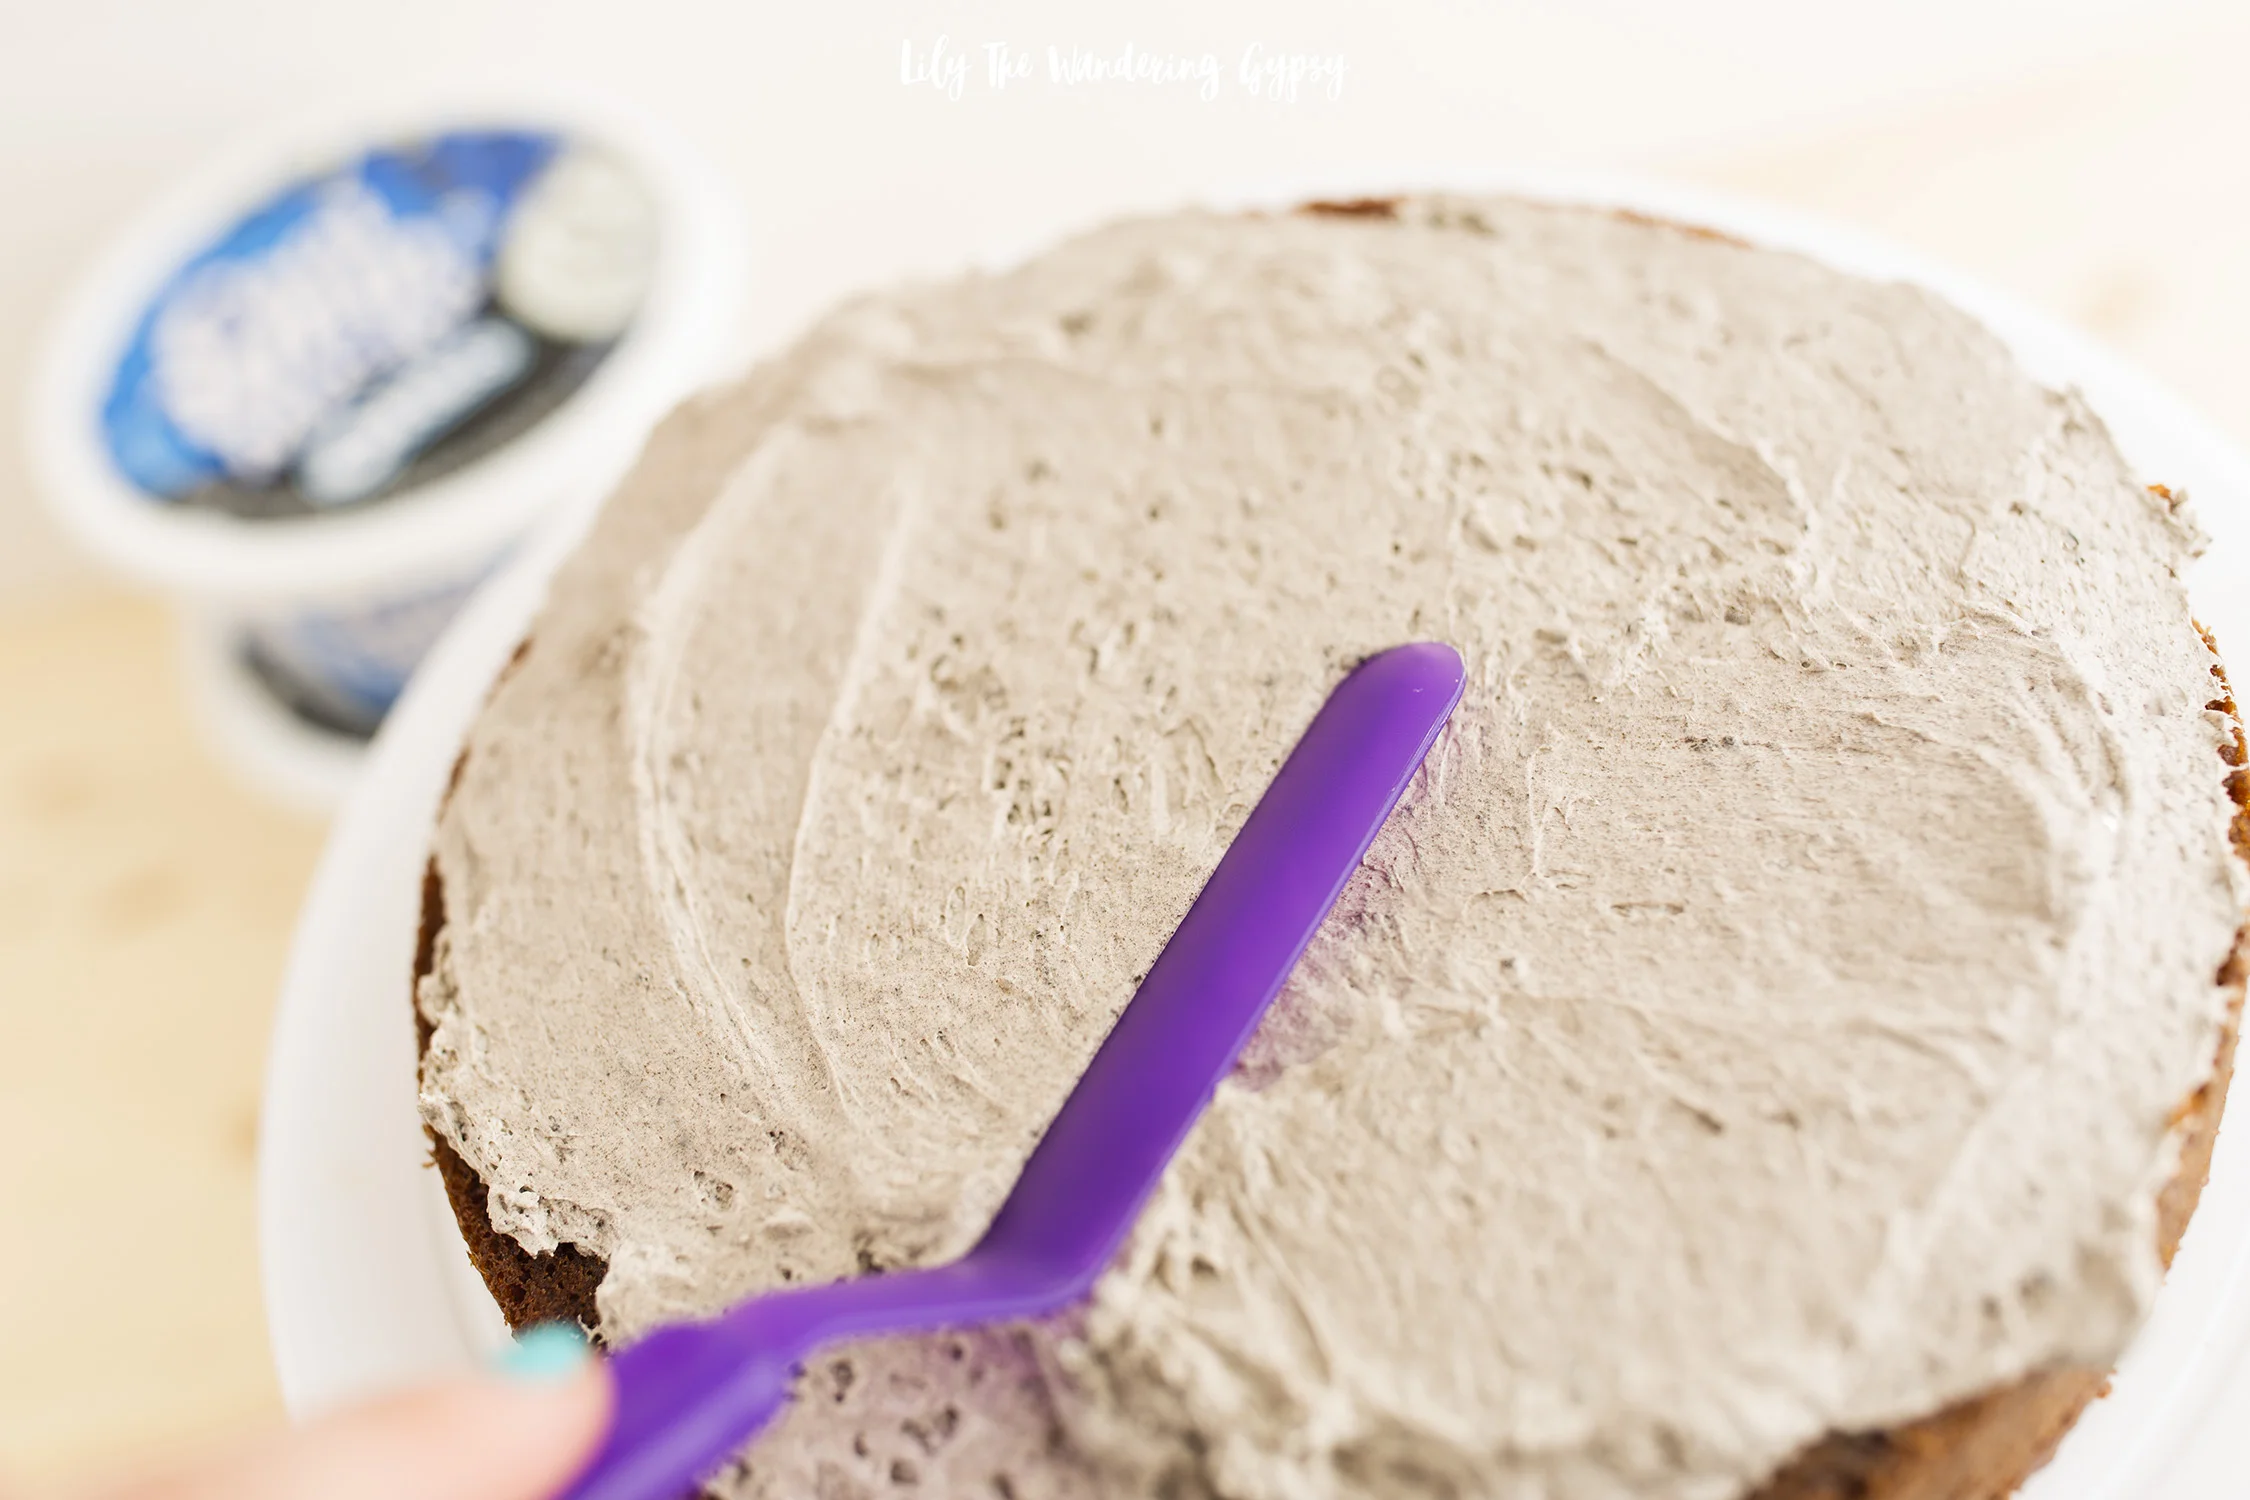
4. Cover the top of the cake with a smooth layer of Oreo Mix-Ins, then add a thin layer to the entire outside of the cake, smoothing several times with the icing spatula. Make sure this layer is as smooth as possible, then place cake into freezer for around 1 hour.

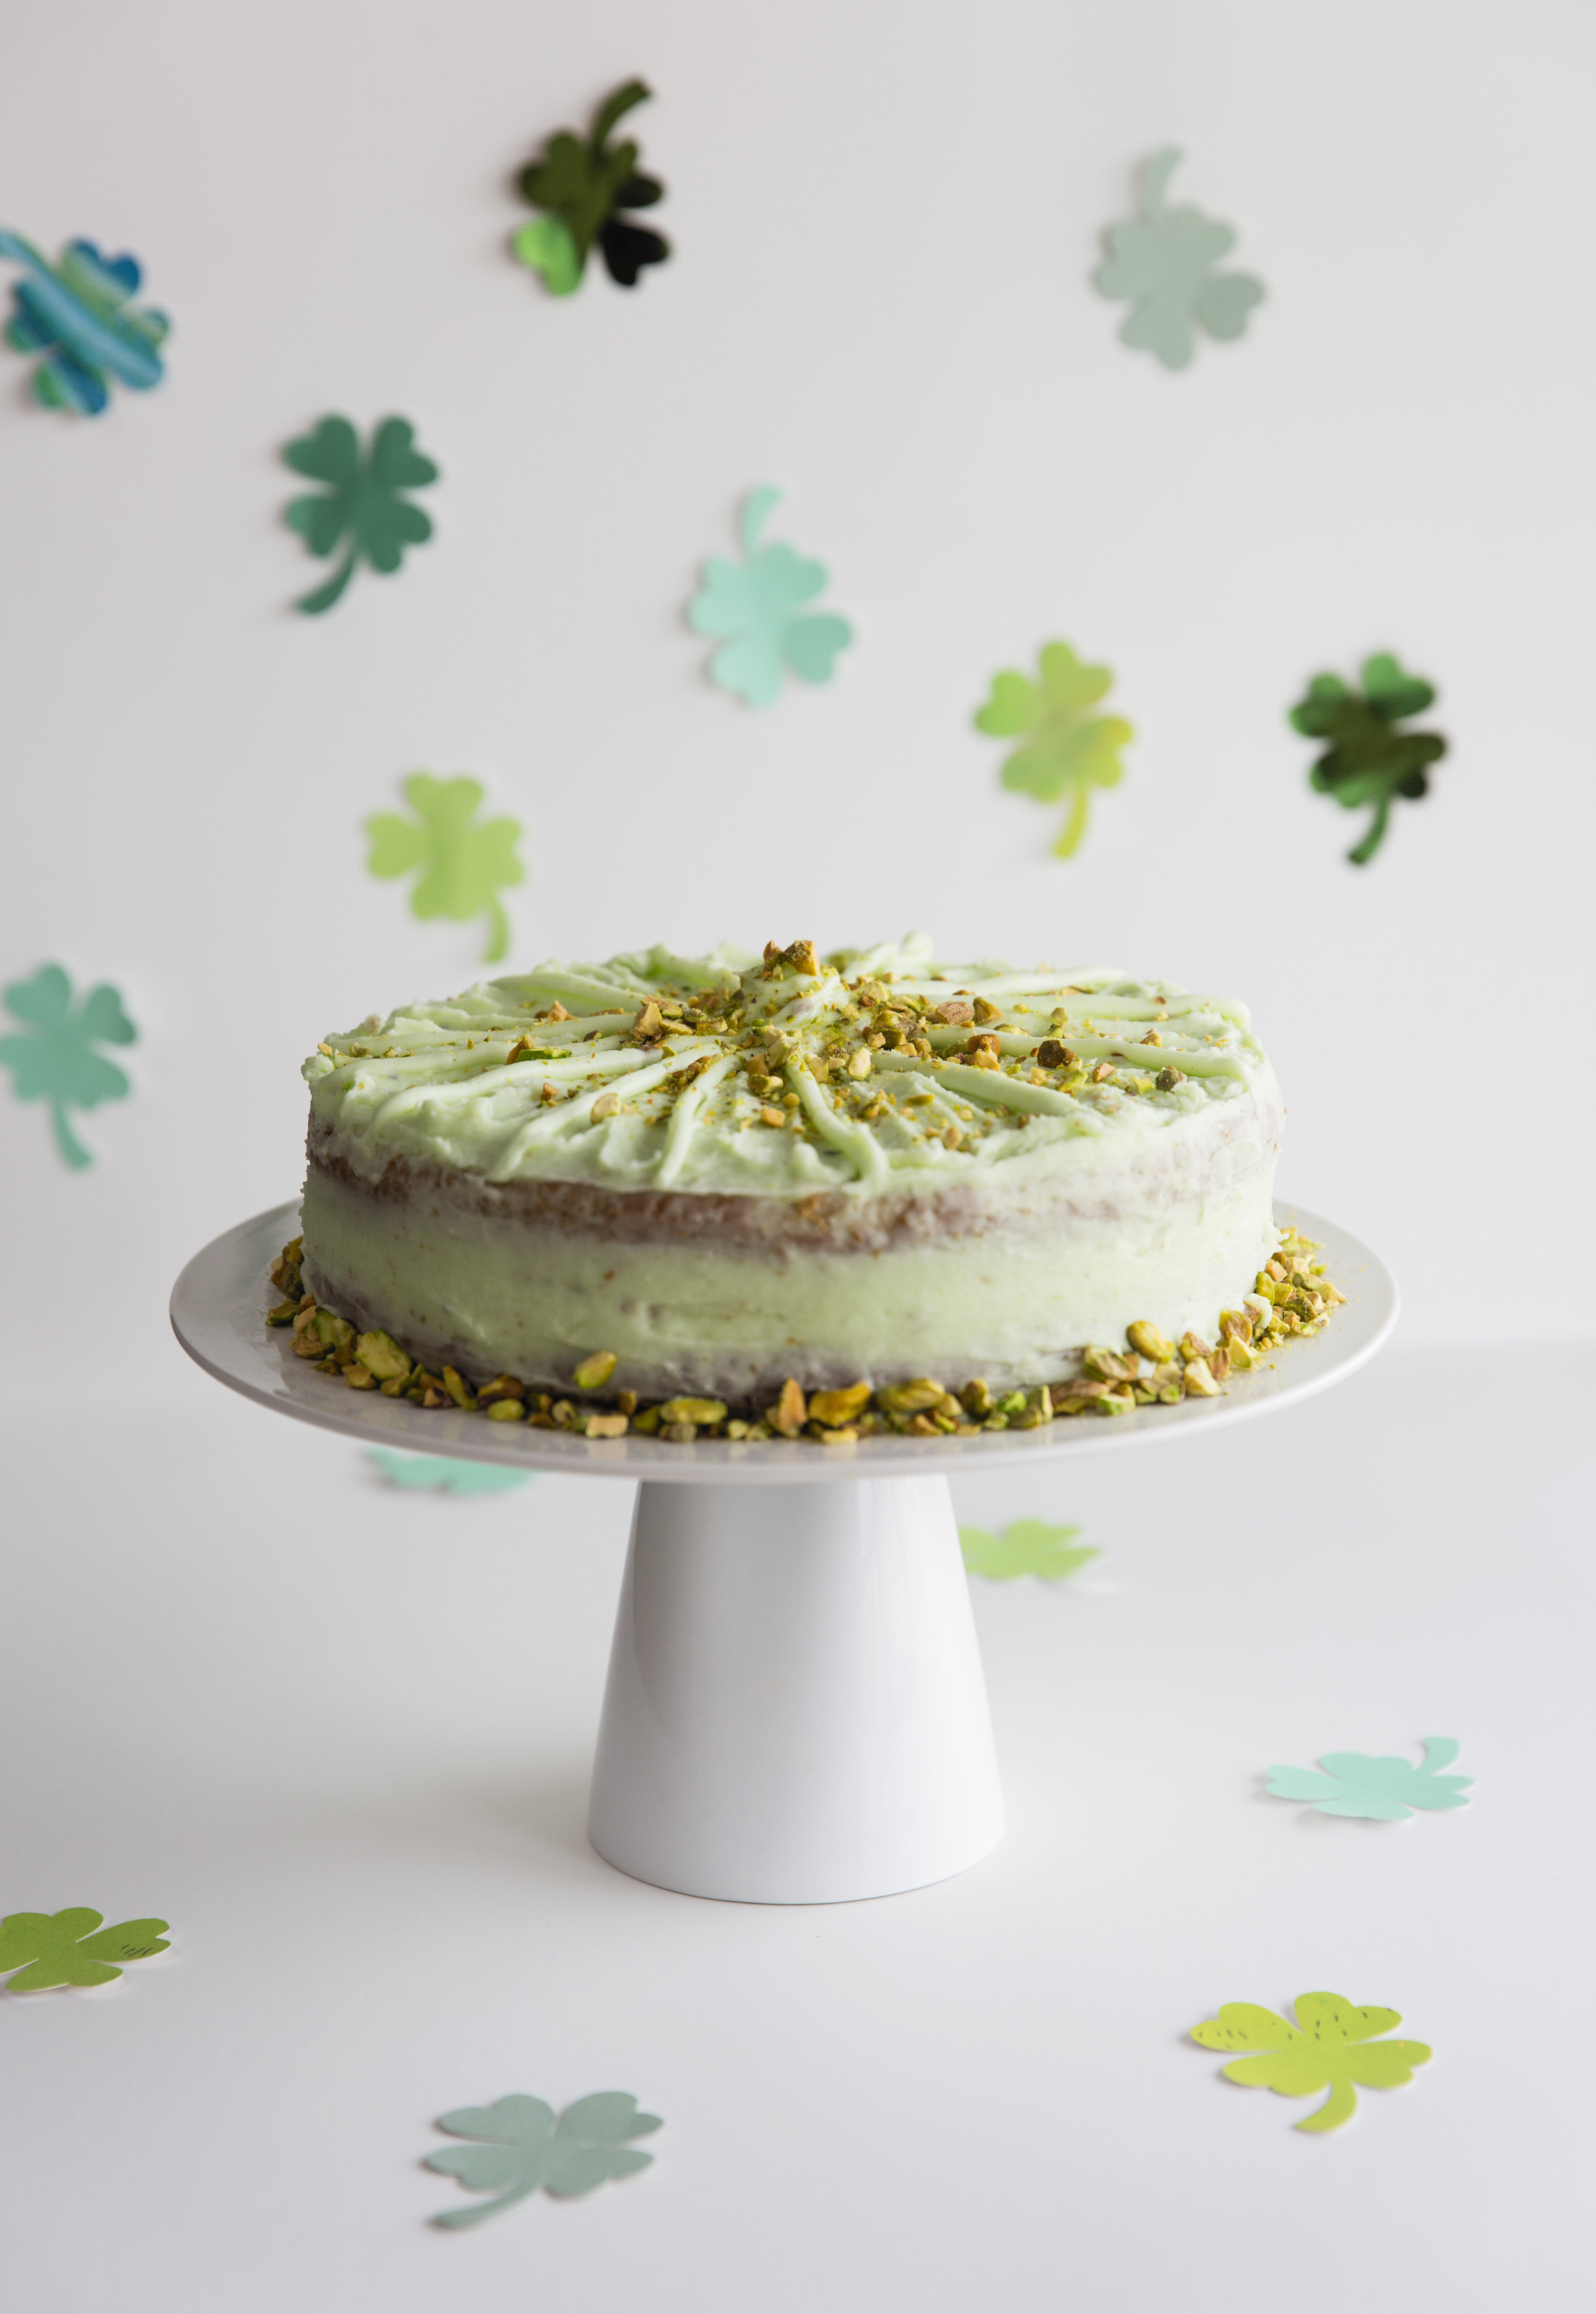
5. Time to decorate the cake! Using that same delicious COOL WHIP Mix-Ins, Oreo as before, pipe little shapes along the entire bottom of the cake. Make sure to keep as consistent of shapes as you can.

6. Lastly, add dollops of icing swirls around the top of the cake (I did 8 total), and add mini Oreo cookies on top. I also added one larger dollop in the middle of the top of the cake and it all turned out so well!

I was SO happy to see how the layers stayed perfectly together with the help of the Cool Whip Oreo layers. I am thrilled to share this recipe because it’s practically fool proof.

Thank you so much for taking the time to check out this recipe. I hope it has inspired you! This cake would be perfect for birthdays, Mother’s Day, Father’s Day, graduation parties, and even just because!

Learn more about this wonderful new COOL WHIP Mix-Ins,Oreo here and retailers near you carrying it, and connect with COOL WHIP on social!

FACEBOOK

INSTAGRAM

PINTEREST

Peeps Milkshakes

Easter is this Sunday, April 1, and I thought it would be adorable to create a beautiful set of treats for the occasion! Hope you enjoy! 

First, find some cute jars and dip the rims into melted white chocolate. Holding the glass over the sink or a large bowl (to catch the sprinkles), apply sprinkles in festive colors to the chocolate. Cover as much as possible.

RECIPE:

2 cups all natural vanilla ice cream (I prefer Breyer's extra creamy vanilla)

2 cups frozen blueberries

2 cups milk

1 tbsp honey

INSTRUCTIONS:

  1. Put all the ingredients in a blender and blend on high until smooth and creamy.
  2. Pour into decorated glasses and add your garnish - carefully poke a skewer stick through the bunny Peeps, and use a jelly bean to make the end look more finshed off.
  3. Enjoy!

How To Make Any Vacation More Relaxing with NEW Canada Dry Ginger Ale and Lemonade

This post was sponsored by Canada Dry®. All thoughts and opinions are my own.

With Spring Break nearly upon us, and with the weather getting better by the week, it’s that time of year when people are planning their vacations! Planning and prepping for a vacation can be stressful, but I have a few amazing tips on how to make any vacation more relaxing. Canada Dry is making it their mission to spread relaxation to you this year and beyond. The NEW Canada Dry Ginger Ale and Lemonade is absolutely delicious! We stocked up on supplies at Kroger before our most recent adventure, and could not be more excited to bring you along for the ride.

What is the most relaxing place you have ever been? Would it be sitting on a beach, listening to the waves? Perhaps you enjoy spending time in a spa with a gorgeous view, being pampered? Maybe it would be spending time looking at mountains, sipping a warm mug of coffee, smelling the crisp fresh air? Whatever your preference, keep reading to learn more about making any travel a little bit more relaxing.

You can win prizes in the upcoming Canada Dry Ginger Ale and Lemonade sweepstakes. Details are at the very bottom of this post. Enjoy!

When I was younger, the majority of my travel was with my mom. She loved to pack lots of fun into each day, from sunup to sundown. There was no landmark, theme park, thrift store, or local boutique we left off the list each day. We never really drove anywhere, but we always flew. I have such great memories of visiting places like Los Angeles and Chicago with her, and I believe that traveling as a kid got me a little more comfortable with travel into my adult years.

Once I met my boyfriend, Bobby, many years ago, we began to travel a ton by car. First we would travel to see live music and to go camping, then once we got into our mid- twenties, we craved finding places without any people nearby, like a secluded campground or a little boutique hotel in a small town in the middle of Utah or New Mexico. Over the past twelve years, my boyfriend and I have traveled over 250,000 miles together, adventuring around the country. We love planning the next trip, and we are so lucky to be able to continue working on photography and making projects along the way, letting the immense amount of travel inspire and nurture new ways of thinking about life along the way.

Some of my favorite travel memories include: driving to or through nearly 40 states, spending time in Kauai, Hawaii photographing gorgeous locations during every season of the year - Aspens in the Fall in Colorado are amazing as well as the snow covered mountains of Montana in late Fall are my very favorites. We have met countless amazing people on these travels, and also enjoyed some of the best, local food we could ever imagine. Just thinking back on these locations really makes my mind at ease.

Travel is full of so many opportunities to enjoy oneself, but there are also a million things that can “go wrong” that make a vacation super stressful. Even the smallest thing can be made into a much bigger deal than it should be due to being out of one’s comfort zone and being underprepared.

Here are a few I can think of off the top of my head: taking the wrong highway an hour or more in the wrong direction, missing a flight or connecting flight, booking a hotel room for the wrong night, finding out that a campground is completely full and having literally nowhere to stay for the night, having an air mattress pop when you’re over an hour from the nearest store, have your car broken into, getting into fights over where to eat or what to do for the day (so focused energy on arguing instead of just going out and exploring the location) a car battery dying THREE times in two days and being stranded on the highway after dark, and many more crazy things that would have never happened if we had just stayed home. I am sure I’m not alone in admitting that travel can be hard and overwhelming and anything but relaxing.

But, I feel that those occurrences make us stronger people and better travelers! What is life without a little bit of adventure? Many of the “travel gone wrong” scenarios happened because we were not fully prepared. I wanted to write this post in order to help you, my wonderful readers, to avoid as many situations as possible, and have more time to actually relax on vacation! Whether you’re flying, driving, or taking other forms of transportation, there are a few key tips that I am excited to share with you today.

RELAXING TRAVEL TIPS:

1.) Pack refreshments (snacks and drinks). I like to have a variety of drinks on hand, one of my newest favorites includes the NEW Canada Dry Ginger Ale and Lemonade. There’s nothing more relaxing than having an ice cold drink in hand while on the open road, on the beach, or in another beautiful location.

I also have lots of fresh water on hand, to refill my water bottle. Sometimes, I also find that two-part snacks like carrots and ranch dip or pita chips and hummus hold my interest longer than other snacks like a simple bag of chips.

2.) Dedicate one specific notebook or journal to be your Travel Journal. I prefer one with grid pages or regular lined pages, and at any moment, I can jot down more ideas on my upcoming vacation(s). I will go online and search for, “best restaurants in…”, “best vintage and thrift stores in…”, “best shopping in…”, and more. I also love using social media geolocation tags on Instagram to search for a more visual and unique point of view for each place. YouTube is also a super fun way to research locations, which I just started utilizing a year or so ago. Keep your travel journal nearby when you are doing your research and you will have a great way to prepare in advance and avoid stress.

3.) One of the best ways to save time on a trip is to find a local map prior to your arrival so you have some time to study the area you’re visiting. Mark off the places that are a must see for you. There’s nothing worse than missing out on a beautiful location because you didn’t have your location researched ahead of time. I love using my phone for maps too, but sometimes businesses are not found unless you do more extensive research. If you’re driving, we always like to have an atlas in the car, because sometime cell signal does cut out, so a good old fashioned paper map is always comforting and valuable. If you’re flying, simply print out a few smaller maps to keep in your carry on. Keep maps in your travel journal as well.

4.) Make sure everyone in your party knows the plans and has familiarized themselves with the maps and area. It’s important to get comfortable with your surroundings and general location, rather than just being on their phones the whole time (not paying attention).

5.) Treat yourself to a few relaxing items, specifically for your trip. We brought a hammock to the beach, and it was a great purchase! I loved being able to lay under the palm trees and let the breeze more me back and forth. The sound of the ocean is magical and did us wonders in feeling relaxed and stress free.

6.) Speak to locals and get suggestions of where to eat, drink, and explore. They are the best people to tell you what is worth your time, or what is not worth the time and trouble. You will save so much time if you ask locals how convenient it is to actually get to a certain location. Oftentimes, there are SO many closer than you’d even imagine.
Below, check out this cute cooler that Canada Dry sent me! They are so kind to make my beach visit a little bit cooler :)

Find NEW Canada Dry Ginger Ale and Lemonade at your local Kroger in both 12 pack cans and 2-liter bottles!

The combination of two wonderful drinks mixed together gives us a new way to relax and enjoy the day.

SWEEPSTAKES:

Enter the sweeps to win branded prizes, including: a corn hole set, a BBQ set, a bicycle, Adirondack chairs, thermoses and glassware sets.

ENTER HERE

Where are you heading this year? I would love to hear all about your travel plans and prepping tips! Feel free to leave your thoughts in the comments, below. Happy Travels!

Music Festival Prep - Top Skincare Ideas and More!

If you're heading to a music festival this year, have you thought about your pre-ffestival skincare routine? Feel your best and most confident with two awesome products that are infused with charcoal. Meet the Bioré® Self Heating One Minute Mask and the Bioré Deep Cleansing Charcoal Pore Strips at Amazon. They are also available at Target.

it's best to get started with your new skincare routine at least a few weeks in advance, so you are sure that you are comfortable with what any product does to your skin. These two products were very lightly scented and washed off super well - they left my skin feeling super cleaned and fresh!

Remember, clear skin means that all of those cute festival clothes will look amazing on you!! 

MUSIC FESTIVAL SKINCARE IDEAS:

1. Deep clean with masks and pore strips.

In addition to the Bioré Deep Cleansing Charcoal Pore Strips, shown above, I have been using the Bioré® Self Heating One Minute Mask twice a week. They give my skin a "finally clean" feeling, that also doesn't feel super tight and dried out. Since it does remove white a bit of oil too, I will surely use it even more regularly once the weather begins to get hot and humid in a month or so - just when festival season begins. 

I do believe that the mask has helped me get lots of blackheads out, which I thought were there to stay forever. My forehead had a pesky breakout that would not go away. After using the mask twice, I only have a couple left! Not bad. This mask heats up in your hands, so it's like a spa treatment of sorts. I love the warmth on my face, it's really relaxing. 

Incorporate deep cleaning into your skincare routine with pore strips and deep cleansing facial masks. 

2. Moisturize

Even though ti may be more humid during festival season, it's important to continue to moisturize your face and body, which will in turn make your skin super smooth and ready to go! 

3. Avoid Excessive Dairy and Sugar Consumption

One easy way to get your skin AND your body looking great is to avoid drinking lots of milk or eating a lot of cheese. I wound up giving up my daily milk and cereal "habit", and my skin has never looked better! I also find that it is much easier to keep off that excess few lbs without having to do a ton of extra physical activity when I simply avoid milk. That is fo course just my observation. Of course, sugary sodas and juices and desserts can also have the safe effects. 

4. Plan on using a higher SPF

Avoid excessive sun exposure by giving into using a higher SPF in the 50-100 range. You will still surely get a tan without having skin damage later in life. Pack a skin-friendly, spray style sun tan lotion every few hours, even if you won't be in direct sun. 

5. Exfoliate

With the possibility of wearing sandals and light, airy clothing throughout the whole festival, you might want to try exfoliating your skin 2-3 times a week. Your skin will be baby smooth and if you follow up with lotion, you're all set. 

6. Get some rest

Since you might be walking around, dancing, and staying up a little bit later during the festival, it's important to store up a bit of rest that time leading up to the event. 

Check out links to purchase the products below! Available on Amazon.com and at Target. 

Cactus Cupcakes in Terra Cotta Pots

I had so much fun creating these adorable cupcakes! I used a fun new product that I just love! I replaced the milk and vanilla in my vanilla cake recipe with Natural Bliss Honey Vanilla Nestlé® Coffee-mate® Creamer. It's my new favorite "secret" ingredient. Learn more about their new Spring lineup, here.

These cupcakes were so fun to make. 

RECIPE

(Adapted from a recipe found here on Food Network)

Ingredients 

  • 2 sticks unsalted butter, at room temperature, plus more for the pans
  • 3 cups all-purpose flour, plus more for the pans
  • 1 tablespoon baking powder
  • 1/2 teaspoon salt
  • 1 1/4 cups sugar
  • 4 large eggs, at room temperature
  • 3/4 cup milk + 1/2 cup Coffee-mate® natural bliss® in Honey Pecan
  • 20-24 mini terra cotta pots (or you can make several in pots, then make the rest in traditional cupcake liners).

Instructions


1. Preheat the oven to 350 degrees F. Prepare your mini terra cotta pots by rinsing them with water, wiping them dry, then wiping with a paper towel sprayed with non-stick spray or butter. Feel free to add flour to the insides of the pots too. If your pots have holes in the bottoms, feel free to line them with mini muffin liners.

2. Whisk 3 cups flour, the baking powder and salt in a bowl until combined. Beat 2 sticks butter and the sugar in a large bowl with a mixer on medium-high speed until light and fluffy, about 3 minutes. Reduce the mixer speed to medium; beat in the eggs, one at a time, scraping down the bowl as needed. Beat in the vanilla. (The mixture may look separated at this point.) Beat in the flour mixture in 3 batches, alternating with the creamer and milk, beginning and ending with flour, until just smooth.

3. Divide the batter between the prepared pots - ONLY FILL HALF WAY WITH BATTER or your project will be ruined! Bake the terra cotta on a baking tray for 14-18 minutes, until a toothpick comes out clean. Let cool completely then get ready to decorate.

4. Pipe a swirl of chocolate frosting with a round icing tip, then add crushed up chocolate sandwich cookies on top to resemble "dirt". To make the cactus cupcake toppers, I simply found some 3D cactus stickers at the craft store, and stuck them onto toothpicks. 

These would be so adorable for a garden party, birthday party, baby or wedding shower, and even Cinco de Mayo! You'll love them, and make everyone smile who gets to enjoy them. 

Recipe Notes - If you do not want to bake the cupcakes directly into the pots, feel free to bake the cupcakes in traditional cupcake liners, then place them down into the terra cotta 

Learn more about Coffee-mate® natural bliss®  Creamer here.

That taste of pecan comes through so well, and I would recommend using this product anywhere milk or flavoring would be used. I had the pleasure of making some DELICIOUS Honey Butter Pecan Swirl Cookies recently and they were a big hit! See the link below.

Free Your Pores With Charcoal From Bioré

Since spring and summer are fast approaching, and there are just more reasons to get out and do fun things, it's a great time to transition that dull winter skin into glowing, clear, clean skin for Spring, Summer, and beyond! 

Throughout this post, I had the chance to get to know a couple new charcoal-infused facial products, the Bioré® Self Heating One Minute Mask and the Bioré Deep Cleansing Charcoal Pore Strips at Amazon. They are also available at Target.

I am always looking for more natural ways to incorporate more spa like treatments to my skincare regimen whenever I can. 

Keep reading to learn what I thought after using both products - I guarantee these are a great item to incorporate into the getting Summer Selfie Ready!!! Have you ever used either of these products?

HOW TO USE (FROM BRAND'S WEBSITE):

Before using, please read cautions and usage instructions. For best results, use on clean face.

1. WET FACE. Leave face wet – the Bioré® Self Heating One Minute Mask is activated by water.

2. APPLY MASK. Dry hands, open single-use packette, dispense contents into hand and apply mask to face. You may add a little water to your fingers to help spread the mask and activate warming.

3. MASSAGE for about 1 minute. As you massage, the mask will heat up. For more heating action or for your preferred consistency, massage in a little water. The mask does not dry/harden.

4. RINSE. After one minute has passed, thoroughly rinse with water to remove the mask.

HOT IT WORKS

Heats on contact with water to open pores and draw out pore-clogging dirt and oil, then cools leaving skin tingly smooth and refreshed.

This product seriously heats up right away! Just as I squeezed the mask into my hands, it started warming up in just a few seconds. It was thick, almost like the consistency of moistened baking soda. It was slightly thicker than any other face mask I have ever used, but the neat thing is that it is fun giving yourself a heated facial massage. I made sure to do this before a shower and it rinsed clean within a couple of minutes. I thought it would be sort of hard to rinse this completely off with just the water at the sink. 

My face felt dry in a good way afterwards, making certain stubborn blackheads actually release easier than without the help of the mask. Win! I love this product and I will likely use it every few days, and since it heated up, it was nice because I am ALWAYS cold, so this did help with that too.

HOW TO USE (FROM BRAND'S WEBSITE):

1. Wet nose

2. Peel strip off plastic & apply to nose smooth side down

3. Wait 10-15 min

4. Peel off strip starting at edges

5. Check out all the dirt & oil…if you're into that sort of thing

"Remove weeks (yes- weeks!) worth of pore gunk with just one strip. With natural charcoal, pore strips suck out deep-down dirt, oil and blackheads, leaving skin feeling fresh, clean and 3x less oily. These Biore With Natural Charcoal, known for its ability to draw out and trap deep-down impurities". 

They are a bit different than the original pore strips that I remember using in high school and really up until this point. The charcoal version is a bit thicker and so I think they do have more blackhead extracting power! I feel the pore strips actually putting some pressure on my skin as they dry, which makes me think they are sticking really well. 

Once I removed the pore strip, The pore strip came off of my nose way easier than the white colored strips, which I liked a lot better. I did have a bit of charcoal residue around my nose, but I just used a bit of water and rubbed in that awesome charcoal onto the skin around my nose. I thought that was actually nice being able to have even a bit of a deep cleansing step after the strip!

Since the strips are black, it is a bit harder to see the blackheads on them. I used a little magnified mirror that I had, and could see tons of little bits of dirt that the strip had removed. I think the strips are overall better at removing smaller dirt that can turn very quickly into something worse, so it's always nice to use these strips at the preventative stage. 

I am excited to give some of these to my friends and see what they think too! 

Once I pulled the pore strips off of my nose, I of course immediately checked for blackheads on the little pore strip. It's so gratifying to see all that dirt that had NO business being stuck on my nose :)


Check out links to purchase the products below! 

The Bioré One Minute Self Heating Mask  

Bioré Deep Cleansing Charcoal Pore Strips

Honey Butter Pecan Swirl Cookies Recipe

#FlavorYourSpring with Nestlé® Coffee-mate® Creamers, and you'll be so happy with your Springtime creations! Imagine the all natural flavors of vanilla and pecan, with a touch of sweetness is added with honey.

These cookies taste like real pecans, and they're so light, crunchy, and delicious. They're in fact, very addictive too! You're going to love them! I loved how easy it was to infuse these cookies with pecan flavor thanks to the Coffee-mate® natural bliss® creamer without having to add pecan flour or chopped pecans. 

INGREDIENTS (COOKIES):

·       2 sticks unsalted butter, at room temperature (1 cup/8 ounces)

·        1 cup confectioner's sugar (4 ounces by weight)

·        1 teaspoon vanilla extract

·        2 cups all-purpose flour (10 ounces by weight)

·        1/4 teaspoon salt

·        2 tbsp Coffee-mate® natural bliss® Creamer in Pecan

INGREDIENTS (ICING):

·       1 cup confectioners sugar

·       2 tbsp + 2 tsp Coffee-mate® natural bliss®  Coffee Creamer in Pecan

·       sprinkles + large star shaped icing tip

INSTRUCTIONS:

1.     Preheat the oven to 350 degrees F.

2.     Place the butter, confectioner’s sugar and vanilla in a large bowl, and beat with an electric mixer until it looks combined, light, and fluffy. Add the flour and salt, and mix until it’s crumbly and looks like it can’t be mixed more. Add the creamer, then keep mixing, and the dough should clump together after about 1 minute of mixing.

3.     Place the dough into a pastry bag fitted with a very large star tip, and pipe onto a parchment paper lined baking sheet. Depending upon the size of your star shaped pastry tip, this will determine whether you can have 12 or 18 cookies per sheet. Bake the cookies for 10-12 minutes or until lightly golden.

4.    Let the cookies cool completely, and feel free to make yourself some icing with the confectioners sugar and creamer. I preferred to make my icing more of a glaze, so it's pretty thin, to allow the beauty of the shape of the cookie show through. 

Use Spring or Easter colored sprinkles and candies to decorate your cookies if you like, and enjoy!

Learn more about all the Nestlé® Spring Lineup of Easter candies, new coffee creamers, and more, here!

Top Travel Snack Ideas for Road Trips with Nonni’s!

A special thanks to Nonni's Artisan Cookies for sponsoring this post.

Spring and Summer are popular times to travel, and if you’re hitting the open road this season, here are a few of our favorite Top Travel Snacks for Road Trips, and how to pack those snacks like a champ. Bringing a variety of deliciously convenient and interesting foods can make a road trip run more smoothly to avoid frequent stops for fast food.

Nonni’s new Chocolate Chip Artisan Thin Cookies are going to be the star of our next road trip, and since the cookies come in individual portion packs of three cookies each, they make amazing road trip snacks. I like the convenience of the packs, and wow, the brand isn’t kidding when they talk about how addictive their new Double Chocolate and Almond Chocolate Artisan Thin Cookies can be. They are superbly crunchy, have a wonderful taste and aroma, and are going to make this year’s travels a whole lot sweeter!

If you’re a regular reader of my blog, or even new to my blog, you will see that we are incredibly inspired by travel. My boyfriend and I have been together nearly 13 years, and we absolutely love to travel to places all over the country together – especially by car!

We road trip for many reasons, first and foremost, so that we can take our dogs, and also because we love the freedom to pack whatever we want in the car with us. Having everything with us always makes traveling easier and we love stopping off at a picnic area or rest area to have a snack or lunch al fresco. The below make great options for that break when you’re on-the-go!

LEARN MORE ABOUT NONNI’S COOKIES HERE:

Almond Chocolate (http://nonnis.com/chipthinaddictives/almond-chocolate/)

Double Chocolate (http://nonnis.com/chipthinaddictives/double-chocolate/)

TOP ROAD TRIP SNACKS

Nonni’s Chocolate Chip Artisan Thin Cookies

These cookies taste delicious and they satisfy my sweet tooth while I’m on the road. They’re unique because they’re made with real ingredients like 55% cacao, whole almonds (in some varieties), and coconut oil. Each box contains six convenient portion packs of three cookies that average 100 calories each.

The individual cookie packs also ensure freshness, compared to opening a whole box or bag of cookies that might go stale that same day.

Pita Chips and Hummus

This is one healthy snack that I find to be easy to eat in the car, and is way more satisfying than stopping through a drive through!

Veggies and Ranch Dip

Use half pint mason jars to contain ranch dressing or ranch dip in one, then, add vegetables like chopped broccoli, rainbow carrots, celery sticks, cherry tomatoes, and more in other jars.

It’s always fun to have a few assorted candies, in their individual jars. This will also severely reduce the need to make a candy run at the gas station. Also, chocolate tends to melt in the car, no matter if it’s winter or summer in our experience. Choose candies that are more fruity like gummies or jelly beans.

Almonds or Mixed Nuts

The satisfying crunch of almonds or mixed nuts can be very perfect for a road trip! I love how the Nonni’s cookies have almonds and chocolate chips in them. Oh my, they’re good!

The great part of using glass jars for snacks is that they hardly ever leak  and keep ingredients fresh. We store them in our cooler and the jars are great to have a picnic on the road, or enjoy once you get to your hotel or destination

If you’re heading anywhere fun this year, please let me know in the comments below! I also love to live vicariously through other people’s travel photos, and I hope you all have something super fun planned this year!

If you loved this post, PIN IT FOR LATER...

5 Ingredient Super Moist Pistachio 7UP Layer Cake with Pistachio Frosting Recipe

This shop has been compensated by Collective Bias, Inc. and its advertiser. All opinions are mine alone. #JustAdd7UP

Looking to create a delicious pistachio themed dessert for St. Patrick’s Day and beyond? I have a fun and unique idea for you that looks super elegant but only took a little bit of time to create. This would also make an excellent cake for a birthday, Mother’s Day, Father’s Day, other holiday, or just because! In fact, I will be making another one tomorrow evening for a friend’s birthday and she is SO excited!!

I was honored when 7UP asked me to create something special for a holiday that means everything to me. My late grandmother, Pat, was born on St. Patrick’s Day and was one of my very favorite people in the whole wide world. She taught me lots of her recipes and I use several of them quite regularly, and I think of her all the time. She instilled such amazing values on me, and I love her so very much! So, with her in mind, and the luck of the Irish on my side, I present you with this Super Moist Pistachio 7UP Layer Cake with Pistachio Frosting. It’s quite possibly the MOST delicious creation on Earth!

It’s really quite impressive that the base of this cake contains only 5 ingredients, one of them being a can of 7UP. This versatile ingredient adds a lot of moisture to the cake, and with the homemade frosting on top, the two flavors mesh together just perfectly.

If you like pistachio, then you are going to LOVE this delicious and easy-to-create cake! It turned out very elegantly too, which I was very happy with! I didn’t use any super special decorating tools, which made things even easier.

Luckily, I was able to grab all of my supplies at Walmart (I always love when life is easy!)

CAKE INGREDIENTS:

Serving Size: 8-10, Prep Time: 25 Minutes, Total Time: 1 hour 25 Minutes

1 can 7UP®

1 box of vanilla cake mix

1 (3.4 oz) box of pistachio pudding mix

3 eggs

1 cup Vegetable Oil

FROSTING INGREDIENTS:

1 (3.4 oz) box of pistachio pudding mix

8 oz softened cream cheese

½ cup softened butter (1 stick)

5 Tbsp milk

5-5 ½ cups powdered confectioners sugar

1 Tbsp vanilla or almond extract


INSTRUCTIONS:


  1. To make the cake, preheat oven to 350 degrees F. Grease two 9” round pans with non-stick spray and add a circle of waxed paper or parchment paper to the bottom of each pan. Spray the paper circle, then add a little bit of flour to your pans. Use your fingers to help move the flour around and coat the pans, and knock out any excess flour.

  2. In a large bowl, combine all cake ingredients and mix on medium to high speed for 4 minutes. Scrape sides of mixing bowl at 2 minutes.

3. Using a measuring cup, add half of the batter to each cake round. Bake for 30-35 minutes, or until cake springs back when you press onto it.

4. While the cake is baking, make your icing. In a large mixing bowl, first add pudding mix, then butter, cream cheese, and vanilla or almond extract. Beat with a mixer until smooth.

5. Now, to finish your icing, add powdered confectioner one cup at a time, first folding it in with a spoon, then mixing with your mixer so sugar doesn’t fly everywhere. Lastly, add 4-5 Tbsp of milk to begin to thin your icing. Once it’s at your desired consistency, set aside.

6. Once cakes have completely cooled, remove them from the round pans, remove the paper off of the cakes, and add feel free to even out the tops of the layers very carefully with a sharp knife.

7. Add icing to one layer of the cake, smooth into an even layer, then add the second cake round on top. Lastly, cover the top and sides of the cake with a smooth layer of icing with a silicone spatula. Lastly, feel free to use an icing tip or icing in a zip top bag with the corner cut off to draw more designs and textures to the top of the cake. Finish the cake with pistachio pieces around the sides and sprinkled on top! Enjoy!

If you are lucky enough to create this recipe, I would absolutely LOVE to see what you make! Tag me on Instagram as @happysolez, or share the link in the comments below to let me know how it turned out. And, if you have any questions, leave them below too.

Beer Cheese Potato Soup Recipe

Thank you Potatoes USA for sponsoring this post. Make a delicious and convenient meal for your family tonight with potatoes!

A delicious beer cheese and potato forward soup that is sure to please just about anyone! The taste of the dark, robust stout really shines through while the potatoes add an element of creaminess that makes it hard to not go up for seconds! I always thought that creamy soups had to be cream-based and I was completely wrong! This potato soup only contains a very small volume of cream, and the rest is made creamy with pureed potatoes! 

Find the printable recipe at the very bottom of this post. 

Ultimate Potato Cheese Soup Recipe (Serves 8+)

Prep Time: 15-20 minutes // Cook Time: 30-40 minutes

Cuisine: American


Ingredients

  • 8 cups chopped russet or baking potatoes
  • 2 tablespoons butter
  • 1 cup chopped or grated carrot
  • 1 cup chopped or grated white onion
  • 3 ounces chopped lean ham, cubed
  • 3 cups chicken stock
  • 1 cup beer
  • 3 ouncesgrated cheddar cheese
  • 3 ounces grated gruyere cheese
  • 1/2 cup reduced fat milk

Potatoes are a culinary canvas with limitless possibilities!

Note - we chose an Imperial Stout, pictured below, and it was delicious! If you wanted to tone down the taste of the beer, then use a dark beer like a Porter that is under 5% ABV.

Another note - if you want your soup to me way more yellow, then choose a yellow cheese like cheddar and even colby jack. 

Directions

  1. In large pot, heat butter over medium until bubbly.
  2. Add carrot, onion and ham. Saute 5-10 minutes.
  3. Add potatoes and chicken stock, stir to combine. Simmer for 20 minutes, covered.
  4. Put about half the soup in a blender and process until smooth. Add back to pot.
  5. Add beer, cheese and milk. Stir to combine.

Additional Info

Blending only half of the soup smooth gives it a great texture. If you’d like to make this soup vegetarian, simply skip the ham and use vegetable stock instead of chicken – it will still be rich and delicious!

I really hope you enjoy this recipe! If you use more of an Irish Stout, then you could utilize the St. Patrick's Day theme even more! 

Check out the Potato Goodness Facebook page here, and the Potatoes USA website here.

PRINT THE RECIPE BELOW:

I was selected for this opportunity as a member of CLEVER and the content and opinions expressed here are all my own.

Easy Rustic Fruit Pizza Recipe (Fresh Raspberries and Almond Cream Cheese Icing)

With Spring right around the corner, it's fun to create dishes with fresh fruits! This rustic and simple Fruit Pizza is delicious. The crispy, crunchy sweet crust reminds me of churros, and this homemade almond frosting is divine topped with fresh, tart raspberries!

INGREDIENTS FOR CRUST

1 - 7.8 oz. package of Wewalka Bistro Pizza Crust (I used rectangular but round would work too)

1-2 Tbsp melted butter + brush or silicone spatula to spread onto crust

1/2 - 1 tsp cinnamon

2-3 Tsp sugar

INGREDIENTS FOR FROSTING

1/3 C. Cream Cheese (at room temperature)

3-4 Tbsp powdered confectioners 

1/2 tsp almond extract 

1-2 6 oz. containers of fresh raspberries

INSTRUCTIONS:

1.) Preheat oven to 400* F and roll out your pizza dough onto a floured surface. This is optional, but it really makes the crust look great. 

2.) Apply melted butter to your unbaked crust with a brush or silicone spatula, then sprinkle on your sugar and cinnamon. Bake for 12-14 minutes until crust is crispy and lightly browned. 

3.) During the baking process, create your frosting. simply beat the mixture of softened cream cheese, confectioner's sugar, and almond extract until smooth. Add more powdered sugar if you want a thicker frosting. 

4.) Lastly, apply your frosting, then top with 1-2 containers of fresh raspberries. I spaced them out a little bit, and found the most attractive side of each berry to place upward.