Mummy Wrapped Jalapeño Poppers

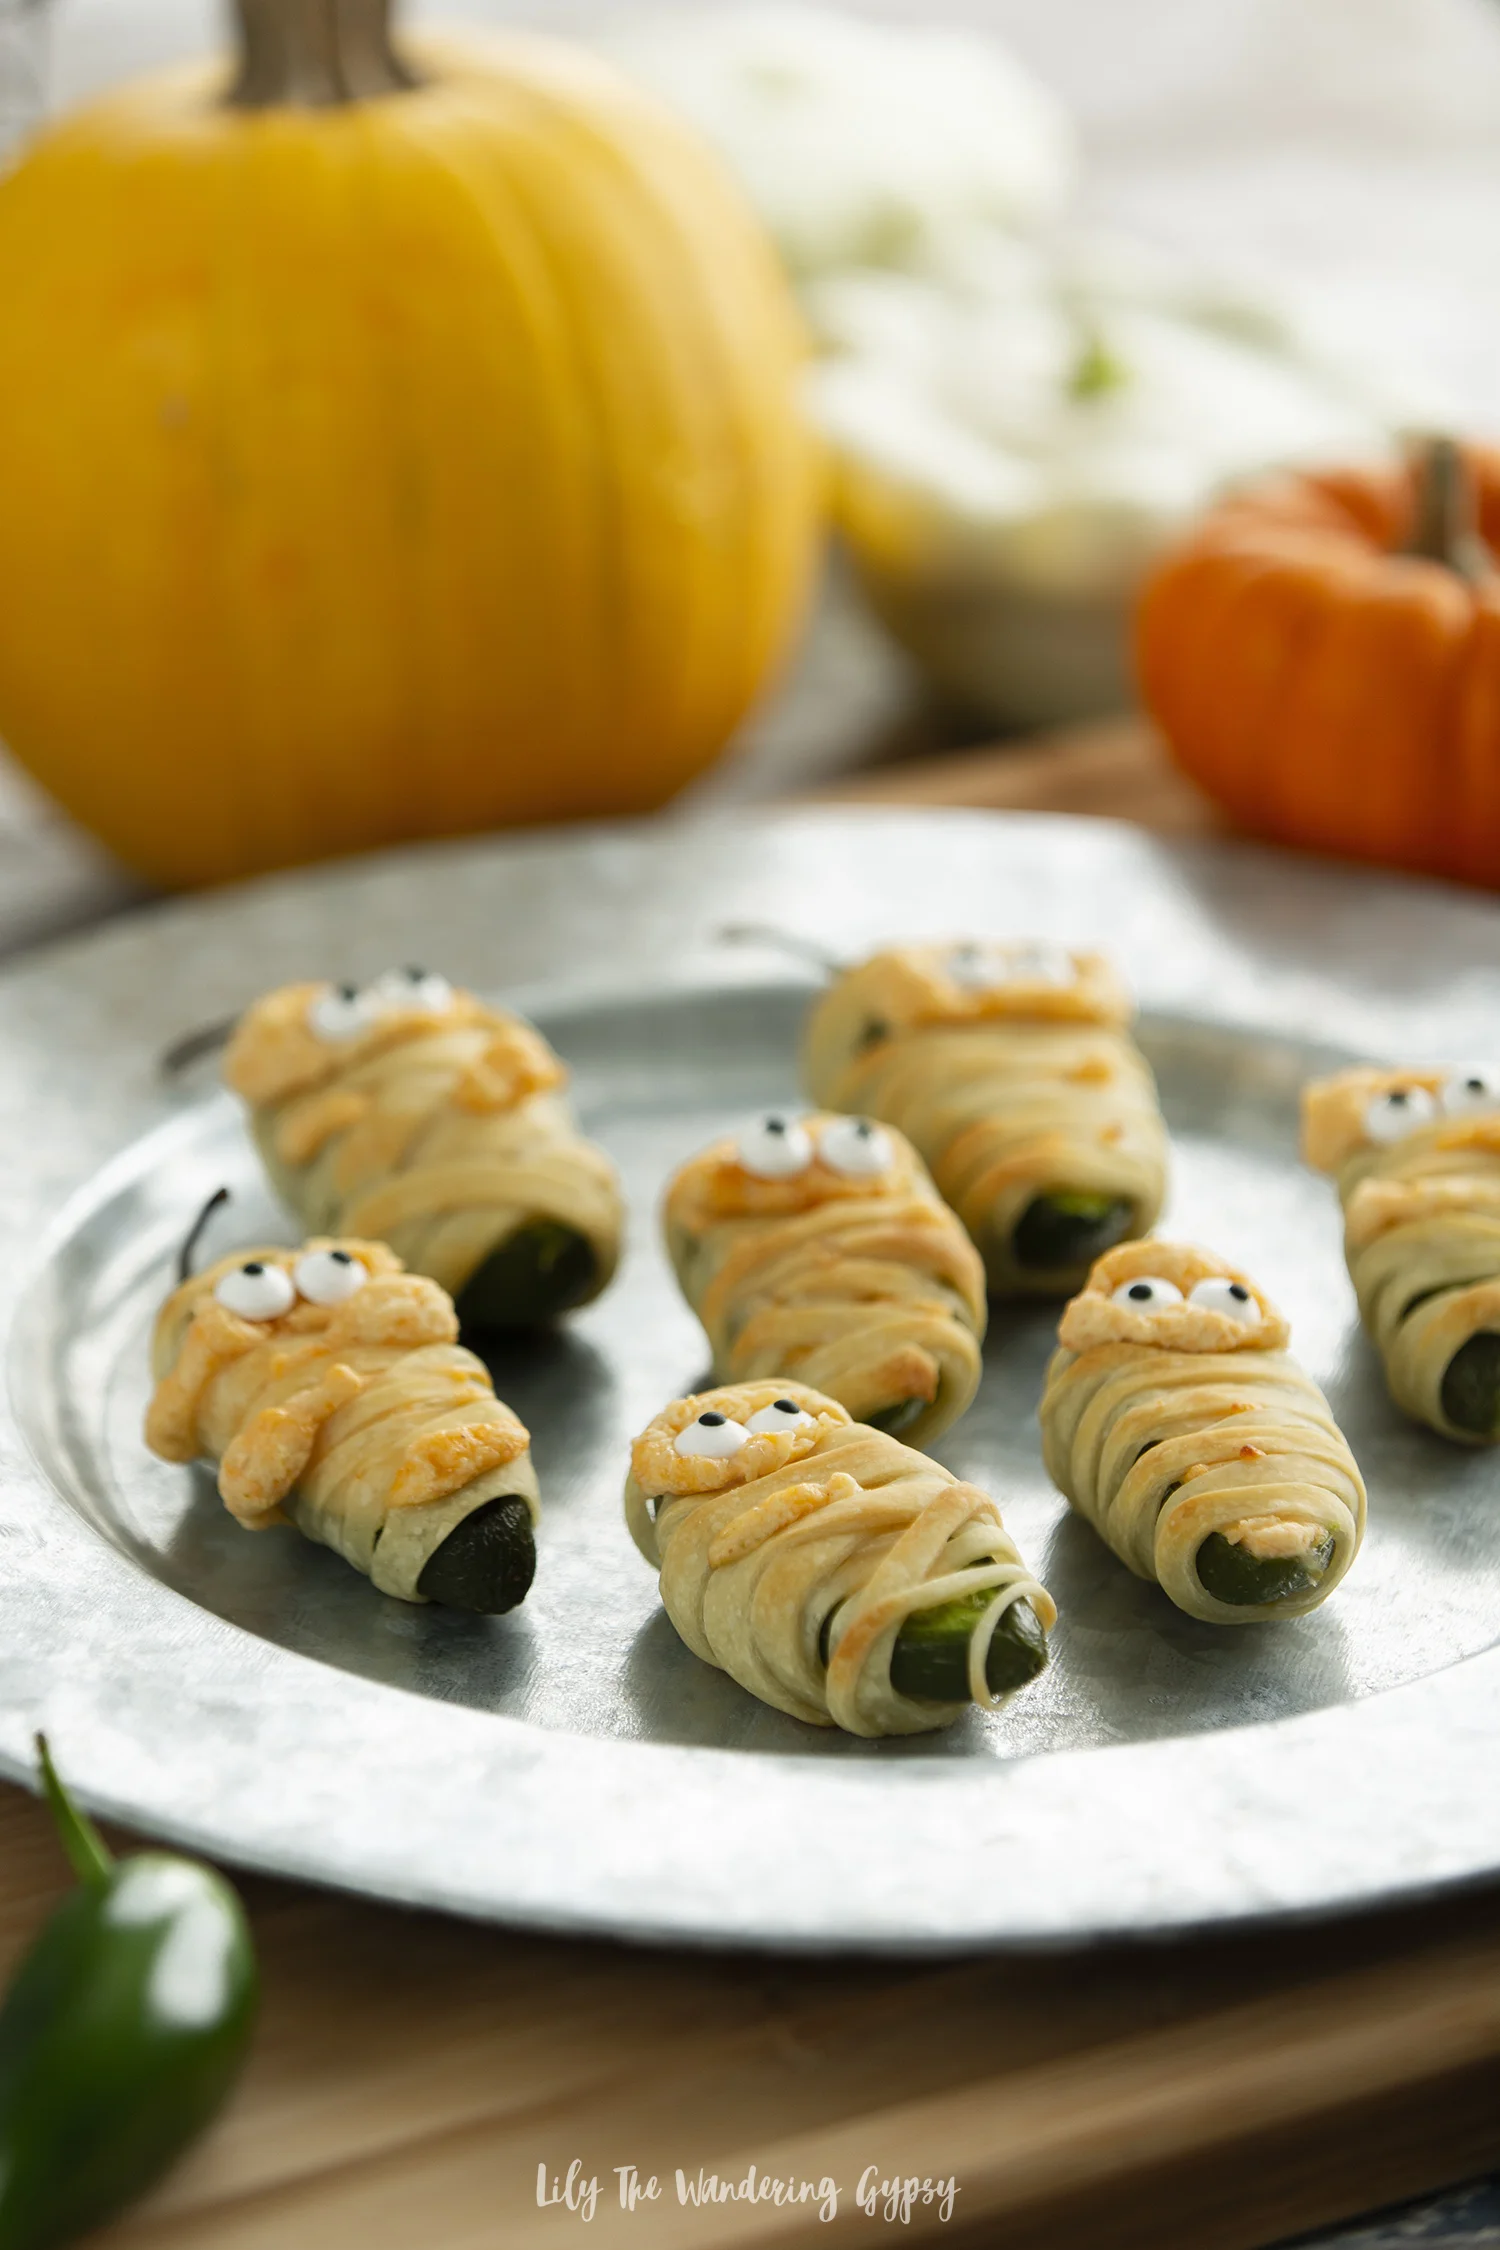
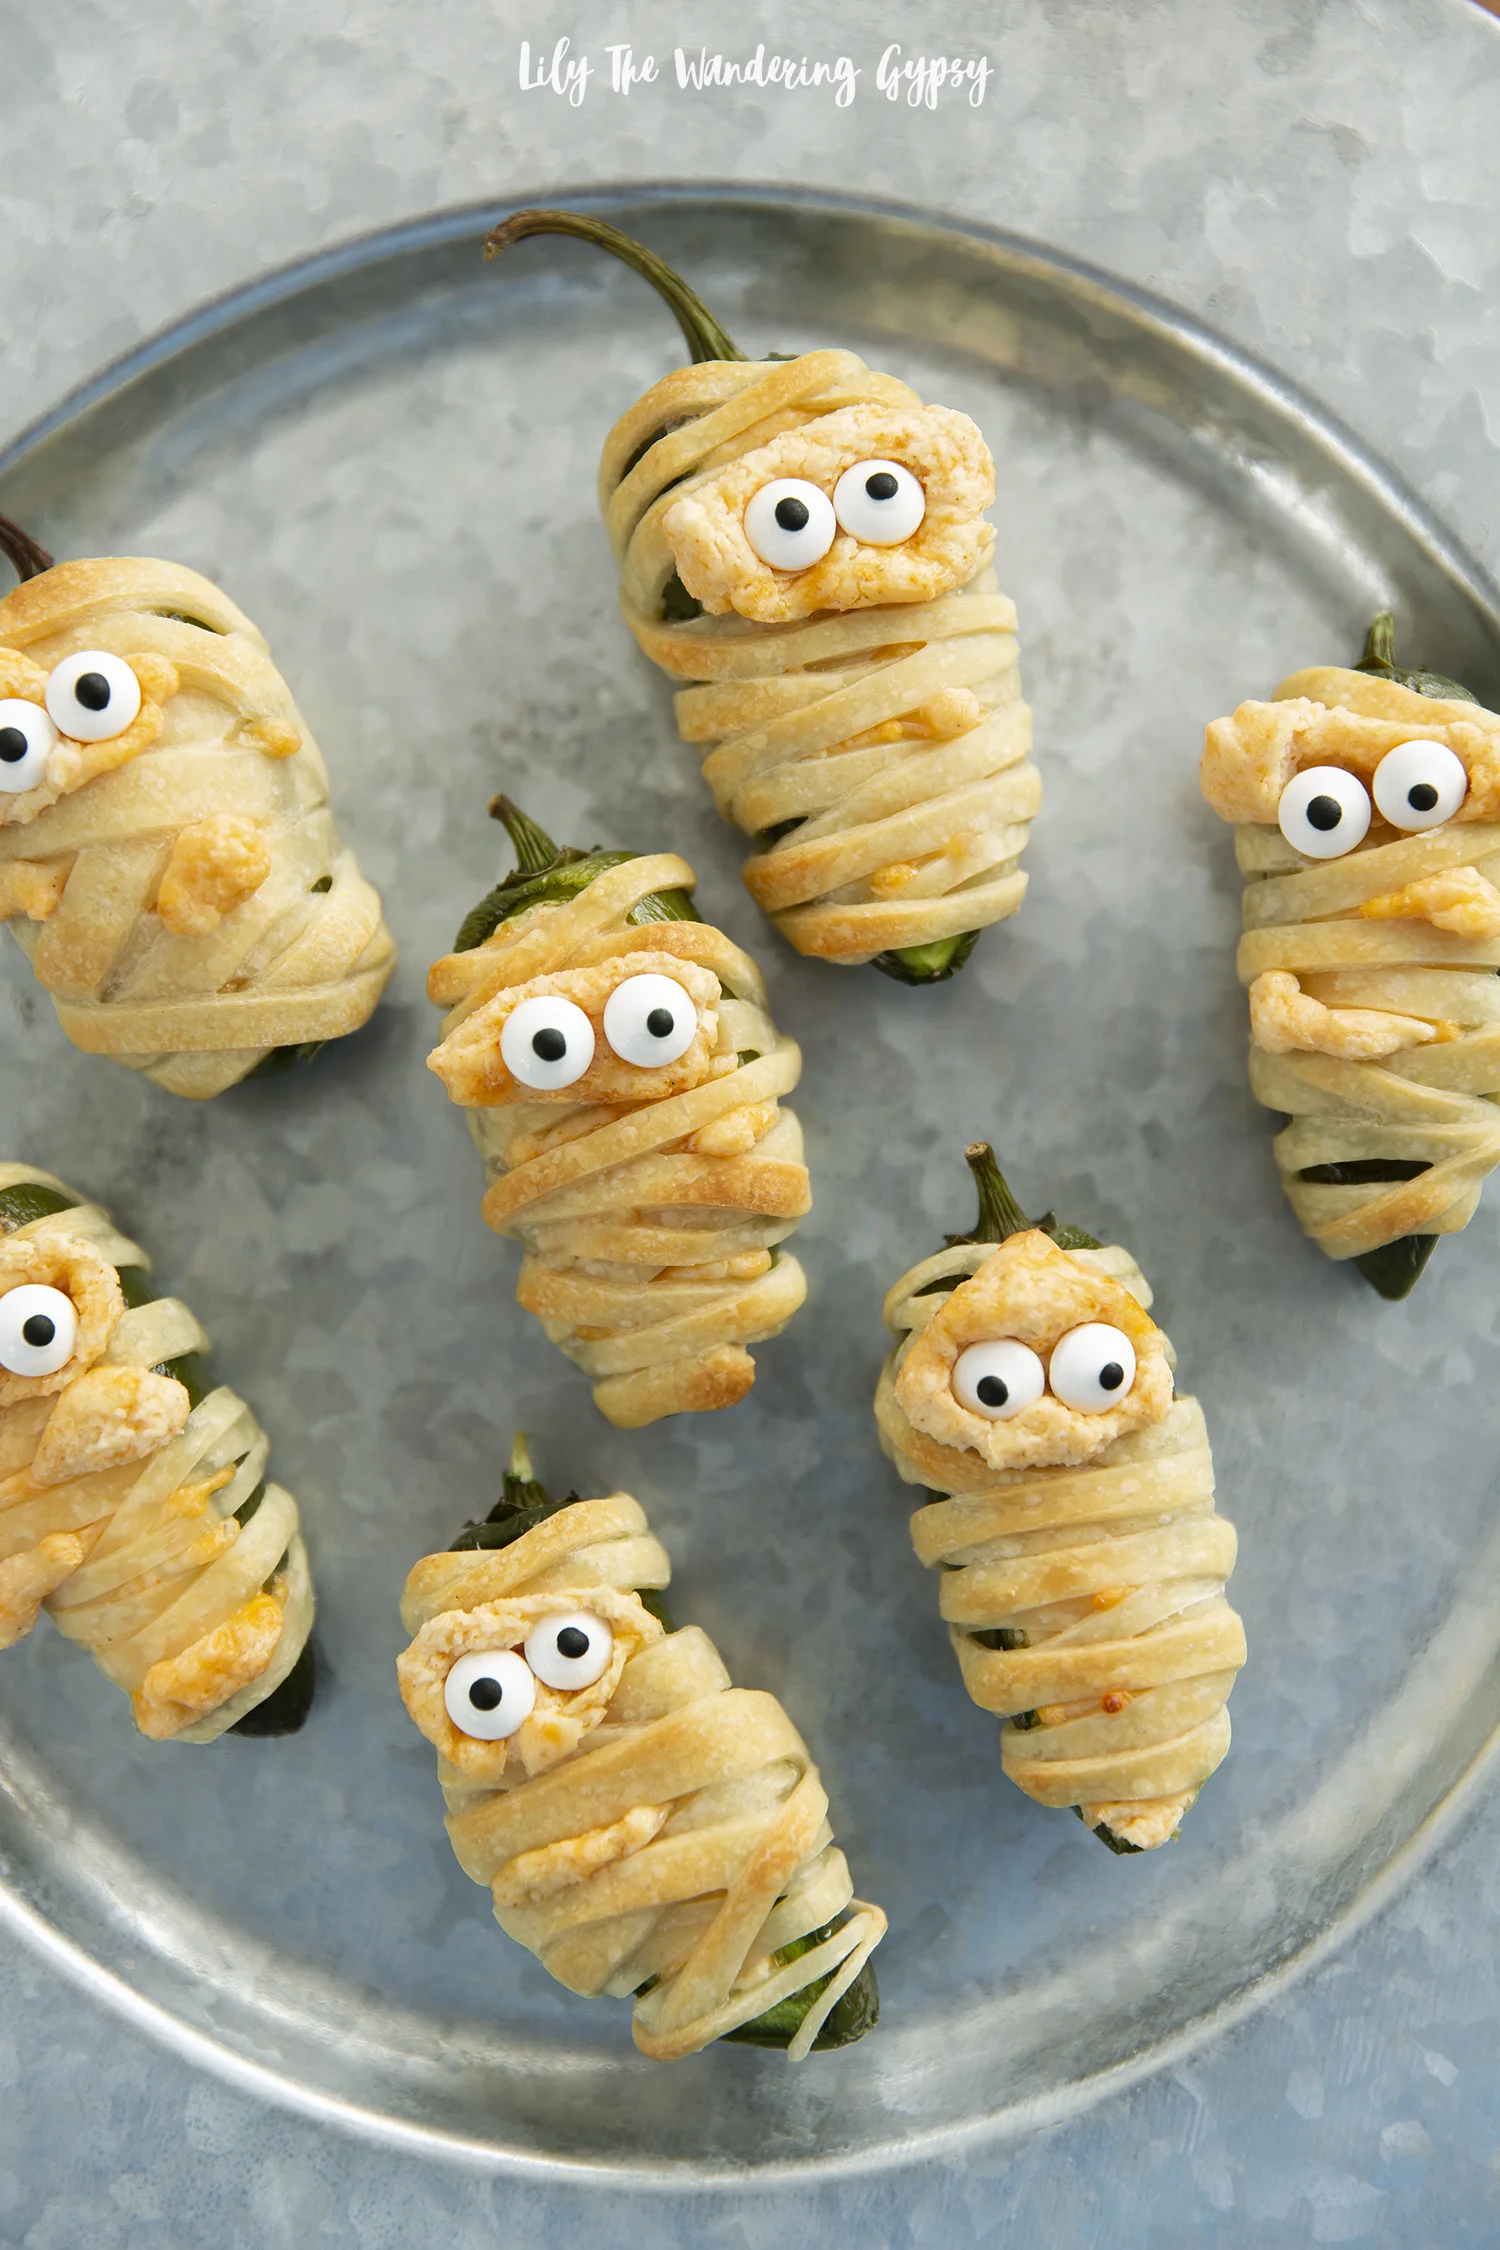
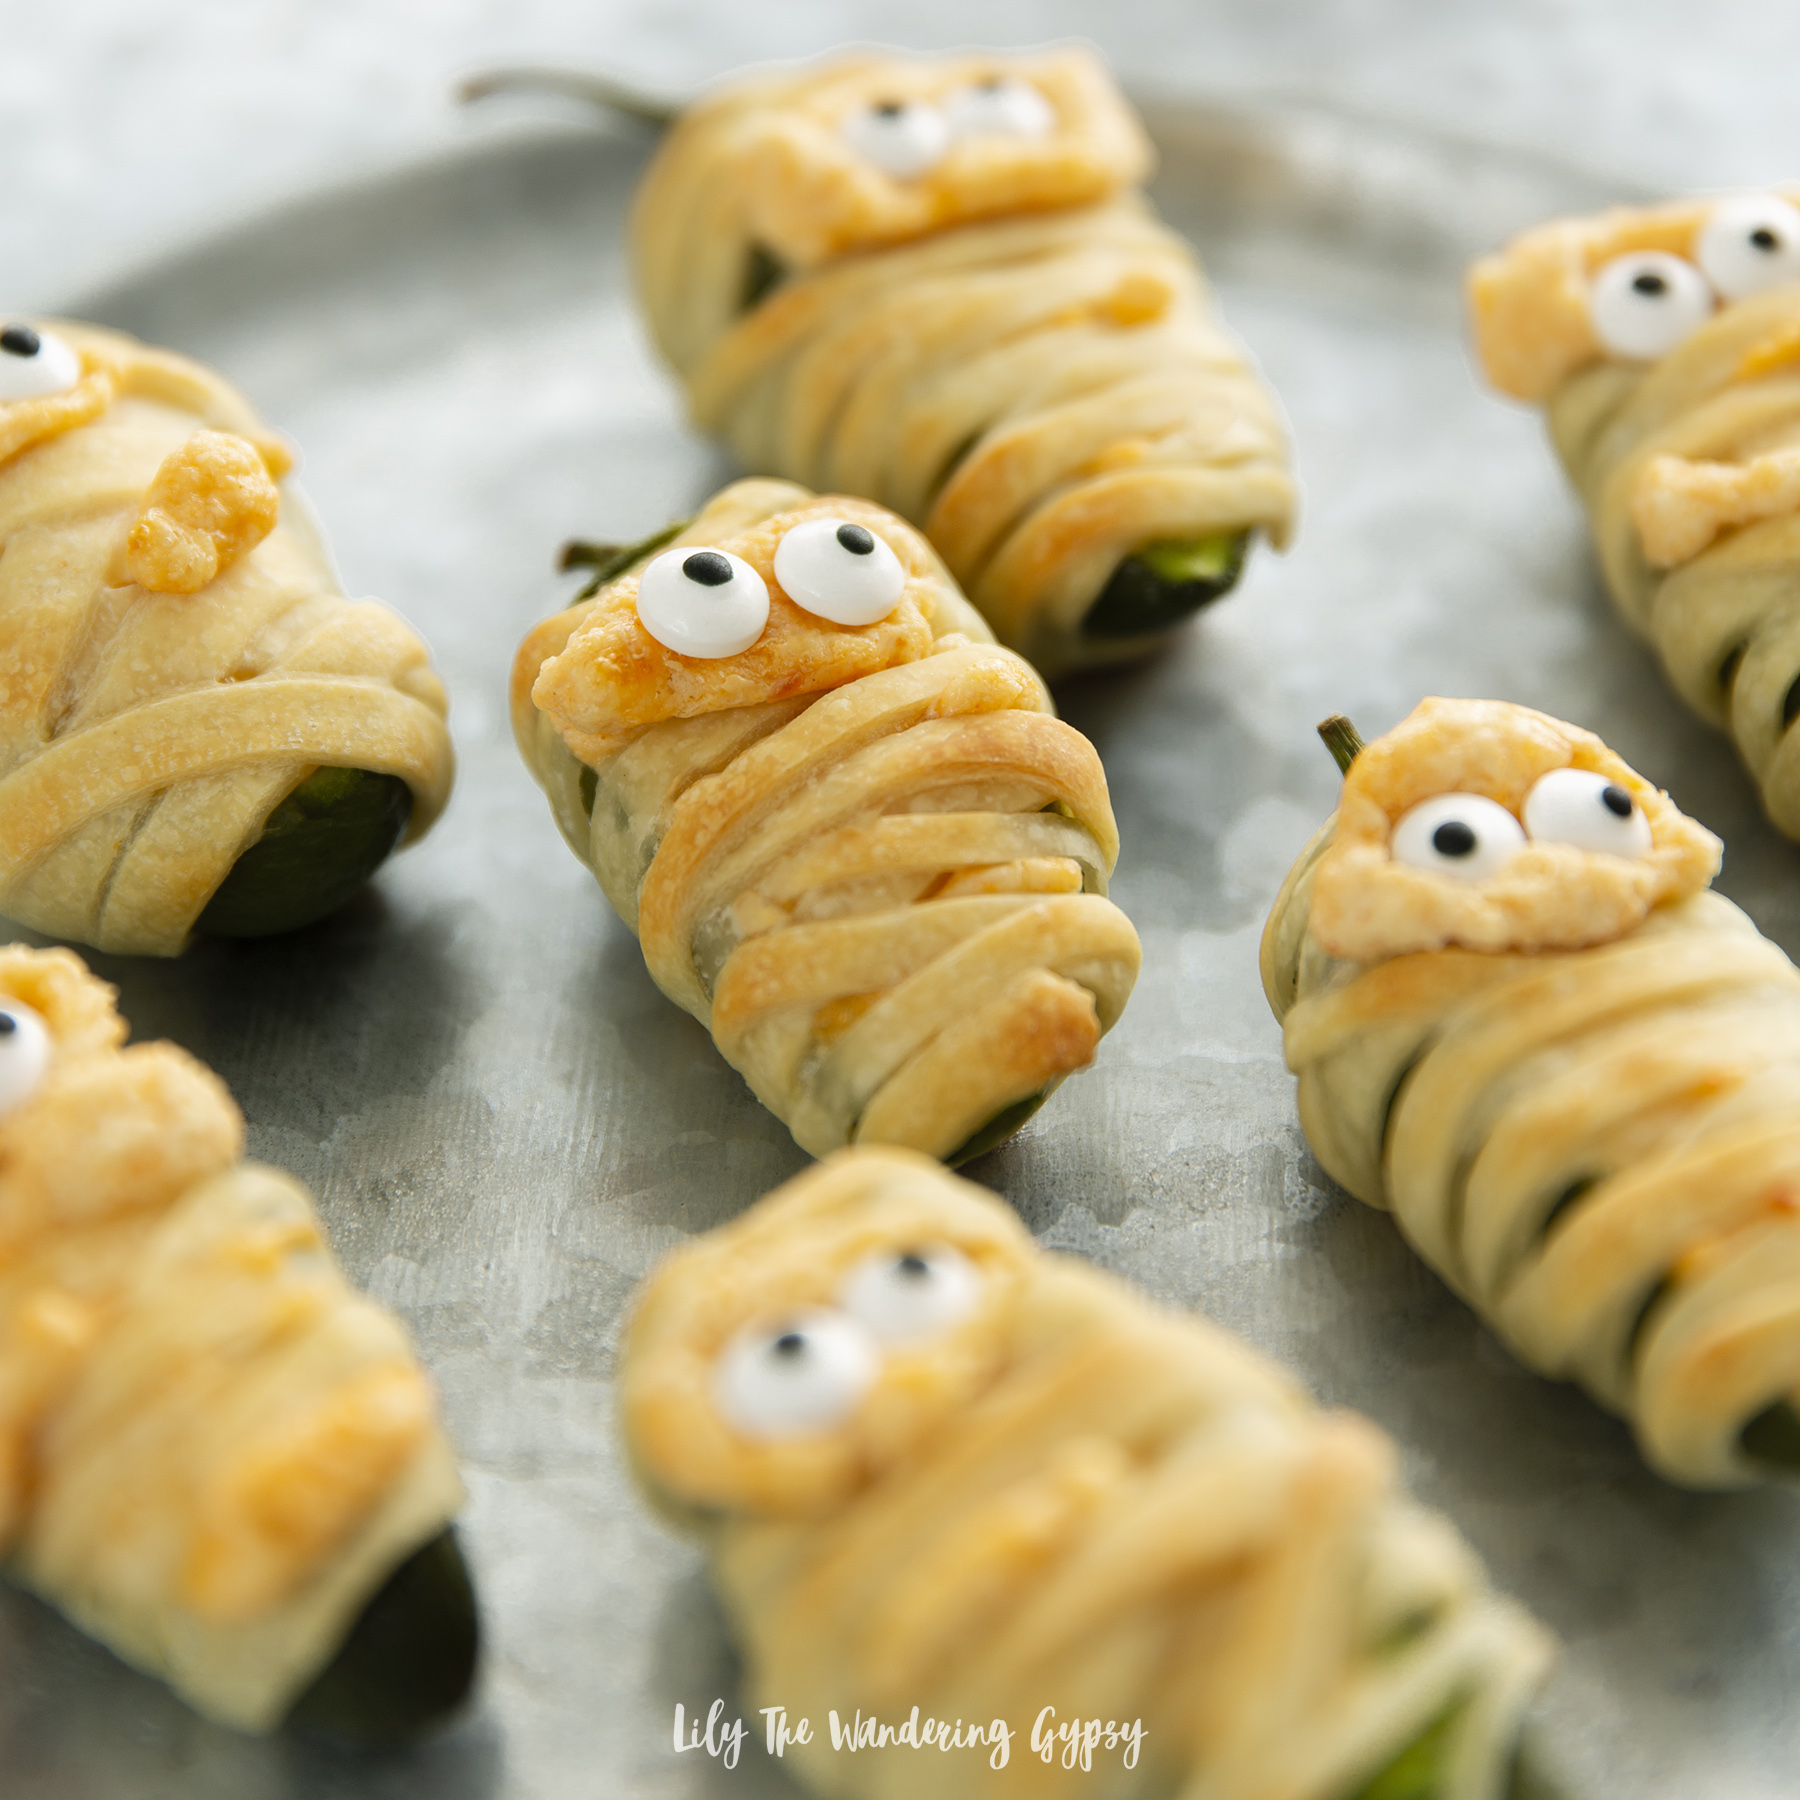
Looking for an eye-catching appetizer that people will love for Halloween? These Mummy Wrapped Jalapeño Poppers are delightfully spooky and you’re going to love them. And, bonus points because these can be made vegetarian or with bacon in the filling - it’s up to YOU!

INGREDIENTS (MAKES ABOUT 20-24 poppers)

1 (8oz.) block of cream cheese

1-1.5 cups shredded cheddar cheese

2-3 Tbsp seasoning - I like Ranch or Mexican seasoning for these

1-2 packages of pizza crust (the thinner the better - I used Wewalka Bistro Crust)

Candy eyes at least 40 pieces (I like these ones)

Baking sheet (I love these Air Bake ones)

Parchment paper - (only suggested if you are not using a baking rack)

Baking rack - optional (similar here and here)

INSTRUCTIONS:

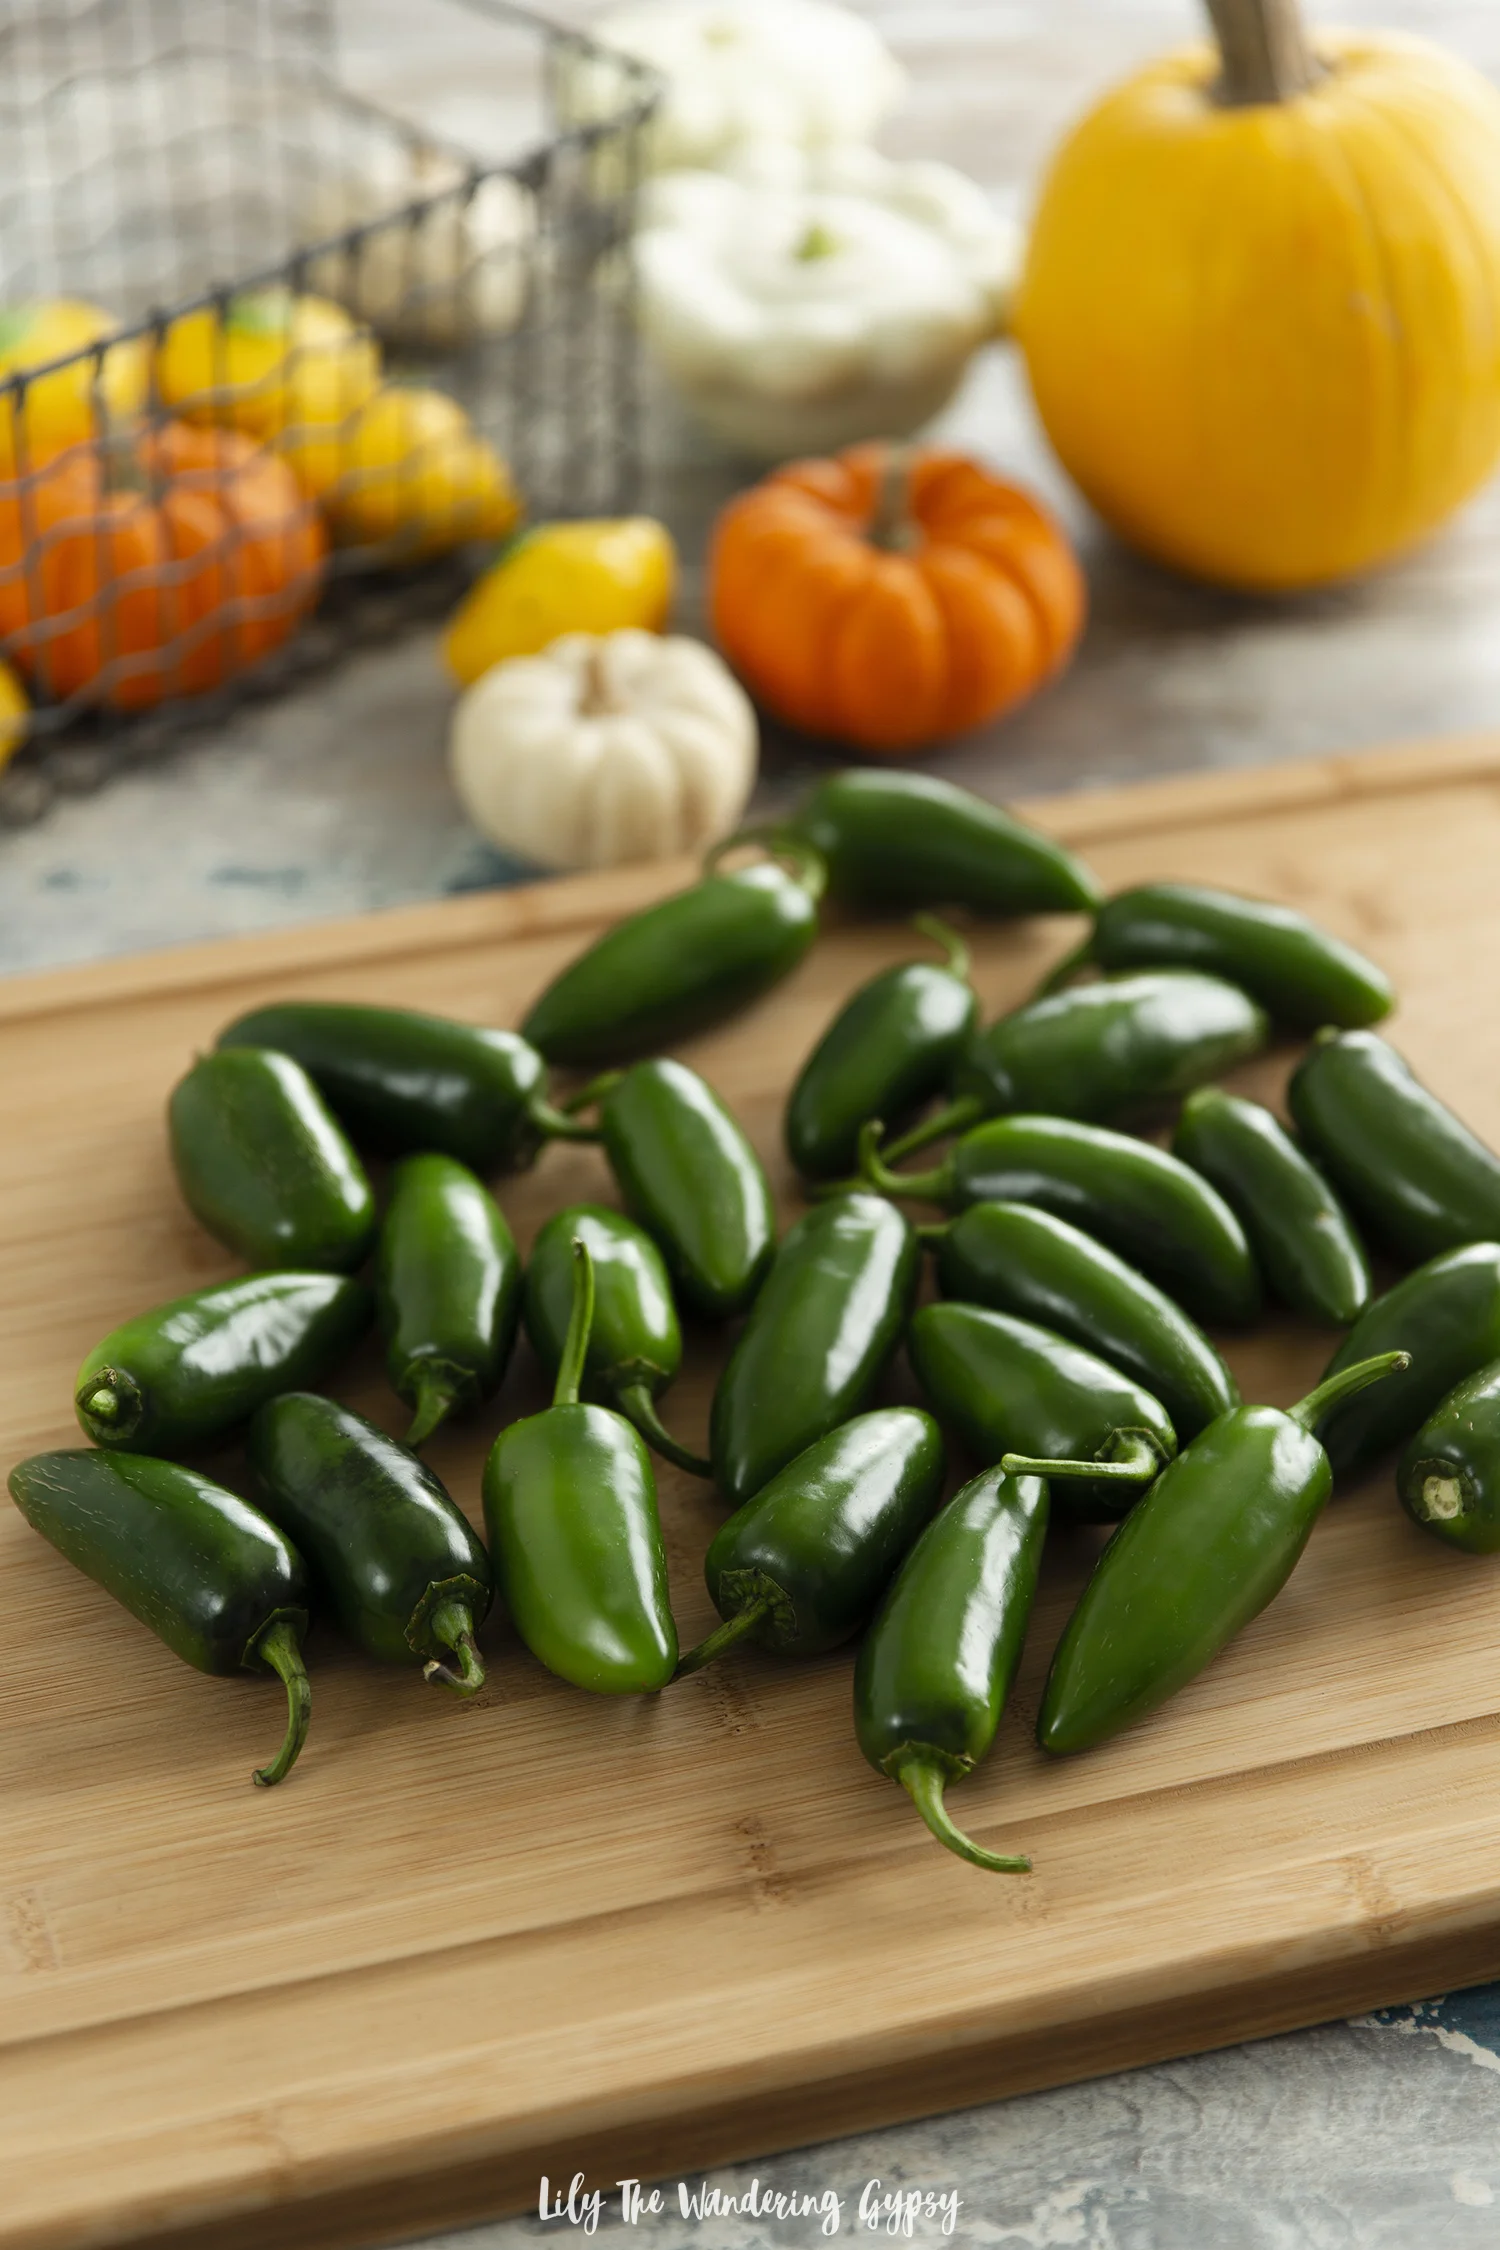
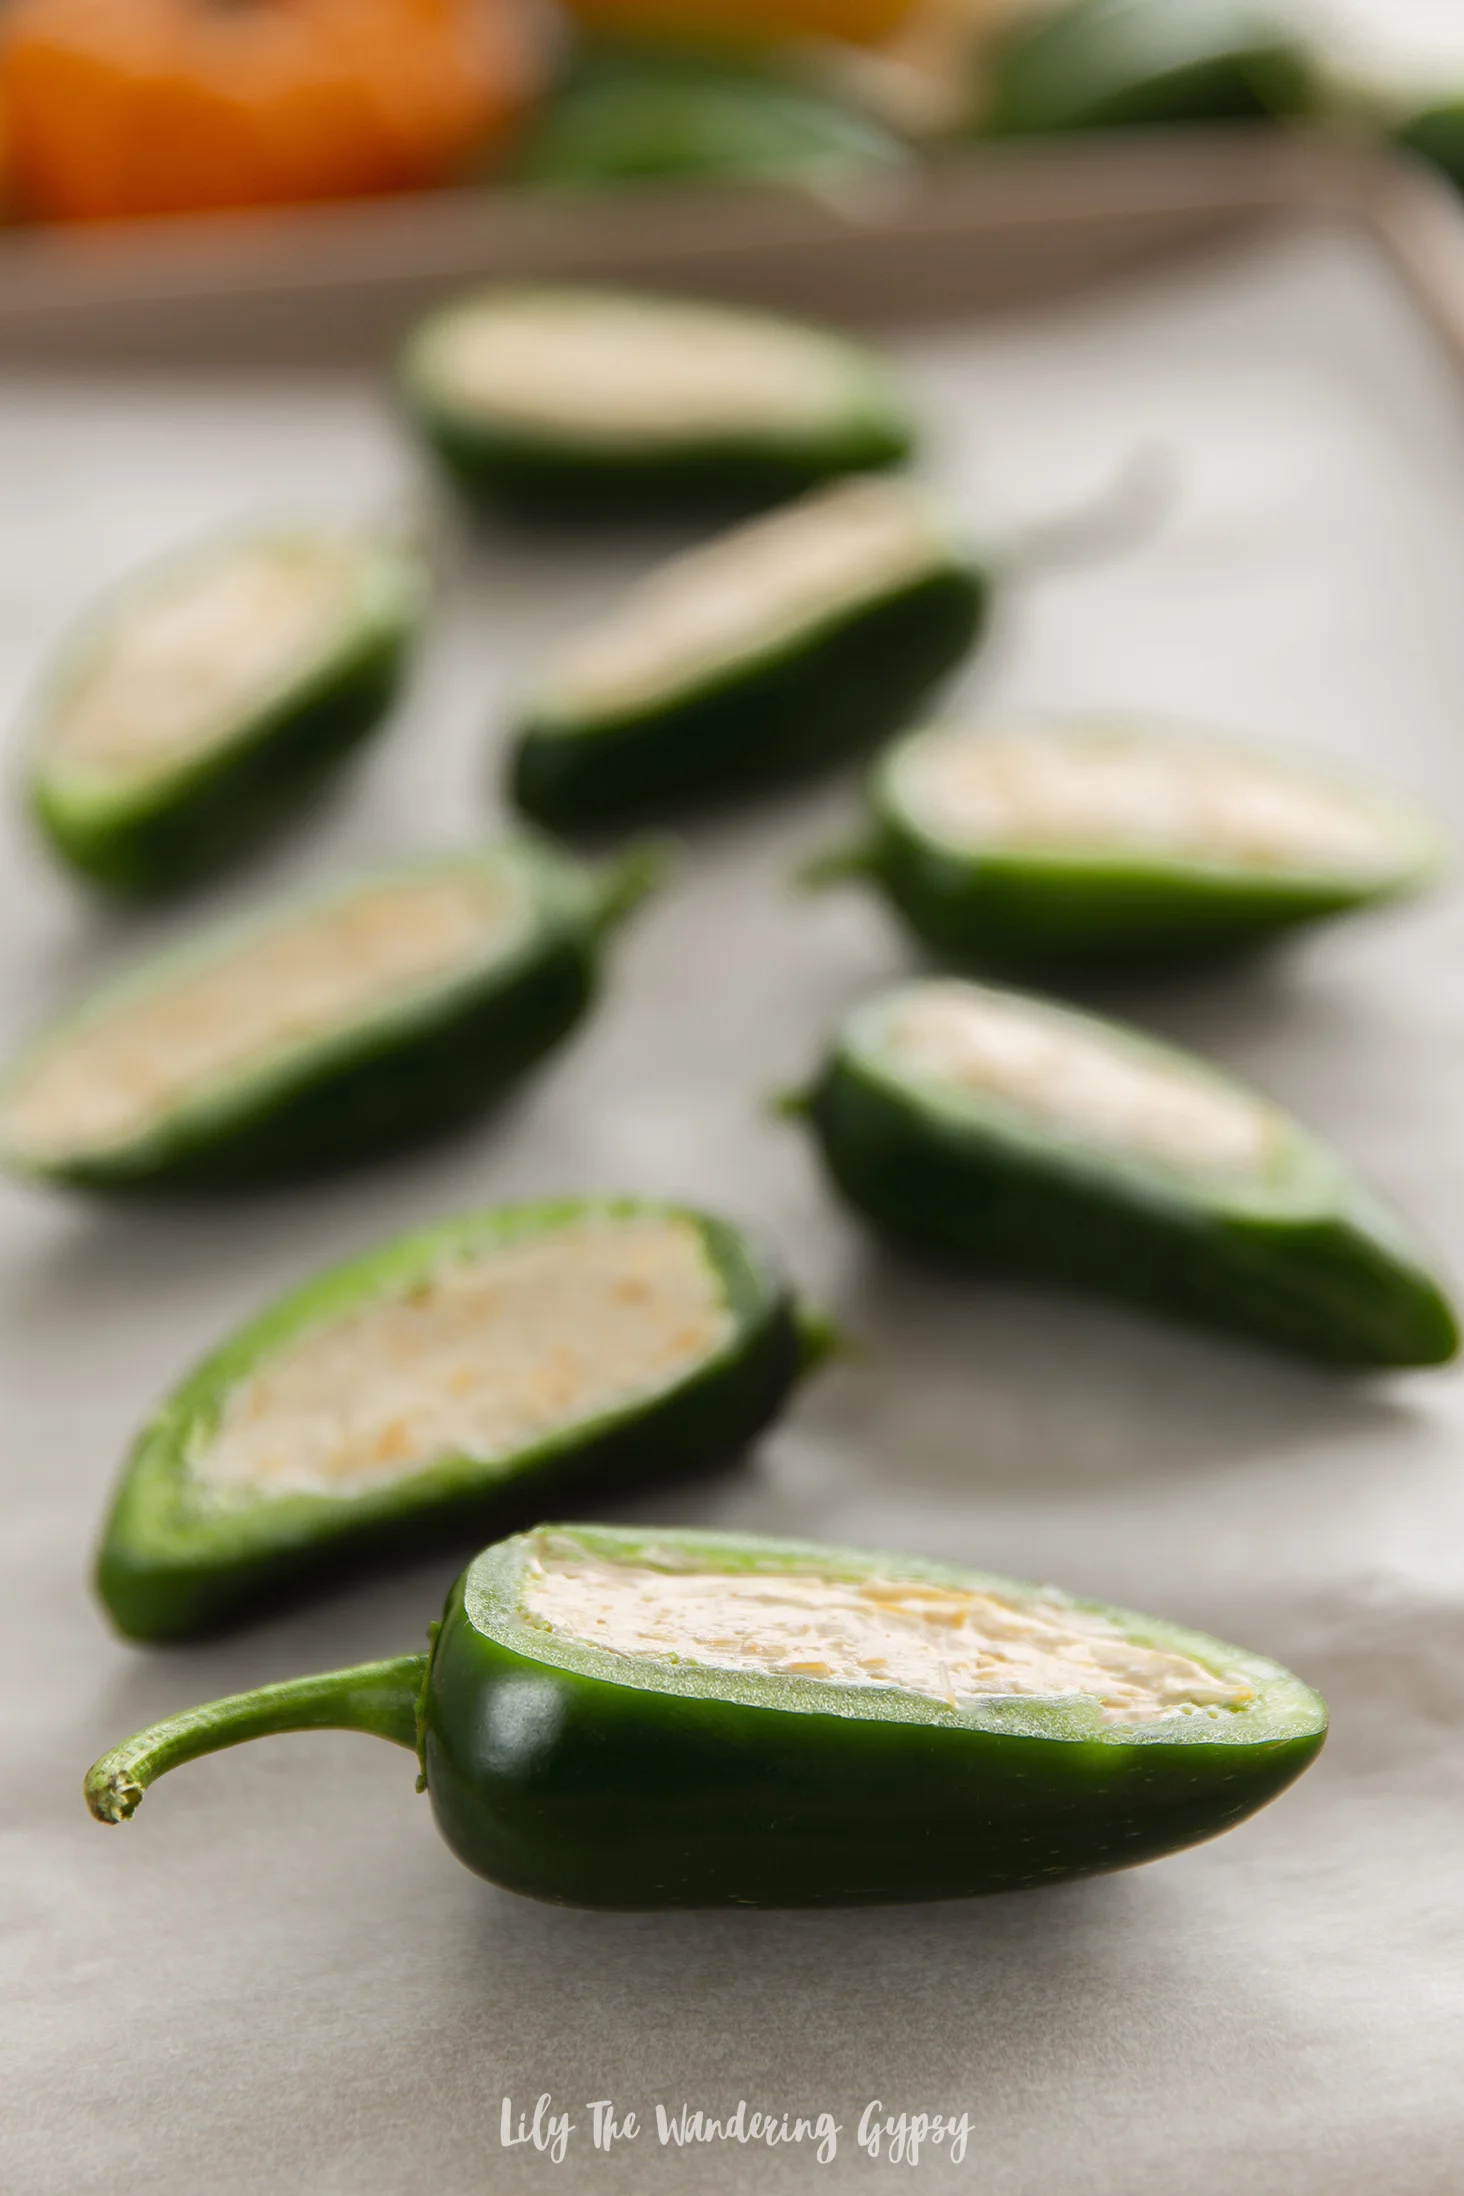
1.) Slice top 1/3 of each pepper off, lengthwise. Carefully remove seeds and other inside material with the back of a kitchen spoon or similar tool. I tend to use rubber gloves when making these, so my hands do not catch any of the spiciness of the peppers.

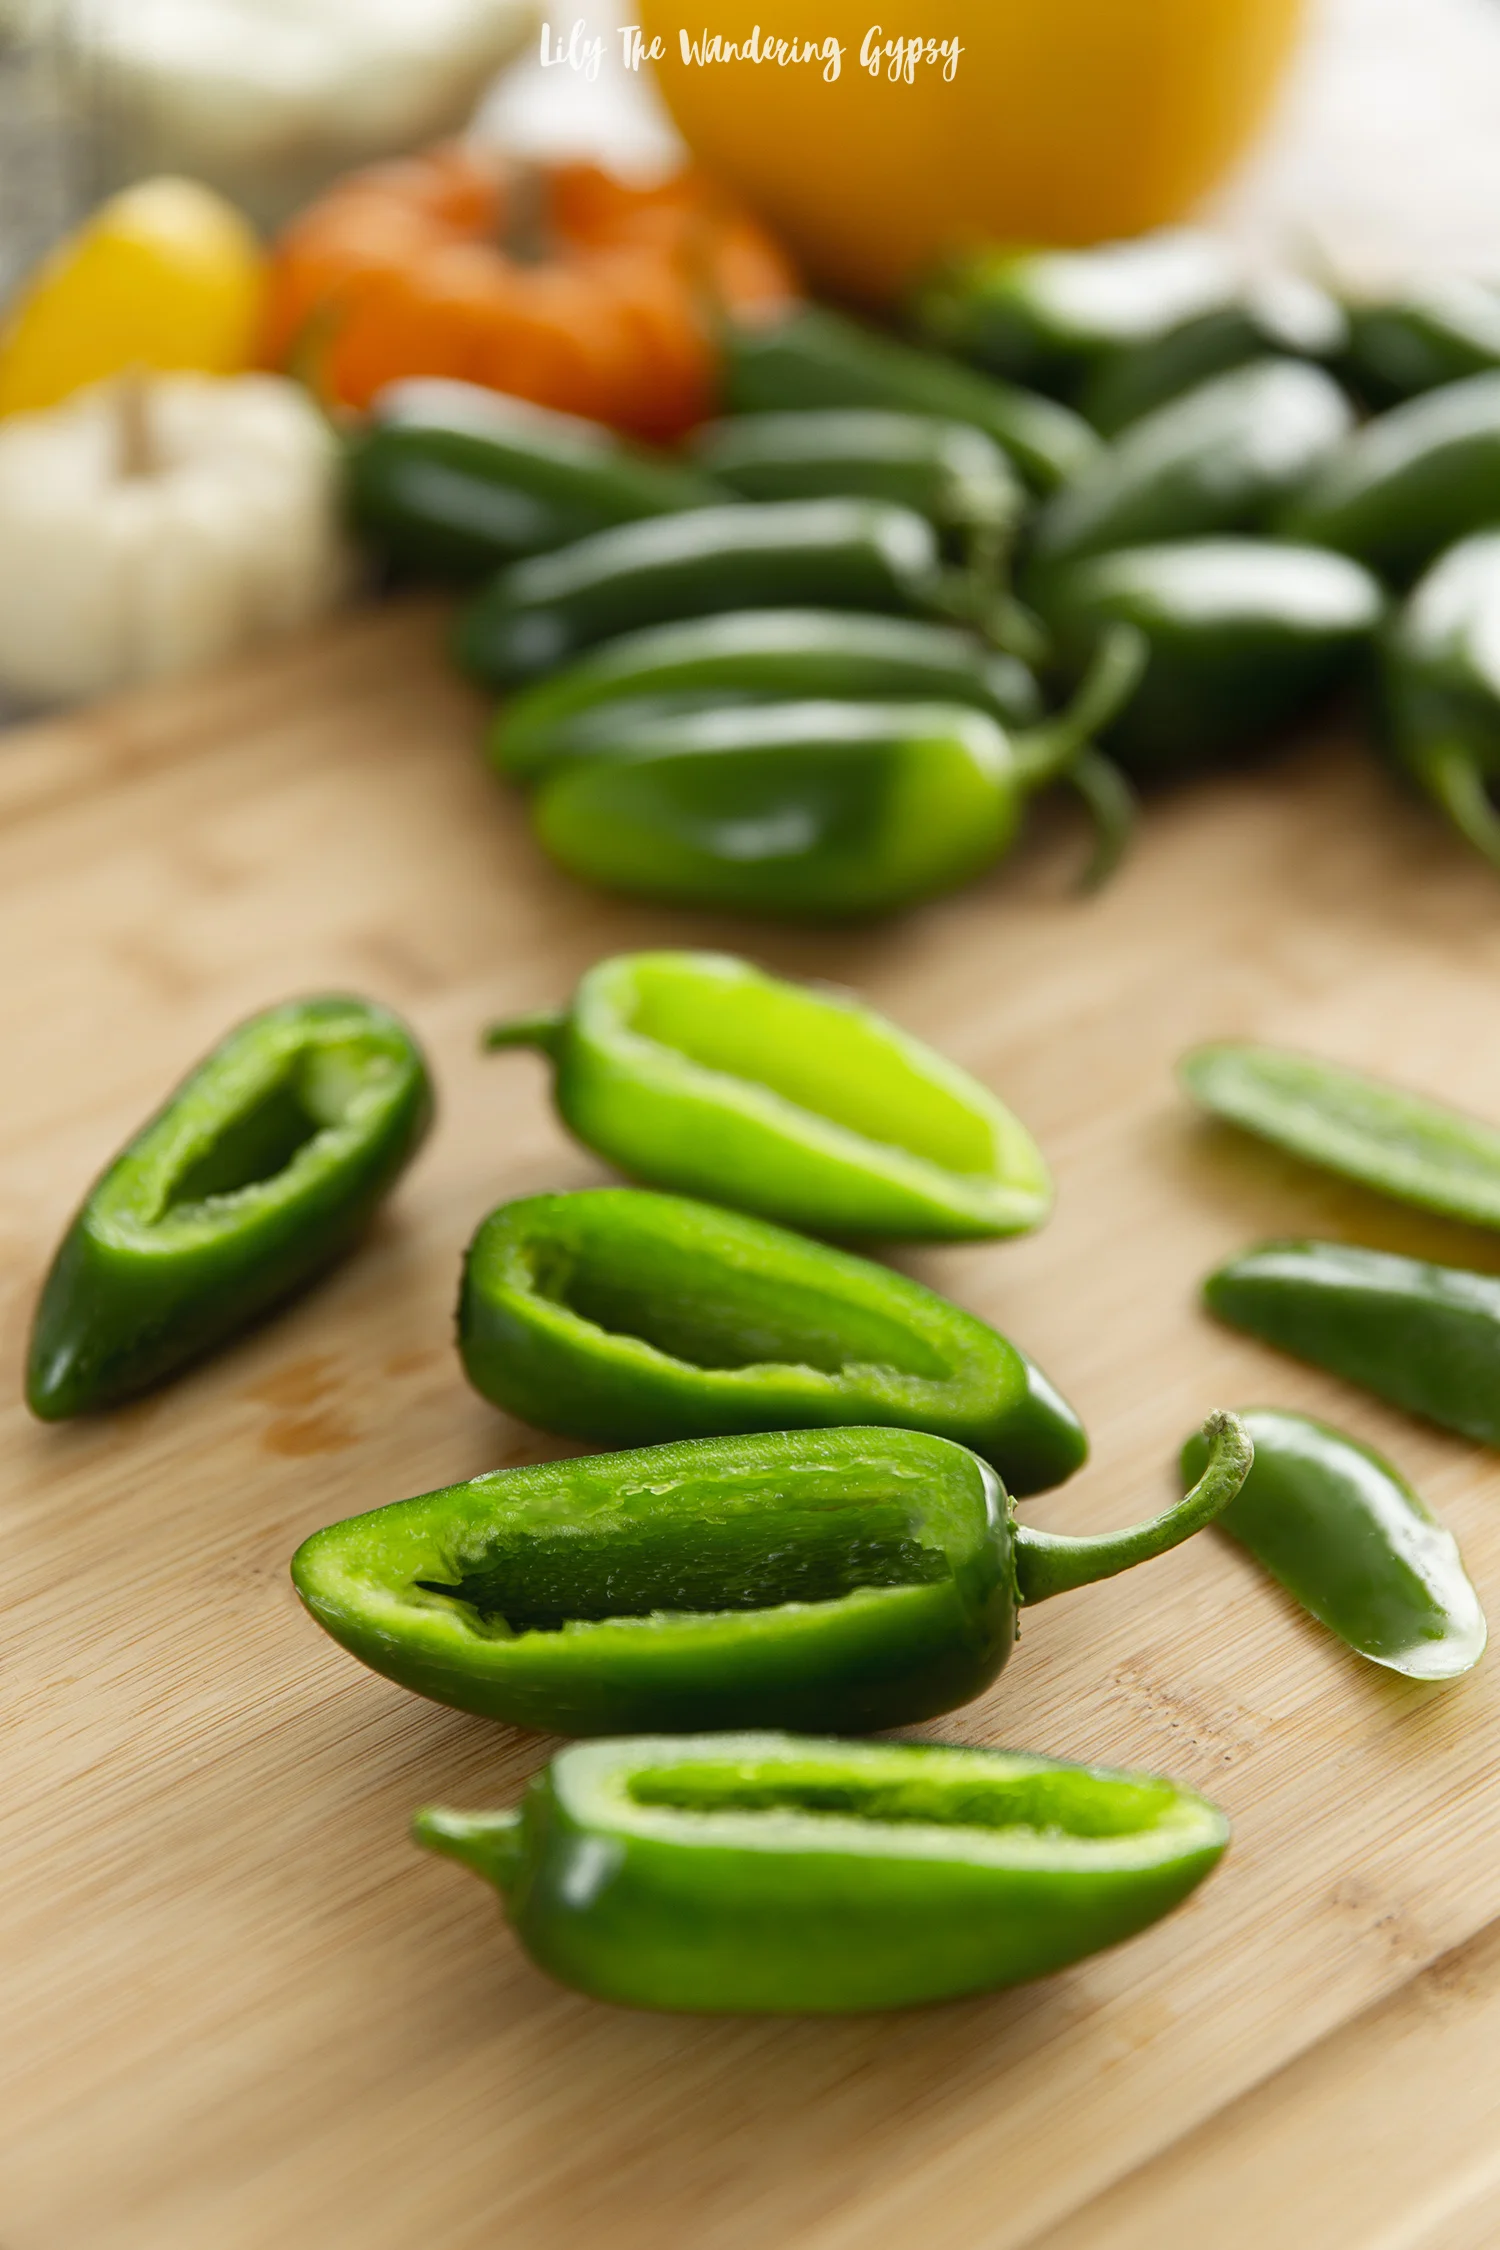
2.) Using a small spoon to add filling to peppers, or place your filling ingredients into a plastic bag and cut the end off to use to pipe the filling into the peppers for a more polished look. Wipe off excess filling that may have gotten on the edges or the tops.

3.) Cut pizza dough into the thinnest strips you can. I use the dough as cold as possible, or almost frozen so it cuts well and also holds the shape of the strips well. Next, wrap small strips of dough around filled peppers in a “mummy sort of way”. I left room for the eye area, and after they baked I placed candy eyes to give them a good personality + spooky look.

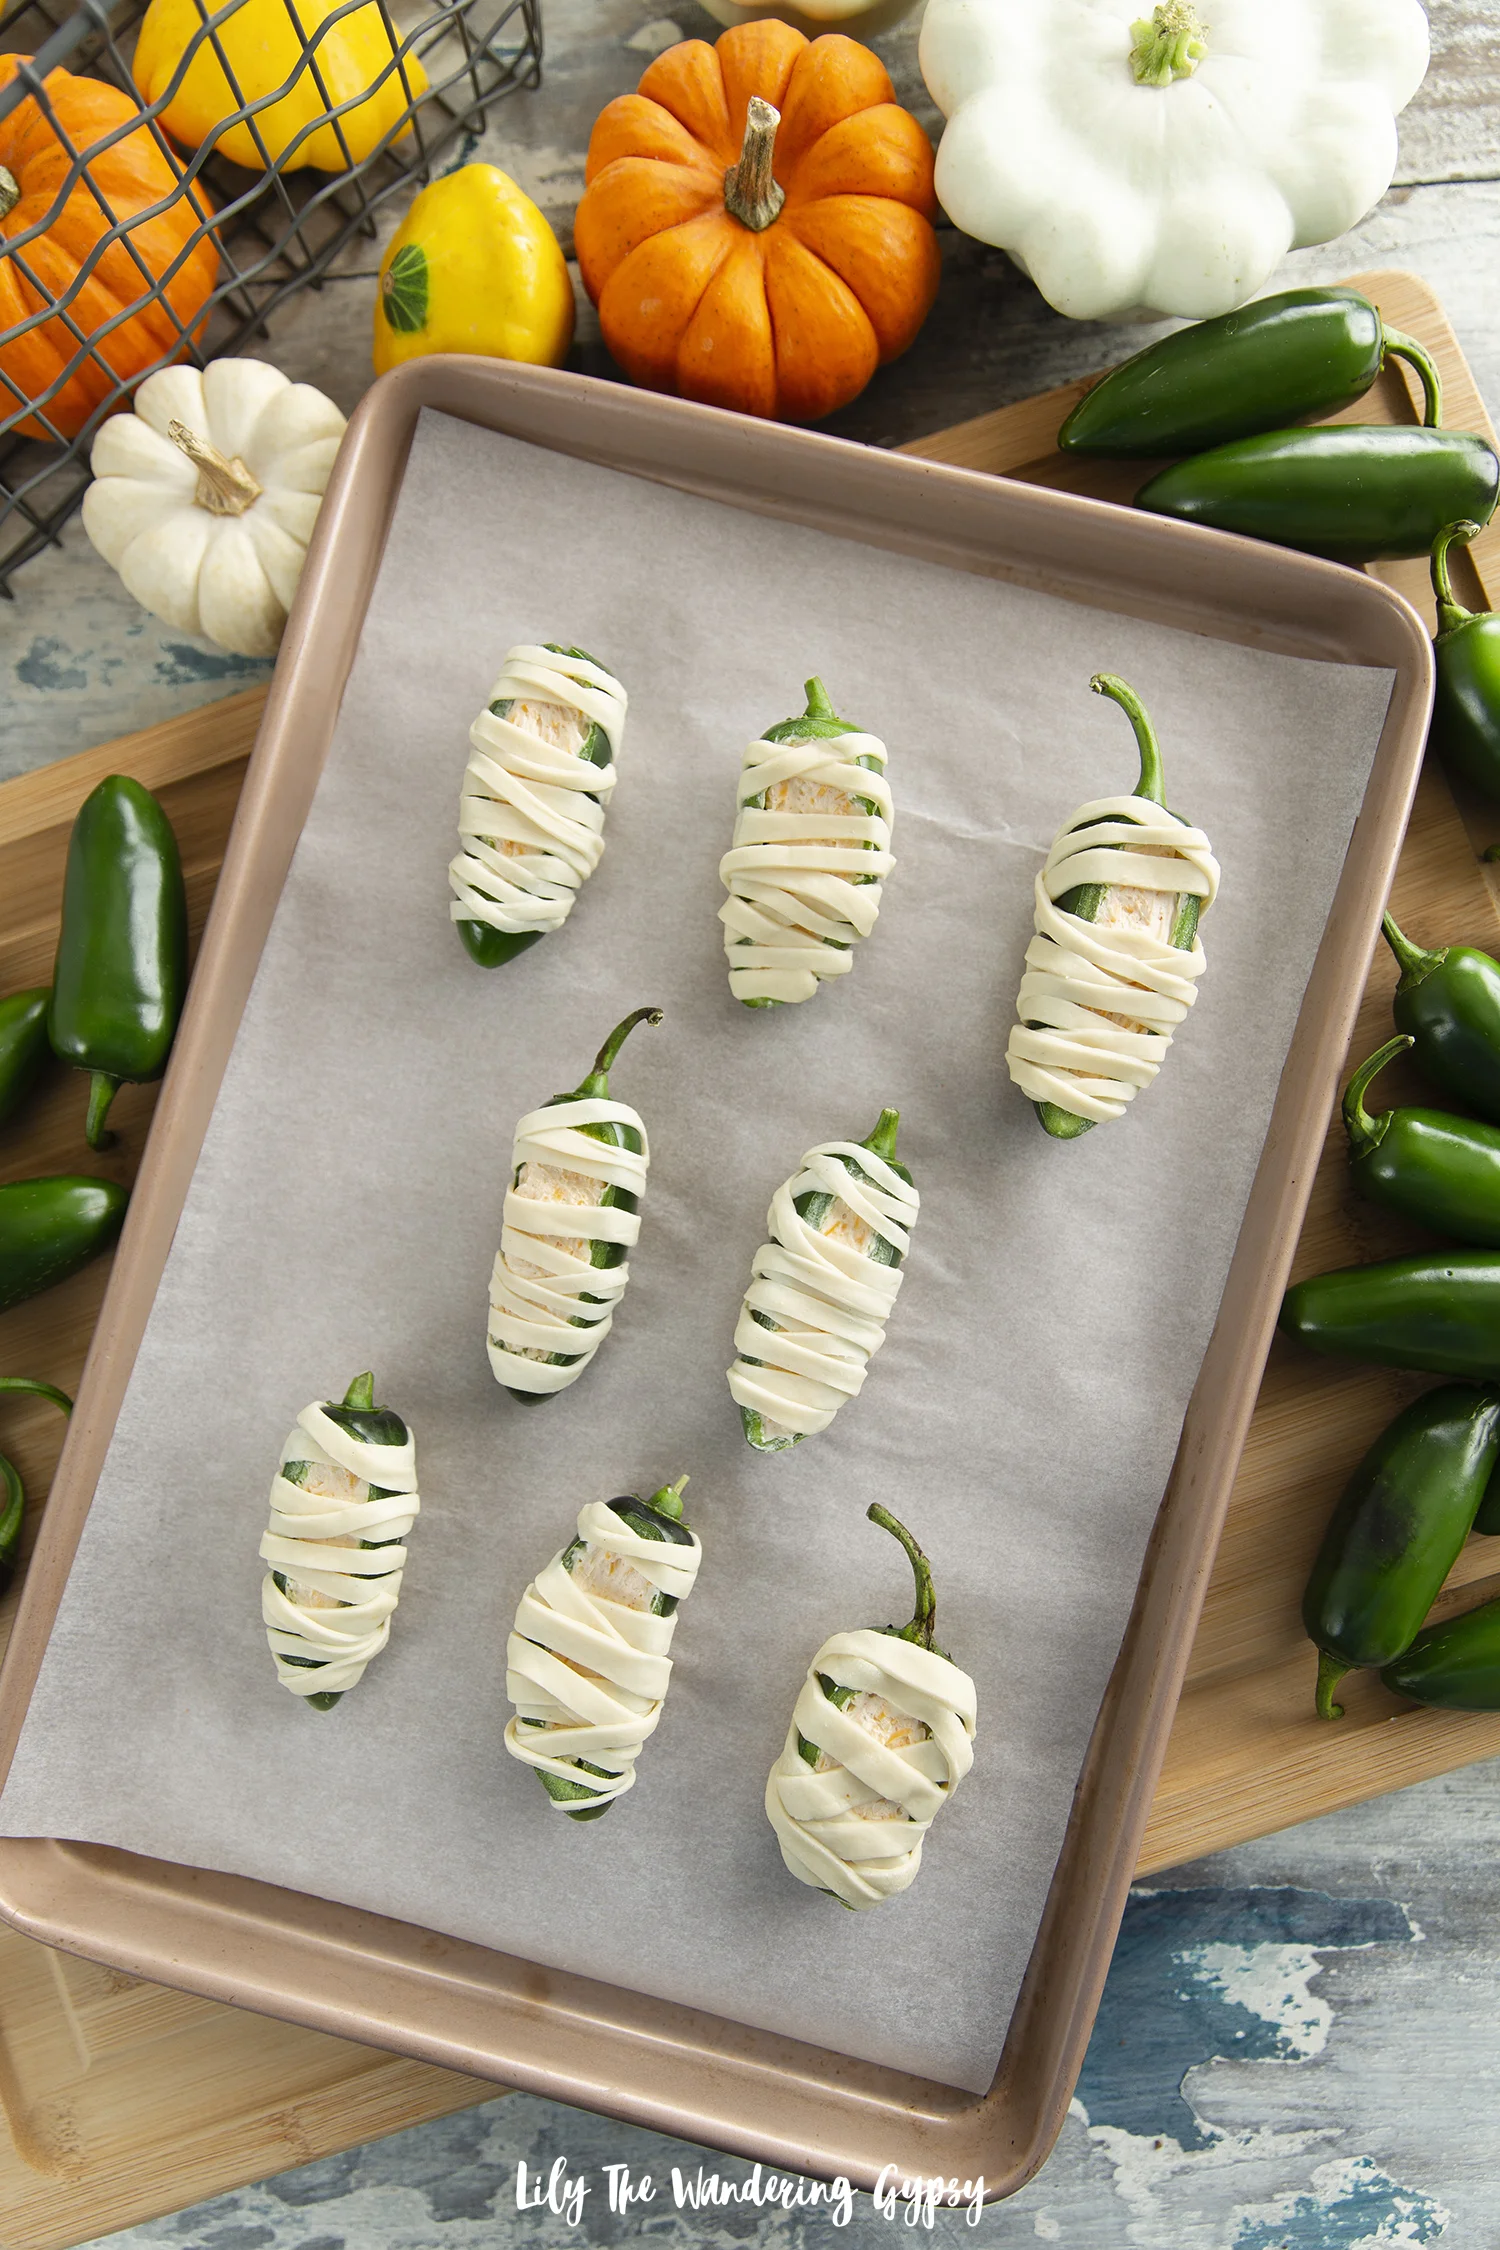
4.) Bake at 350-375 degrees F for 10-15+ minutes on a metal baking sheet, covered in parchment paper. These baked pretty quickly and I just LOVE how they turned out!

Add the candy eyes to the mummy poppers! While poppers are still warm, take two candy eyes in your fingers, and place them on the “mummy face” both nest to each other at once, so they are both looking/pointing in the right direction. You can have a lot of fun with these, and I would love them to be a part of your Halloween celebrations and festivities! Enjoy! Happy Haunting!

Top 10 Halloween Cakes

While many of us celebrated Halloween this weekend, I am still in the Halloween spirit! Here are some outstanding examples of Halloween Cakes that I found incredibly inspiring. I hope you do too!

A Halloween Bat Cake that takes the cake for the most elegant and 3-Dimensional cake.

This amazing Brushstroke Halloween Ghost Cake is out of this world spooky and artistic!

Another adorable and festive Halloween cake that is decorated just right.

This “eye-catching” cake sure does look amazing!

This zombie cake looks so realistic and those graveyard cupcakes pair so well with the theme!

A perfectly decorated two tier cake to inspire your Halloween!

The undead would definitely feel welcome at THIS Halloween party!

This zombie face wedding cake would definitely win an award for one of the creepiest cakes!

Love this cake, especially the eyeballs and hand sticking out from the top!

This bleeding brain Halloween cake is just too gross!

Creamy Tomato, Basil, Parmesan Soup Recipe

A delicious, homemade version of a classic tomato soup recipe. This will be the only tomato soup recipe you will ever need. With lots of tomatoes, a creamy base, and a hint of parmesan, this soup is sure to please! We even doubled the recipe, and finished the soup in a matter of days. Keep reading to get the recipe, below!

Luckily, I used this recipe from Tastes Better From Scratch and I was thrilled with the outcome!

FIND THE ORIGINAL RECIPE HERE

The weather definitely turned to fall/winter today. Last night, it began to get pretty chilly but definitely bearable. This morning, the high was about 45 degrees, and I am super happy to welcome cooler temps with this soup recipe and lots of others. Perhaps loaded baked potato soup will be next!

Ingredients (serves 8)

  • 2 14.5 ounce cans diced tomatoes , with the juice

  • 2 tsp olive oil, if using stovetop method

  • 1 cup carrot , finely diced

  • 1 cup onion , finely diced

  • 1 cup celery , finely diced

  • 2 Tablespoons tomato paste

  • 4 cups low-sodium chicken broth

  • 1 teaspoon dried oregano leaves (Tbs fresh oregano)

  • 1 cup fresh basil leaves or more (or 2-3 Tbsp dry basil)

  • ½ cup butter

  • ½ cup all-purpose flour

  • 1 cup freshly grated parmesan cheese

  • 1½ cups half and half (or whole milk)

  • 1 teaspoon salt

  • ¼ teaspoon freshly ground black pepper

Instructions

For the Stove Top (This is the method I used):

  1. Add diced tomatoes, carrots, onions, celery, tomato paste, chicken broth, oregano, and basil to a large soup pot. Bring to a gently boil and cook for several minutes, until the vegetables are tender. Alternately, I cooked the onions for a few minutes with 2 tsp olive oil, then add carrots, celery, and seasonings to cook until carrots are a bit tender.

  2. In a separate pot, prepare the roux. Add butter to the pot over medium low heat and allow to melt. Stir in the flour and whisk together constantly for about 10 minutes or until the roux is a nice golden brown color. Slowly add 1 cup of the soup from the other pot to the roux--it will start to form a thick paste.  Slowly add another 3 cups of warm soup to the roux. Whisk together until smooth. Add the roux mixture to soup pot and stir to combine. Note - the rue + soup mixture was thick at first, but when added back into the larger soup pot, everything turned out extremely well!

  3. Pour soup into blender (you may need to do this in batches, depending on how big your blender is)

  4. Purée until smooth. Return to soup pot.

  5. Stir in the Parmesan cheese, half and half (or milk), and salt and pepper. Add additional oregano and basil if needed, to taste. Stir well. Cook for a few more minutes until warmed through. Enjoy!

For the Slow Cooker:

  1. Add diced tomatoes, carrots, onions, celery, tomato paste, chicken broth, oregano, and basil to your slow cooker. Cover and cook on low for 5-6 hours until flavors are blended and vegetables are soft.

  2. About 30 minutes before the soup is ready, prepare a roux. Melt the butter over medium low heat in a skillet and add the flour. Whisk together constantly for about 10 minutes or until the roux is a nice golden brown color. Slowly add 1 cup of the soup from the slow cooker to the roux--it will start to form a thick paste.  Slowly add another 3 cups of warm soup to the roux. Whisk together until smooth. Add the roux mixture to the slow cooker and stir to combine.

  3. Pour soup into blender (you may need to do this in batches, depending on how big your blender is)

  4. Purée until smooth. Return to the slow cooker.

  5. Stir in the Parmesan cheese, half and half (or milk), and salt and pepper. Add additional oregano and basil if needed, to taste. Stir well. Cover and cook on low for another 20-30 minutes or until warm. Enjoy!

Vegetarian Pot Pies Recipe with Amy’s Kitchen

Thank you Amy’s for sponsoring this post. #StartWithAmys this Soup Season.

With cooler weather on the horizon, it’s time to incorporate comfort food that will make you happy about what you are serving and eating. For over 30 years, Amy’s Kitchen has been cooking up vegetarian meals made with high-quality ingredients. As fall quickly approaches, it’s time to get your soup on!

I found a unique way to incorporate three varieties of Amy’s Kitchen soups into a Vegetarian Pot Pie, and I hope you love it! Since Amy’s Soups already taste delicious on their own, I was able to allow those flavors to shine, while simply complimenting them with a few more veggies and a flaky, puff pastry woven lattice crust. This dish can be made as individual pot pies, or as one large casserole – it’s completely up to you! And, feel free to use this lattice technique, or simply use a full sheet of puff pastry crust right across the top.

This homemade, vegetarian dish is waiting to be served at your next weeknight dinner, holiday meal, or even as a make-ahead meal that can be frozen and baked in just a short time, making dinner exceptionally easy AND delicious!

The phrase “comfort food” definitely comes to mind with this dish. It’s filled with an array of veggies, plus Amy’s Organic Cream of Mushroom Soup, Organic Chunky Vegetable Soup, and their Organic Vegetable Barley Soup. This dish is literally brimming with vegetables, you are going to love it. Even super picky eaters will enjoy this food. It’s a great idea to stock up for the cooler months with Amy’s soups! Keep a few soup cans stashed in your pantry (or desk!) for those times when you want something tasty that will warm you up as well. I always feel better after a warm meal, and these soups make an exceptional meal all on their own!

I love this cream of mushroom soup - it could surely be enjoyed on its own, warmed up with a handful of oyster crackers in the bowl for some crunch. I have never found a cream of anything soup that I am happy with. I have found that most canned cream soups are all way too thick and just full of unnecessary ingredients, and I have found too some have a sort of strange aroma. This has always turned me away from using condensed cream soups, but now I have a newfound hope thanks to Amy’s Kitchen! The Cream of Mushroom Semi-Condensed Soup worked super well for the base of this recipe, and would even be super delicious heated and enjoyed on its own, or with a handful of soup crackers.

I have fond memories of my mom making chicken pot pie many, many times as a child. She would use a traditional recipe that incorporated chicken and a small portion of veggies. It was always amazing, but as I grew older, and realized the importance of eating plant-based, I knew I needed to adapt a few of my most treasured family recipes into vegetarian versions.

Luckily, all of Amy’s products contain high-quality ingredients. That is extremely important for me, and I am so happy I have made a small lifestyle switch to considering each and every ingredient in the foods I eat and prepare for those I love. At Amy’s, they choose the best ingredients for each recipe. They cook with ingredients that people use in their own kitchens and trust, like carrots, beans, flour and spices! They don’t use a lot of starches and thickeners (which I do notice when I open their soups and other foods. They rely instead on slow simmering and cooking to develop soups and creamy sauces. This is very apparent as I was using the Amy’s Cream of Mushroom soup, it’s a really smooth texture without being overly thick, like other cream canned soups.

PRINTABLE RECIPE BELOW - RIGHT CLICK TO SAVE OR PRINT

INGREDIENTS:

1 can Amy’s Organic Cream of Mushroom Soup

1 can Amy’s Organic Chunky Vegetable Soup

1 can Amy’s Organic Vegetable Barley Soup (any of their other vegetable soups will work well too)

1 sheet of puff pastry

½ red onion - chopped

1-2 cloves garlic – minced

1-2 TBSP olive oil

½ of a red potato – chopped into very small pieces

1 c. broccoli – chopped into small pieces

½ c. corn (frozen or canned)

½ c. frozen peas

2-4 TBSP seasoning (I use a mixture of low sodium seasoned salt and a Greek spice blend)

1 TBSP butter or butter alternative

3 TBSP flour

salt

Optional 1 egg for egg wash (simply use which to stir up one egg in a small bowl)

INSTRUCTIONS:

1.)   Sautee olive oil, onions, and garlic, and 1-2 TBSP seasoning for 2-3 minutes. Once onions are soft, add potatoes and cook at medium heat for about 3 minutes with the pan’s lid on. Carefully stir the potatoes once during cooking, and replace lid.

2.)   Add 1 cup broccoli, corn, and frozen peas, and simmer another 3 minutes. Add up to 2 tsp more seasoning at this point, and stir to coat all veggies.

3.)   Turn off heat, and transfer all veggies from skillet to another heat safe bowl and set aside. Do not clean or wipe out skillet yet.

4.)   In this same skillet, melt 1 TBSP butter. Once melted, stir in 3 TBSP flour, and stir until combined. This helps to thicken the sauce. It will look “chunky”, but that’s ok!

5.)   Add 1 can of Amy’s Organic Cream of Mushroom soup, and stir to combine. Turn heat back onto medium, and add the bowl of veggies back into the skillet. Stir to combine, and heat for 2-3 minutes while stirring, to combine and thicken everything.

6.)   Preheat oven to 400 degrees for Transfer into prepared baking dish(es) – make sure to spray them with non-stick spray first!

7.)   Time to do the crust! Either place one sheet of puff pastry across the top of the baking dish and trim the sides and cut vents at top, OR use the lattice technique I have shown in this post!

8.)   To lattice: cut ½” or 1” strips out of your puff pastry sheet and weave them across the top of the pie. I start by placing three strips vertically, then working on weaving in the three horizontal strips. From there, I can then place the remaining strips of puff pastry into the top of the pie. Cut excess dough hanging over sides of baking dish, and if you want, use your fingers to gently press the dough strips down onto the baking dish so it does not move while baking.

9.)   Brush top of pie with an optional egg wash, and bake small pies for 17-22 minutes or one pie for 25-35 minutes. The puff pastry need to be pretty crunchy on top to ensure that the dough touching the filling is not doughy.

What a fun and comforting vegetarian meal to make for your favorite people! Perhaps you could even surprise a busy family with a frozen version of this pie, and they can enjoy a vegetarian meal in a less than a half hour of baking time! Enjoy!

I was selected for this opportunity as a member of CLEVER and the content and opinions expressed here are all my own.

Elegant Halloween Party Recipes with 7 Moons Wine

This shop has been compensated by Collective Bias, Inc. and its advertiser. All opinions are mine alone. The following content is intended for readers who are 21 or older. #7MoonsWine #MadeForTheMoonlight #CollectiveBias

Each phase of the moon invites you to slow down, relax, and reflect with a glass of 7 Moons Wine in hand. Today, I am so excited to share a delicious wine I tried recently and a few ideas on making your Halloween gatherings or even a Halloween date night a bit more elegant and delicious! Uncork a bottle, pour a glass, and find connection in the moonlight.

In this post, I am featuring the 7 Moons Red Blend, which “opens with aromas of chocolate-covered cherries, baking spices, and vanilla bean. Flavors of strawberry preserves, cherry cola, and milk chocolate follow through a smooth, fruit-forward, lingering finish”. I found everything at my local grocery story, which is often my experience there! I rarely have to go to another grocery store for anything, making my shopping trips very pleasant.

People were definitely admiring my cart on the store!!!! Let me tell you,I was VERY excited to be shopping for Halloween. Connect with the brand on Instagram and Facebook!

7 grape varietals of grapes are combined into a smooth, fruity, easy to drink wine.

Enjoy a blend of 7 different grape varietals sourced from prime vineyards up and down California’s Central Coast and Lodi regions. A mix of Syrah, Merlot, Petite Sirah, Zinfandel, Cabernet Sauvignon, Malbec, and Grenache! Smooth and easy to drink, simple with a little embellishment.

The brand explains that their Red Blend wine is “delicious paired with a broad range of foods from barbequed chicken and caprese salad to take-out Chinese” - a very versatile drink in my eyes! It’s fun to keep a bottle of this 7 Moons Red Blend for enjoyment throughout the week, or for special occasions!

With those tasting notes in mind, I tried the wine by itself, then paired with the food featured in this post, and I was very pleased with how everything tasted together! The goat cheese plate and the dark chocolate cupcakes were a huge hit! A few black candles also set the mood perfectly.

Offering guests a red blend is perfect because it’s right in the middle between dry and sweet, which seems to allow people who don’t drink red wine often to be introduced into a mild, smooth red wine, compared to one with more of the dry characteristics, which can sometimes be hard for someone to get used to, if they rarely drink red wines. Sampling a few red blends has definitely made me more of a red wine drinker because these are such complex flavors that I love to explore.

Throughout the research phase of this project, I also loved being able to dive deeper into learning about moon phases and astrology. I was inspired to create festive crescent moon cupcake toppers, which I think looked absolutely gorgeous! I used metallic, gold cupcake cups, dark chocolate cake mix, and dark chocolate frosting to make the darkest and most delicious Halloween cupcakes of the year!

TO MAKE THE CUPCAKE TOPPERS:

Supplies:

  • 1 sheet of silver glitter paper (found in the specialty scrapbooking paper aisle)

  • Toothpicks

  • 3D star stickers

  • Clear Tape

Instructions:

  1. Print out a crescent moon shape that is about 1.5” at the longest points.

  2. Cut out that shape and trace it onto the back of the glitter paper.

  3. Cut out crescent moon shapes, and glue or tape to a toothpick and insert into cupcakes!

  4. For the stars, I simply stuck the star stickers onto the toothpicks, and inserted them into the cupcakes. Such a simple and elegant way to dress up these dark cupcakes for Halloween!

Here are the 7 phases of the moon, according to 7 Moons Wine.


CRESCENT MOON PHASE


Open your eyes. It’s time to make your dream a reality.


QUARTER MOON PHASE


Trust your instincts. Make your move with confidence.


GIBBOUS MOON PHASE


Reflect on your journey. Learn from your winding path.


FULL MOON PHASE


Take stock of your accomplishments. Have pride in them too.


DISSEMINATING


Show gratitude. Don’t hold it back.


3RD QUARTER MOON PHASE


Let your worries go. Move forward without them.


BALSAMIC MOON PHASE


Pause. Rest. Close your eyes and find your next dream.

Since I love incorporating a bit of elegance into my Halloween décor, recipes, and celebrations, a Red Blend wine is actually perfect to pair with dark chocolate and a “creepy” Halloween cheese board with all natural ingredients. They all paired super well with the 7 Moons Red Blend wine. I looked up the best pairings when I was in my research phase, and both goat cheese and dark chocolate paired well, and that was my jumping off point. Above, the cheese board was created with a more rustic look - using fresh dill to look like moss! Some of the dill really resembled tufts of the green fuzzy plants you find on the forest floor. PLUS, I was extremely happy that the dill paired exceptionally well with the goat cheese.

The other goat cheese ball was rolled in crispy onions, which I just rough chopped. Three ingredients made for some really divine tasting cheese balls!

CREEPY CRAWLY CHEESE BALL

Ingredients:

8 oz. log of goat cheese or two 4 oz. pieces.

½ cup crispy onions

1 package of dill (.5 oz)

Almonds, dark chocolate pieces (60% cacao), black or green olives, and crackers or bruschettini style toasts to dip in goat cheese.

Creepy crawly plastic toys like snakes, bats, and spiders to add Halloween elements.  

Instructions:

  1. Cut goat cheese log in half, and roll both halves into balls. Set aside in fridge.

  2. Chop up a little over half of the dill (reserving prettiest pieces for mossy garnish). Place chopped dill into a small bowl.

  3. Chop up crispy onions, or place into a zip top bag and pour into a second small bowl.

  4. Roll one goat cheese ball in the dill and the other ball in the crispy onions, and place onto plate.

  5. To decorate plate, add bits of dill around cheese balls to resemble a natural setting.

  6. Place almonds, dark chocolate, and olives around plate, and then place/sprinkle tiny bits of dill “moss” tufts around plate for natural forest look.

  7. Embellish further with plastic snakes and other creepy crawly items. I also added a glittery black raven, which is a paper cutout I found at a craft store. Enjoy!

7 Moons Wine is an excellent choice for all of your holiday get togethers. I learned so much about the moon phases and explored making food look super elegant for Halloween. It’s been so much fun, and I hope you are also able to use this post as an inspiration for your next gatherings.

Relax and unwind this Halloween season and enjoy the finer things in life, perhaps under the moonlight!

Football Party Ideas + Updated Pigs In A Blanket Recipe

This shop has been compensated by Collective Bias, Inc. and its advertiser, Dr Pepper® and Eckrich®. All opinions are mine alone. #MyMeijerWin

Time to reinvent a classic, well-loved recipe that tastes better than ever! College football season it the perfect time to try out a few new recipes for guests, friends, and family alike! This grown up, more sophisticated version of Pigs In A Blanket will delight guests! Serve with ice cold Dr Pepper® for a pairing with Eckrich® Smoked Sausage, sure to be out of this world delicious! A true crowd-pleaser during your college football celebration - who will YOU be rooting for? 

Check out this mperks offer to save $1 on any TWO (2) Dr Pepper® 6pk 7.5oz cans or 8pk 12 oz bottles at Meijer (while supplies last).

I used one of my favorite ingredients, Eckrich® Smoked Sausage, to make this delicious creation, which would be AMAZING for your next game day or holiday celebration. People rave about these and always ask when I’ll be making more. Read on to learn more about my latest college football celebration, and get the details on how to make your next celebration a success. Our college's colors are maroon and white, so actually Dr Pepper is a fun choice to celebrate locally. PLUS, every single one of my friends is slightly obsessed with Dr Pepper, so offering this refreshment at any of my parties tends to go over well. The smoked sausage worked super well for this project too. 

I thought it was super clever to cut up the smoked sausages for this recipe, compared to using traditional small cocktail weenies. This made for a much better bite! ​

Whenever I begin to plan a design for a college football party, I immediately think of which vintage elements I want to incorporate. For some reason, I associate football with the nostalgia of times (and games) past, PLUS I believe that a vintage style theme and set of decorations will appeal to all age ranges, which I love. If someone who can have a sort of connection to my decor, whether they are actually attending my parties OR viewing the recaps on my blog, it means a lot to me.​

PRINT THE RECIPE:

RIGHT CLICK AND SAVE OR PRINT

GAME DAY PARTY DETAILS: 

To choose your colors, decide what color metallic you like best. I chose gold here, but silver or copper would be your other common choices. The gold accents really catch the light so well, and can make any party décor look more classy. These metallic gold, plastic utensils almost look real, and the gold shimmering tinsel (found in the gift wrap section at a craft store) really made things shimmer. I thought that the gold tinsel reminded me of pom poms!

Next, I used lots of rustic wooden surfaces, and one small vintage crate to get some of the items on the table up at eye level. I love setting up the food and drink table(s) with items being served at different heights. This adds SO much visual interest to the party offerings! This is such a better alternative than simply laying all the food on an uninviting table.Taking a few extra moments to consider the design of your food and refreshment table seems to at least make party setup more exciting on my side as well.

Let people serve themselves by offering Dr Pepper and other drinks in nice containers or a cooler, so you do not have to serve each guest individually. This gives you way more time to enjoy your company rather than stressing out by hosting so much. 

I incorporated football themed cups, plates, and napkins wherever I could! I loved this rather vintage look for the party, with rustic woods, plaid patterns, and even a vintage looking font for the Tailgates and Traditions can carrier, above. In addition to being a cute way to display Dr Pepper at your college football parties, this carrier (or some other fun 6 pack holder) would be perfect to tote your soft drinks to the game or to tailgate.

As soon as I begin to see football related party items in stores. I tend to pick them up. We celebrate all football season long, and so having a lot of different party items on hand makes life a little bit more fun, in my opinion! 

Do you tend to go all out when decorating for football parties / game days, or do you tend to scale things back a bit and just stick to the essentials? Either way, offering guests Dr Pepper and these updated Pigs In A Blanket will make your next get together a win!

I offered guests three different flavors of mustard to compliment the Pigs In A Blanket - I used a traditional yellow one, a creamy dijon, and a stone ground. But, whatever you have will likely work! Just serve the mustards in small glass bowls or anything that spruces up the presentation, and you're set. I definitely consider that a #MyMeijerWin

If I am having a party, I tend to offer lots of dips, making each meal a little bit more unique and delicious. Above, you will see three different mustards that I shared. Simply use whatever you already have in your home, or head to Meijer and take a few minutes to see just how many varieties of mustard there are. I chose a yellow, a stone ground, then a creamy stone ground variety. Whatever mustard(s) you choose, they will pair super well with these Pigs In A Blanket! YUM!!! This celebration and these recipes turned out SO well, and I cannot wait for you to try something this delicious. Enjoy!! 

PIN THIS POST FOR LATER: