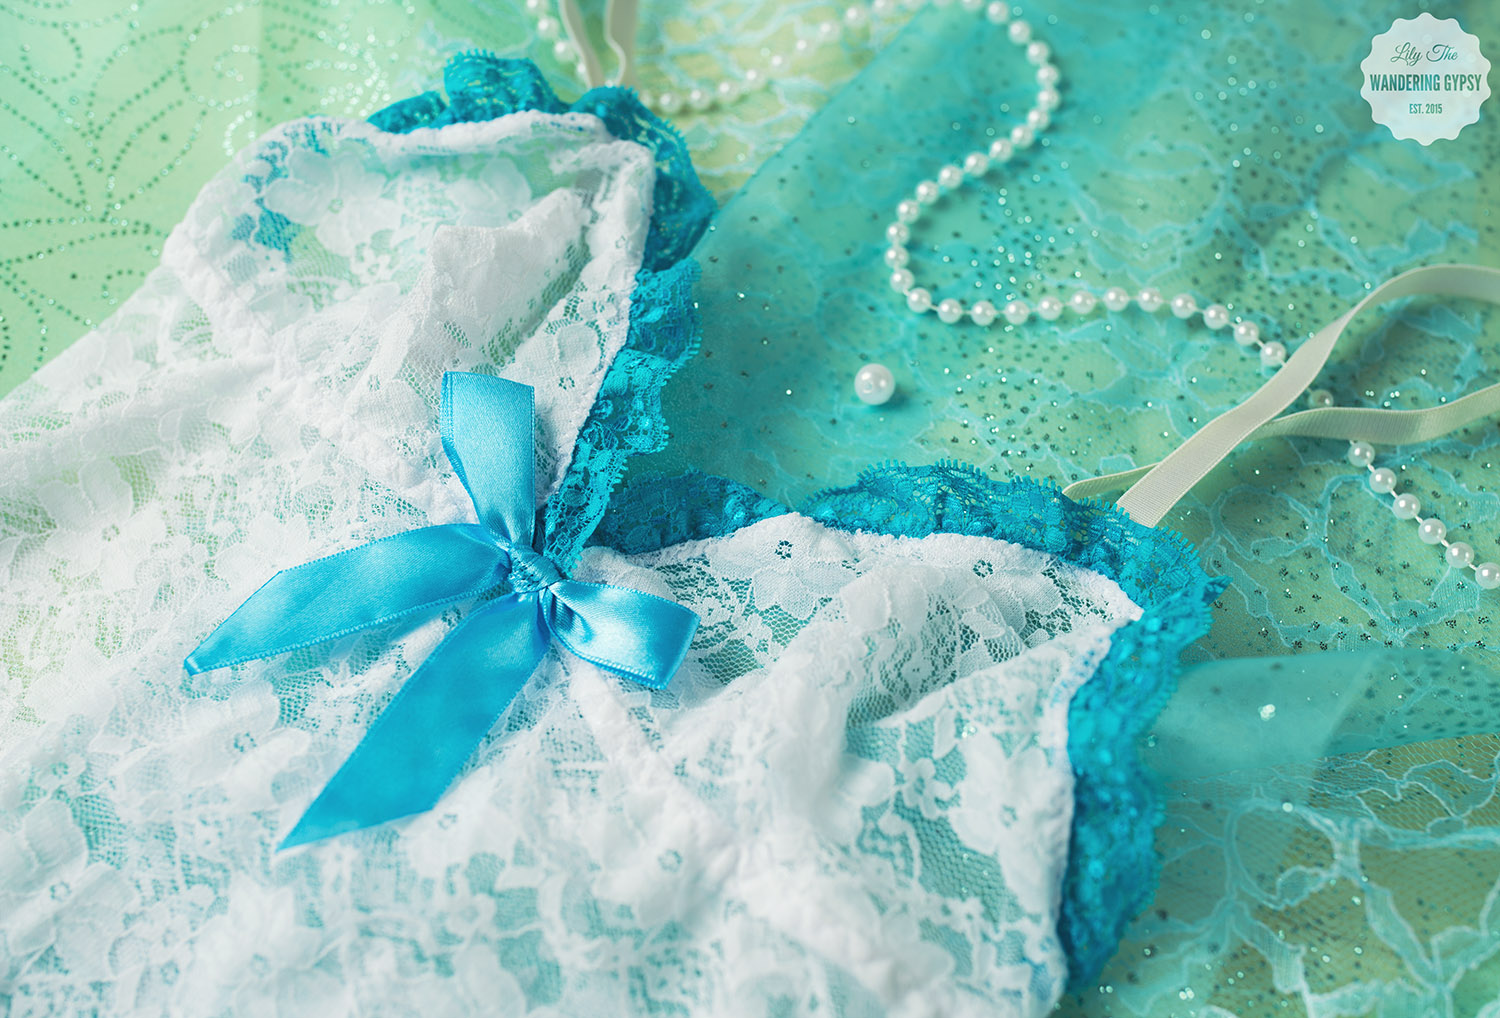
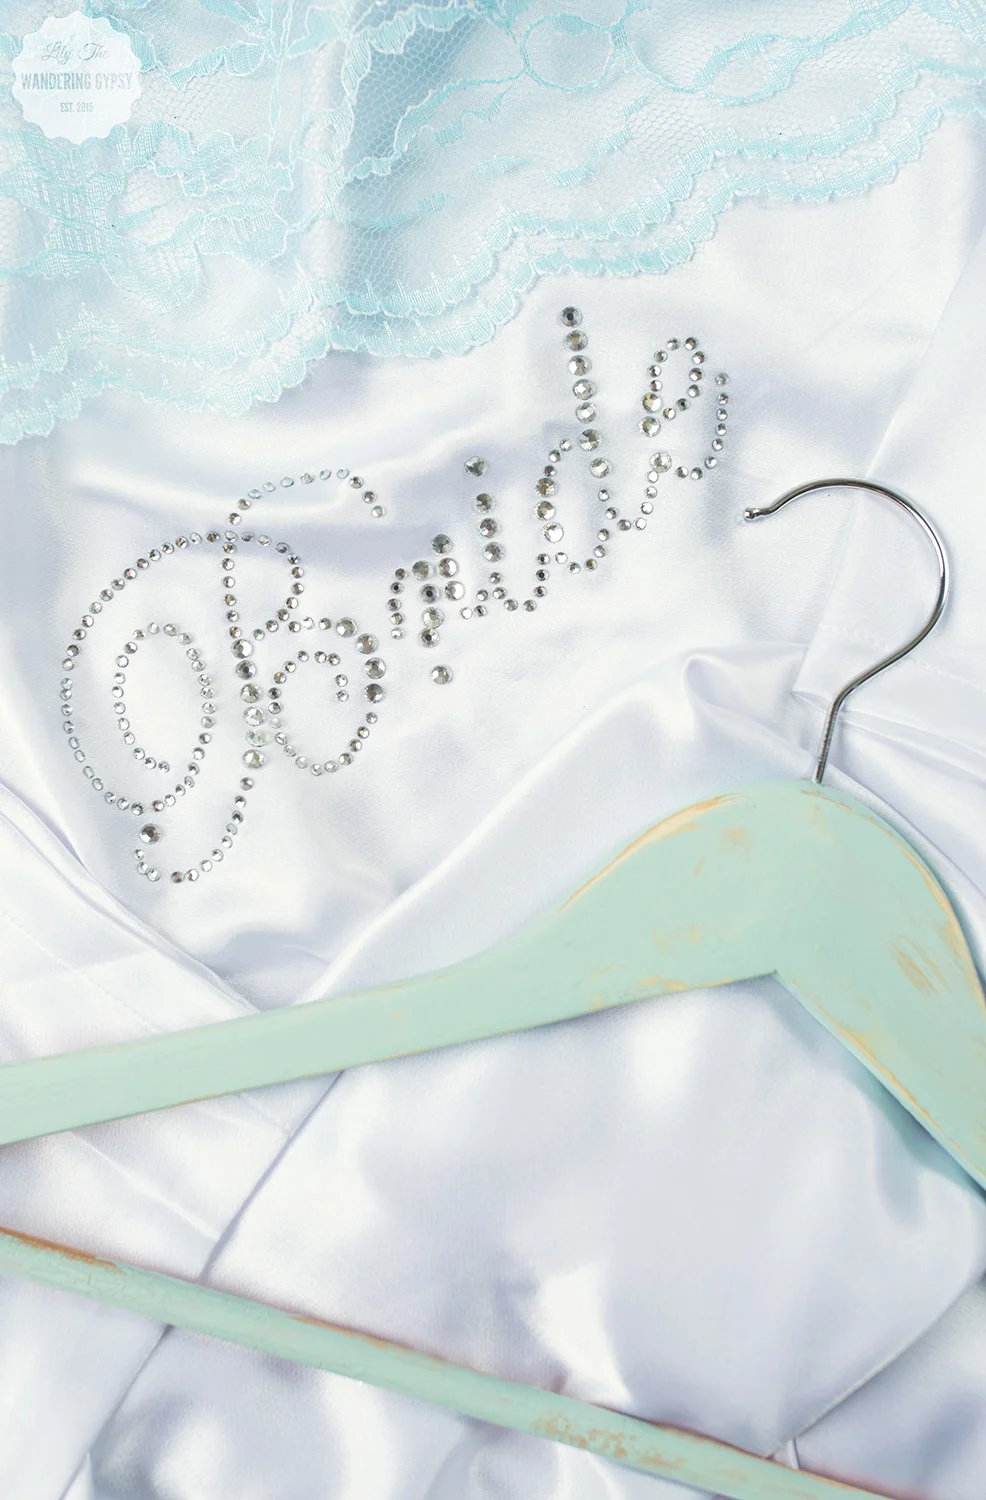
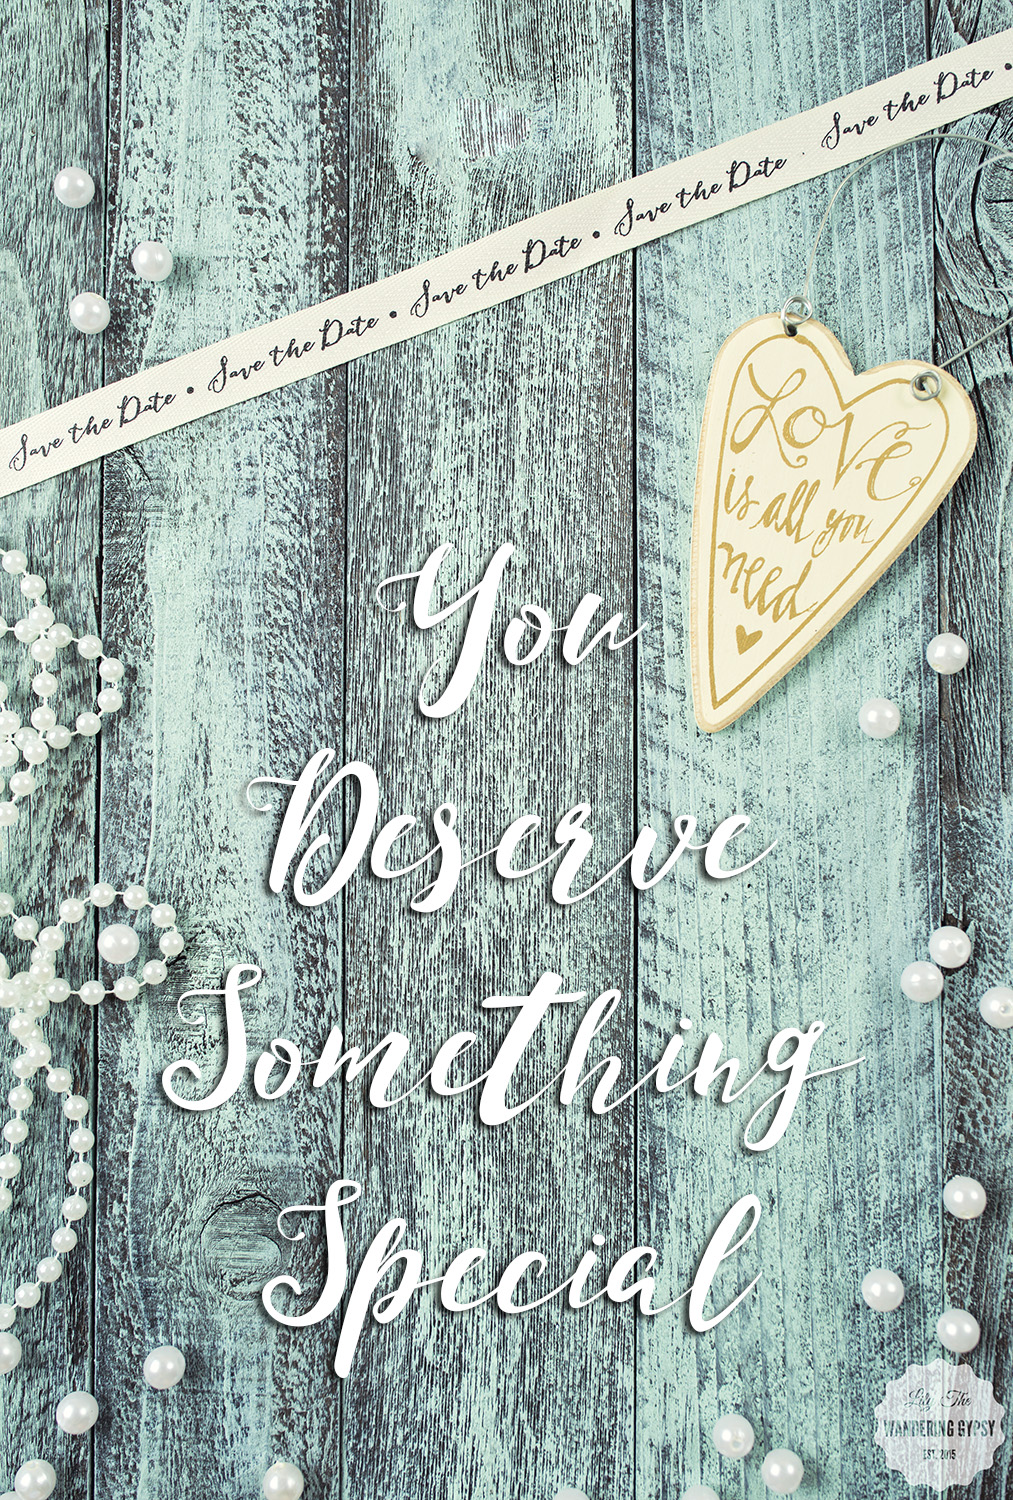
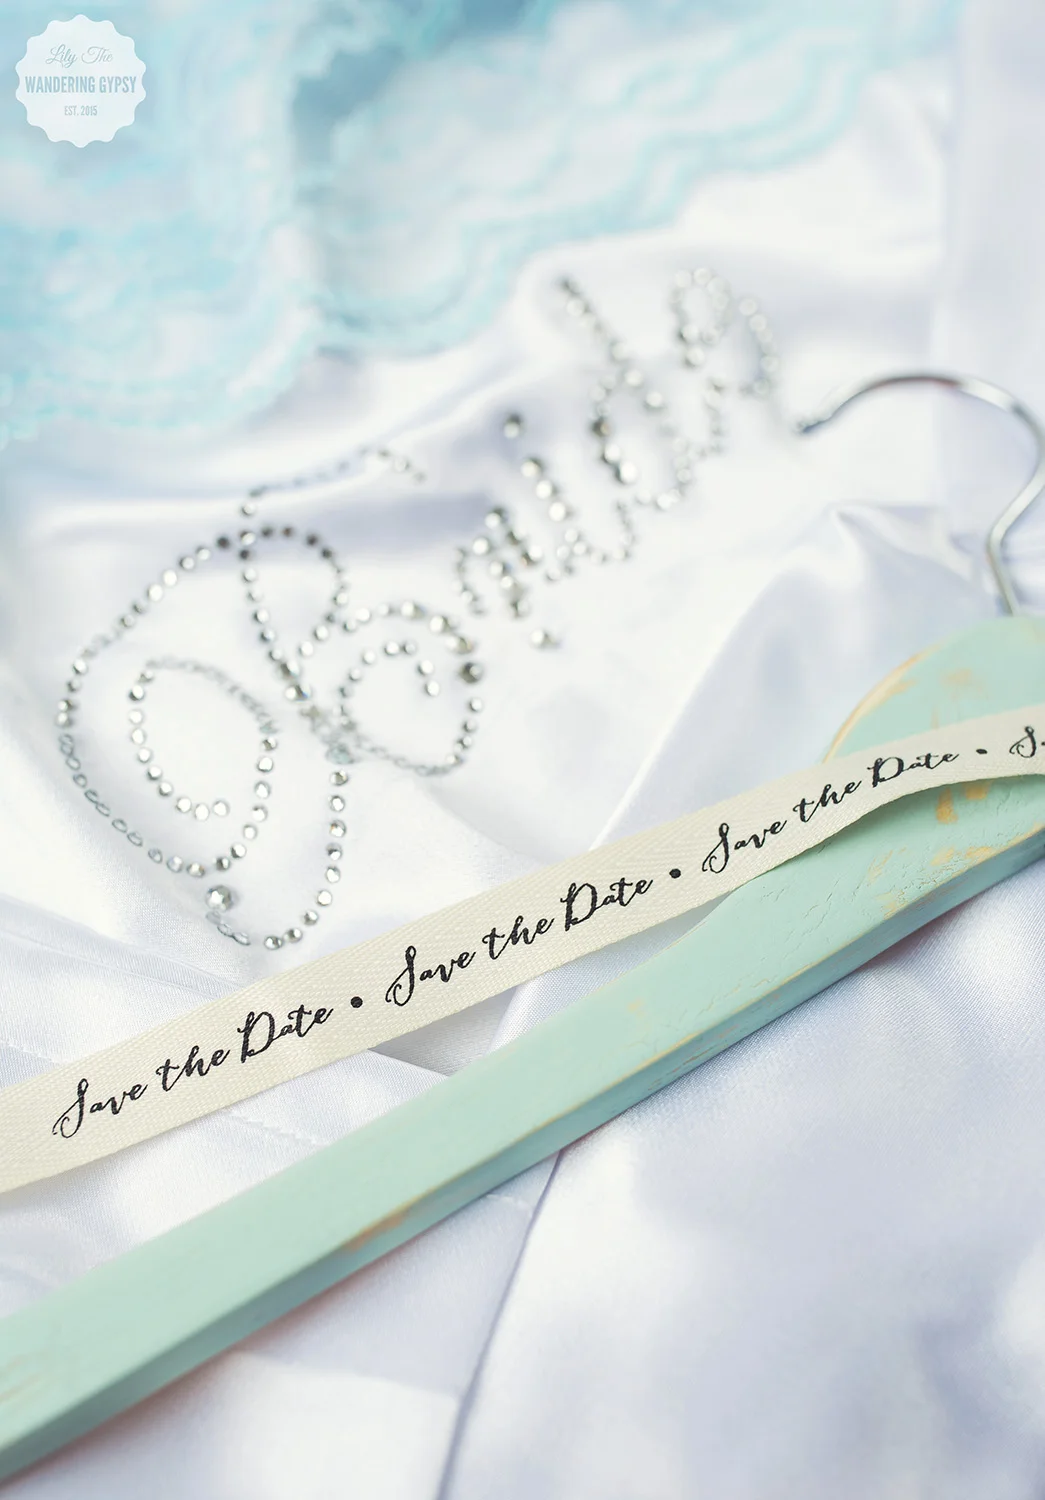
I am so excited to share some of the latest and greatest from yandy.com! They offer a huge selection of bridal lingerie and it's all so cute! The colors and materials were all so inspiring! I even created a new distressed wooden surface, and I love how well it matched the lingerie so well! Yay for #mint, right?!


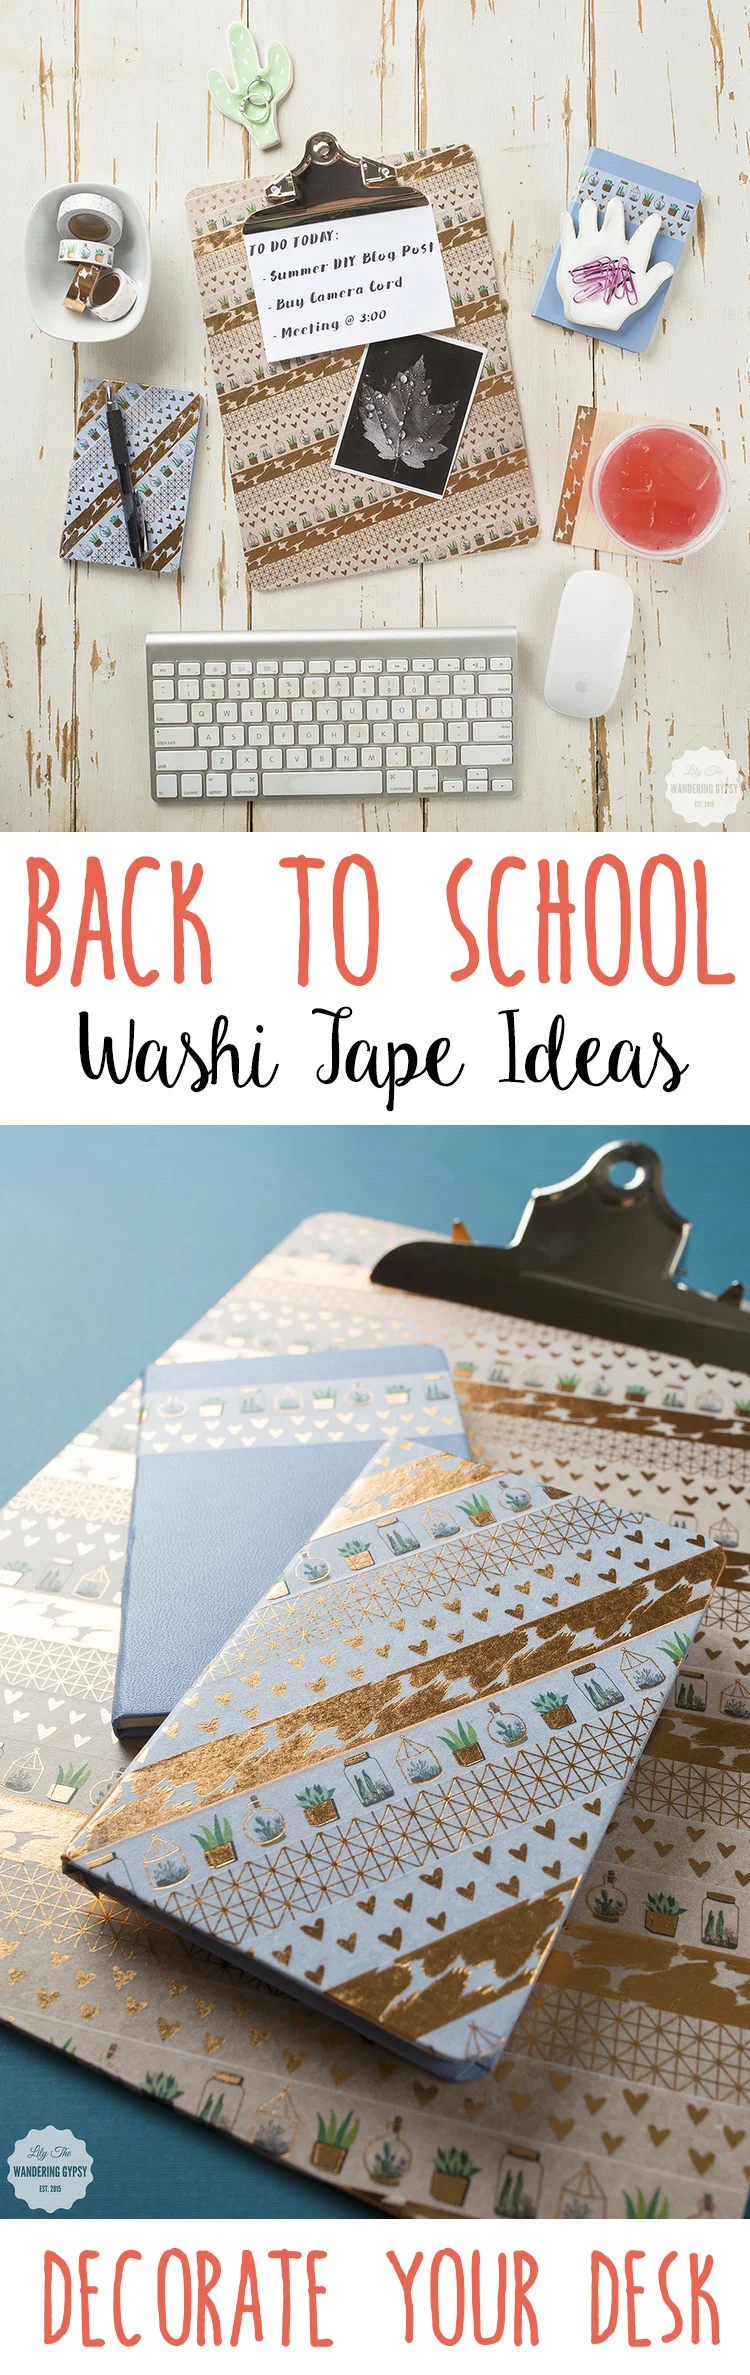
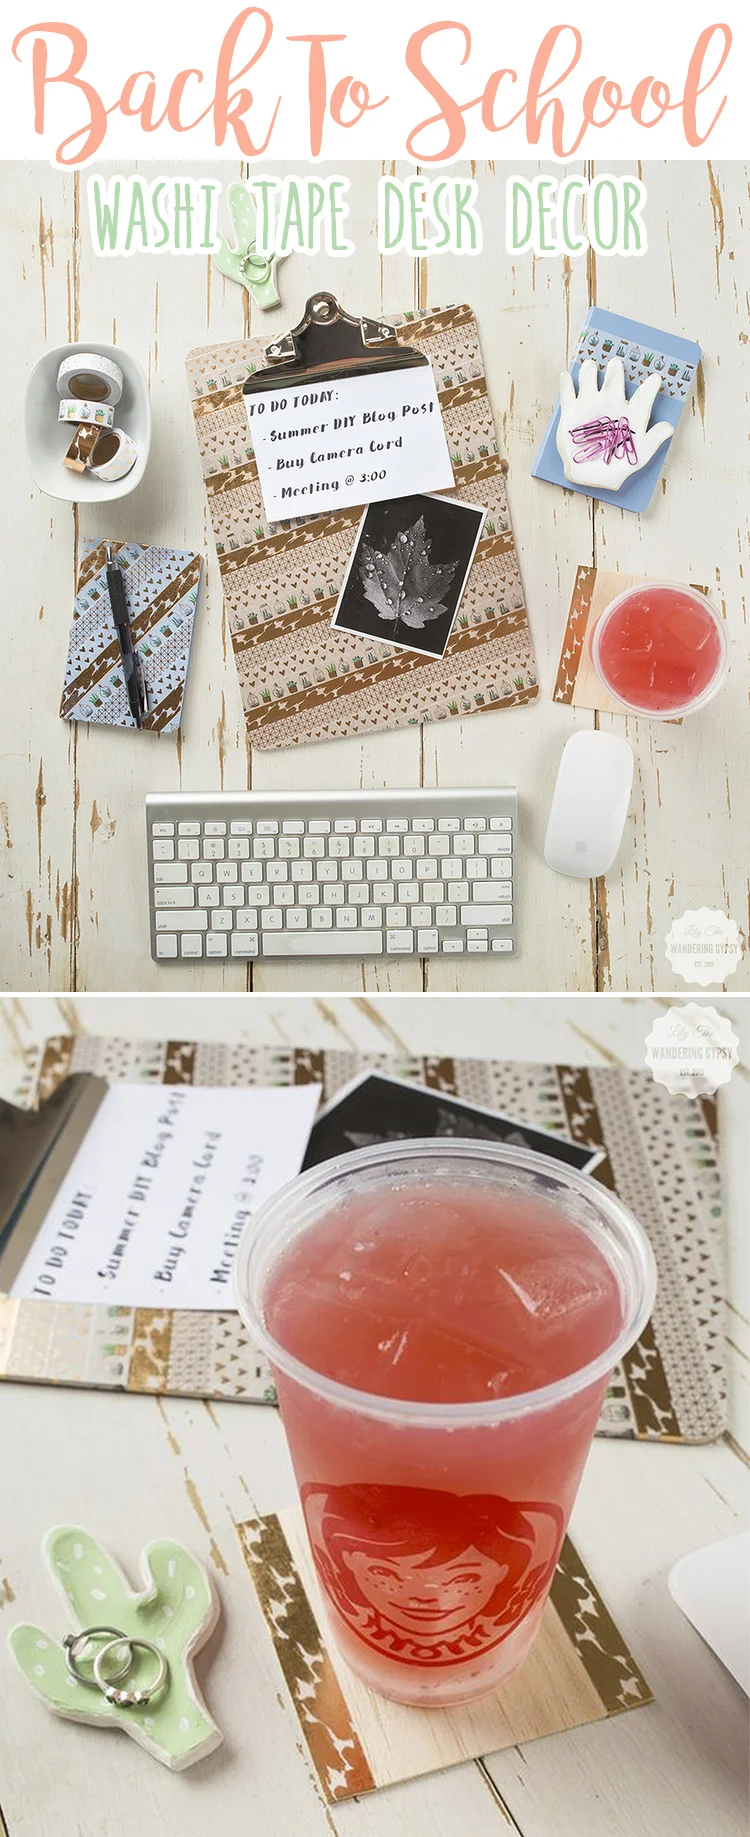
DIY Summer Fun - Washi Tape Everything!
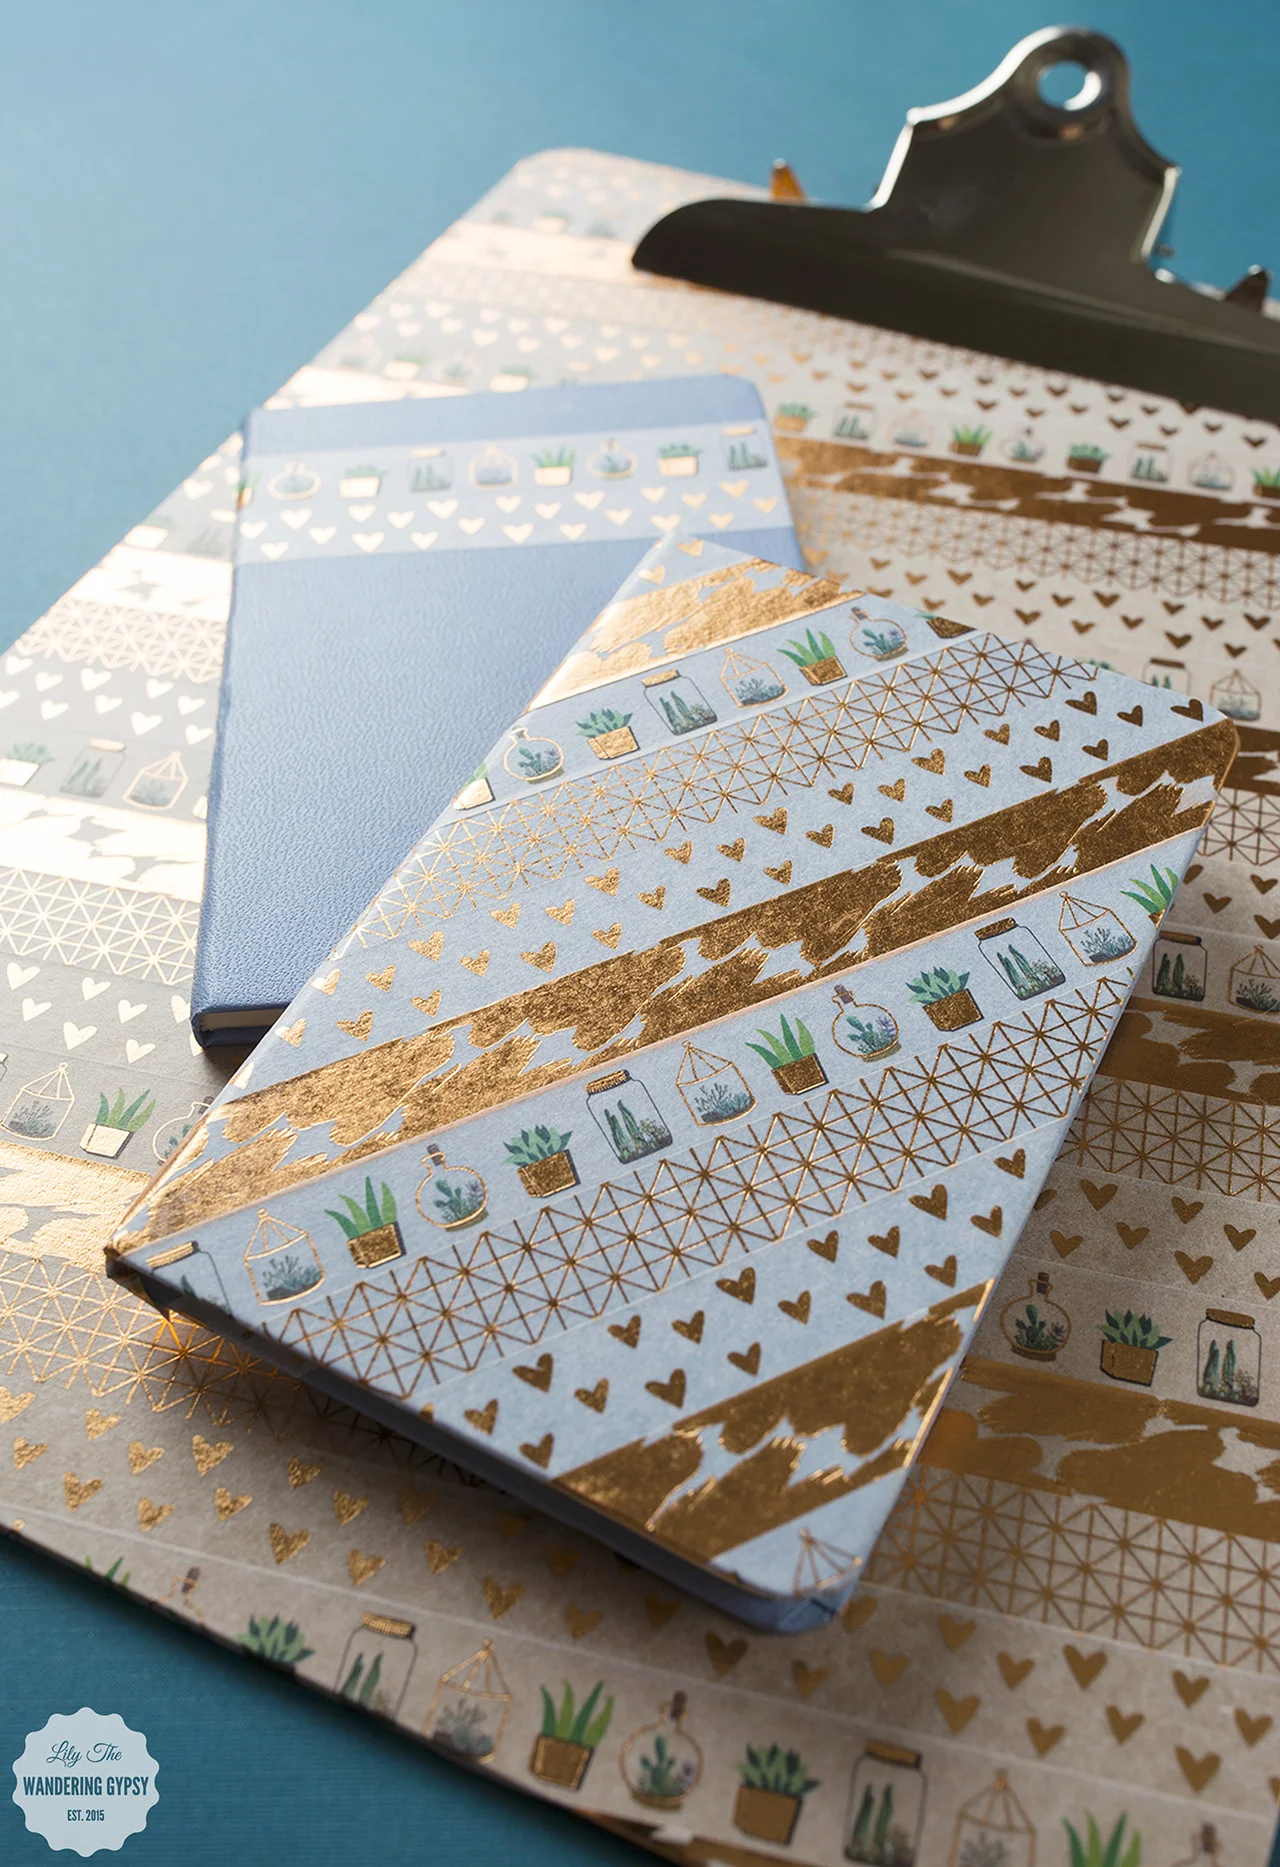
Washi Tape is here to stay, and I absolutely love it! This tape sticks to SO many surfaces, and creates an instant pop of color and a bit of whimsy to anything you adhere it to.
Below, you will find a few items that I covered, to show you how easy it is to update just about anything on your desk and around your home!
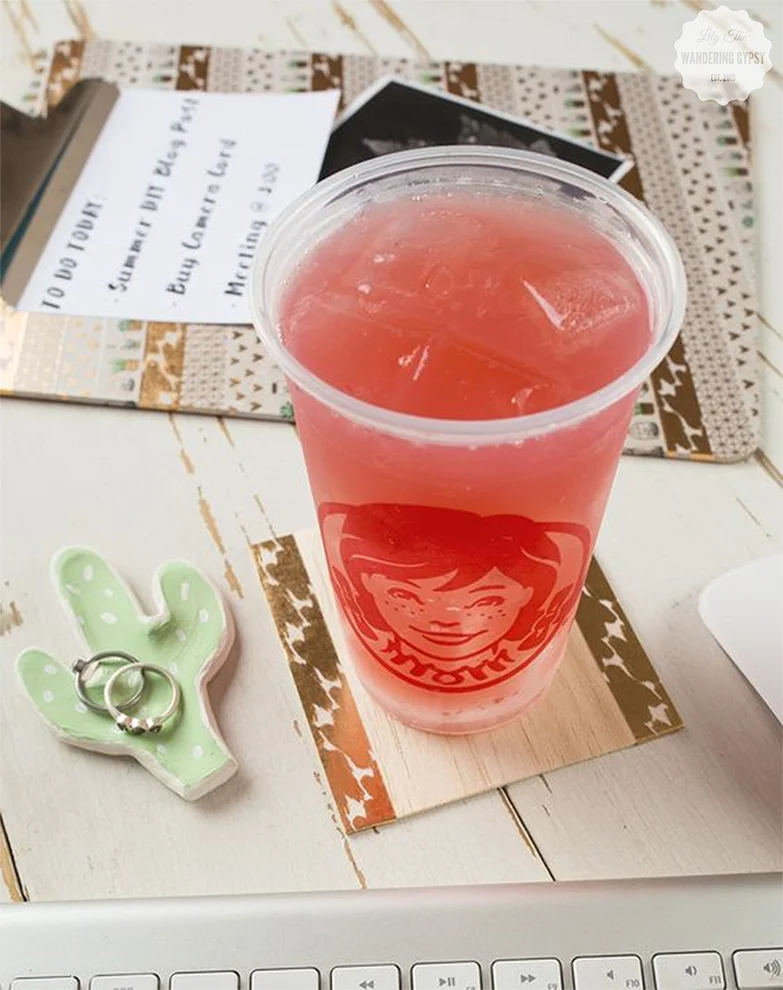
I created these photos for a fun campaign that I helped share for Wendy's Blackberry Lemonade. I loved creating this DIY project for such a well-known brand!
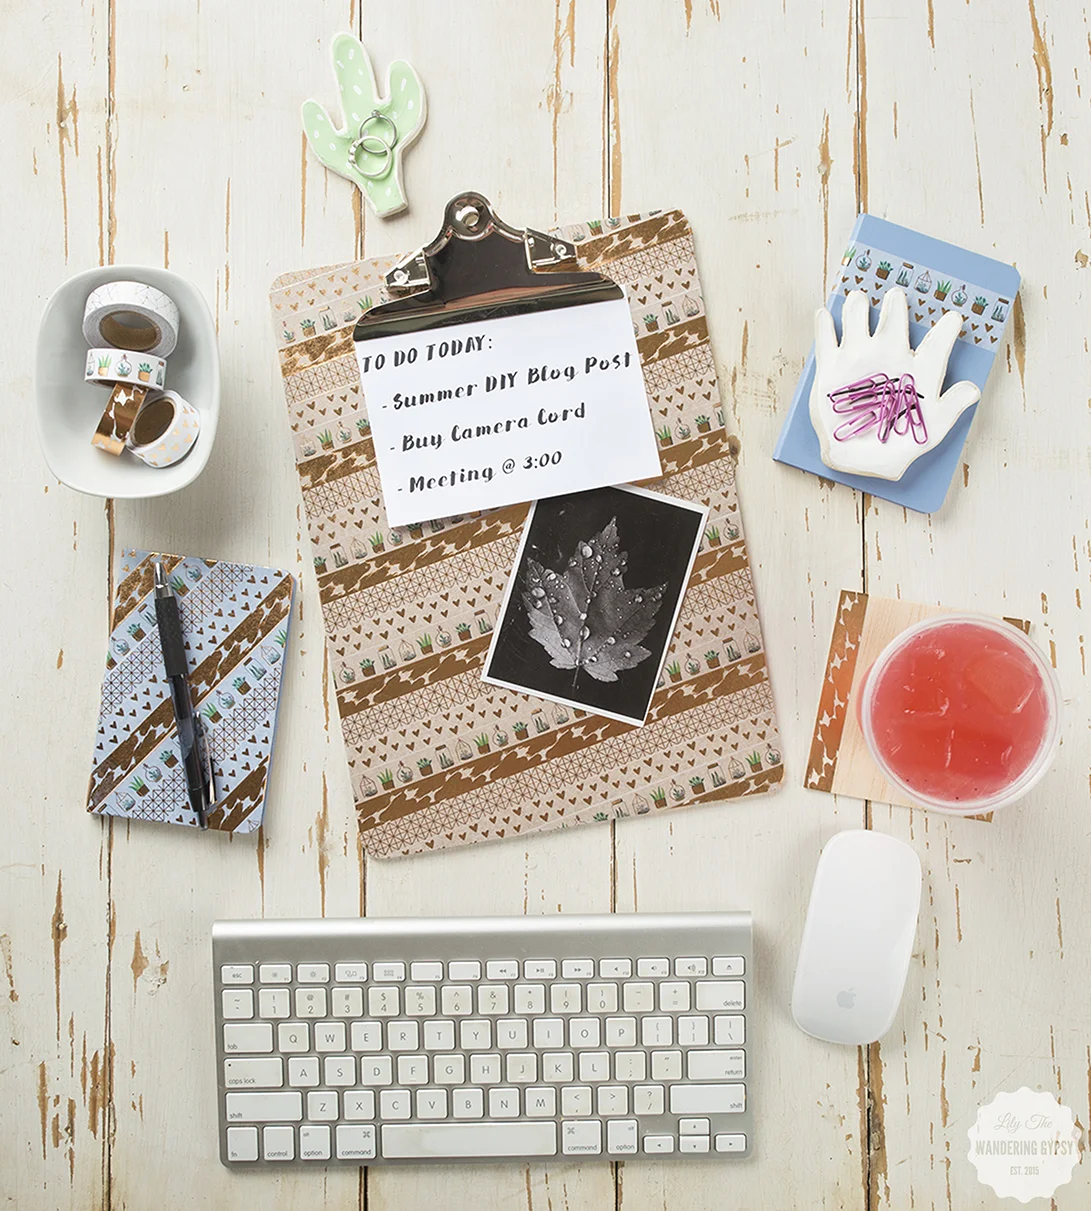
I covered an assortment of items, including: A clip board, wooden utensils, blank journals, and paper gift bags! Seriously, this project was SO fun!!!


{PB + Banana Toast} Summer Snacking with Sahale Snacks
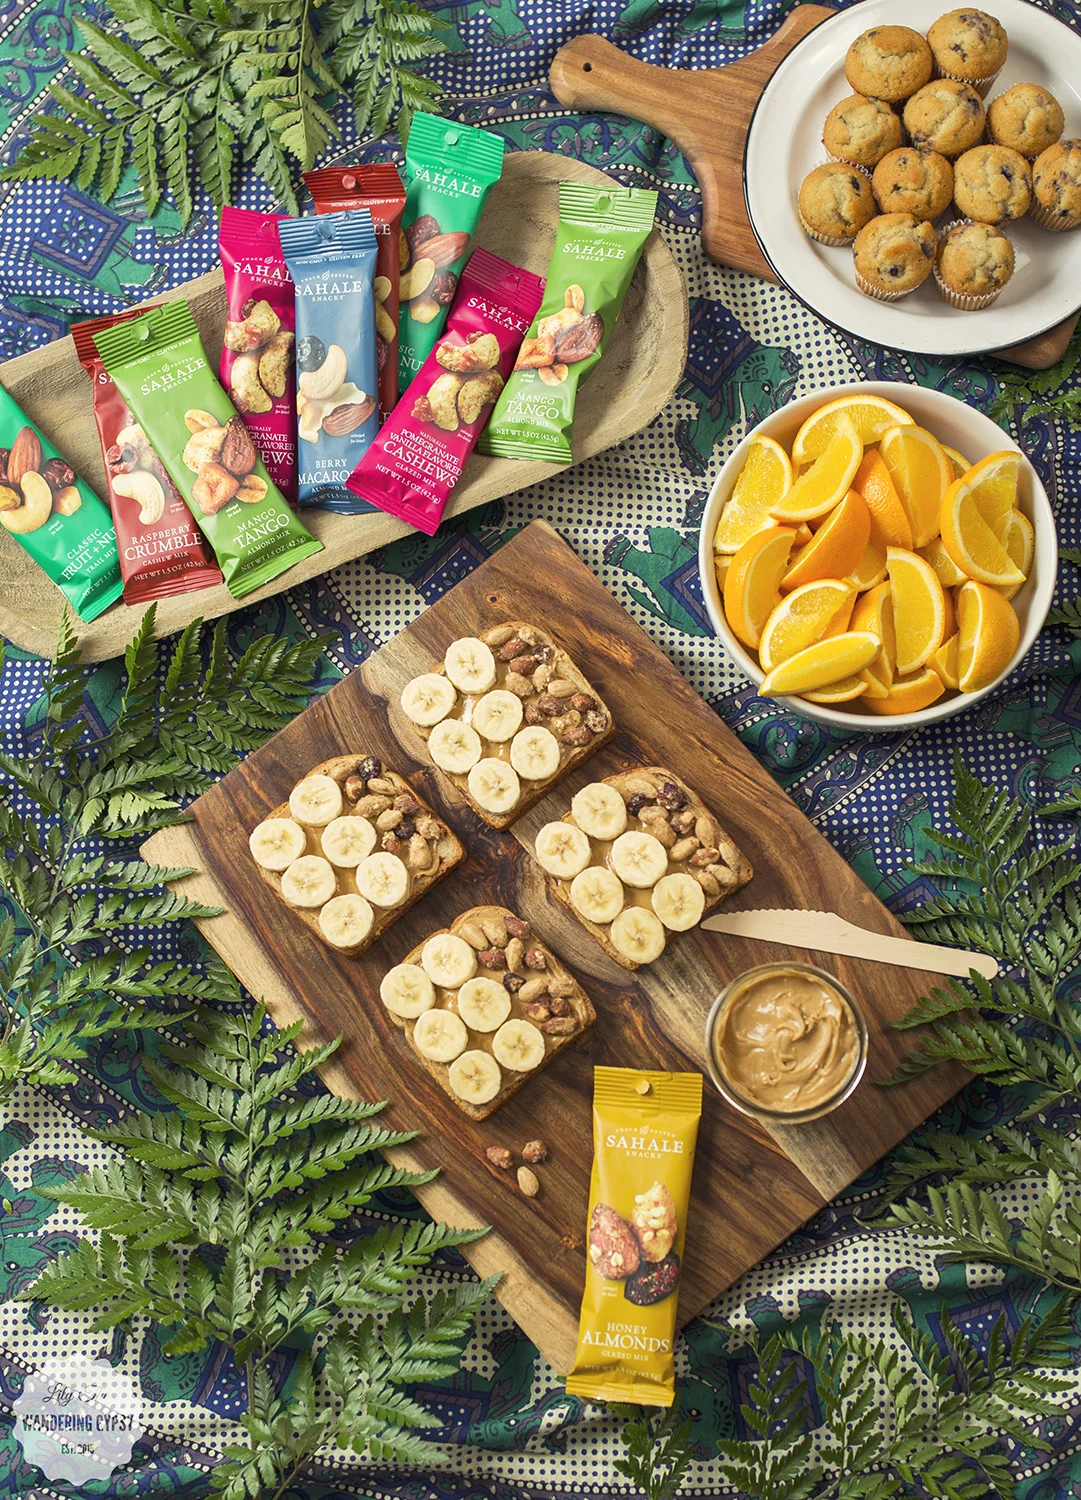
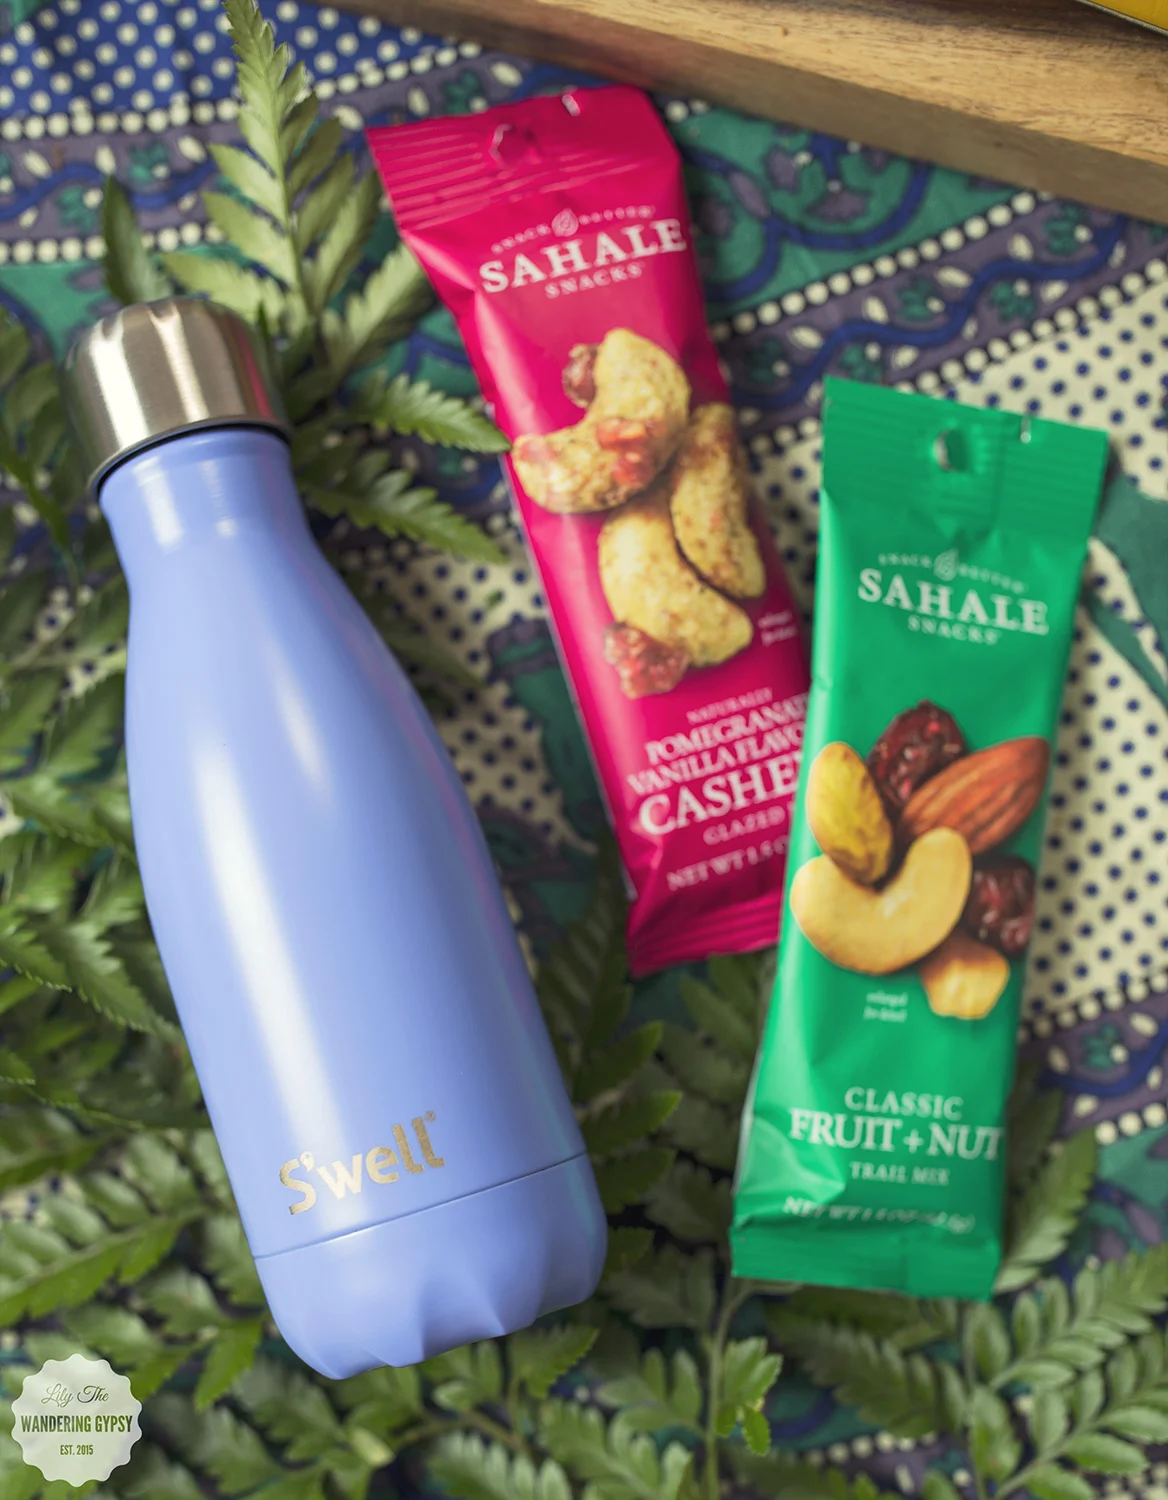
I found a new, favorite snack mix! Actually, I found quite a few new favorites in this amazing package that I received from Sahale Snacks! I wanted to share a fun "recipe" of sorts that will hopefully inspire you to take the time to get some healthy foods together, and have a breakfast picnic!!
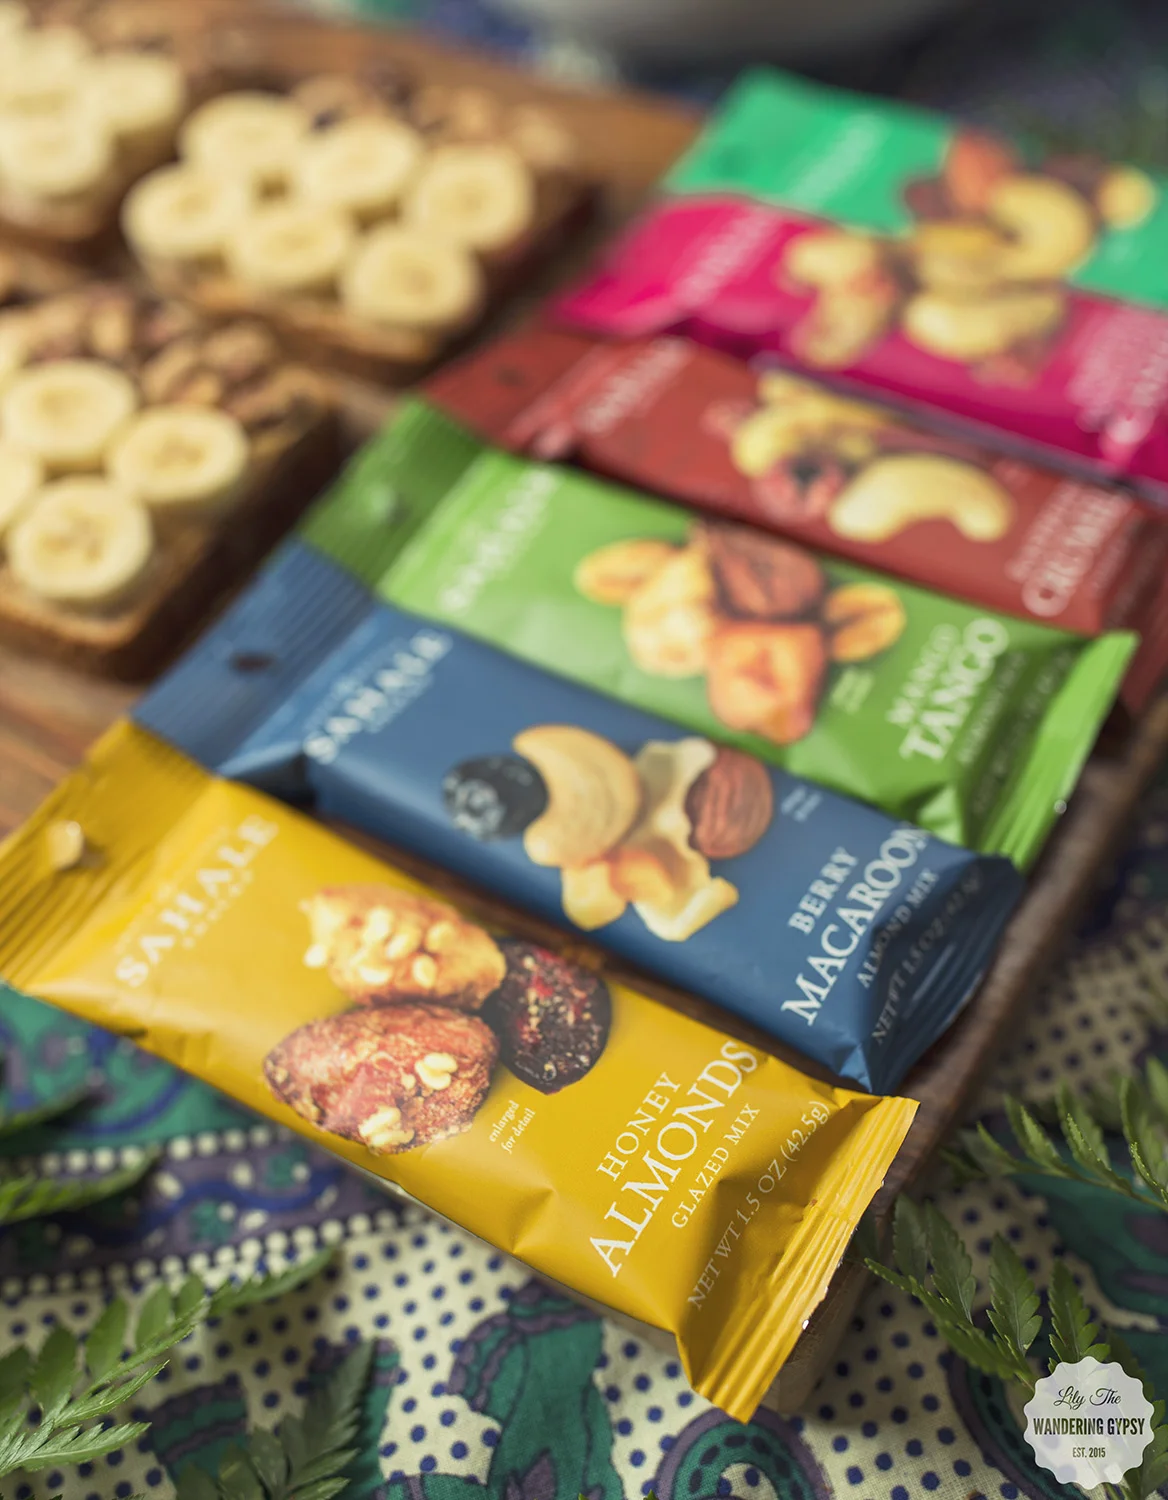
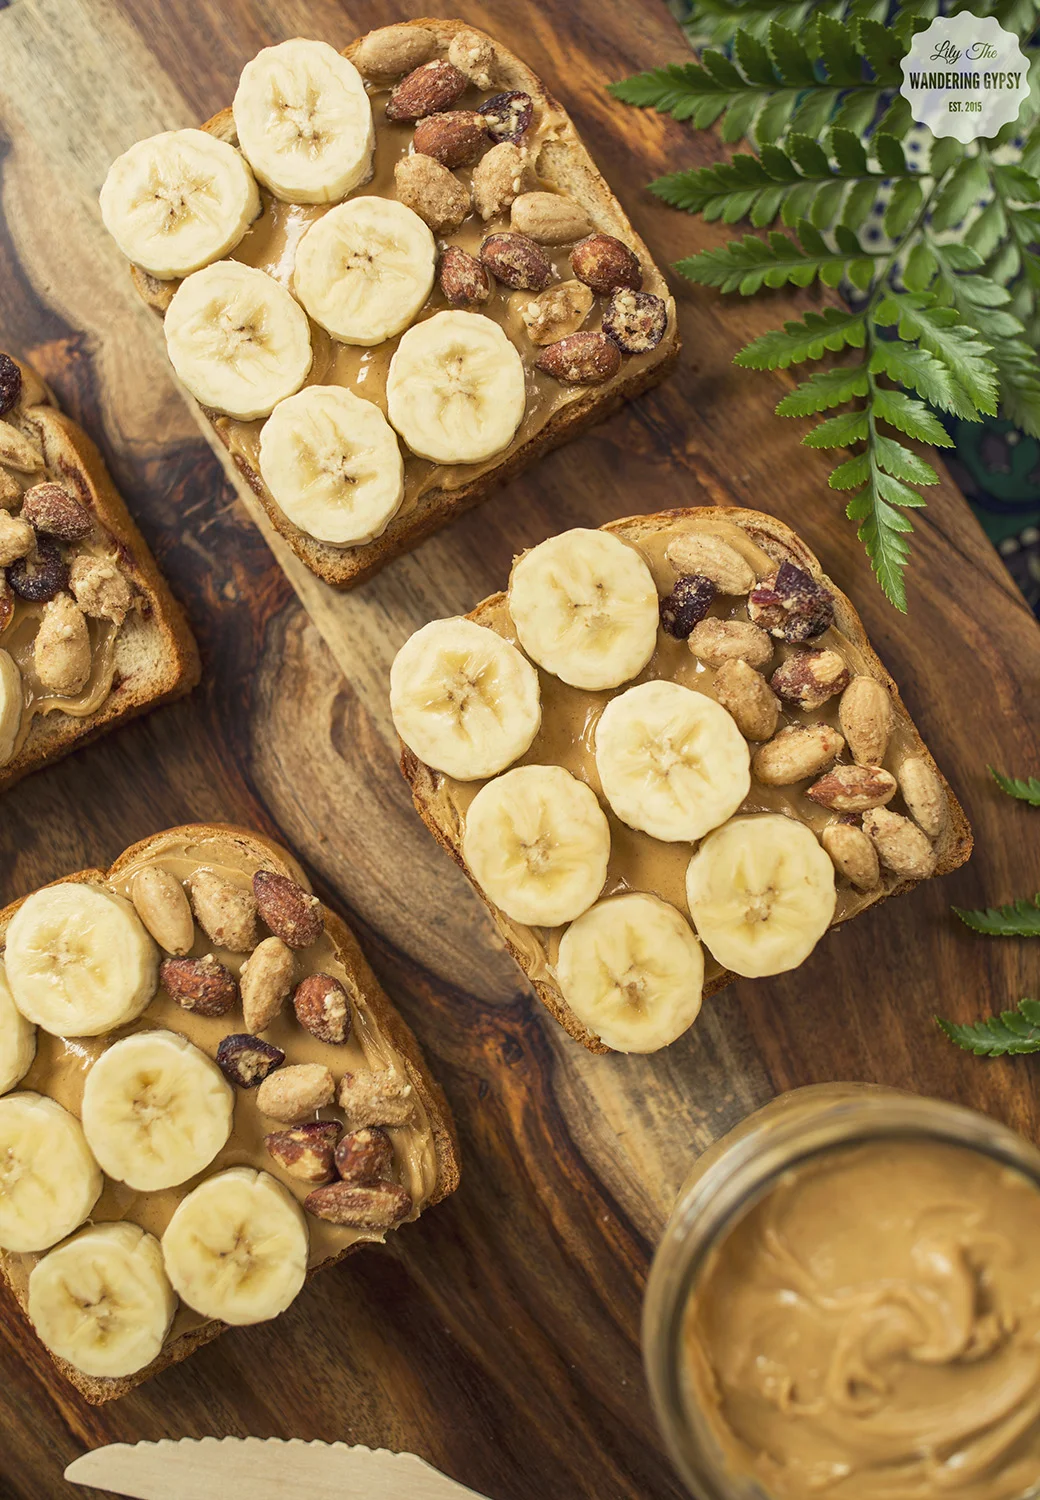
This fun "recipe" basically consists of only four ingredients! Toast, Creamy Peanut Butter, Bananas, and Sahale Snacks Honey Almond Glazed Mix, which also features sea salt and cranberries for a bit of tart and sweet.
I just spread the PB onto the toast, then sliced up my bananas to about 1/4" thick. I placed 6 banana slices on the toast, then added the tasty almonds. They are coated in the most delicious honey crunchy awesome-ness, so I wound up eating a few as I was creating these photos - how could I resist?!
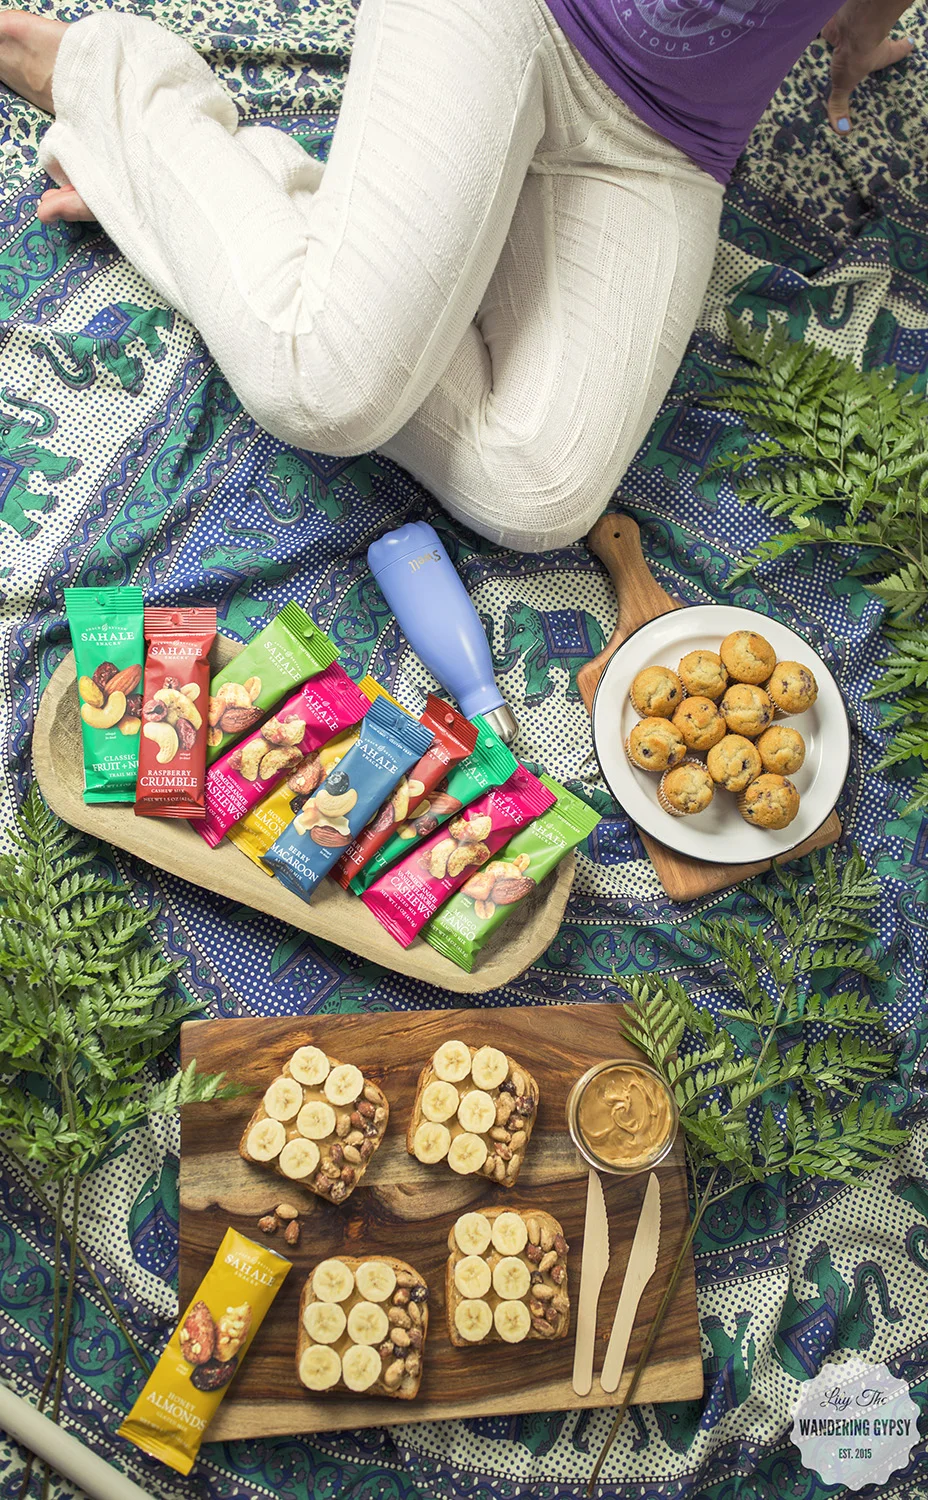


If you are just looking for something to grab on the way out of the door, or if you're looking for snacks for your next road trip, then these Grab & Go Snacks from Sahale Snacks are perfect!!
I also fell in love with this S'Well bottle from their Satin Collection - in Moncao Blue. SO many colors to choose from!!!
I'm sharing #SahaleSnackers in my life as part of a Sahale Snacks® sponsored series for Socialstars™. Thank you for supporting the brands that help keep my blog a beautiful space to showcase my work!

Smoothie Time With Annie's Homegrown Organics
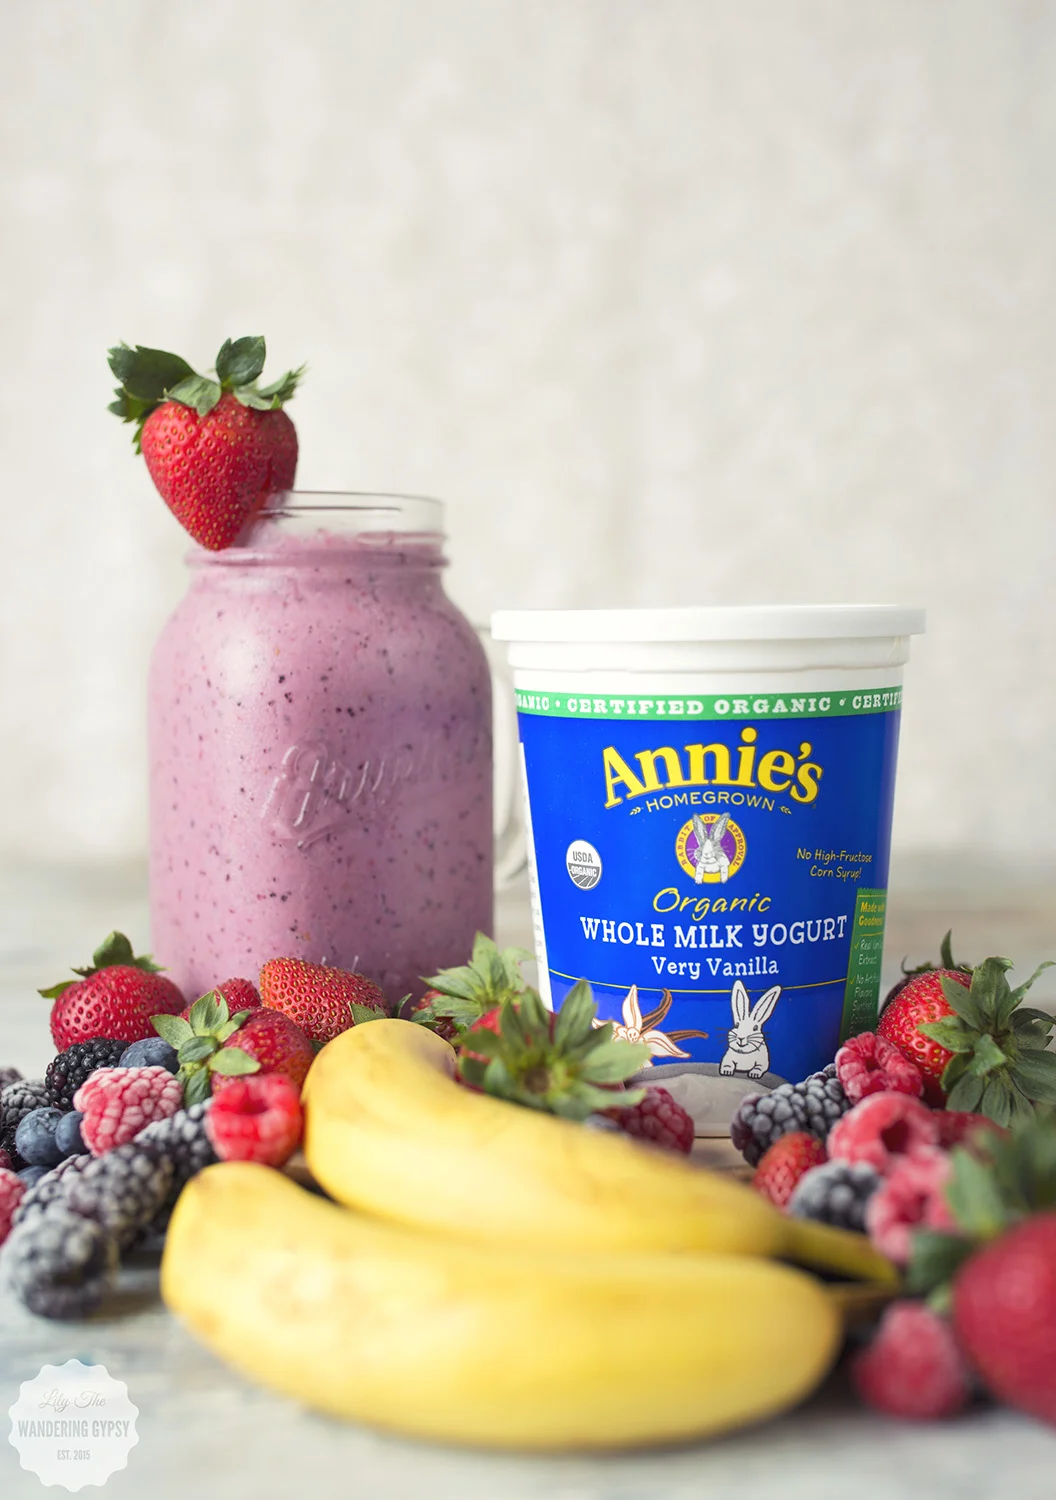
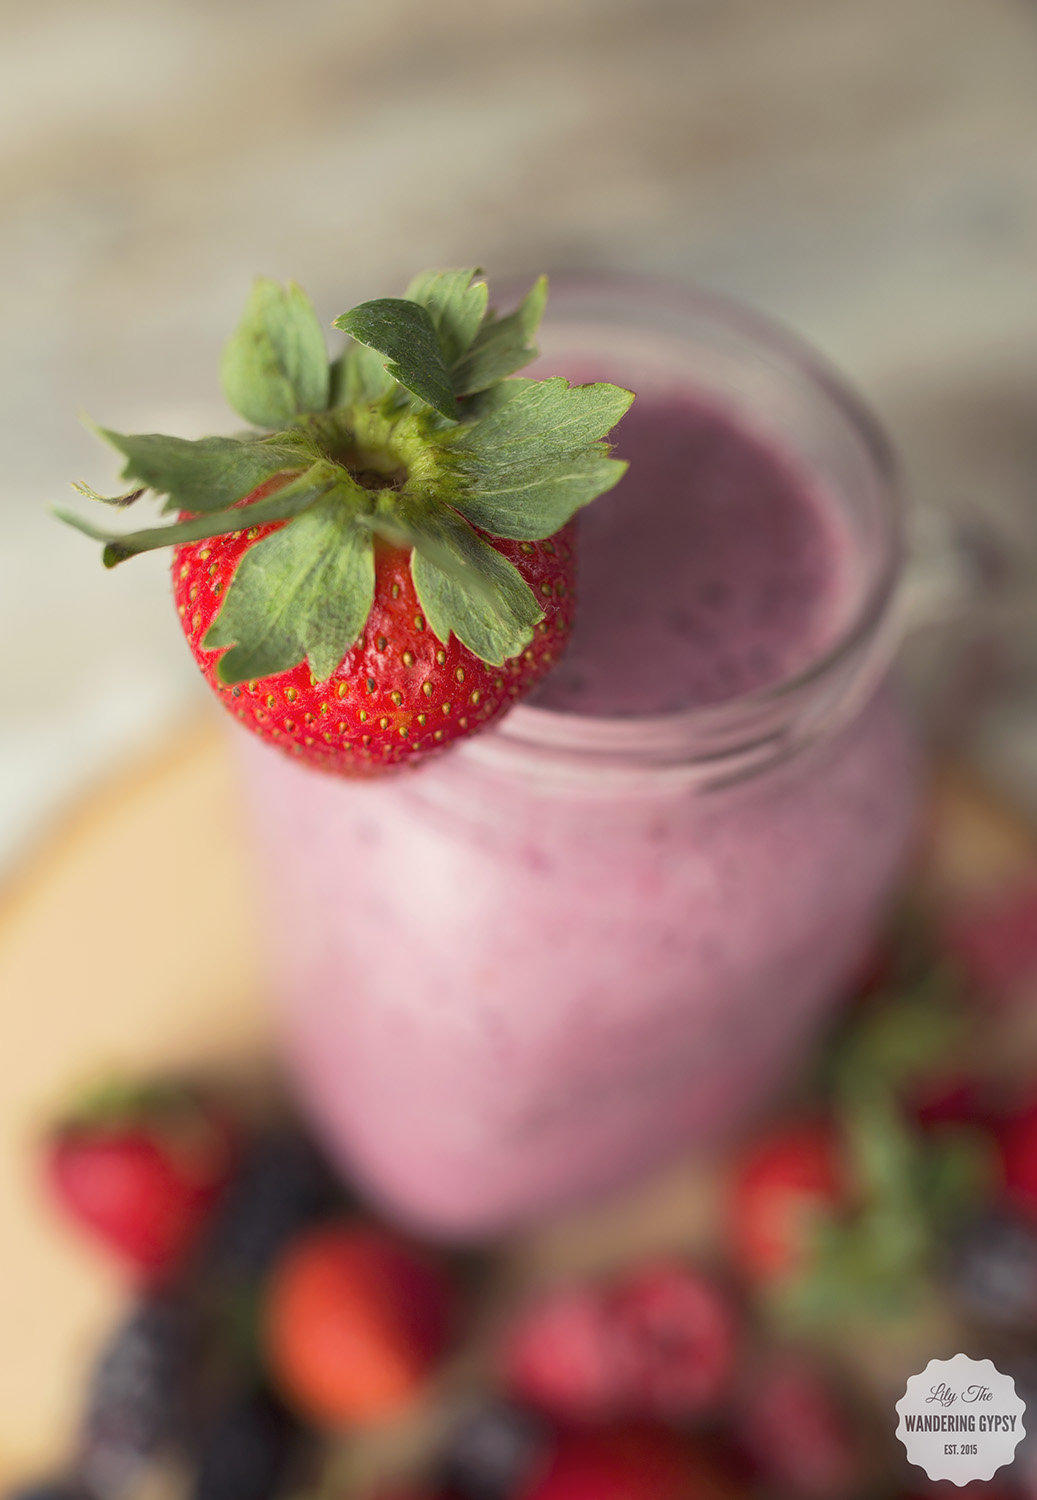
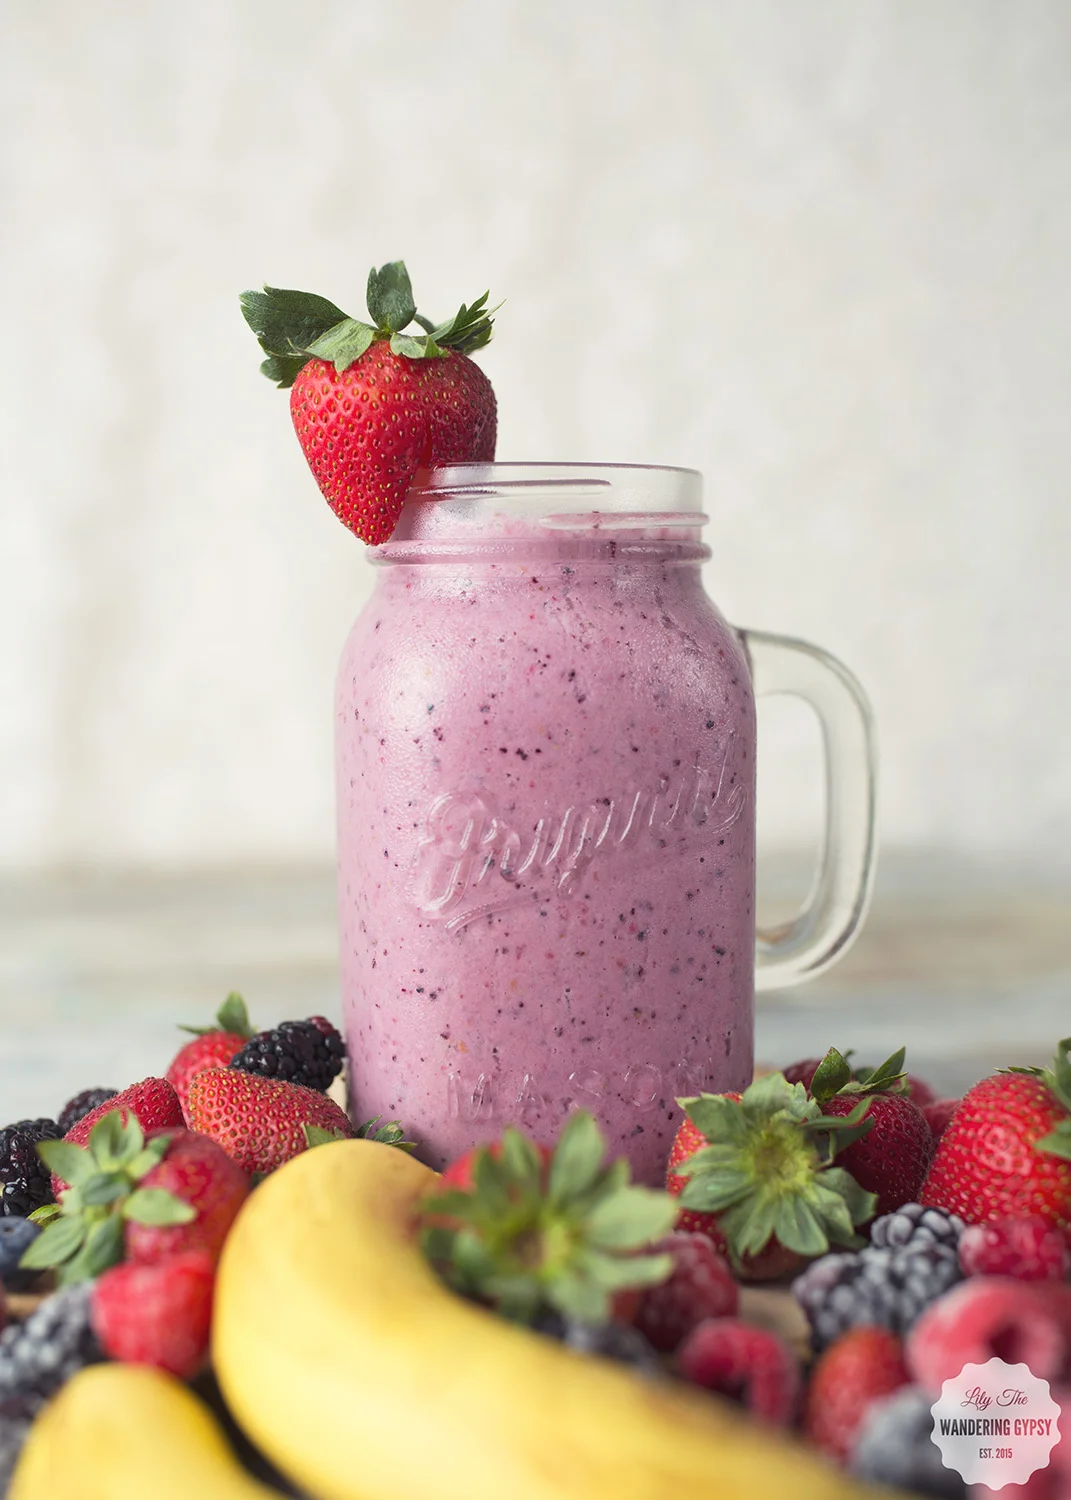
I have been on a major smoothie kick lately, and after making one almost every day, I have found my perfect blend of ingredients to make a smoothie that I haven't gotten tired of yet! I will alter the recipe just a little bit, depending upon what fruit I have in my fridge or freezer, but I basically use the same formula each time.
I have always been drawn to Annie's Homegrown Organic products, so when I saw this yogurt at our local Schnuck's, I grabbed a couple of containers, lots of berries, and also re-upped on unsweetened almond milk.
I have also learned that to make a smoothie the best (most drinkable) consistency possible, you can't use all frozen fruits. Otherwise, it freezes all of the other ingredients, making something more like soft sorbet (which is great for smoothie bowls or making nice-cream). Also, adding the almond milk definitely helps to thin out your smoothie, but the taste can be overwhelming, so just test your smoothie before pouring it in the jar. Lastly, with the yogurt, I add a good amount, because it tastes SO good! So, the amount of each ingredient just depends on your taste preferences.

MAKES 2 LARGE SMOOTHIES
- Annies Homegrown Organic Very Vanilla Yogurt
- Unsweetened Almond Milk
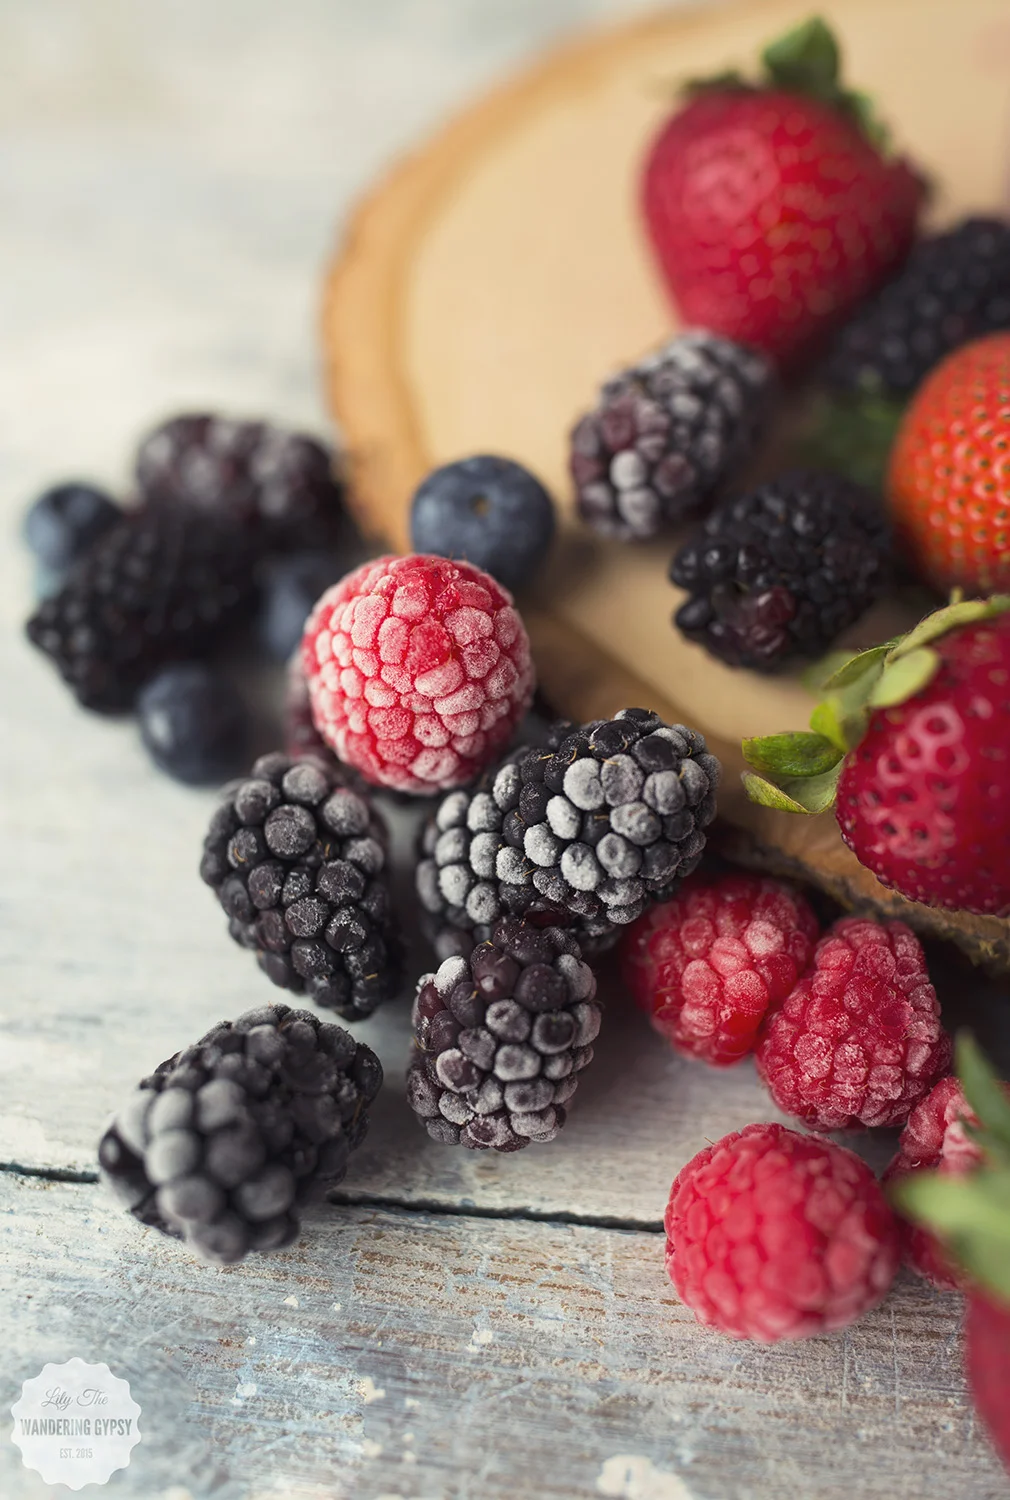
- Frozen Raspberries (I freeze fresh ones in jars)
- Frozen Blackberries (I also froze some fresh ones in jars)
- Fresh Strawberries (tops sliced off, cut into smaller pieces)
- Fresh Blueberries
- Fresh Banana
- Ice
- Sugar is your fruit isn't very sweet or too tart

1.) In a blender or food processor, add sliced strawberries, fresh blueberries, frozen raspberries, frozen blackberries, a dash of almond milk, banana, 1/3 container of yogurt, and a handful of ice.
2.) Hold the blender down, and begin to blend and puree your ingredients! Keep blending for a bit, because you want everything the same consistency. Note - unless you have a super-awesome blender, the ice will sound rough at first when you blend...
3.) Pour into a big jar, and enjoy! This smoothie keeps me full well past lunch time, it's amazing!
Find more about the Annie's Hiomegrown Organic yogurt, here!

A Summer Boho Makeup Idea For Music Festivals #playbeautifully with e.l.f.
Summer festivals are in full swing, and I am so incredibly inspired by the makeup trends and clothing styles. I am beyond happy that the boho look has lasted this long, and I hope it's here to stay for a long time. I wanted to share a few makeup items that I would definitely recommend taking to your next music festival, or wearing to your next concert!
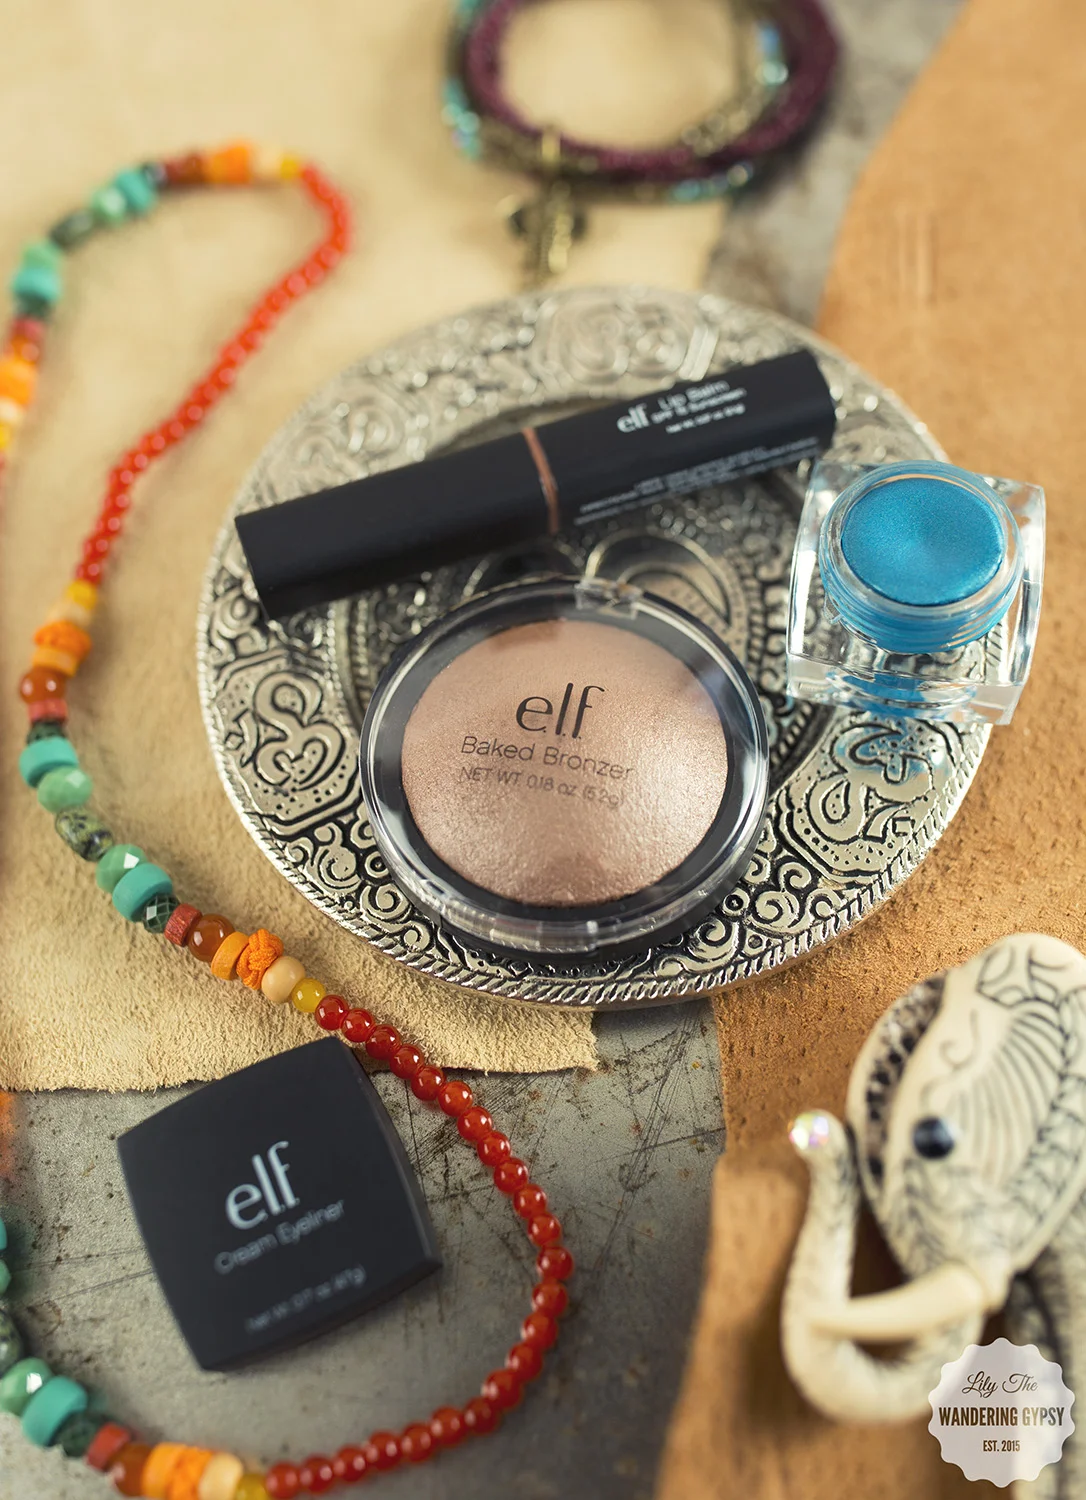

The Makeup Featured In This Post Includes:
Long-Lasting Lustrous Eyeshadow in Celebration and Toast
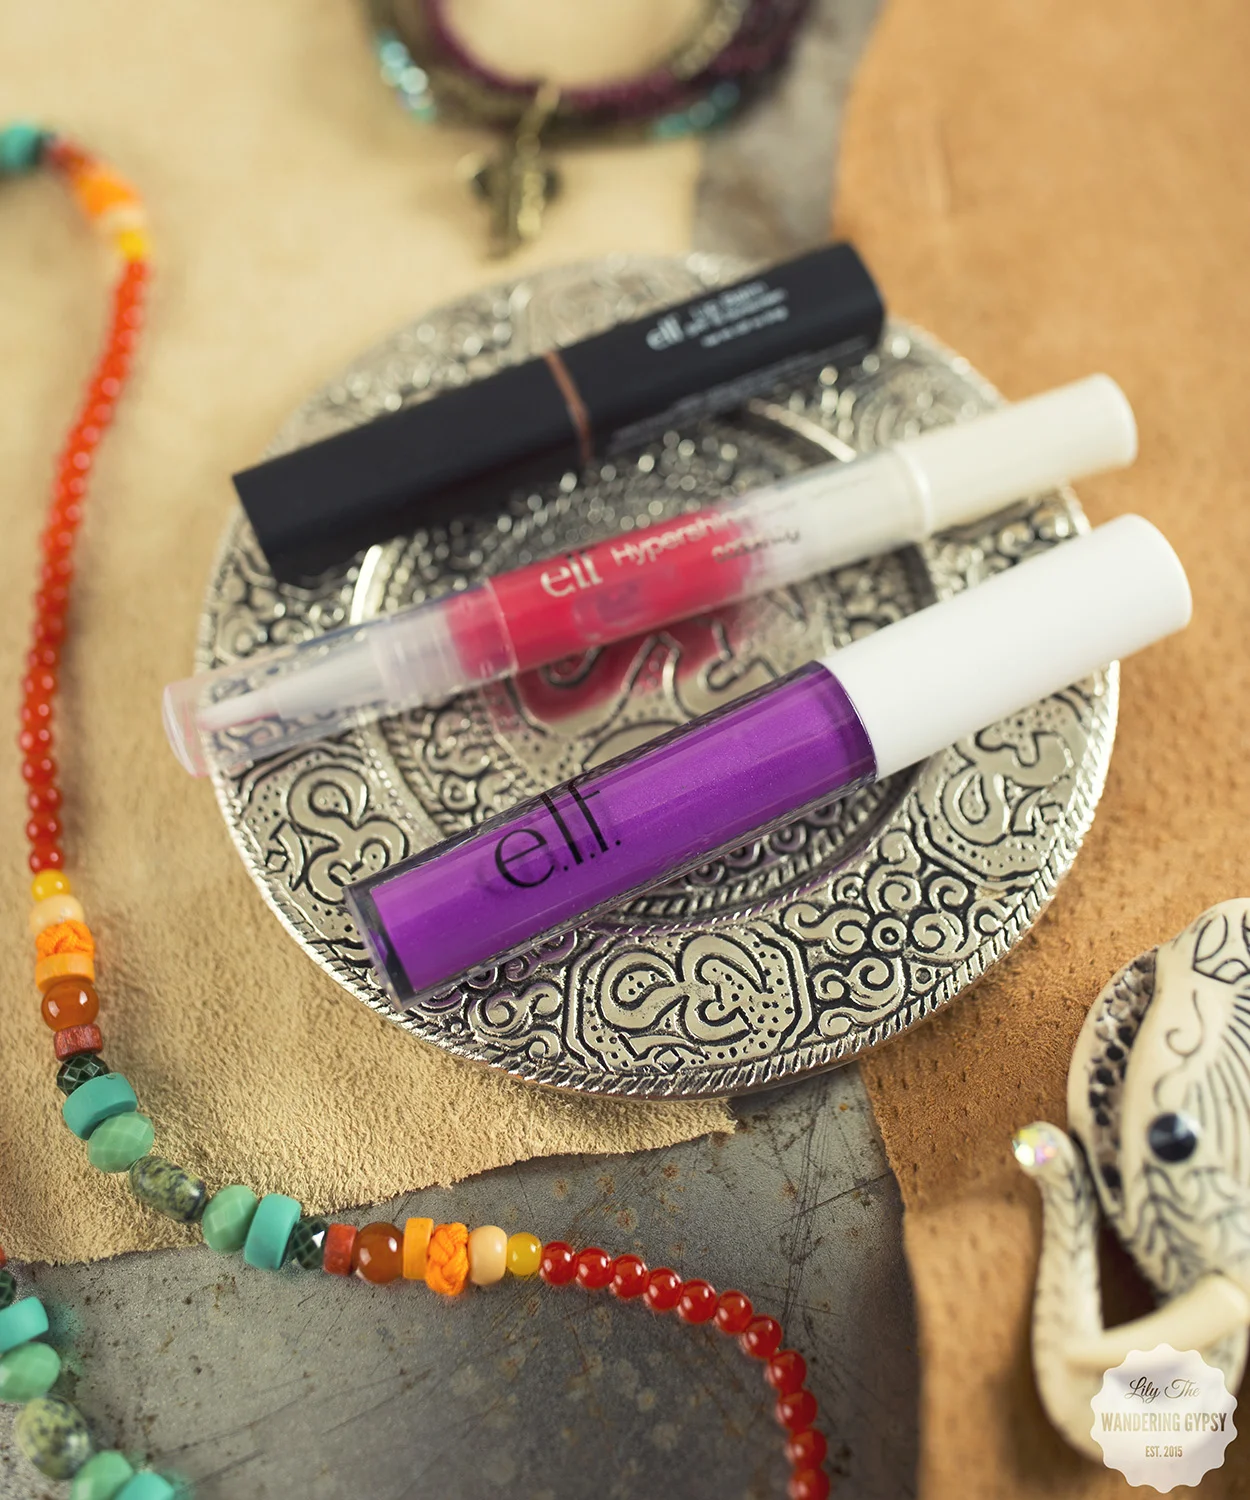
My favorite items were these three lip colors, and they're all around $3.00 - the perfect price for trying out a new color to see if it's something you are going to wear more than once.
The lip lacquer, in purple had TONS of color to it, and I know that purple lips have been so popular this summer. The middle one, the hypershine gloss, in vixen, was also very bright, in a good way, and very flattering with just about any makeup look. The SPF 15 lip sunscreen, although the color is nude, I loved the hint of color, and light shimmer (not glittery, luckily), and I also really like the fact that this has SPF. It's incredibly smooth and creamy, making me think that this would be perfect for any time you head out this summer.

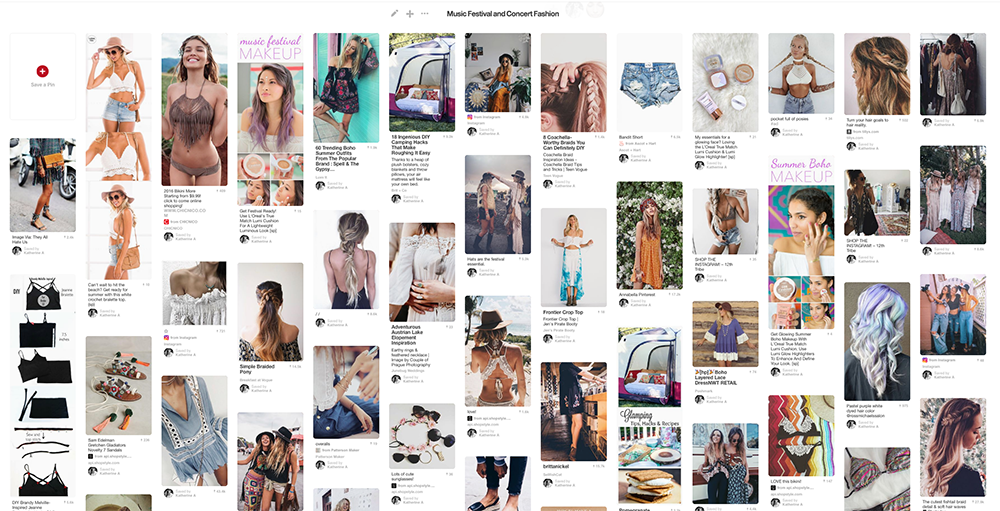
I am constantly inspired by all of the amazing, boho fashion and makeup ideas I find on Pinterest on a daily basis! I created a Pinterest Board, called Music Festival & Concert Fashion, where I keep track of all of my finds!

Below, you can see how lovely the Lip Balm with SPF 15 looks! I can see this color (nude) looking great on so many skin tones. And, this won't make it look like you're wearing a ton of makeup. Just enhance your natural beauty, and also protect your lips - they're so sensitive that they deserve a bit of protection!


The Perfect Watch For Back To School & Beyond
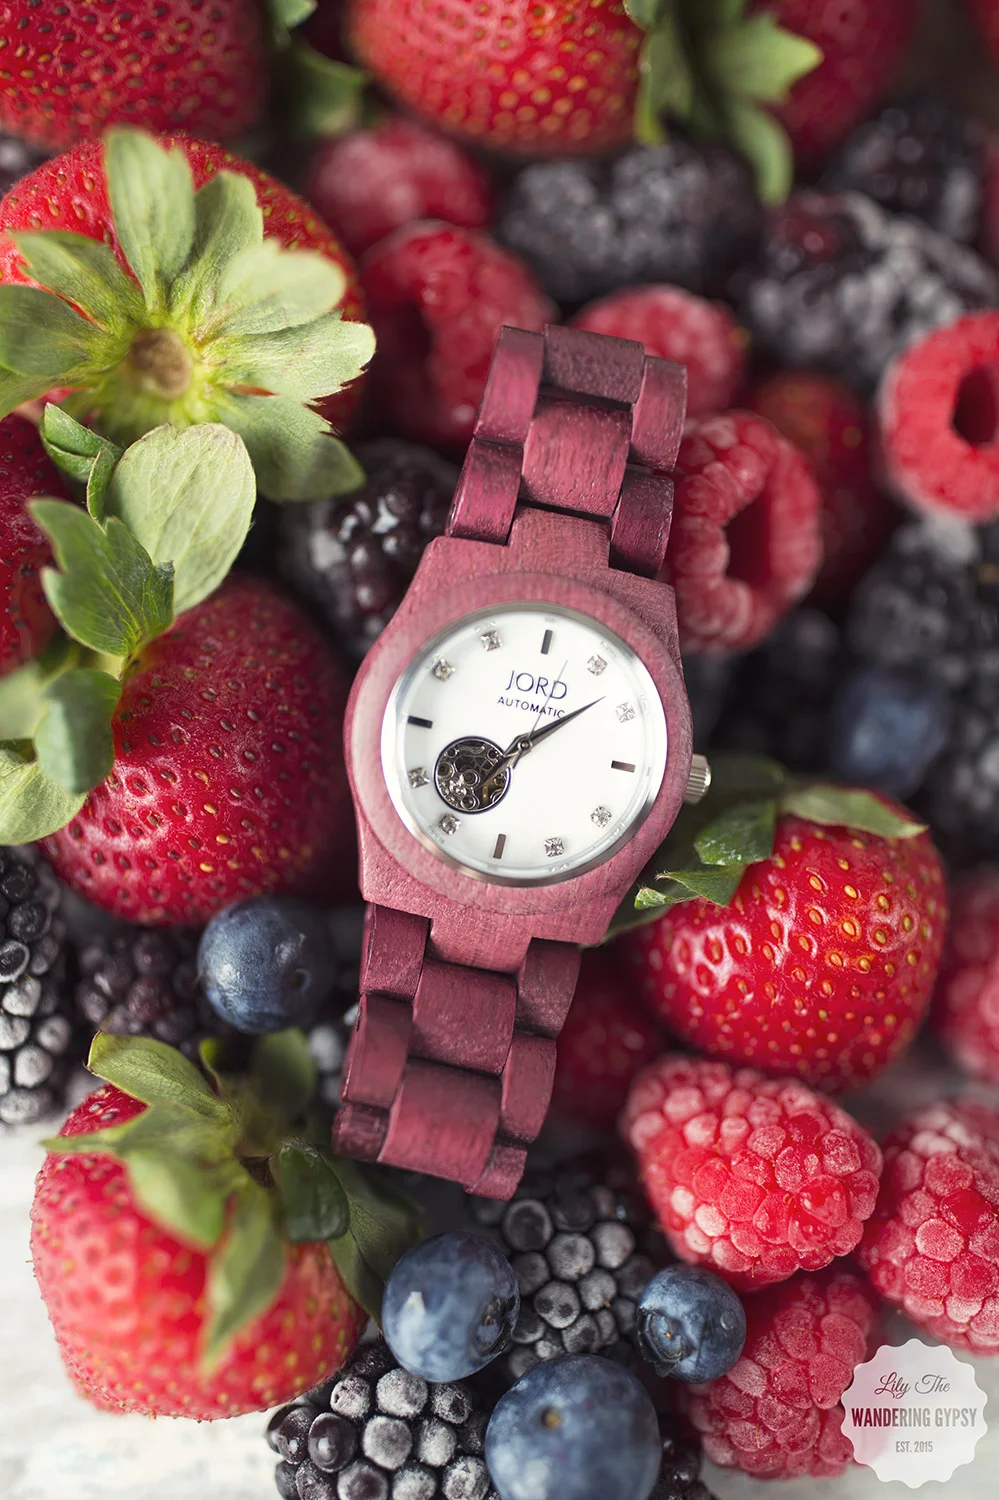
I found my all-time favorite accessory - the Cora watch in Purpleheart and Mother of Pearl, by JORD! I know I have blogged about these beautiful watches before (here and here), but I recently received a new, smaller style and love it SO very much!
The reddish, darker color of the Purpleheart wood is absolutely stunning, and is going to be great for back to school, fall, the end of summer, and beyond. I also love the unexpected sparkle of the jewels in the watch face. The other little nod to extreme attention to detail is the fact that the back of the watch face is made of glass, so you can see the inner workings of the watch! I cannot believe how nice these watches are, they're so well-made.

"Savoring something, however small, is why your style will always be revered, and rarely replicated. You'll love how the Purpleheart wood pairs with opaline Mother of Pearl to showcase the luxe nature of natural materials. Crafted to be adored, our Cora was created for you."

And, just for fun, enter to win $75 towards your very own Wood Watch! That is a GOOD DEAL!!!

This Cora Watch matches the boho styles so well! Whether you're pairing a cute button up 3/4 sleeve shirt with dark cropped skinnies, or wearing a cute dress, the watch will never look unflattering because its design is so streamlined. This watch is very comfortable, and really makes me smile when I wear it!


sapphire crystal glass
deployment buckle with push button
swarovski crystal markers
screw-down crown
case width: 37mm
case thickness: 12mm
lug ends: 38mm
band thickness: 18mm - 22mm
band length: 211mm (they send extra links)

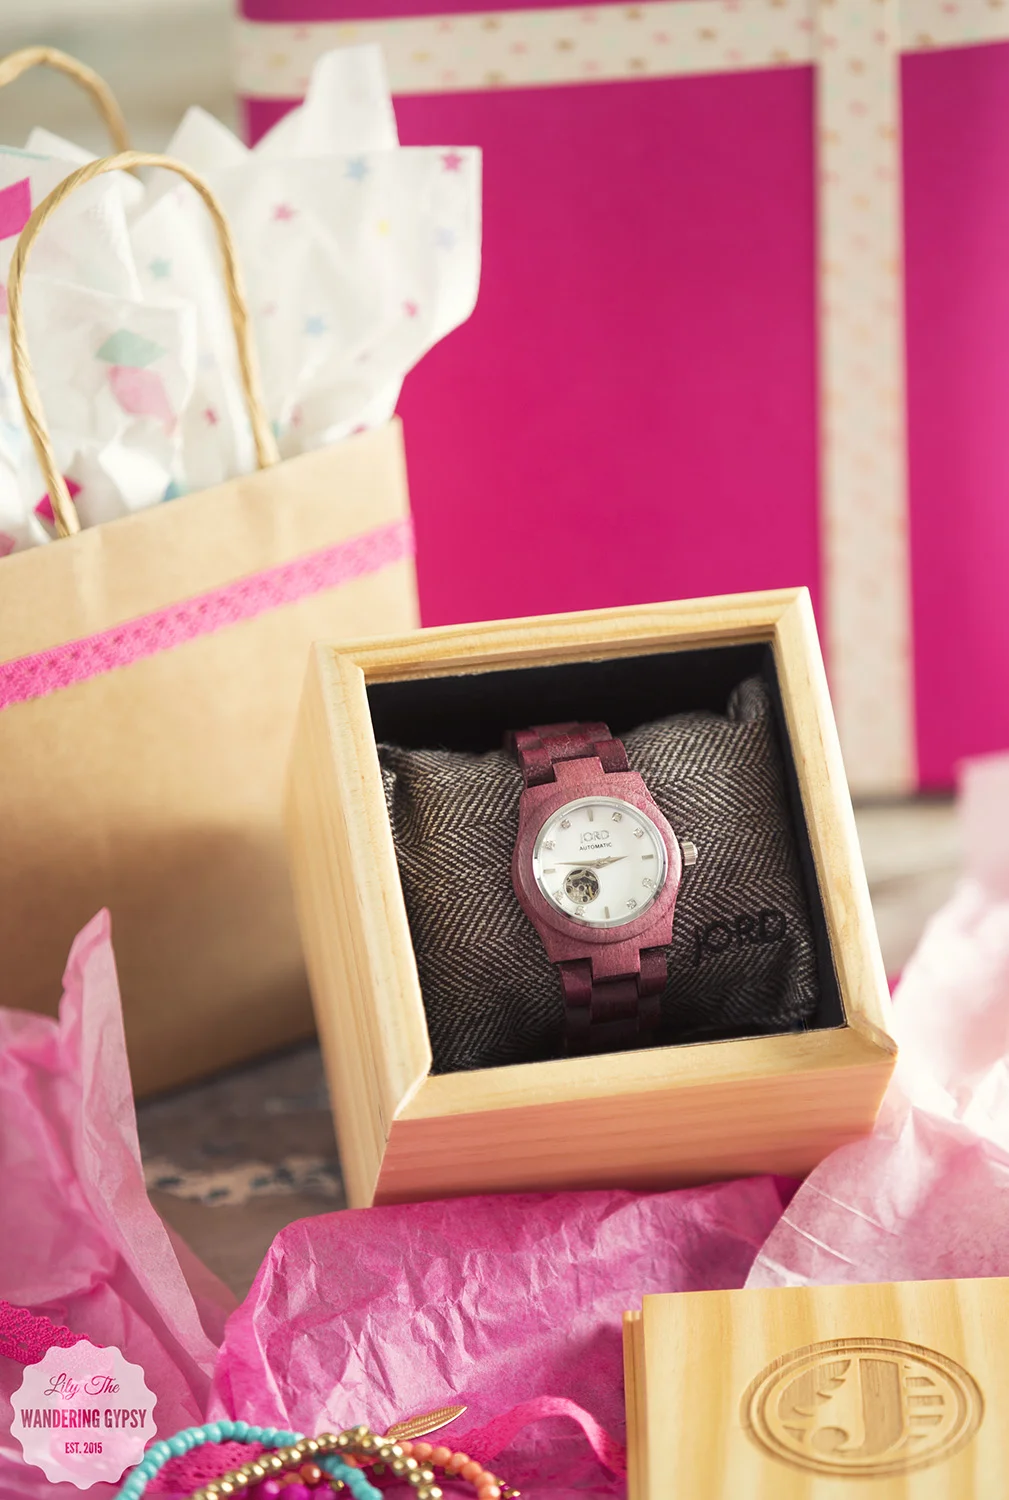
These watches make amazing gifts, too! My sister is already eyeing this one :) They are such good quality watches, that whoever is lucky enough to receive one will have it for a very long time. And, like I mentioned before, JORD wood watches come with extra links, just in case. There are SO many colors of these watches, so go ahead and check out the whole collection, here.


I had so much fun styling this watch for JORD. Check out all that JORD has to offer here!

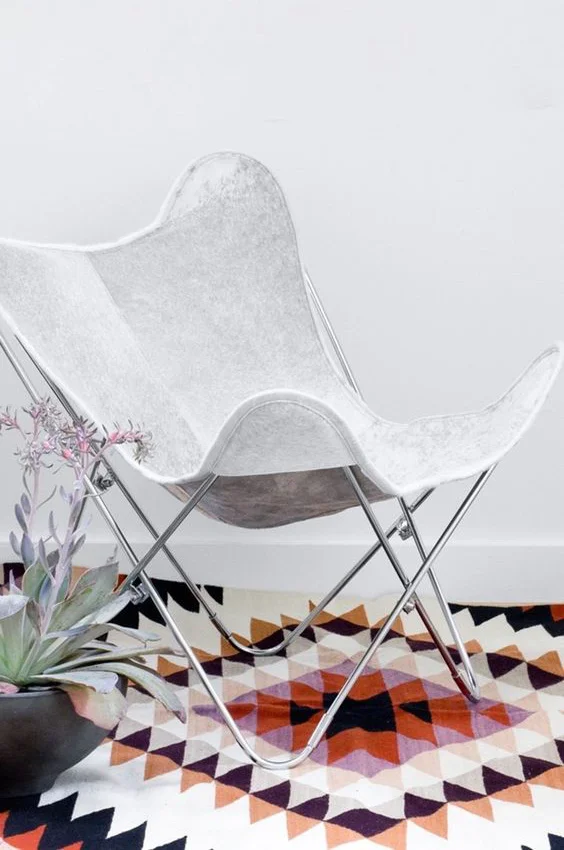
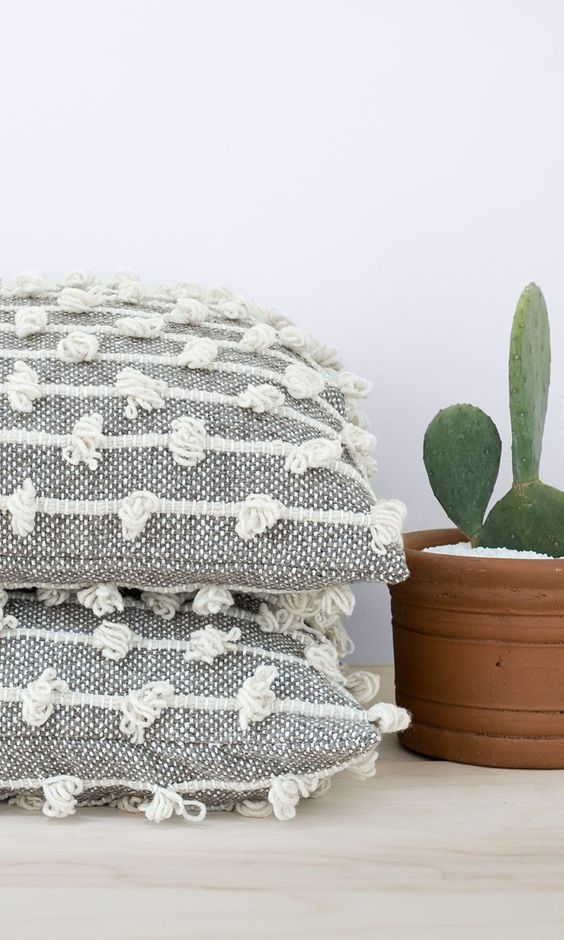
The Citizenry - Trend Report
Shop Home Goods Here
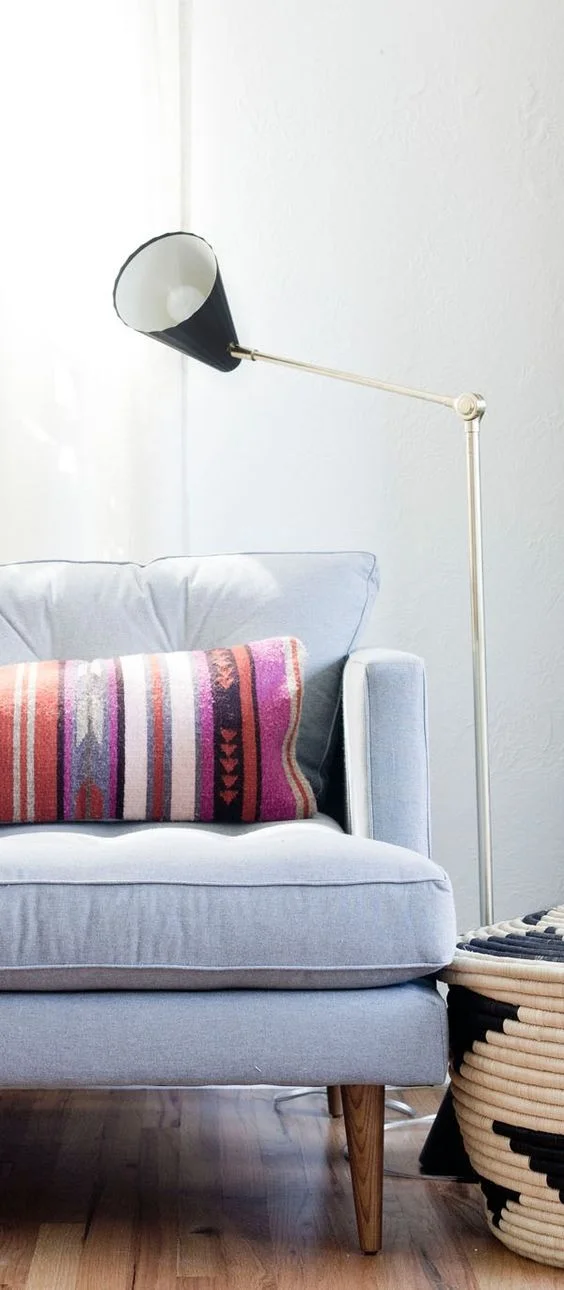
I really love rooms that have white walls, wood floors, leather and wood furniture, lots of plants, and the pops of color in the room come from soft pillows, rugs, and blankets in Aztec prints and bright colors. My home isn't there just yet, but I am always SO drawn to those images!
While I did not shoot these photos, I wanted to share some of the newest home goods that I am helping to promote on Pinterest - The Citizenry.
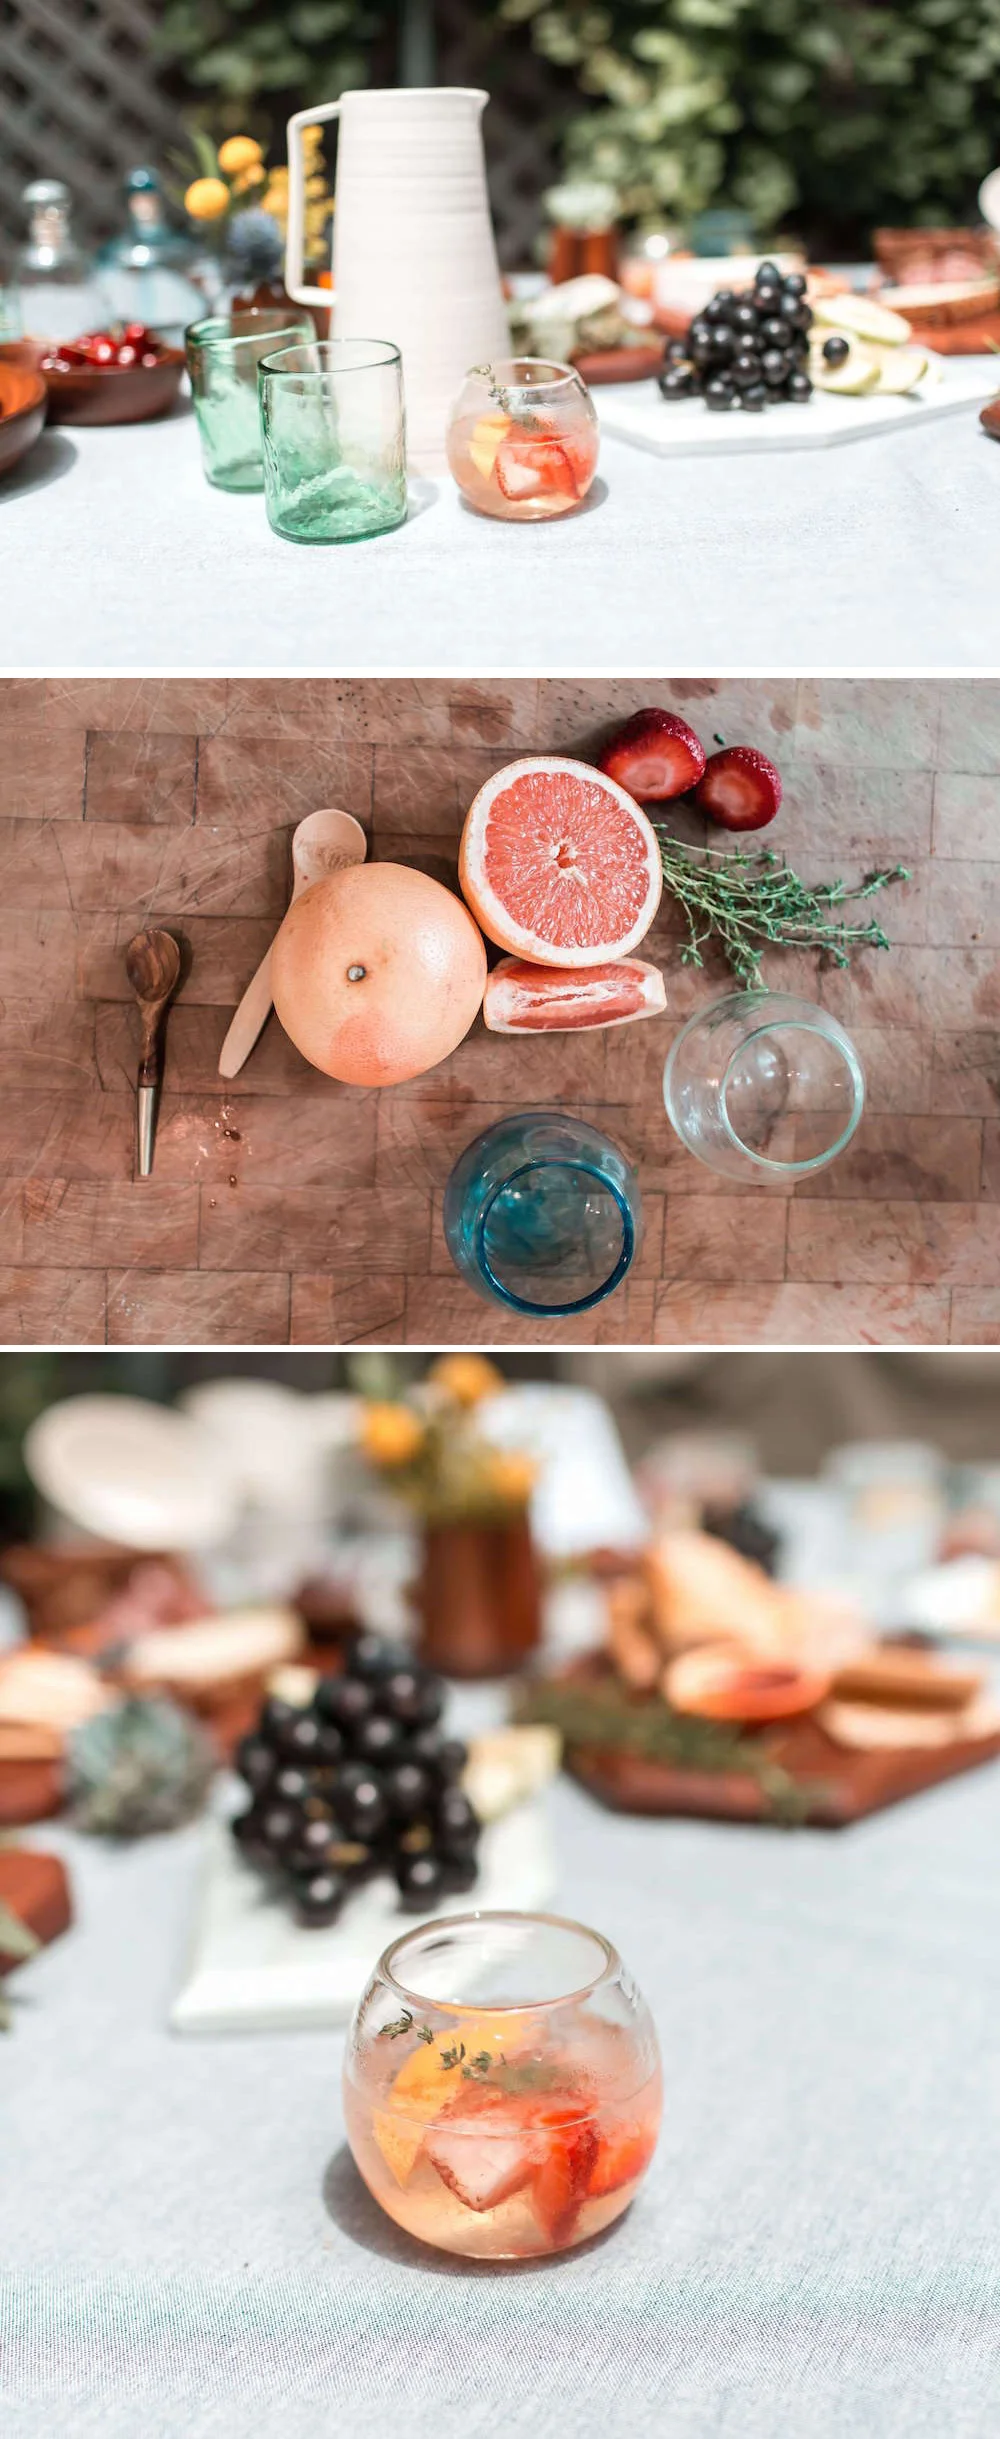
In addition to the home goods that they offer, their blog provides a huge amount of inspiring content, like cocktail recipes, home decor ideas, inspirations, and travel-related posts.


OUR PHILOSOPHY (FROM THE CITIZENRY.COM)
"We believe our homes should be reflections of the journeys we take. Our personal spaces deserve designs with a soul, a story, and a purpose. It's why we travel the world to develop our exclusive collections of home goods. Country by country, we partner with master artisans, blending our modern style with their time-tested techniques.
By personally traveling to each country and using only local materials, we establish sustainable relationships with our artisans. From there, we sell directly to you online–there is no middleman. This is how we’re able to offer handmade goods, crafted with the highest quality materials, at more reasonable prices than traditional luxury boutiques."
WHY THE NAME “THE CITIZENRY”?
"We set out to build a company that celebrates the people behind our products. Our name is a reflection of the collective of individuals – artisans, designers, and dreamers – who rally together across cultures and continents to craft our collections. The Citizenry is our way of sharing these stories and products with you."

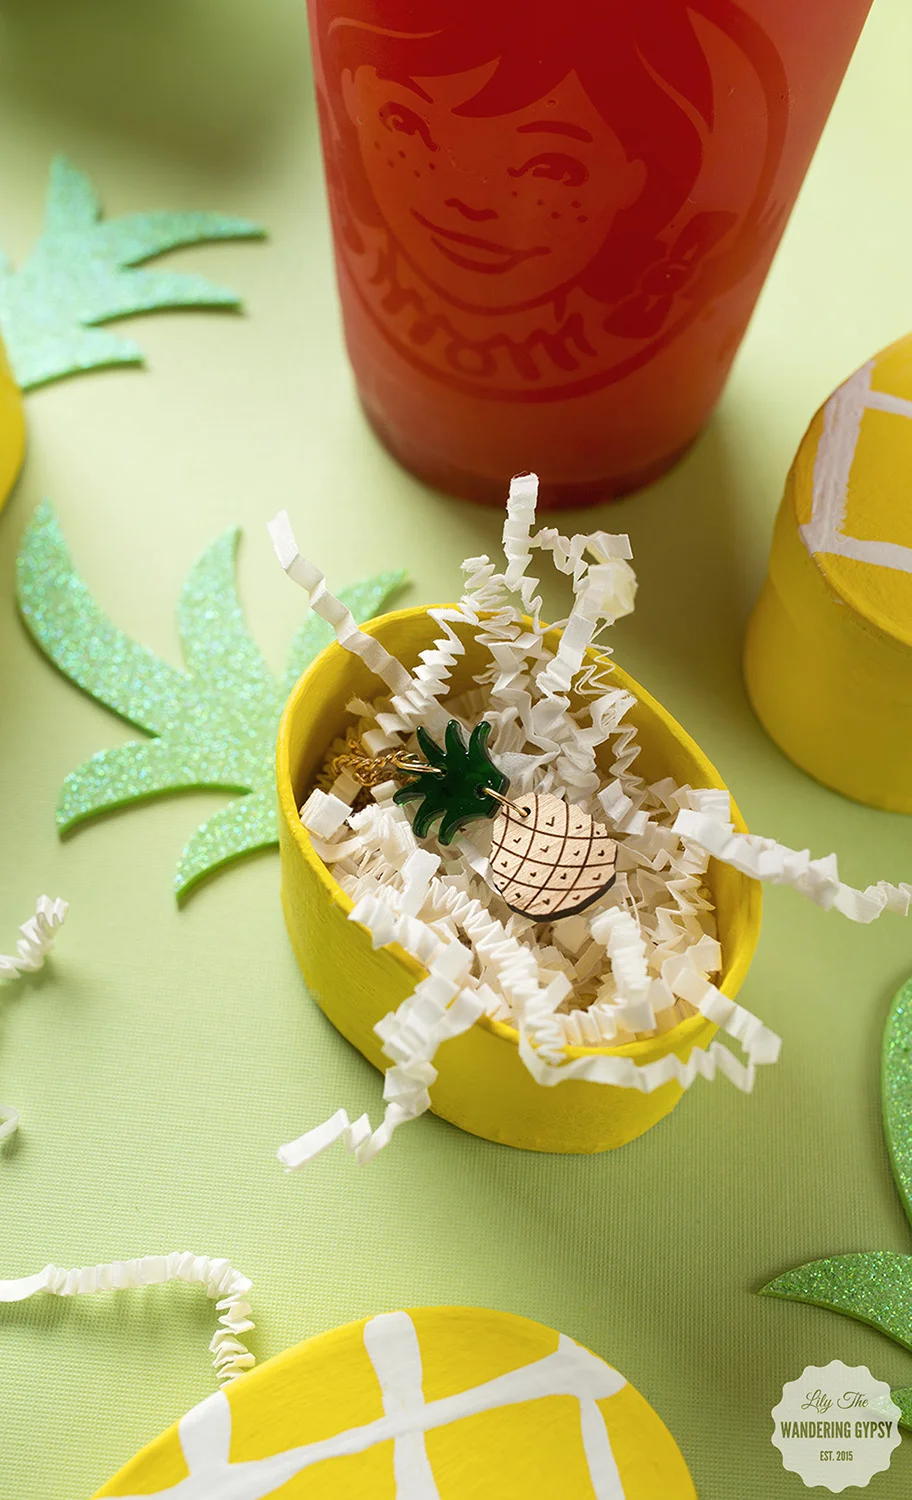
DIY Summer Fun - Pineapple Gift Boxes
There's no doubt that it's summer, why not embrace it and make something cute inspired by tropical breezes (wishful thinking), and pineapples! Why not make someone smile by creating a gift box that is a present in itself. I made this project a little while back in order to help Wendy's to help promote their Blackberry Lemonade. It was just the right amount of tart and sweet, wrapped up into one pretty drink! What will you be making and gifting this summer?

This post was totally inspired by the amazingly awesome blog, Damask Love!

- Oval-shaped Paper Mache Boxes
- Yellow Paint, White Paint
- Paint Brush (to paint over entire box)
- Wooden Skewer Sticks (to paint white marks on boxes)
- Paint Brush
- Mint Green Sparkle Foam Sheet
- Glue
- Gift Items or Candy to fill boxes


1.) Cover your work surface, and paint your boxes yellow. I used 2 coats, but they dried pretty quickly.
2.) Make sure your yellow paint is 100% dry, then with a skewer stick, draw/paint the lines onto the boxes. I basically put the white paint onto a paper plate, then laid the skewer sticks down, covered the end in paint, then drew the lines across the boxes. This helps you create super straight lines, too!
3.) Now, cut out your green top parts. Feel free to print the photo, below, to get the right shapes. I just sort of free-handed one, and traced it on the non-glitter side of the foam. These were so easy to cut out!

4.) Now, simply glue the little green top pieces onto the boxes, and you're done!! Fill them with paper shreds, and whatever your heart delights!

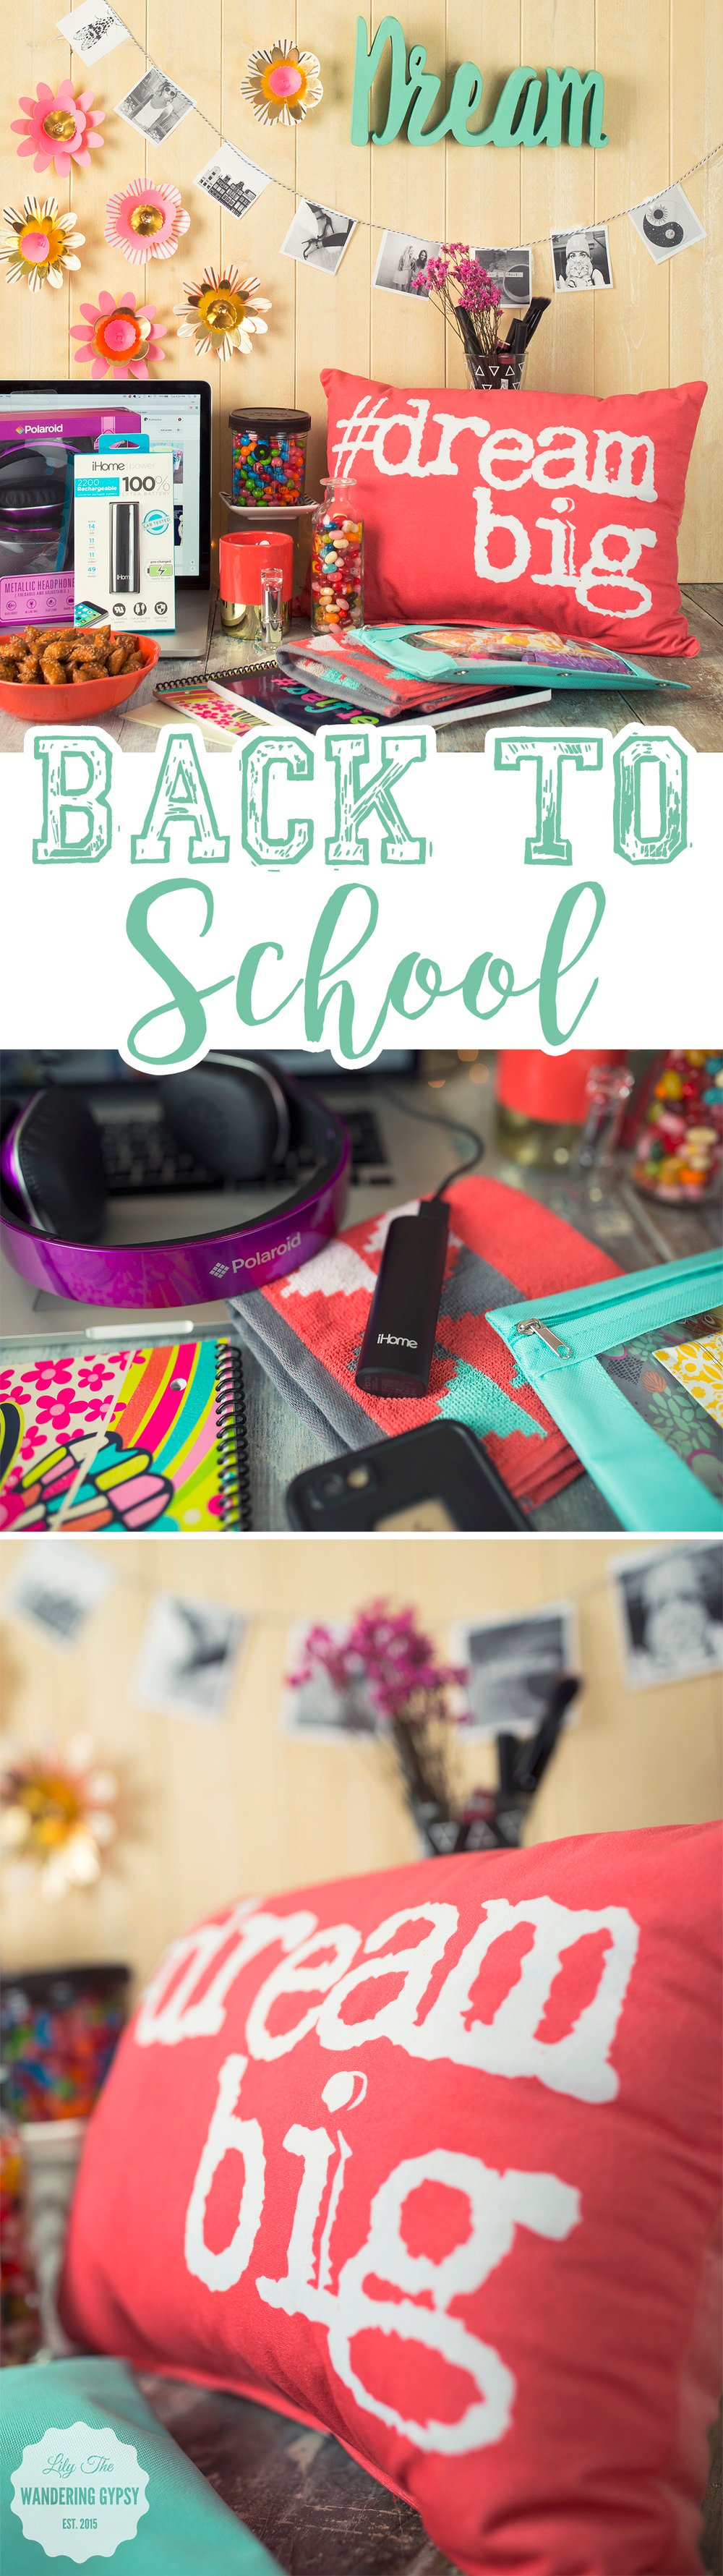
A Cute Desk Decor DIY & Celebrate Back To College With Big Lots
This shop has been compensated by Collective Bias, Inc. and its advertisers. All opinions are mine alone. #BigLotsReady #CollectiveBias
I am here today with a cute DIY idea, and tips on how to design a space for a woman who is shopping for back-to college items, and wants to learn how to maker her space her own. My sister, Ellen is such a talented person. She is going to be a Junior at the University of Louisville, KY in the nursing program this Fall semester, and I couldn't be more proud of her! She will be receiving her BSN in no time at all! She is my complete inspiration for this post! She is so talented, and she is a gifted artist and designer.

Ellen lived in a dorm her first year, and it was super cute. She did the best she could with the furniture she was given, but last year, her design style really had a chance to blossom. She moved into a beautiful house with some of her sorority sisters, and her bedroom was beyond adorable. Now, she is moving into a house with a bit more space, and I can't wait to see how she designs the place.
Read on to see more about the space I designed for a woman who is in college and needs a beautiful space to work! The directions for a DIY Background Inspiration Board are below.
Get tons more inspirations, and shop all of the Back-To-College items here. And, click around on the image below, it's shoppable!

Meet my sister, Ellen!
I shopped at my local Big Lots for many of these items, and I could not believe hoe friendly and helpful everyone was! The main cashier knew exactly right where everything was, and I was happy to find so many of the items available in-store. I also found lots of items that coordinated with my coral and mint theme, so I grabbed a few extra items while there. Another option is to shop on biglots.com, if you want an even broader selection of colors or want to see the entire line of back to college gear.
No matter what your style, Big Lots has some super cute home decor items that will inspire a cute color combo, or even an overall theme to your new space, from college dorms, new apartments, or any work space. In addition to the items I featured here, Big Lots also has: mattresses, furniture, small appliances, bedding, sheets, pillows & throws. These items will fit into lots of popular decor trends, for both guys and girls.
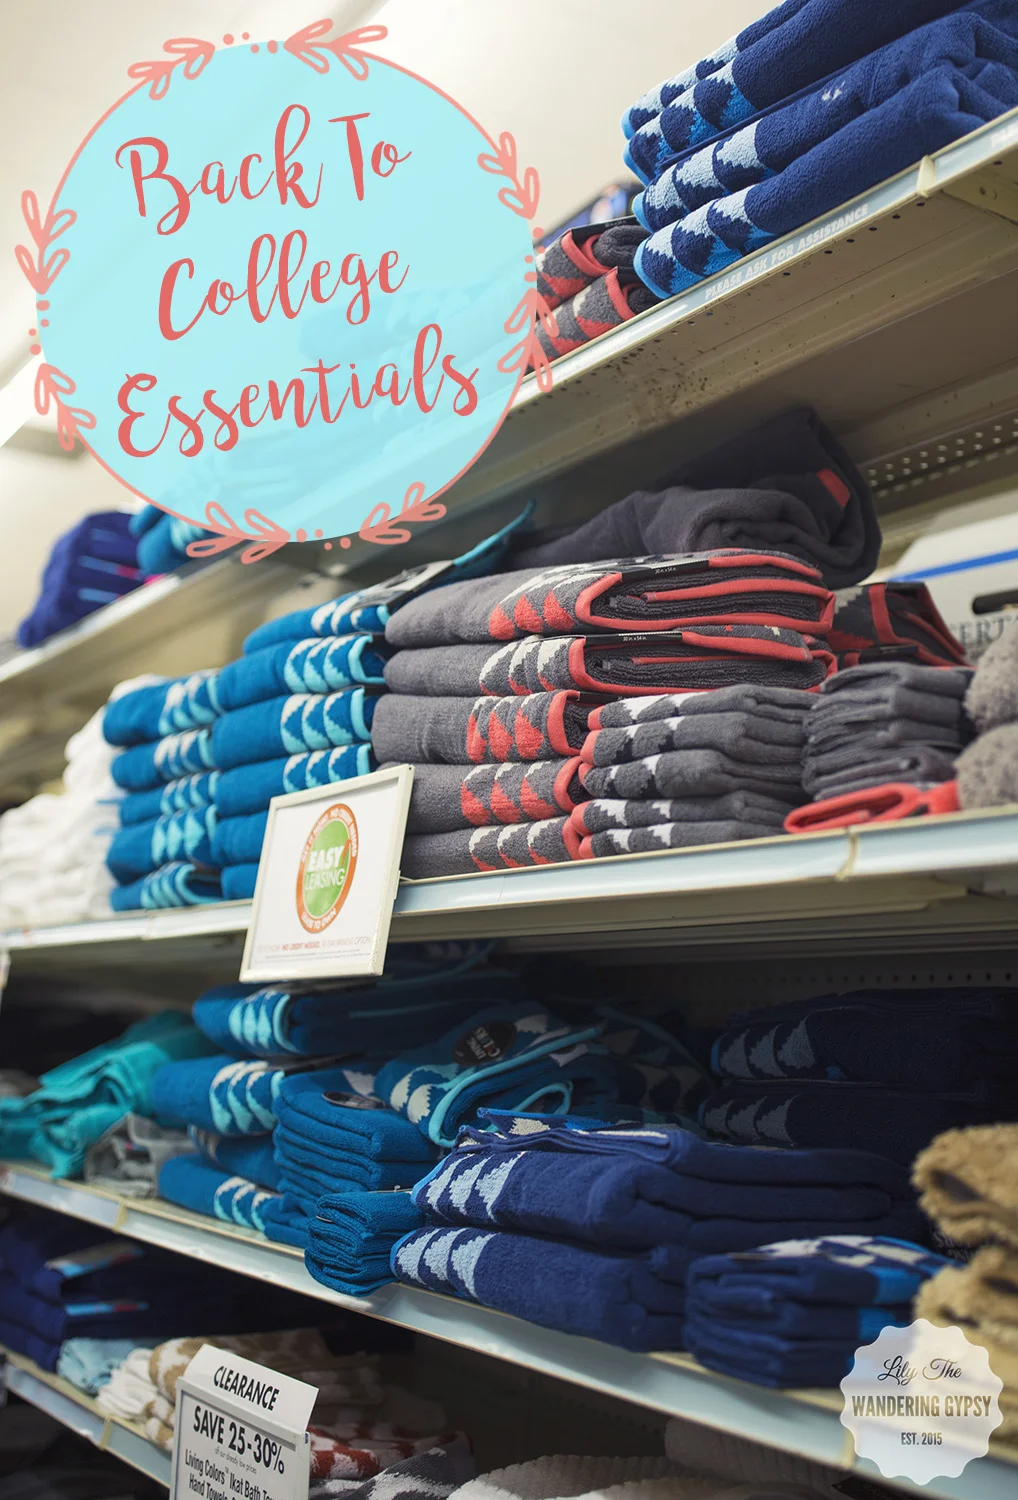

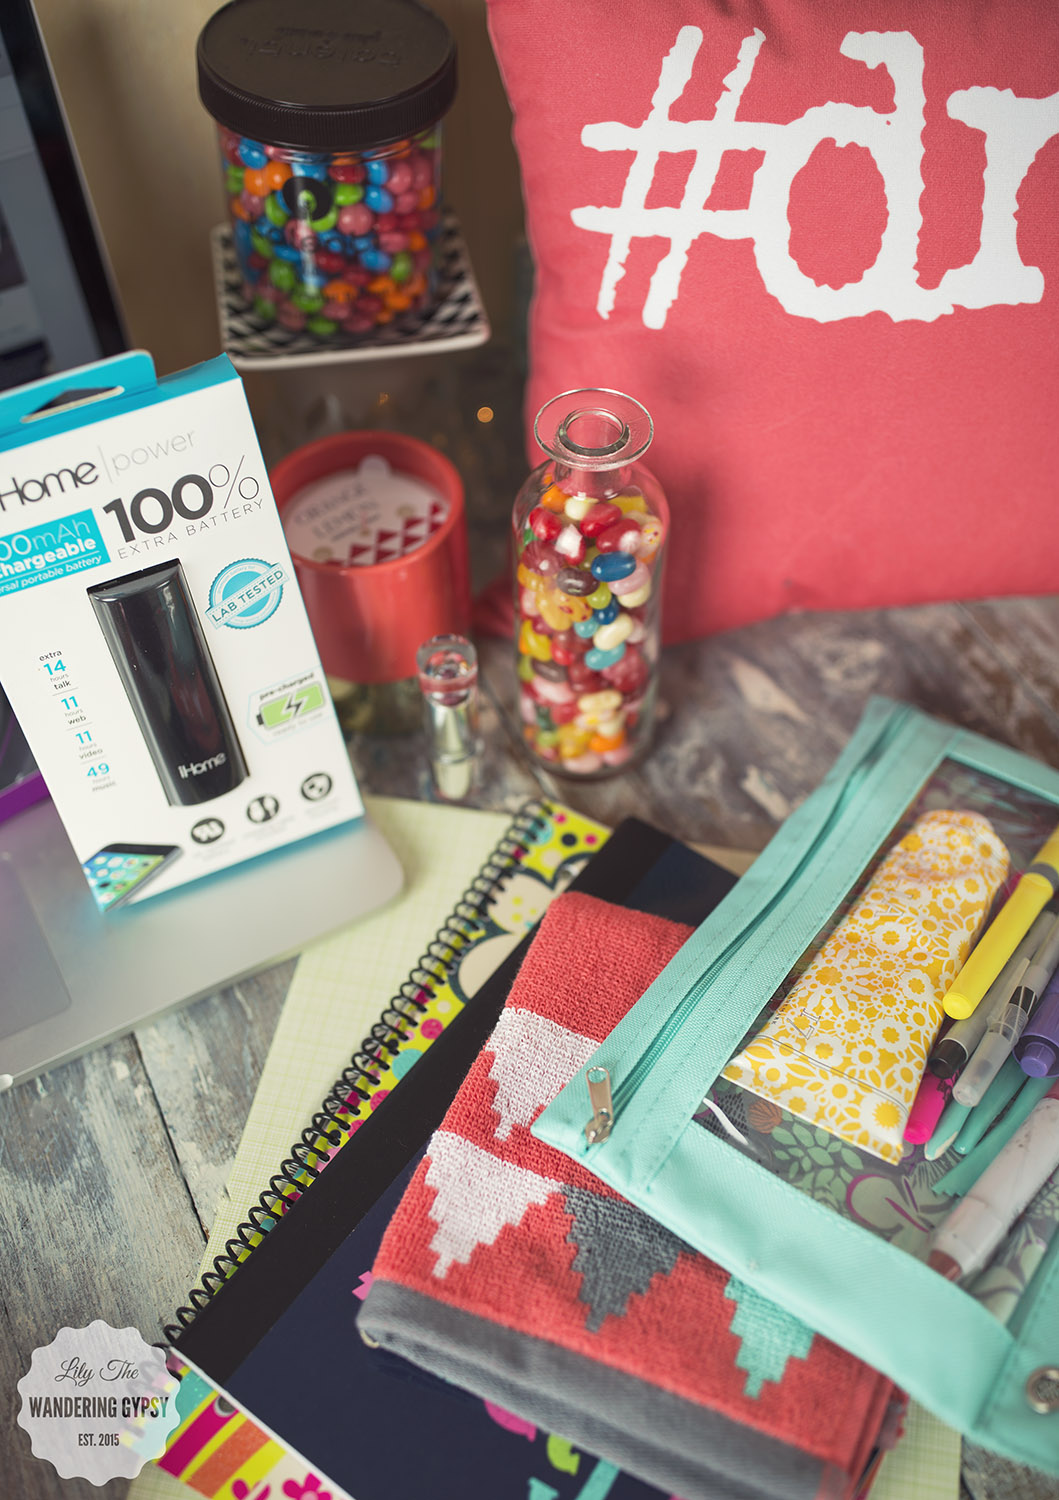
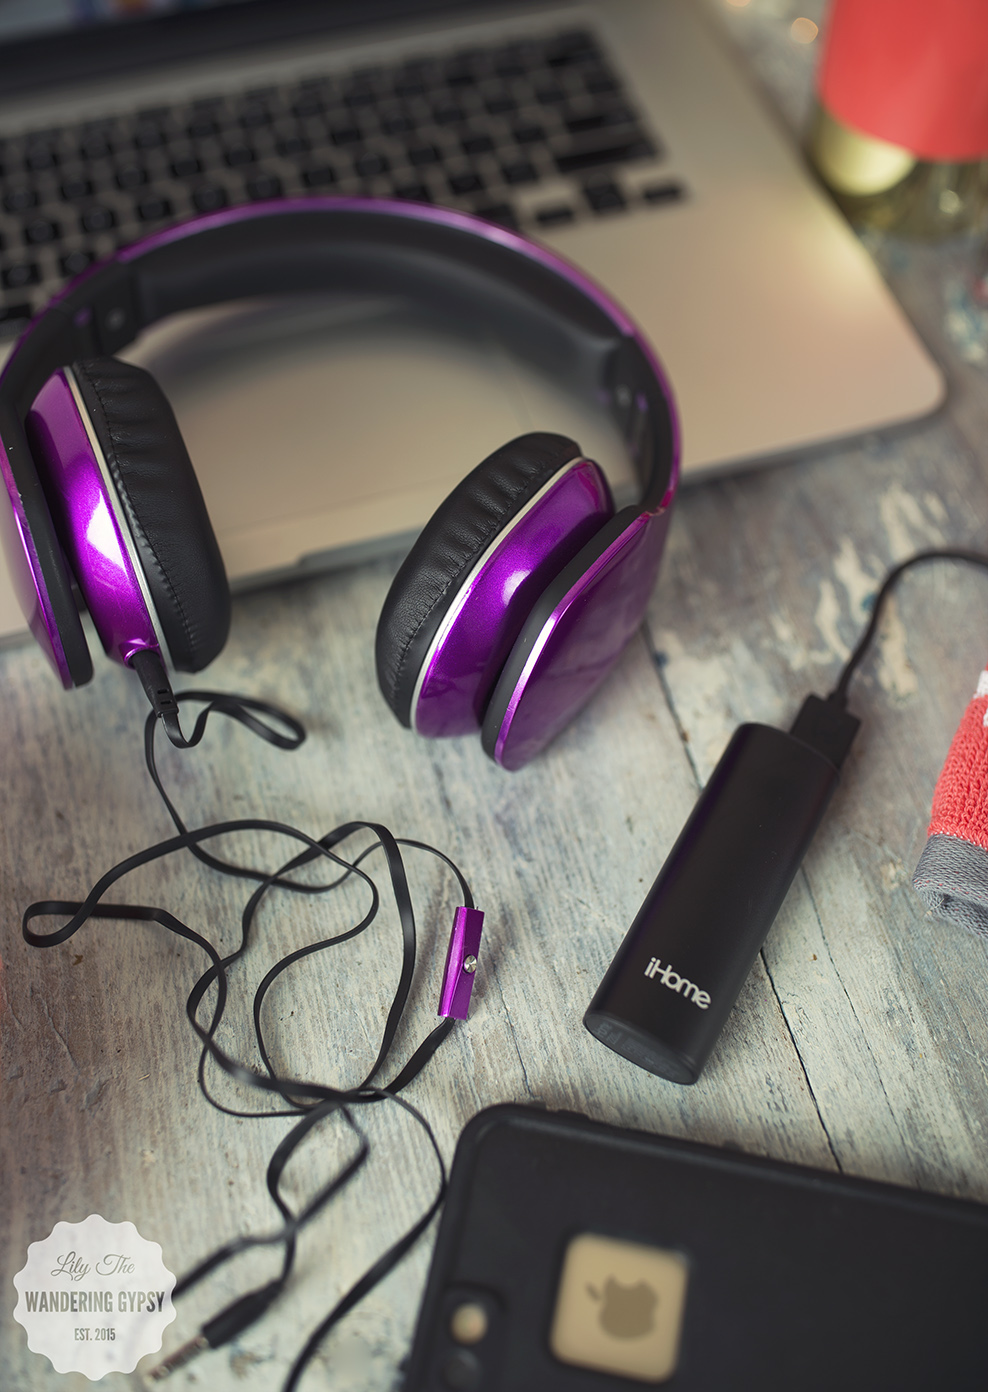
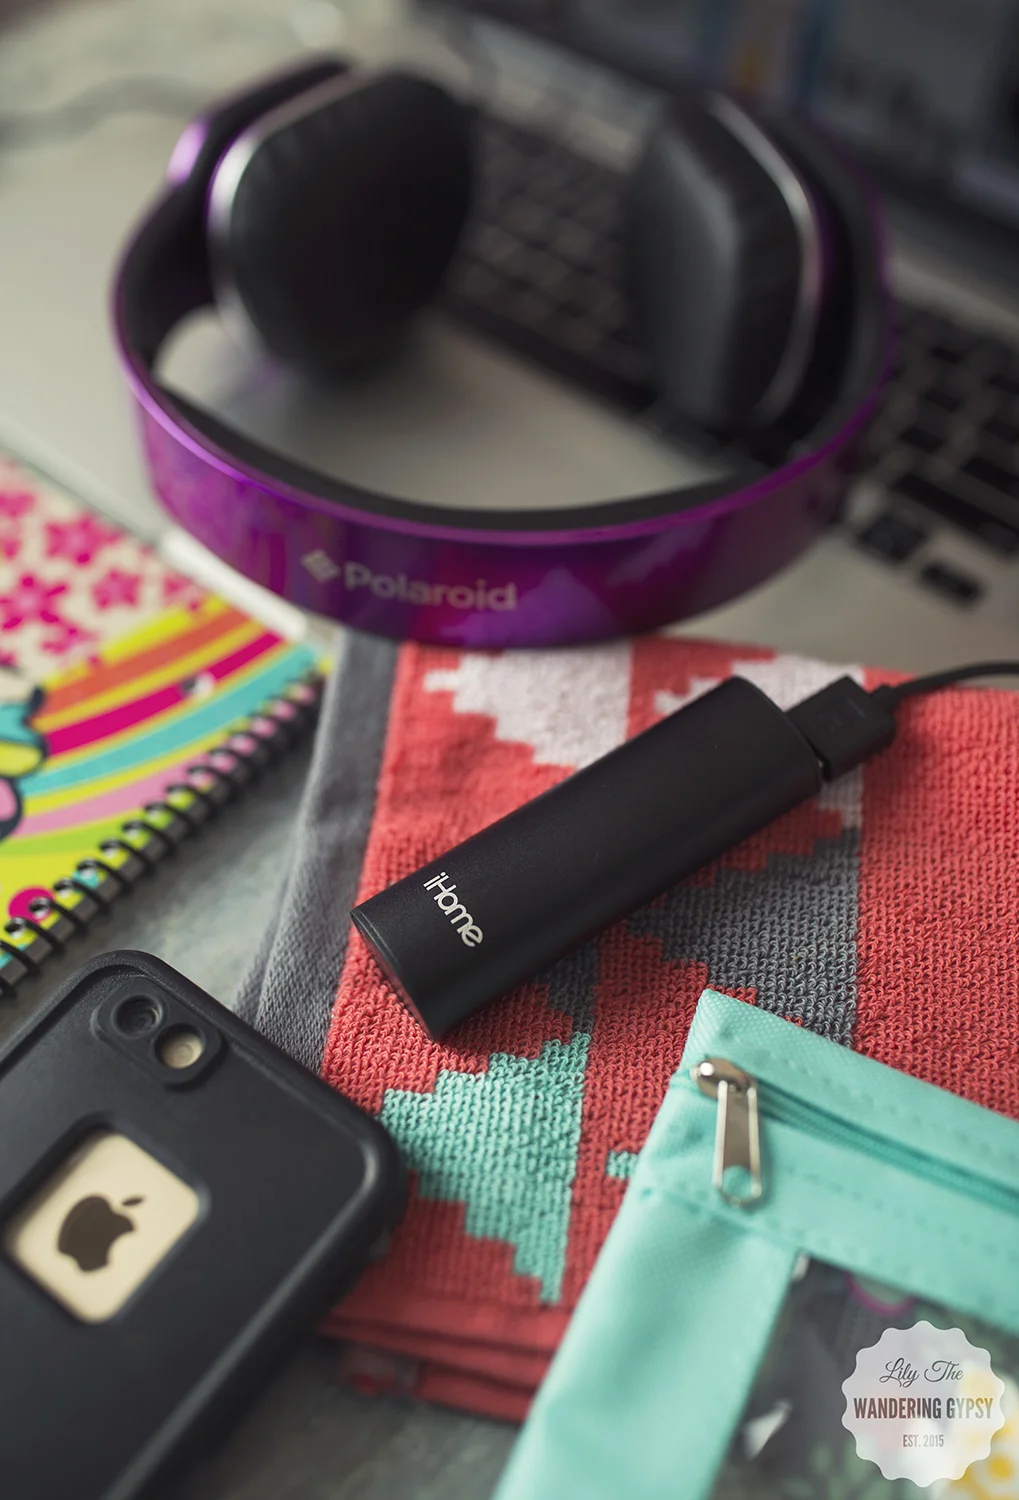
And, there were way more electronics than I could have imagined! They're all stocked up on items like extra battery packs for charging your phone and small devices (see photo, right), as well as cute headphones in literally every color imaginable.
I also found a ton of other apartment/dorm/new place ready items like Ninja blender, lots of vacuums, toasters, pots and pan sets, plates, dishes, cups, silverware sets, and a good selection of curling irons, and other bathroom items. I always like checking out the beauty aisle, you never know what sorts of hair products, lotions, and even gift items for your new roomies!

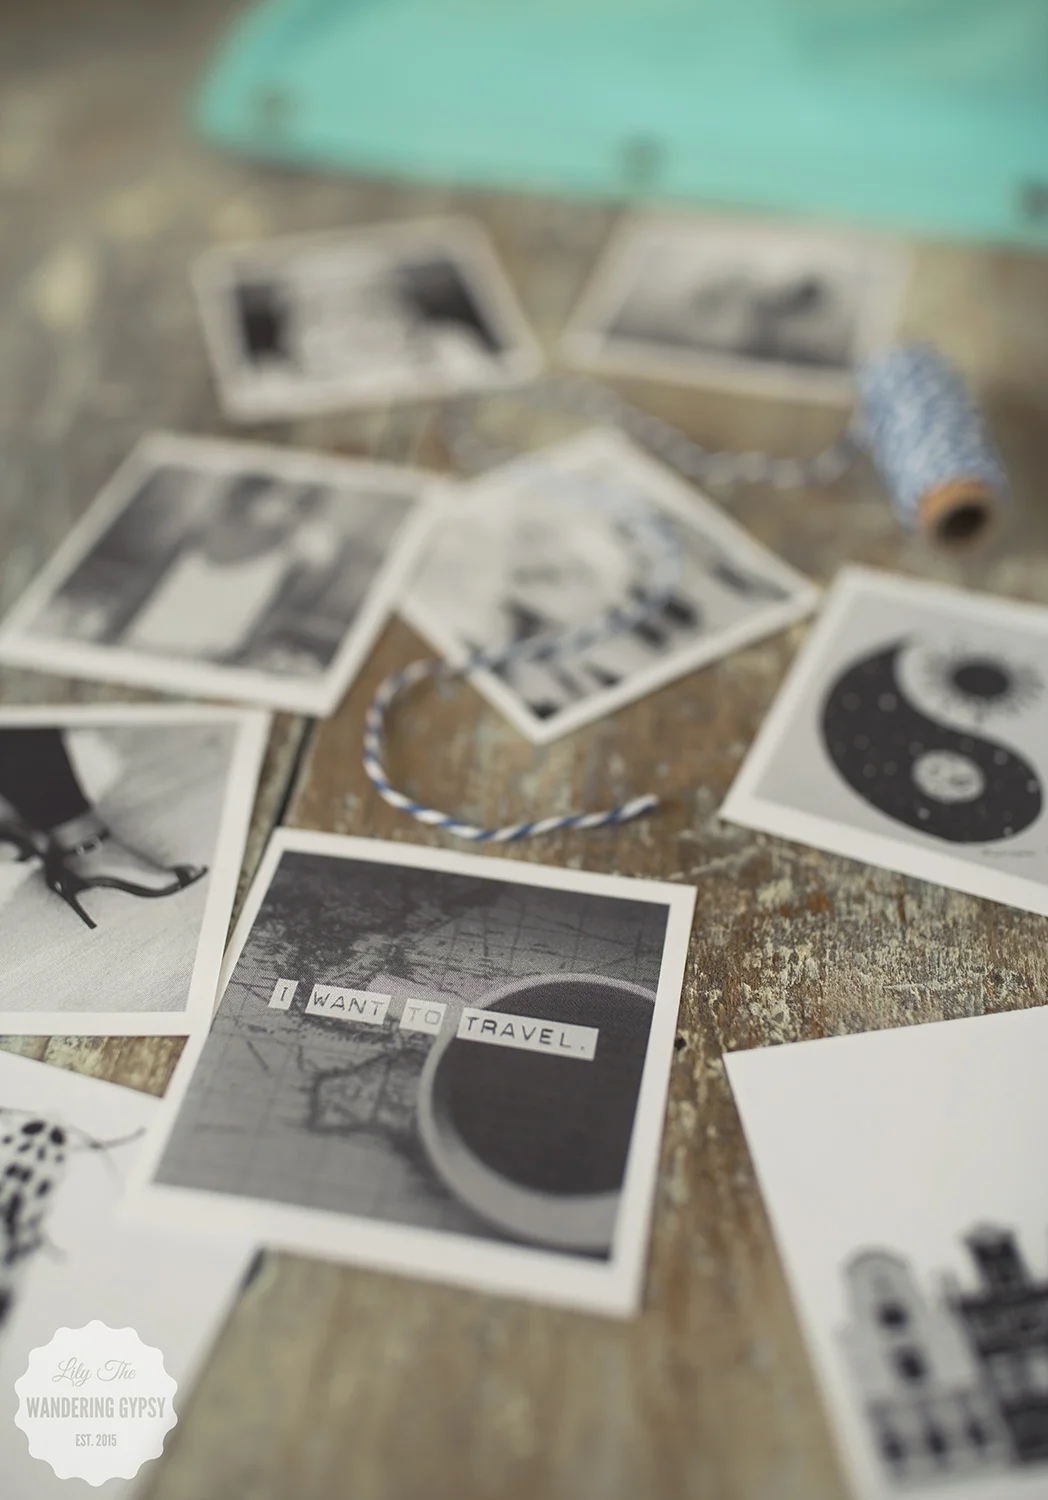
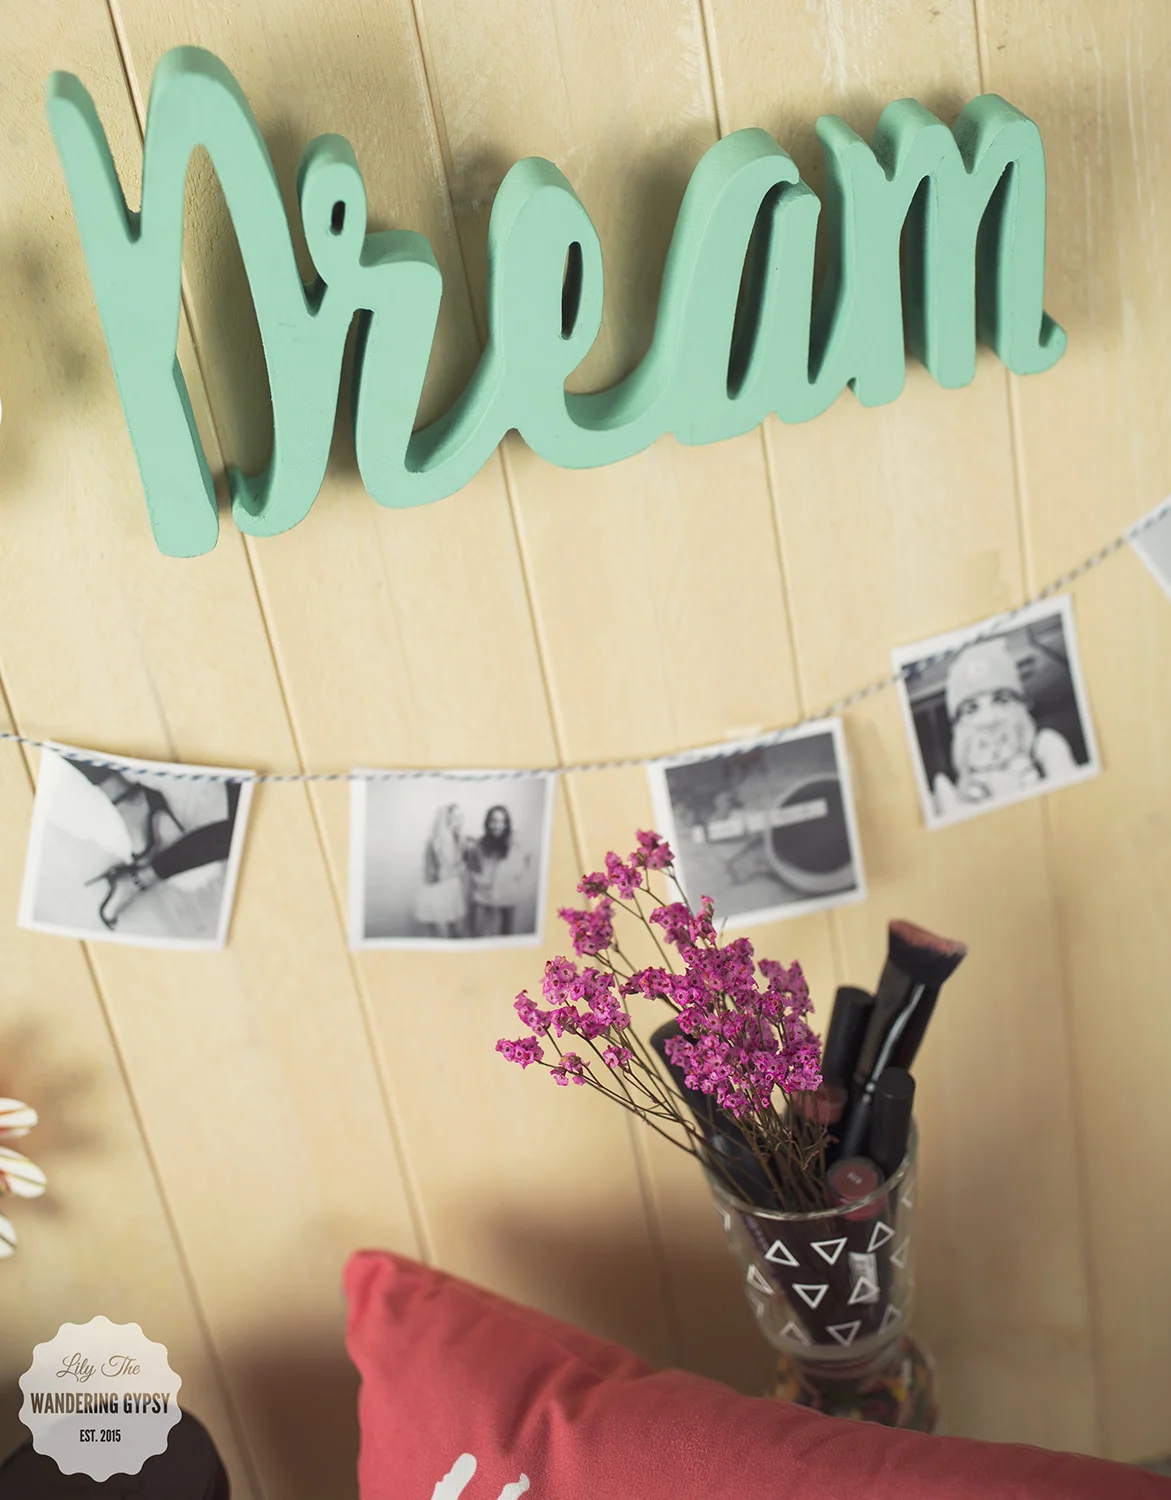
Rather than staring at a blank wall while you type away at your term papers, decorate the wall behind your computer with something cute and meaningful! All you need is some black and white photos. You can use your own photos and print them in black and white), or you can grab some from Tumblr, like I did! I used a bit of colorful twine and clear tape, to adhere the decor to the wall.
TO DIY YOUR SPACE:
1.) Cut a length of twine and drape it in a wide U-shape across the wall, behind your computer.
2.) Tape up the twine on both ends. Now, tape each photo to your wall with clear tape, then tape the twine down onto it, making it appear as if the photos are strung from the twine.
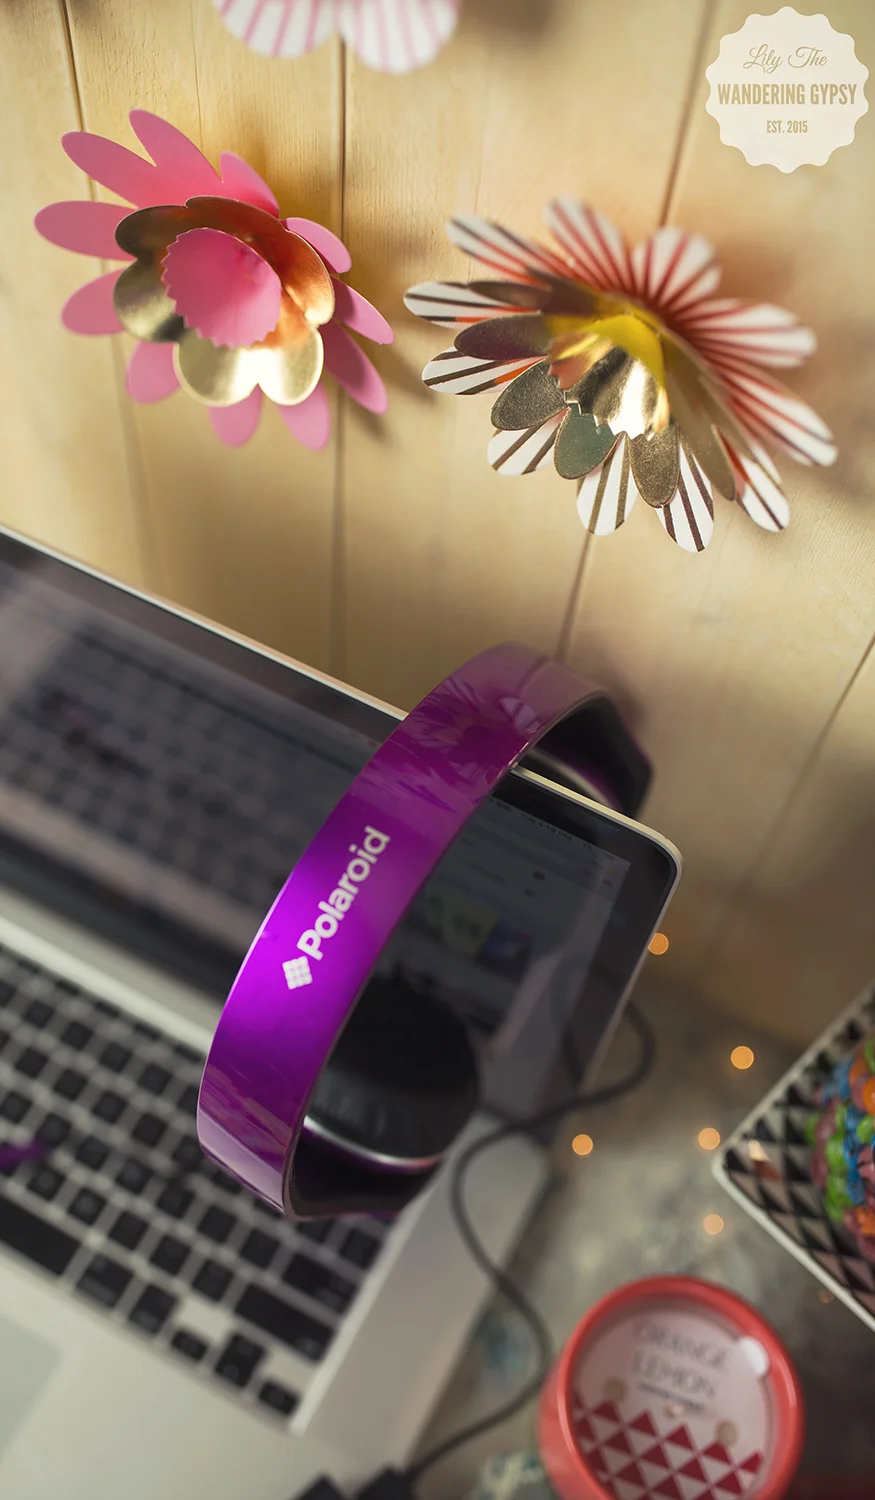
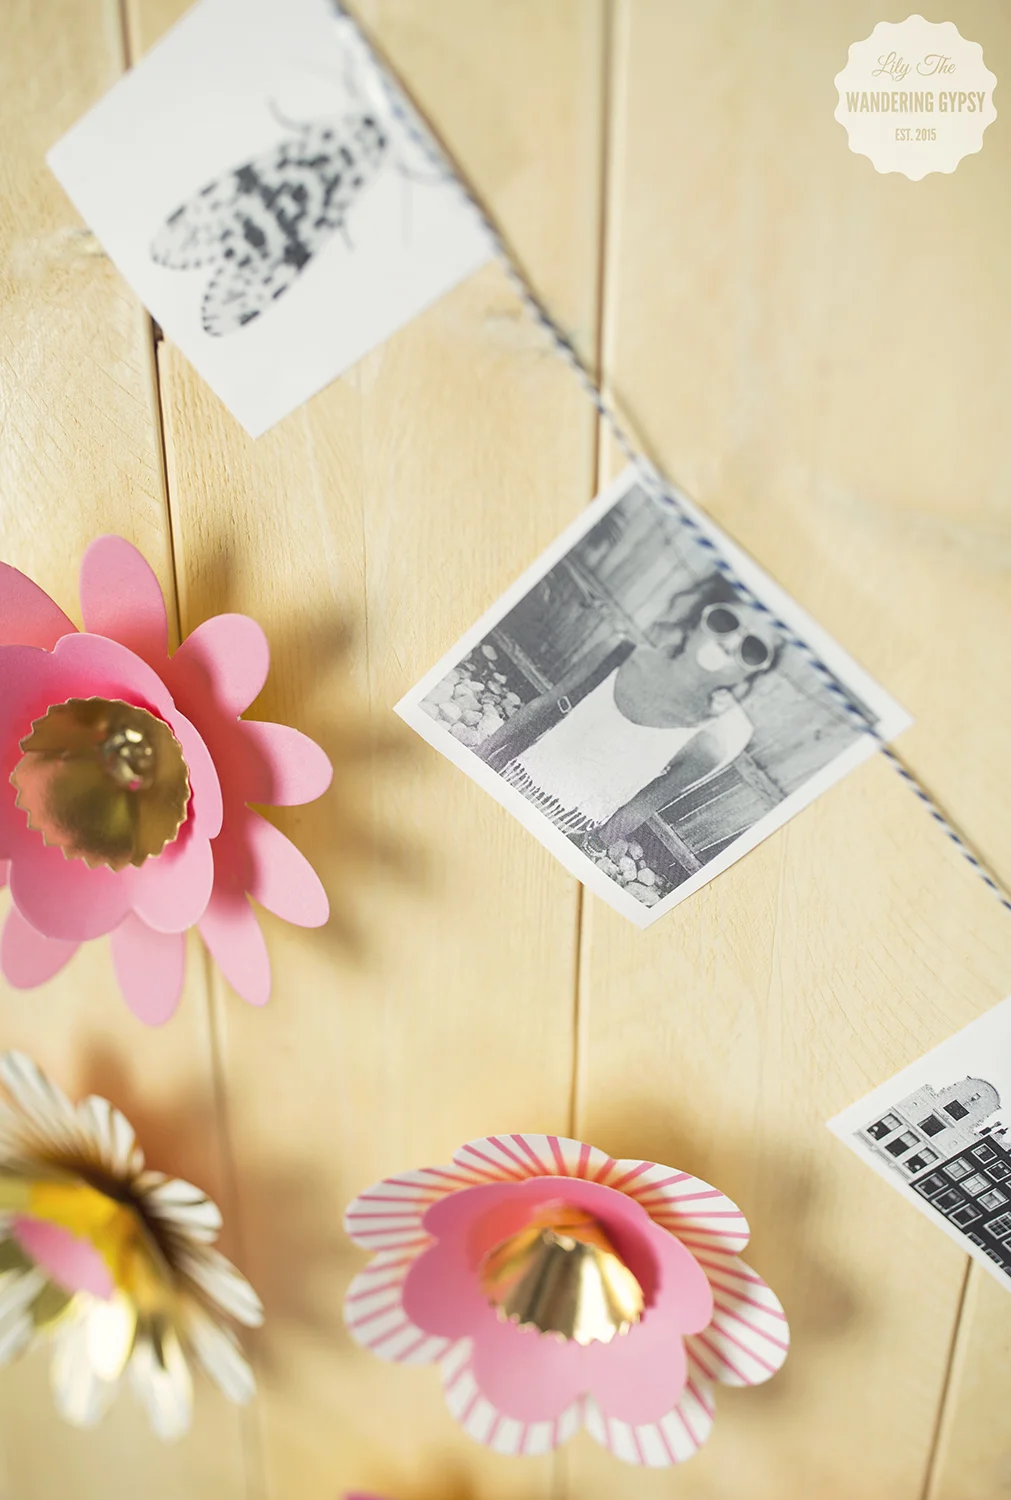
3.) Add 3-D paper flowers (which I found at a craft store) - you can also make these from scrapbooking supplies that you find at Big Lots! That's it! A super simple DIY decor idea for your work space.


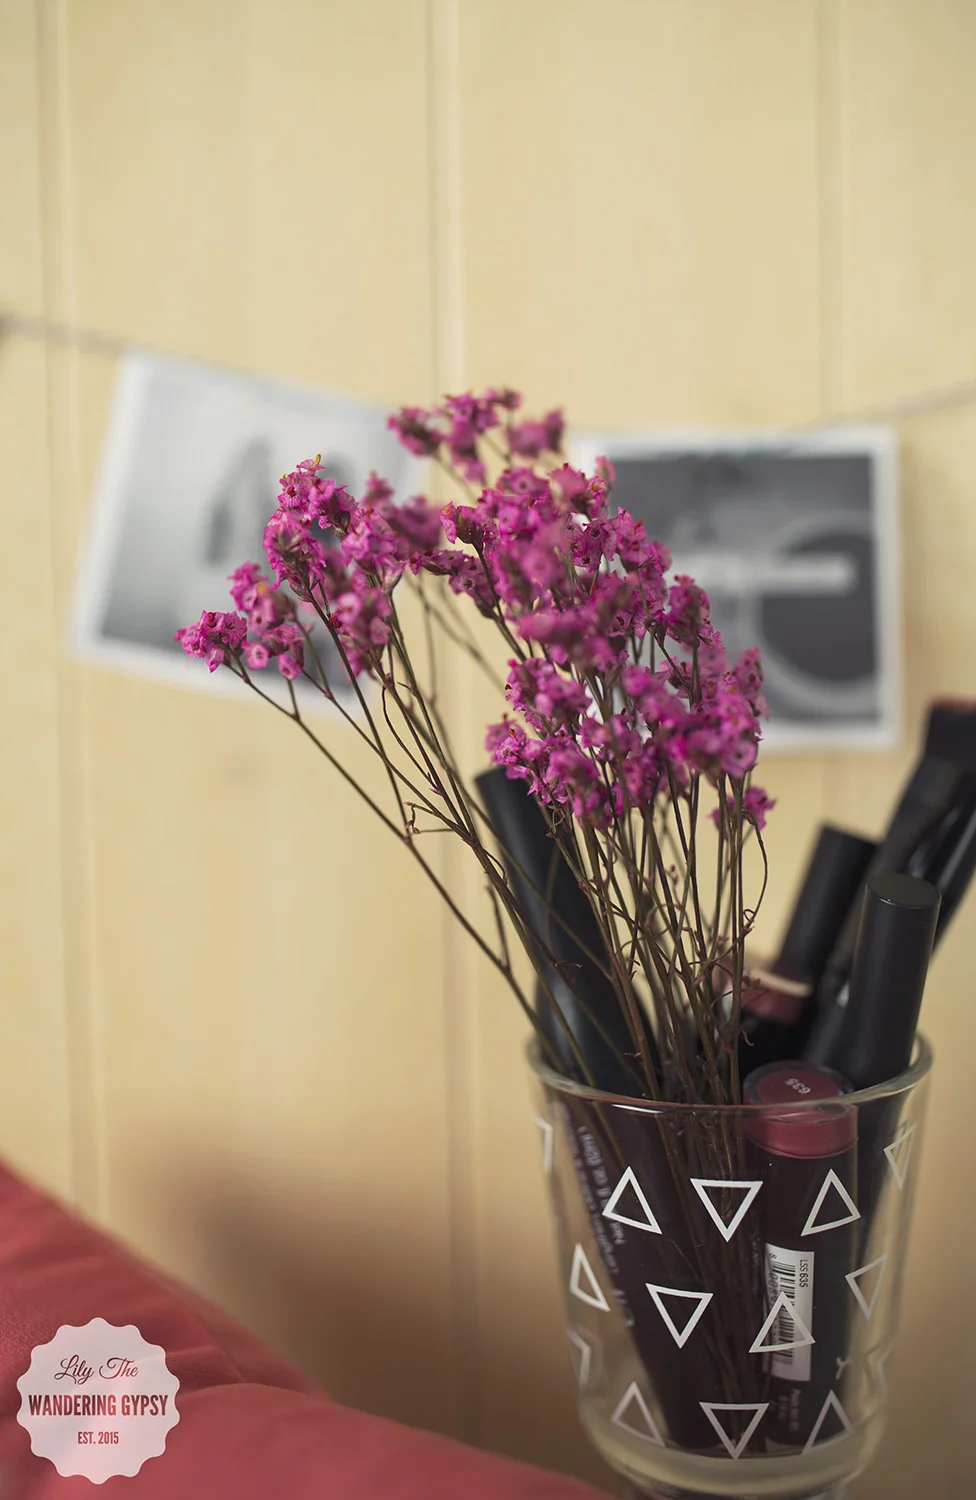
Also, creating varied heights on your work surface makes a more visually-pleasing look. You can use a candle holder, or a stack of books to create height, and then add a picture frame, vase full of flowers, or jars full of colorful candy to add inspiration. I also really love the idea of using a small candle holder or glass to hold makeup and makeup brushes. Keep the daily essentials at close reach! A mirror would also be a great addition to this design.
And, a scented candle will definitely help keep your space smelling fresh, and could even help you concentrate! Choose a more relaxing scent for studying at night, and a more lively, fresh scented one like this Orange Lemon one, below.

How will you decorate your new space this Fall? Thanks so much for stopping by!!

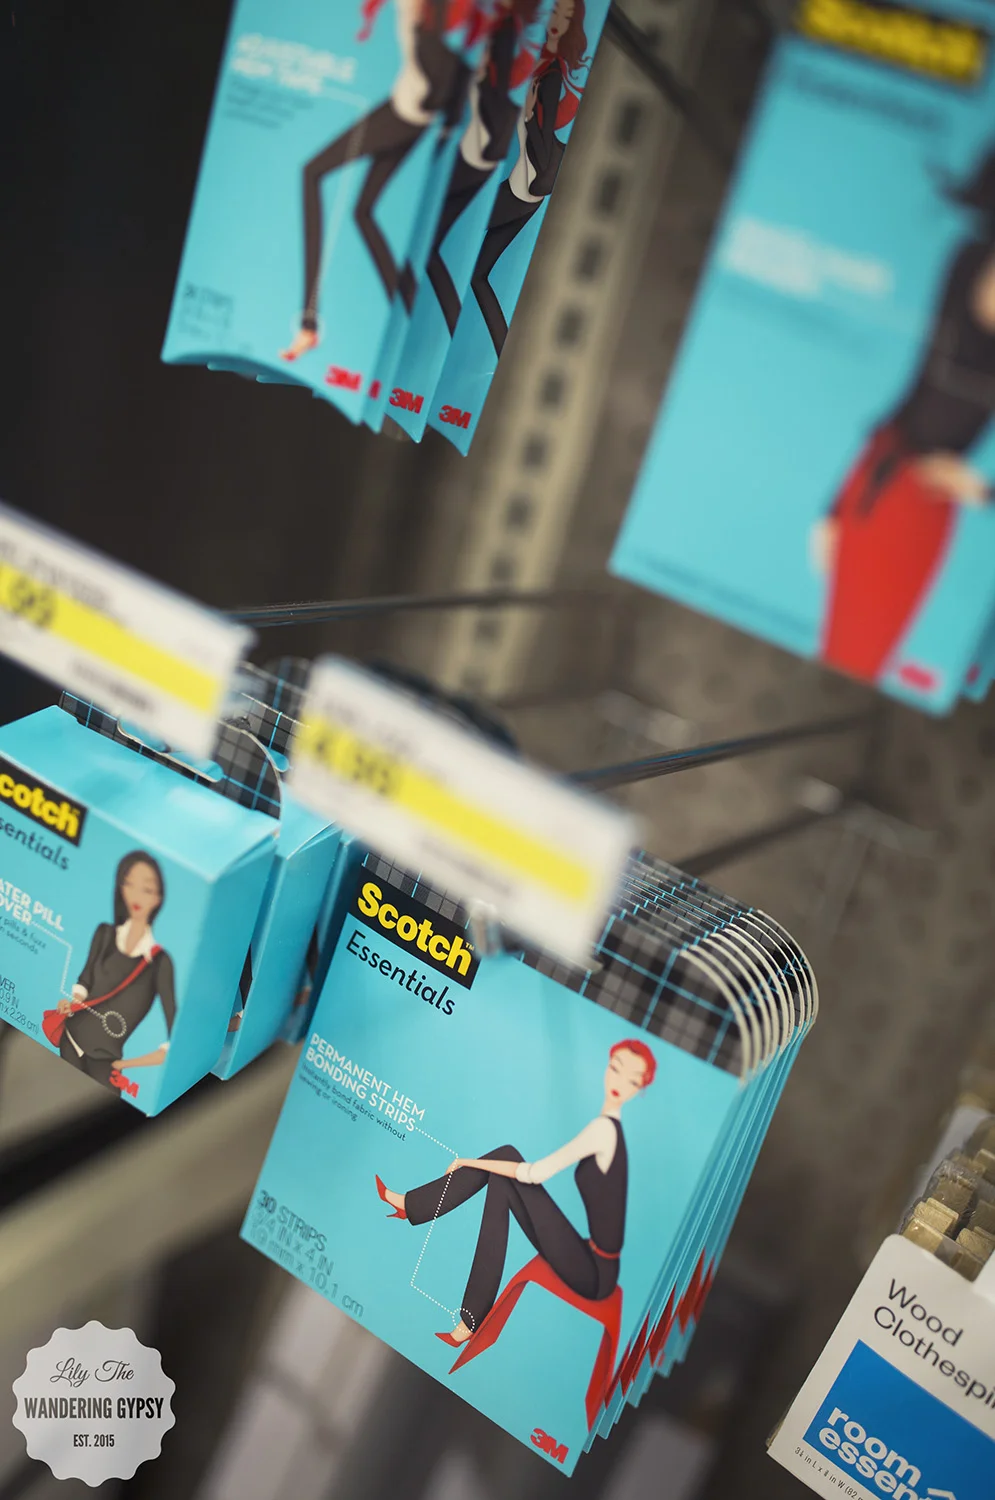
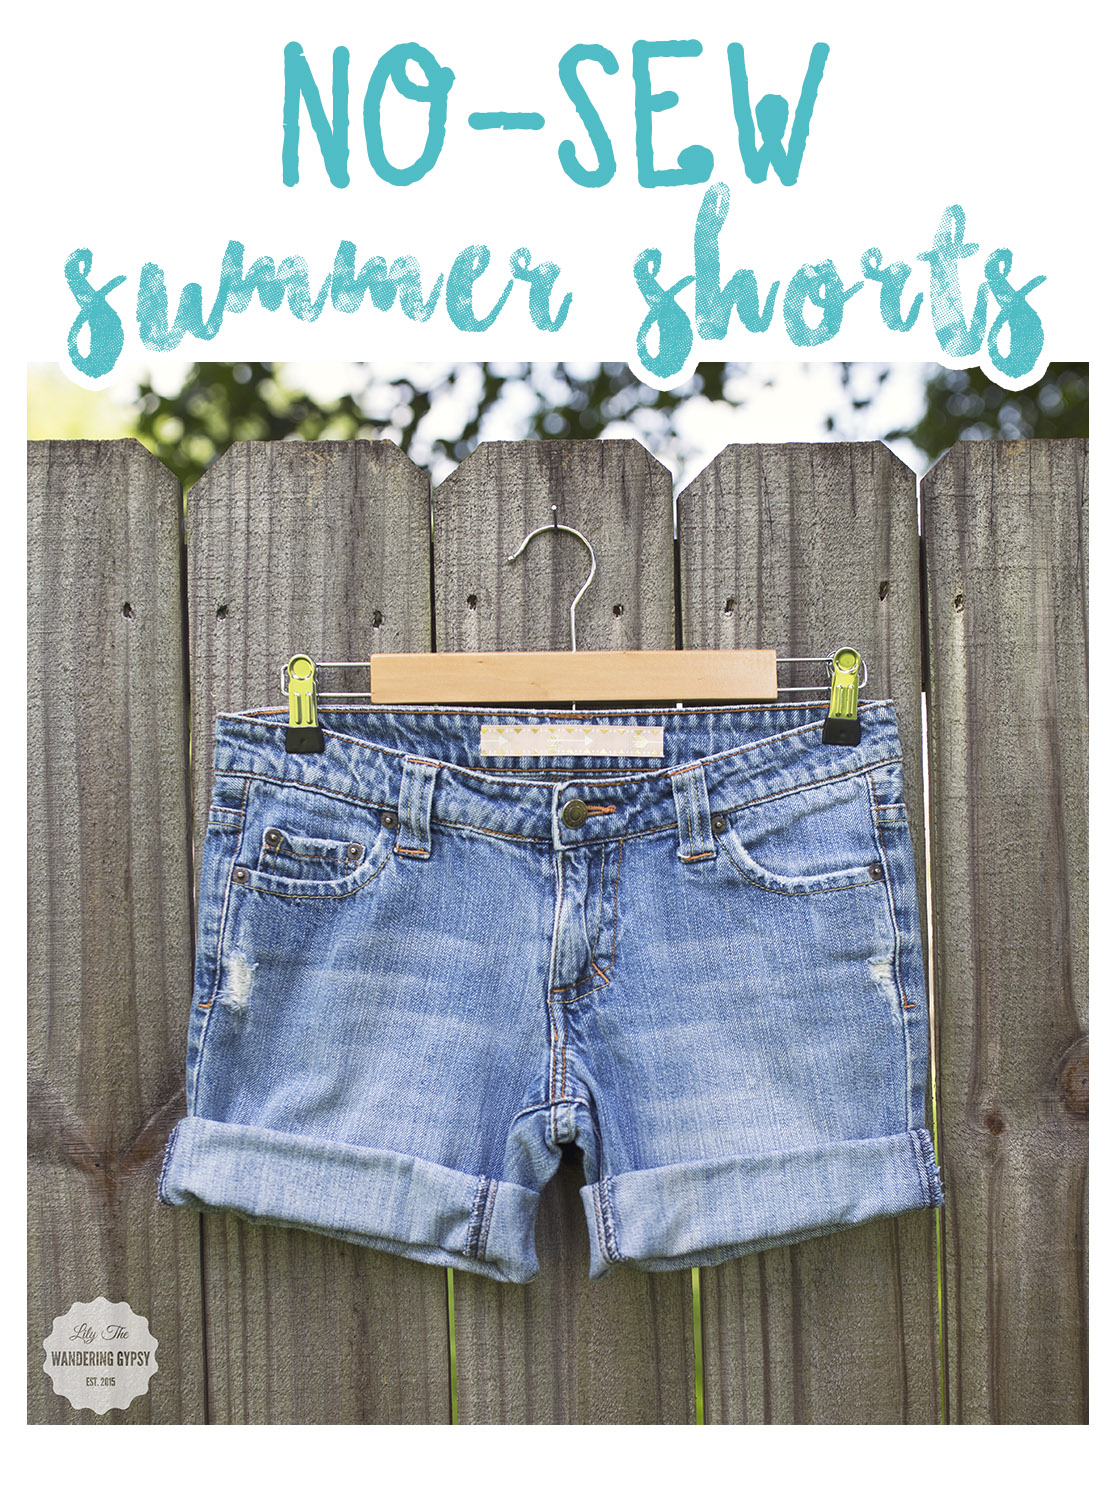
Easy No-Sew Summer Wardrobe Solutions with Scotch™ Essentials At Target
Looking for a fun way to update your summer wardrobe? Here are a couple ideas to get you started! This shop has been compensated by Collective Bias, Inc. and its advertiser. All opinions are mine alone. #WardrobeSolutions #CollectiveBias
I just love altering and upcycling clothing items! Especially to update my summer wardrobe. We all may have that pair of pants that is way too long, or fits well in one place, but not another. I also know many people enjoy super quick and simple DIY projects that take less than ten minutes, too. If you are someone who doesn't want to be bothered by sewing in order to refashion your wardrobe, here is an amazing, new solution that I am so glad I found! Seriously, NO SEWING, it's great. And, I would definitely recommend packing these products for your next vacation or night out, just in case you have a wardrobe malfunction and need to fix something on the spot.
Here are two Summer DIY wardrobe solutions, making updating your summer wardrobe so much easier!


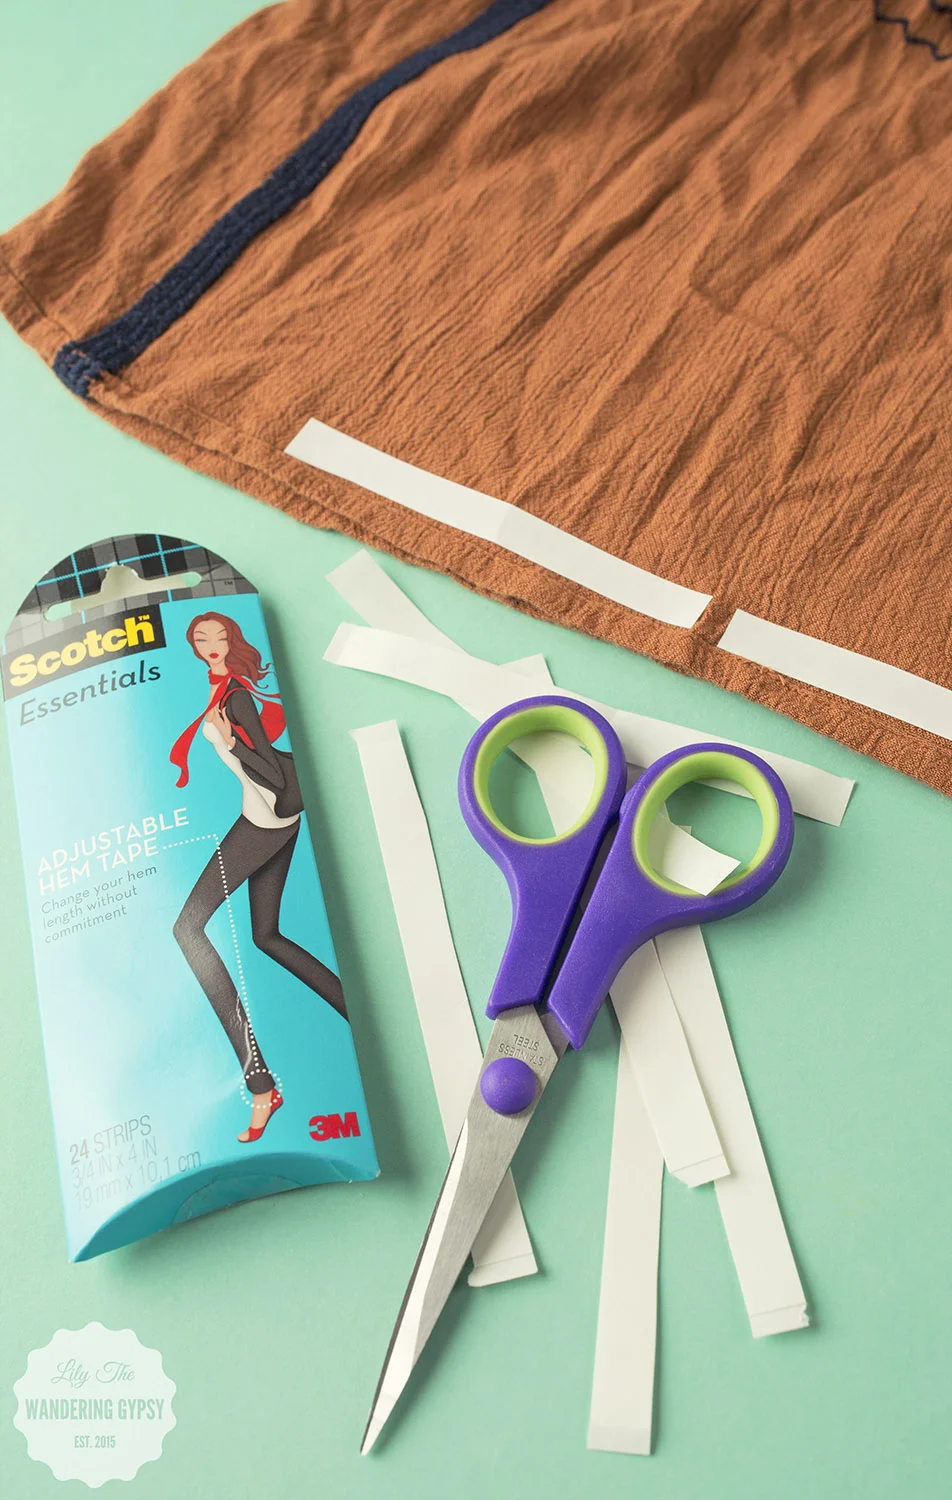
Scotch™ Essentials Adjustable Hem Tape (Used on shirt)
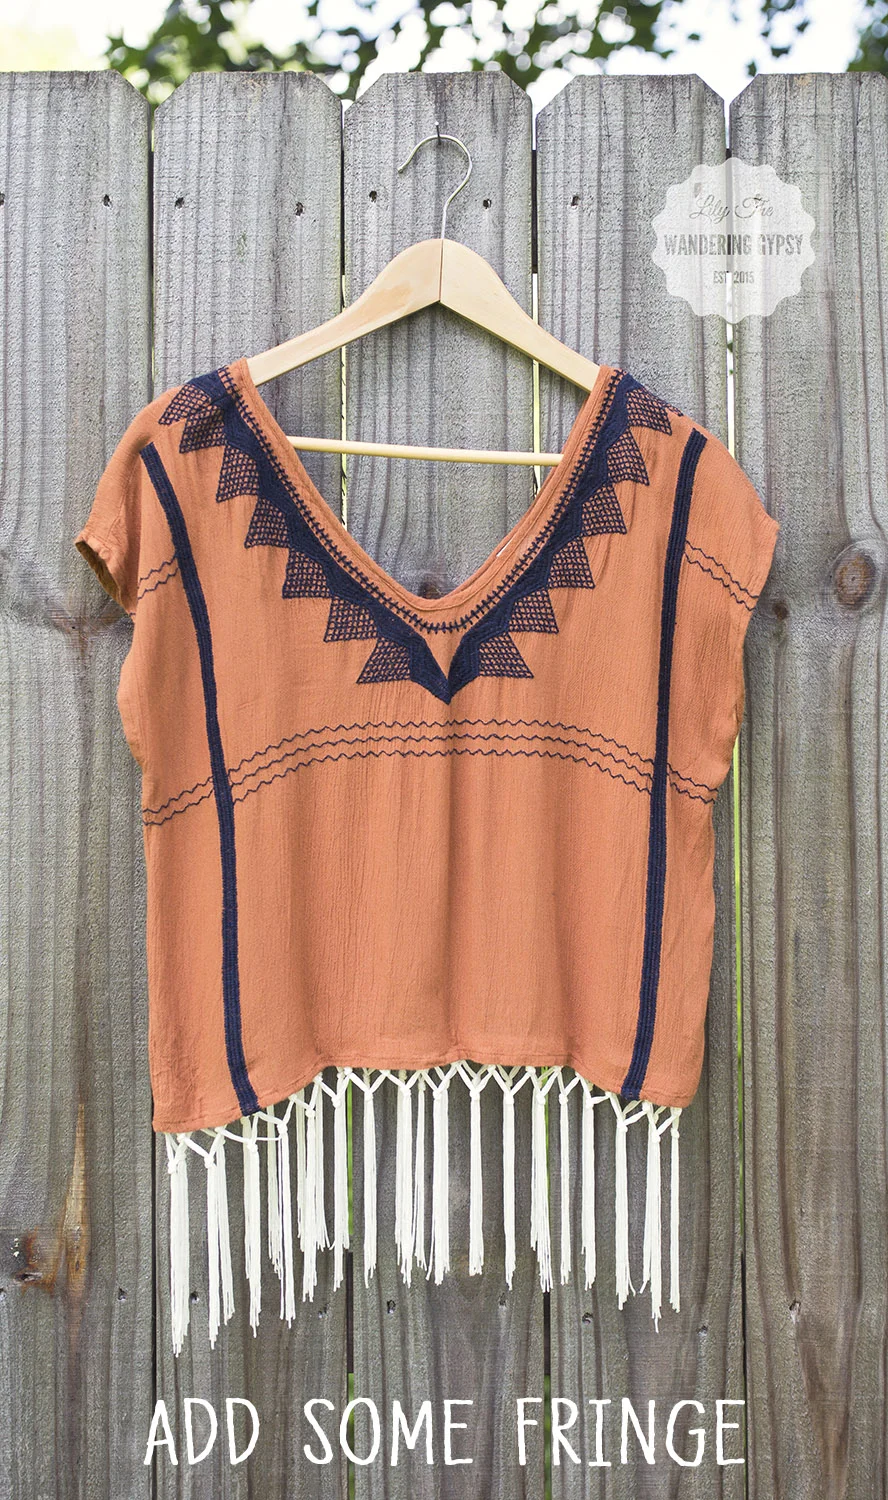
I loved this hem tape. I have only used the iron-on kind in the past, and it is a pain to use. But, these adjustable hem tape strips are just perfect for a projects like adding fringe to a top, because you may want to remove the fringe once you wear the shirt, or even remove the fringe before washing. Who knows, you may love the fringe one day, and want to remove it the next.
More traditionally, this adjustable hem tape can also be used to shorten a hem length on a pair of pants depending on your shoe height (heels vs. flats), or if you have a child that is growing an inch a day, well here is a way to really extend the life of those pants!
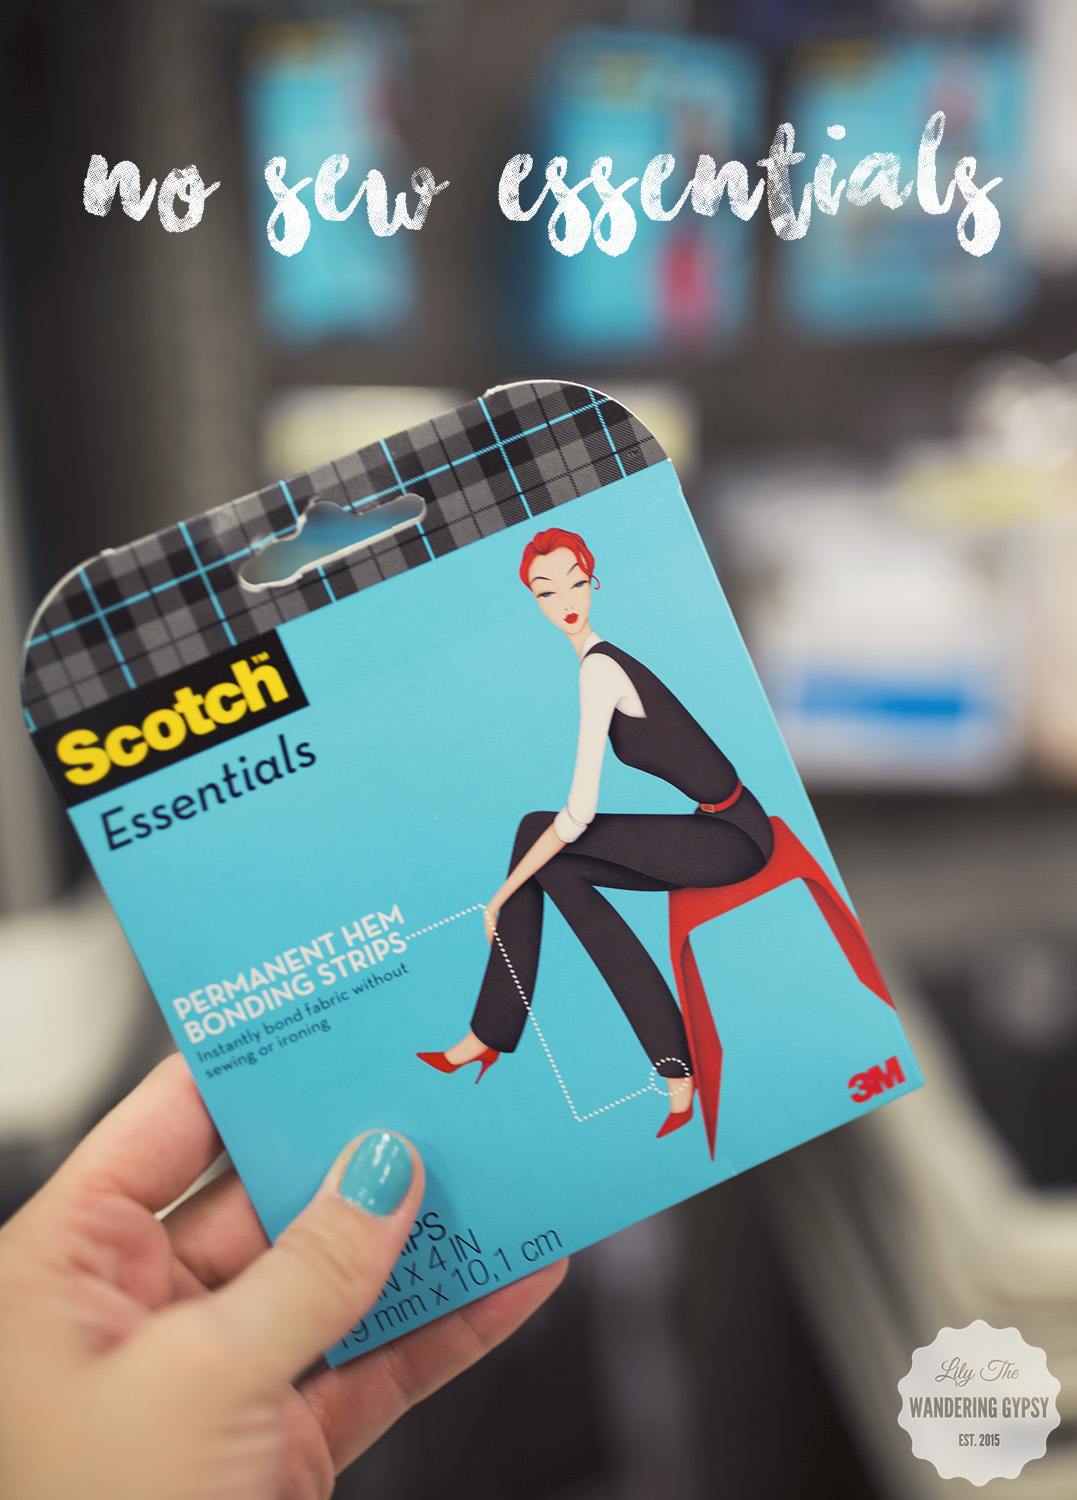
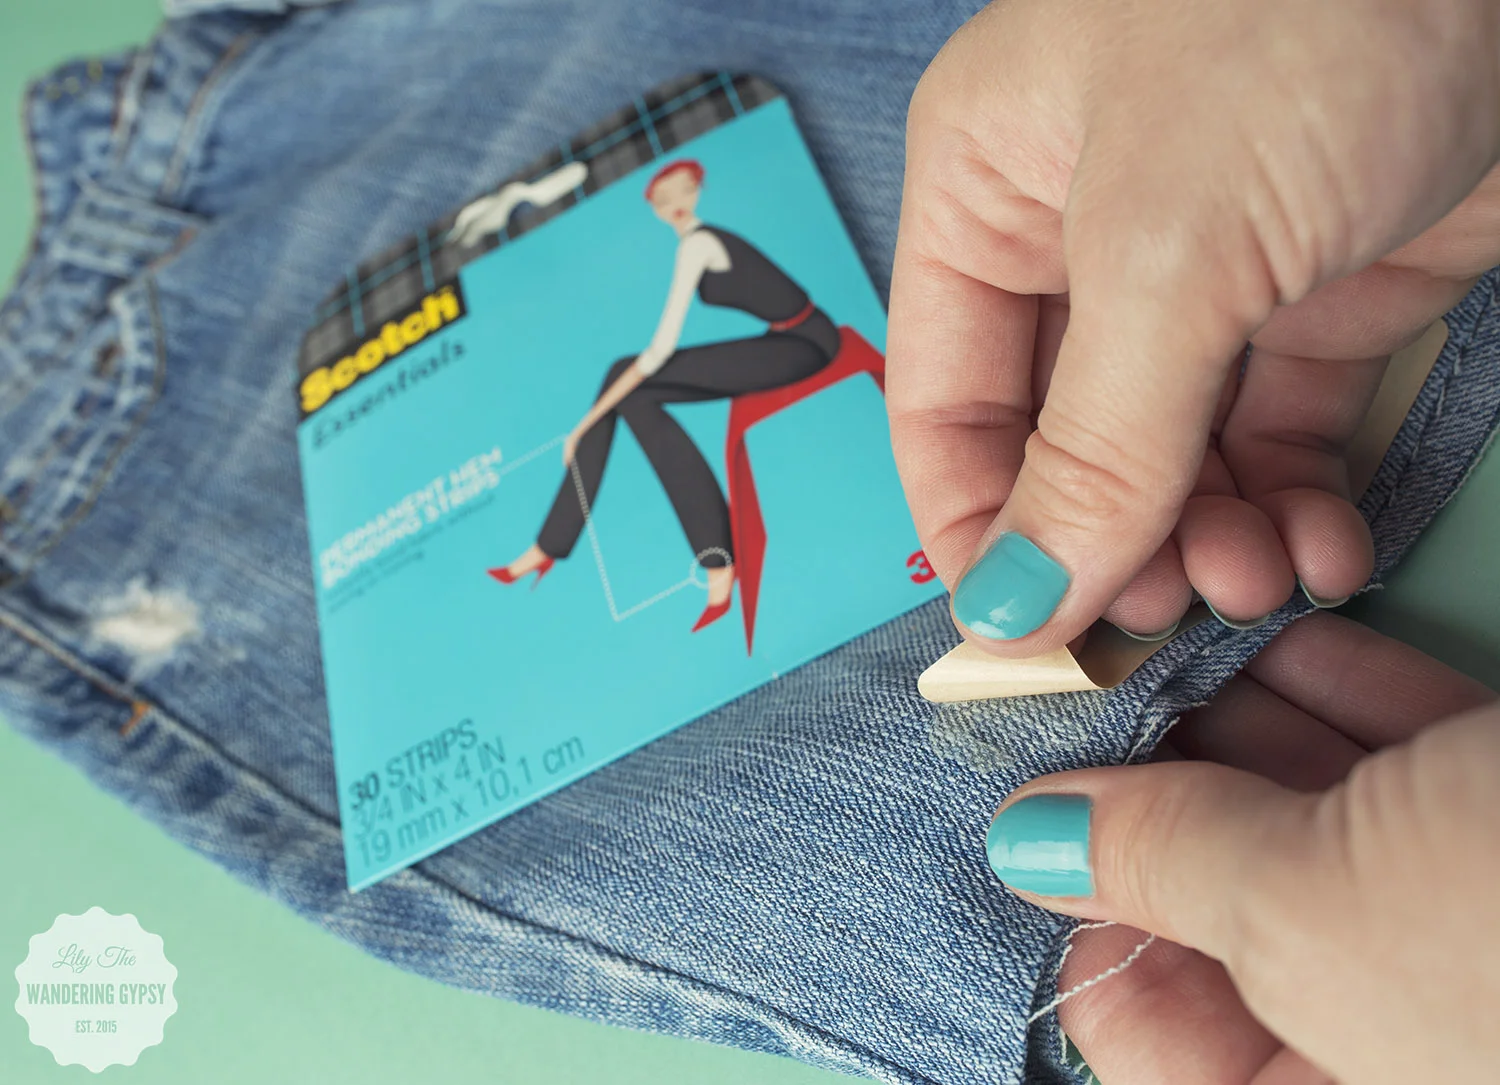
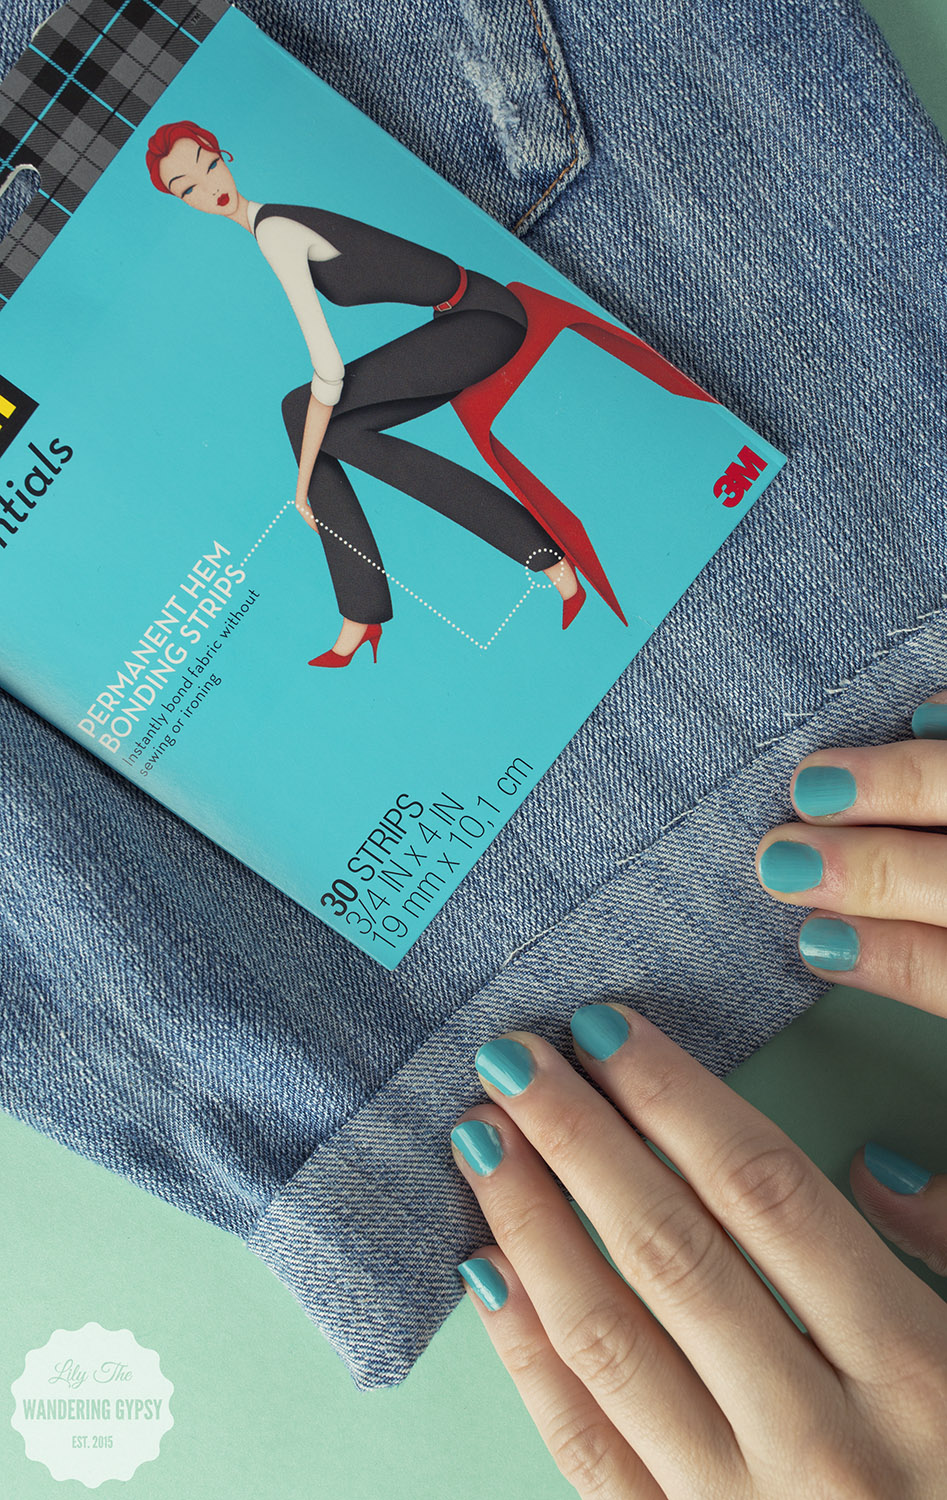
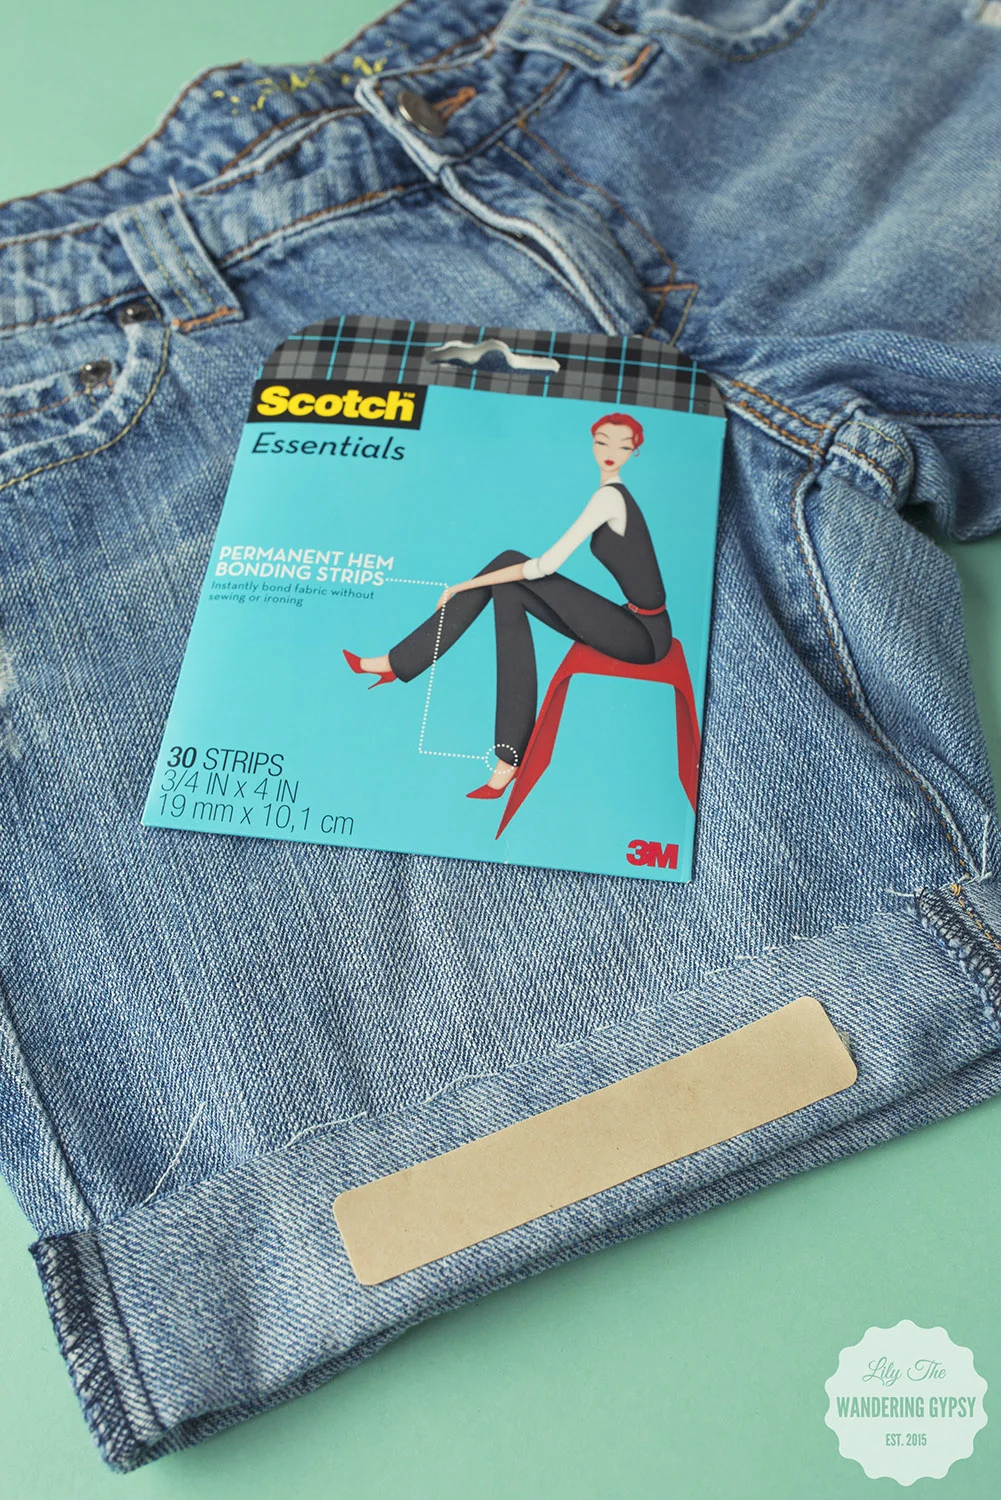
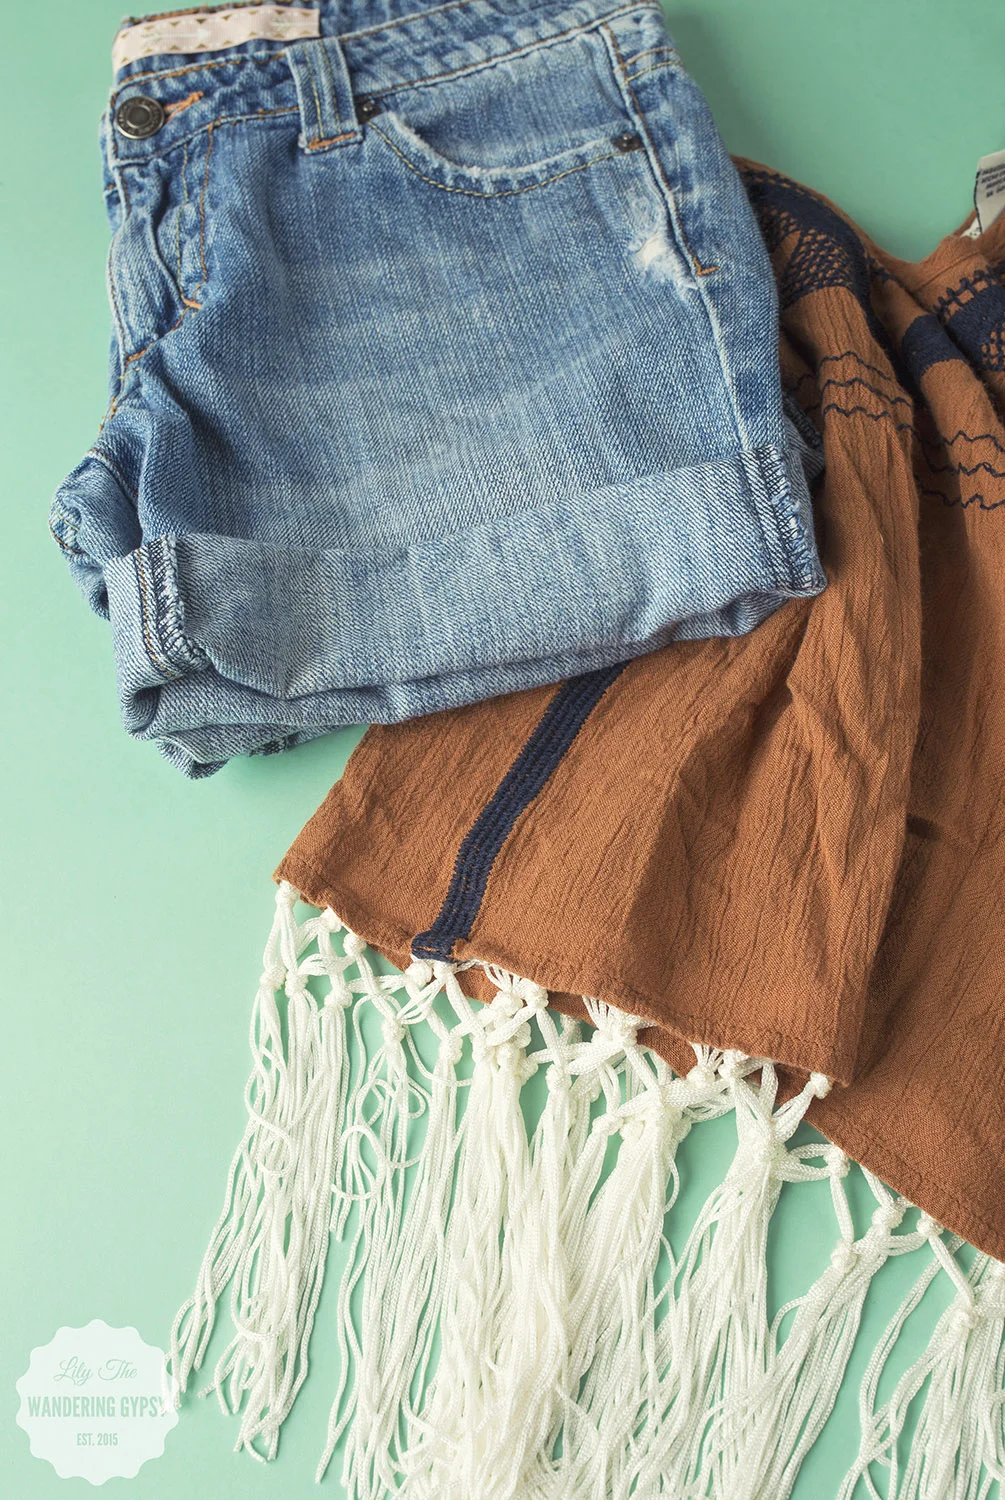
Scotch™ Essentials Permanent Hem Bonding Strips (used on shorts)
My overall impression of these permanent bonding strips is really great. I wish so badly that I had known about these, because they are SO incredibly strong and would bond just about any fabric to another fabric. Caution - they are insanely sticky, so be careful what is on your work space, so nothing sticks to it that shouldn't. I was extremely happy with how well this material bonded denim to itself, like in this rolled cuff shorts DIY. You could even create a little pocket, or applique fabric onto a shirt with these bonding strips.
I really liked the ribbon detail on the back of the jean shorts, which allowed me to cover up the old label, and customize the shorts to have something much cuter.
More traditionally, this material would be used on shortening curtains, so you don;t have to pull the sewing machine out, or make sure that you have the correct needles and materials if you do want to sew. Seriously, these strips are SO sticky, I can see this bond lasting for a very long time. Also, it is recommended that you use these permanent bonding strips with fabrics like denim, canvas, cotton, etc - as long as the fabric is not extremely lightweight (just because you could possibly see where the bonding strips are hiding). I just love these strips! I am so impressed.
Scotch™ Essentials Wardrobe Tape Strips
Last but not least, these wardrobe tape strips are skin-safe, so if you have a dress or top that has a neckline that always shows a bit too much, you can simply adhere a bit of this tape to the inside of a neckline (or problem area), and your garments will stay exactly where they need to be!
I headed to Target in order to find some of the items I needed for this project. I found all of the Scotch™ Essentials in the sewing section by the irons and hampers. I love that aisle :)

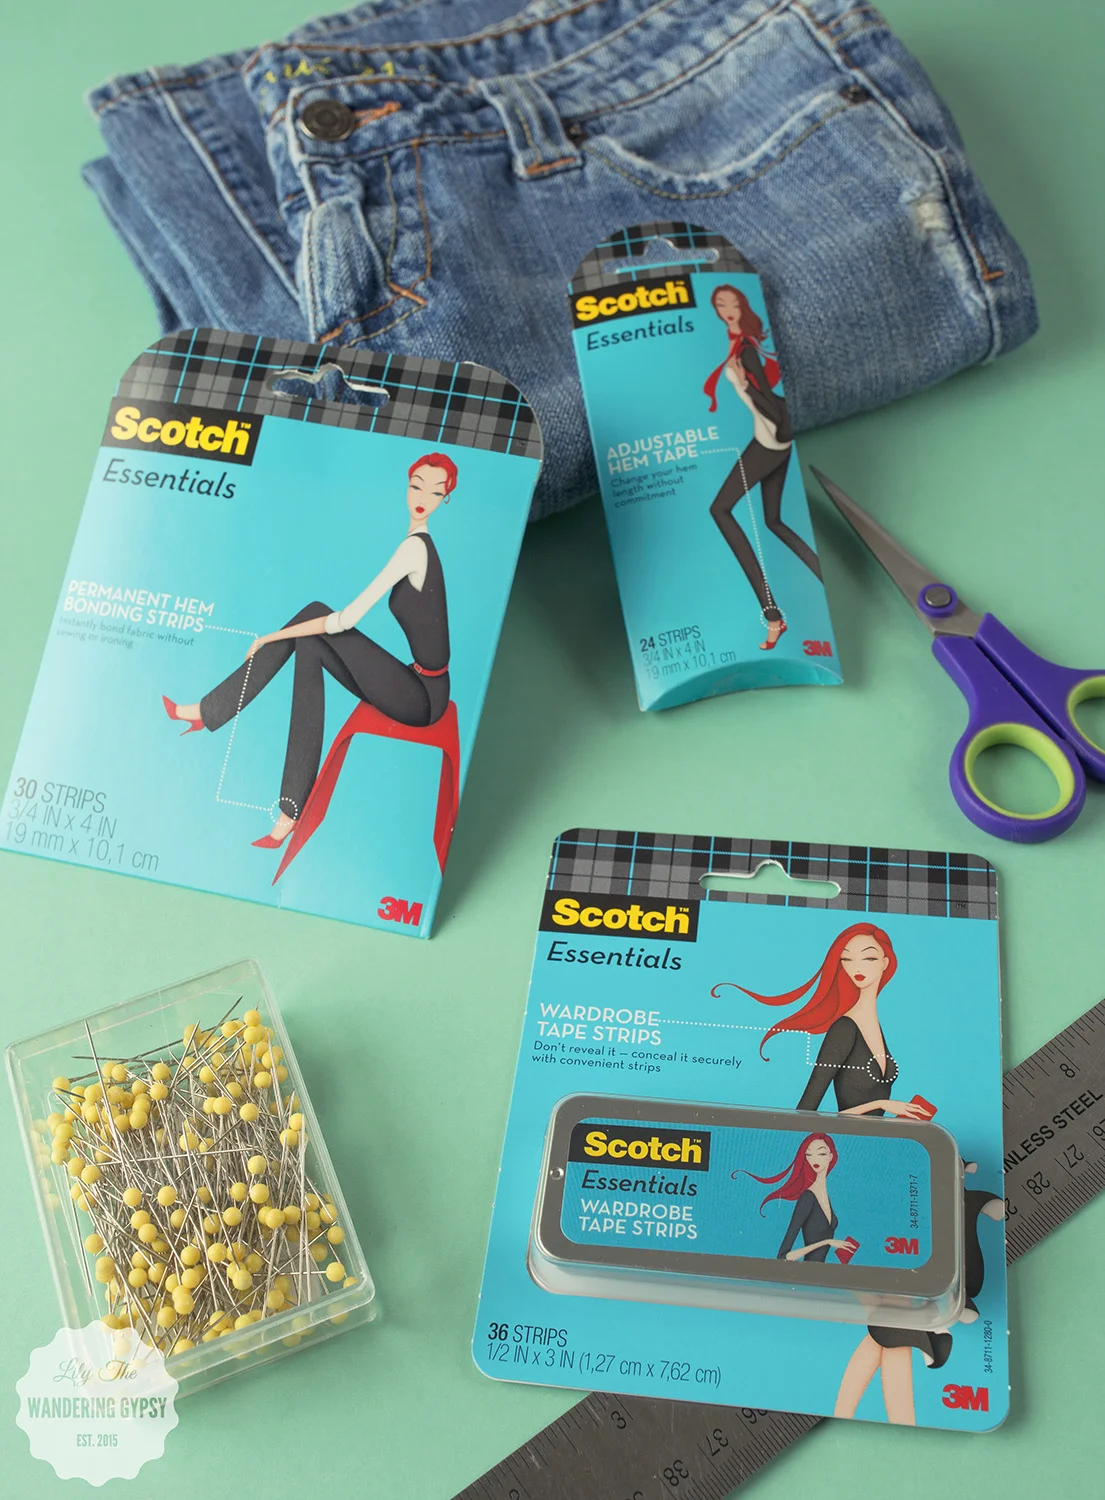
You only need a few materials for this fun summer no-sew DIY!
- Jeans to cut into shorts
- Sewing pins (or you can mark with a marker)
- Scissors that will cut through jeans
- Ruler
- Scotch™ Essentials Permanent Hem Bonding Strips (Used On Shorts)
- Scotch™ Essentials Adjustable Hem Tape (Used For Fringe On Shirt)
- Scotch™ Essentials Wardrobe Tape (Just In Case Of Wardrobe Malfunctions)
Get tons of inspirations, and shop all of the Back-To-College items here
LOOKING FOR MORE?
SAVE $1.00 on any Scotch™ Essentials product here (Expires 9/2/16)
Visit The Scotch™ Essentials Social Hub here
Scotch Wardrobe Tips Page here.
Find Scotch Essentials On Social:
Scotch Facebook
Scotch Twitter @ScotchProducts
Scotch Pinterest
Scotch Instagram
LOOKING FOR MORE?
SAVE $1.00 on any Scotch™ Essentials product here (Expires 9/2/16)
Visit The Scotch™ Essentials Social Hub here
Scotch Wardrobe Tips Page here.
Find Scotch Essentials On Social:
Scotch Facebook
Scotch Twitter @ScotchProducts
Scotch Pinterest
Scotch Instagram


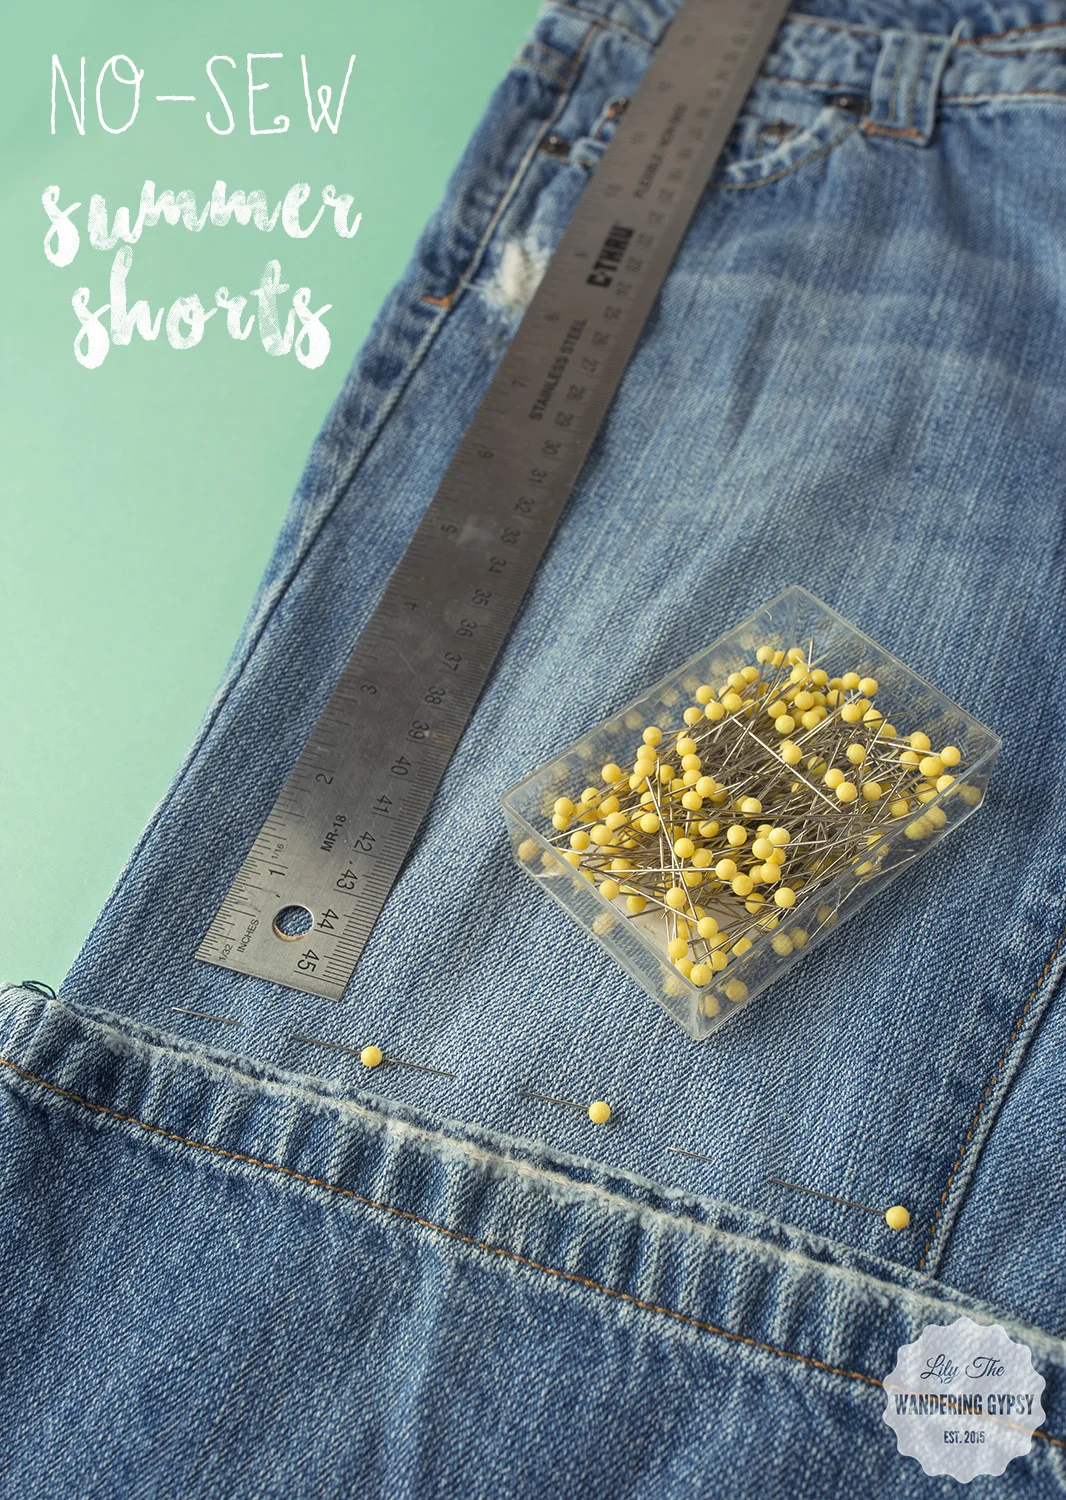
FOR THE SHORTS
1.) Lay jeans onto table, and measure 16-17" down from the waist. This will tell you where to mark the fabric to cut. I actually folded up the pant leg to get a straighter line to cut across.
Keep reading to learn how to upcycle some of your clothing and make sure you look super cute this summer!
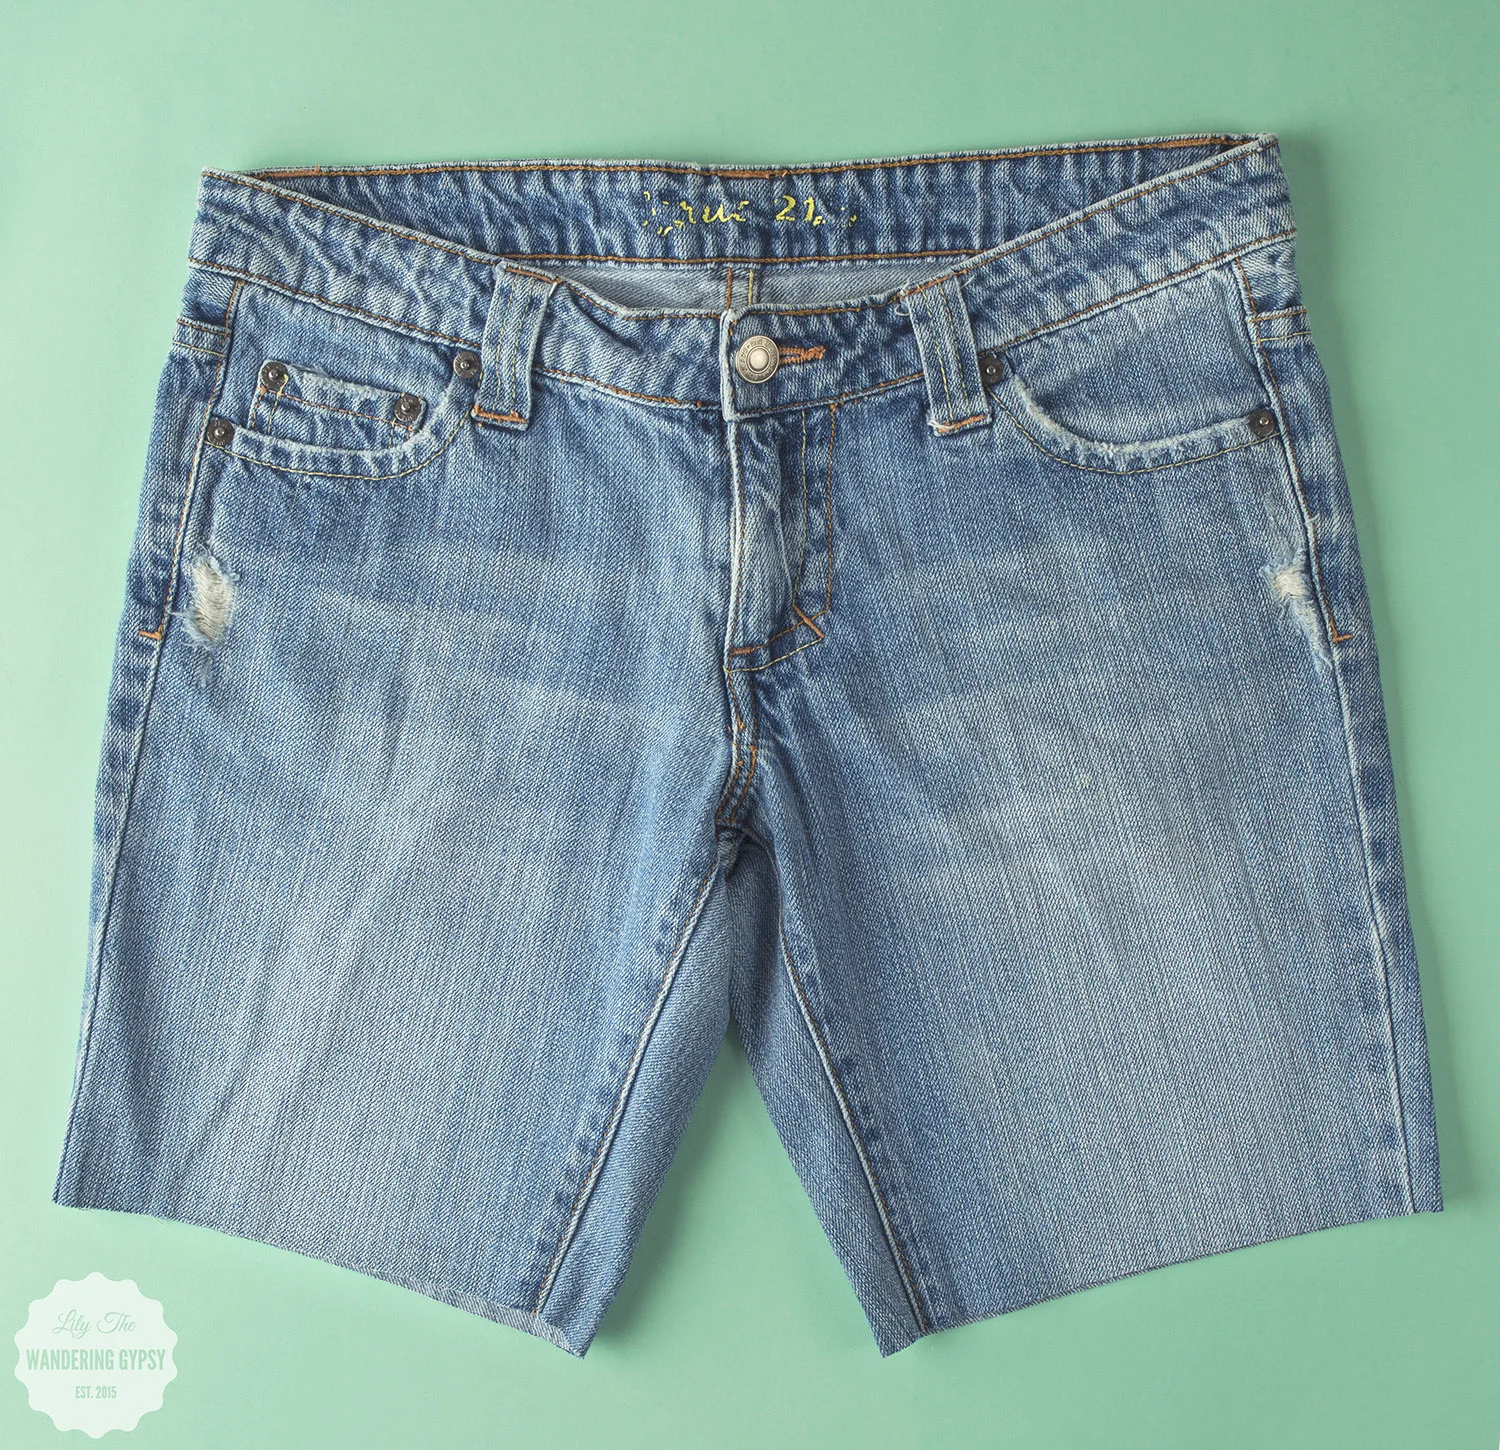
2.) Cut the first leg off where you marked your measurements, and then fold the jeans in half, and cut the other leg. I actually like how they look already!
3.) Remove permanent bonding strips from package. and peel 1 paper sticker off of the backing. Careful - it's SUPER sticky! Press the sticky side onto the shorts (1 in front, and 1 in back), just near the hem line you cut.
Remove the paper backing off of the front of the jeans, and leave the paper on the one in back.
4.) Fold, or roll the hemline up about 2". Press to secure bonding strip. Now, remove the paper off the back of the jeans cuff, and again, press firmly to adhere.

ANOTHER QUICK DIY PROJECT: ADD FRINGE TO ANY SHIRT
And, one more way you can customize your clothes for a no-sew DIY project is to use the - Scotch™ Essentials Adjustable Hem Tape to add a bit of flair to any top or garment!
1.) Cut Scotch™ Essentials Adjustable Hem Tape strips in half lengthwise. Peel the sticker strips off of the backing, and apply the bonding strips to the entire bottom hem of the INSIDE of the shirt. The image, below, shows the strips cut in half lengthwise.
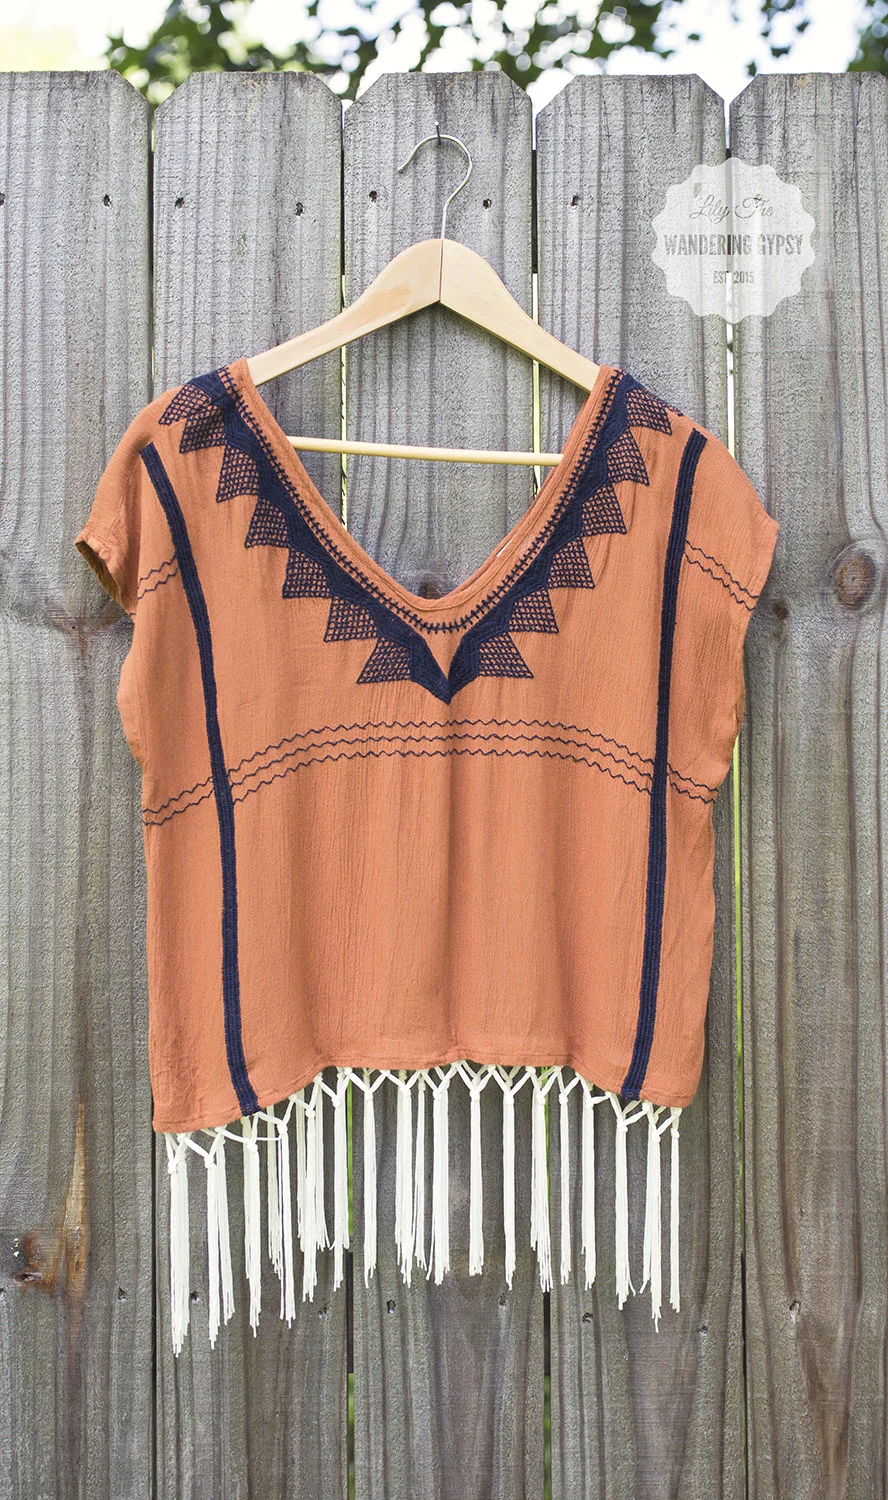
2.) Now, peel off the paper backing left on the strips, and begin to press the top of the fringe to the inside of the shirt.
3.) Make sure everything is secured and dance the night away in your new fringe top!!!


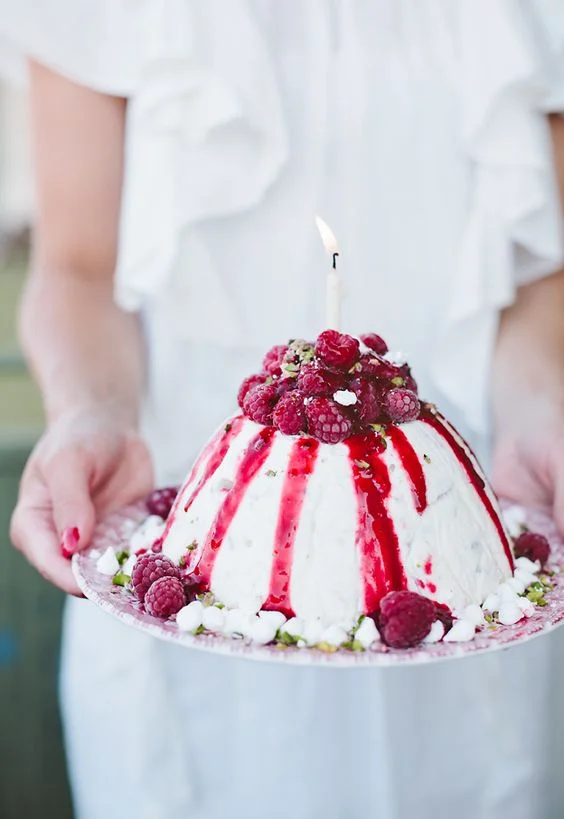
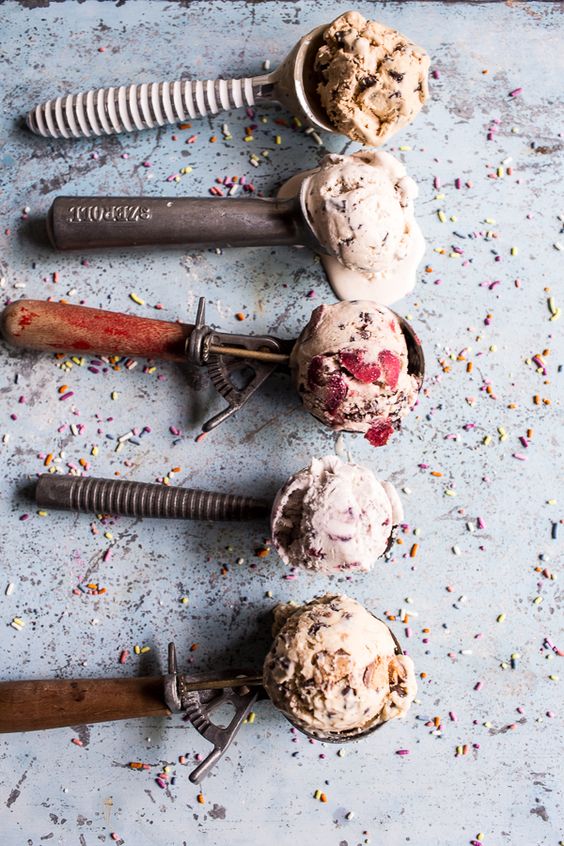
Happy National Ice Cream Day! Recipe Roundup + Food Photography Inspirations
While I didn't get a chance to create any ice cream recipes for you, I wanted to share some of the most mouth-watering ice cream I have ever seen! I am so inspired by the food styling, backgrounds, lighting, and overall layout of these recipe hero images. Which one will you be trying to make today? Happy #NationalIceCreamDay!!!
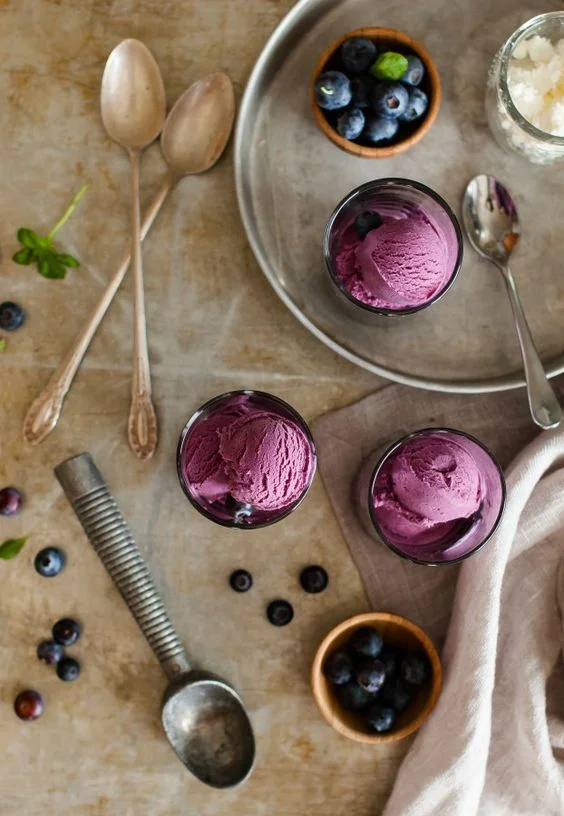
Roasted Blueberry Balsamic Goats Cheese Ice Cream - via The Kitchen McCabe
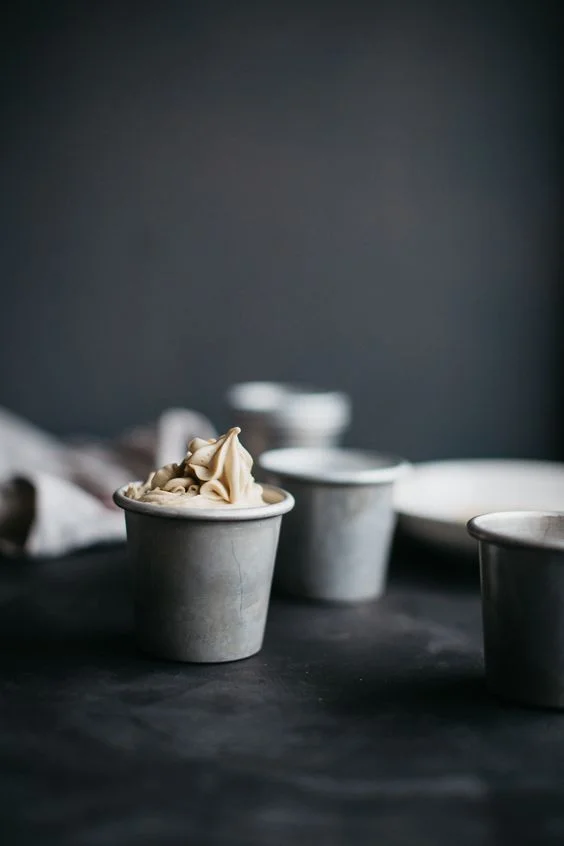
Cereal Milk Soft Serve Ice Cream Recipe - via Erin Made This
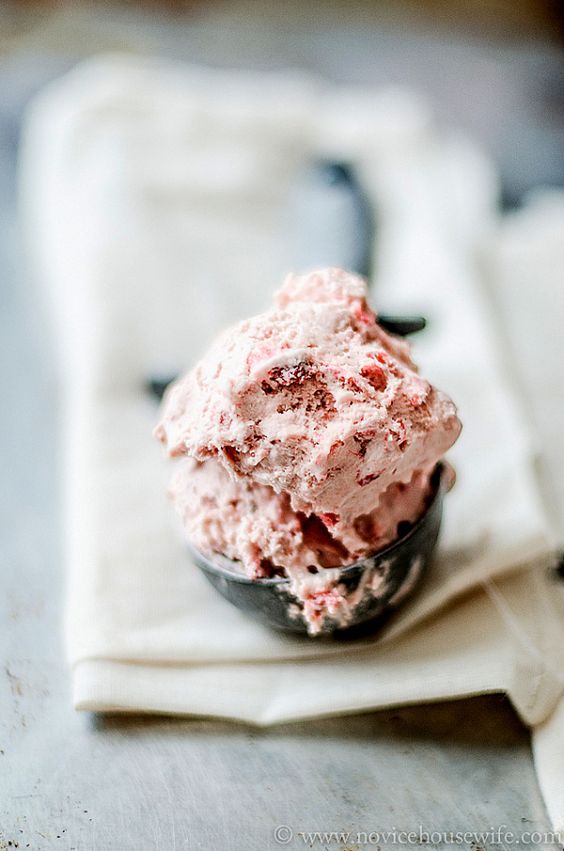
Roasted Strawberry Ice Cream - Via The Novice Housewife
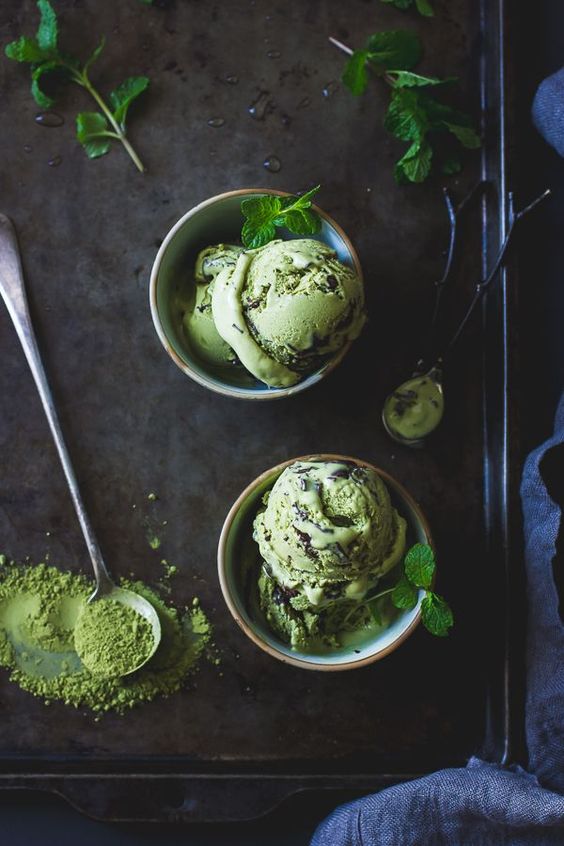
Matcha Mint Chip Ice Cream - via Bojon Gourmet
No-Churn Ice Cream (5 Ways) - via Half Baked Harvest
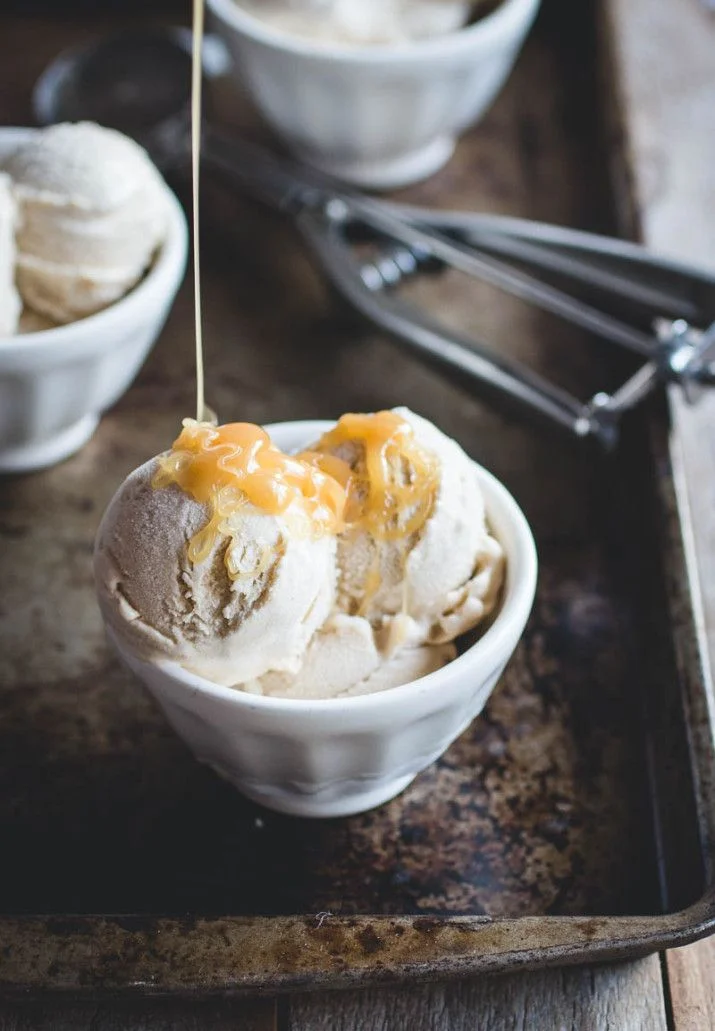
Tahini Ice Cream With Caramel Sauce - via Butterlust
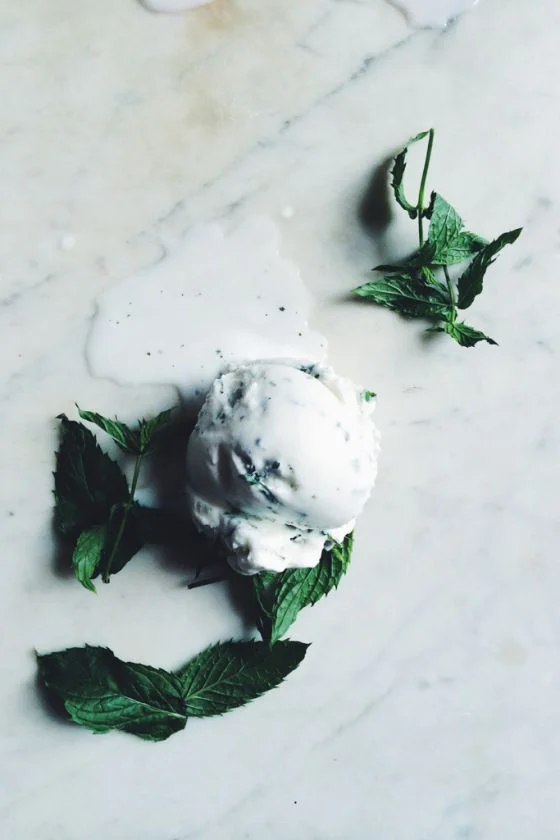
Backyard Mint Ice Cream - via For The Love Of The South
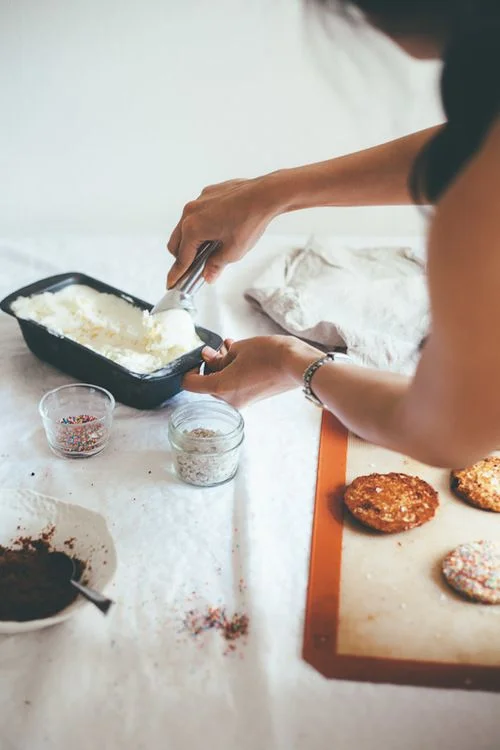
Bacon & Sweet Corn Ice Cream Sandwiches - via My Name Is Yeh

Blueberry Cheesecake Ice Cream - via Take A Megabyte

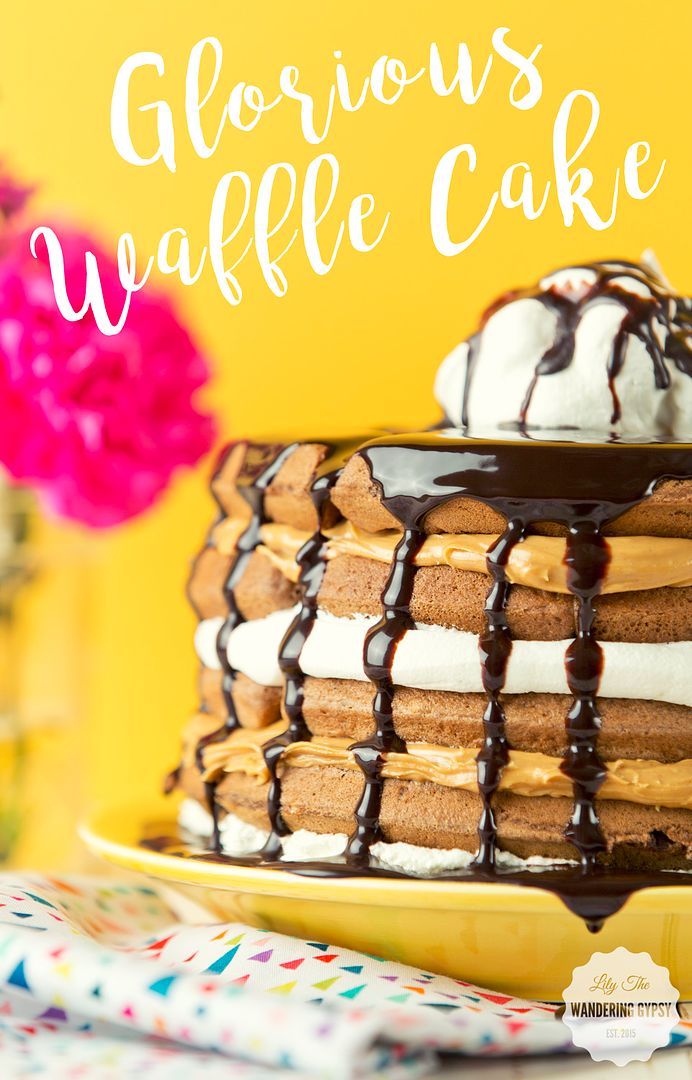
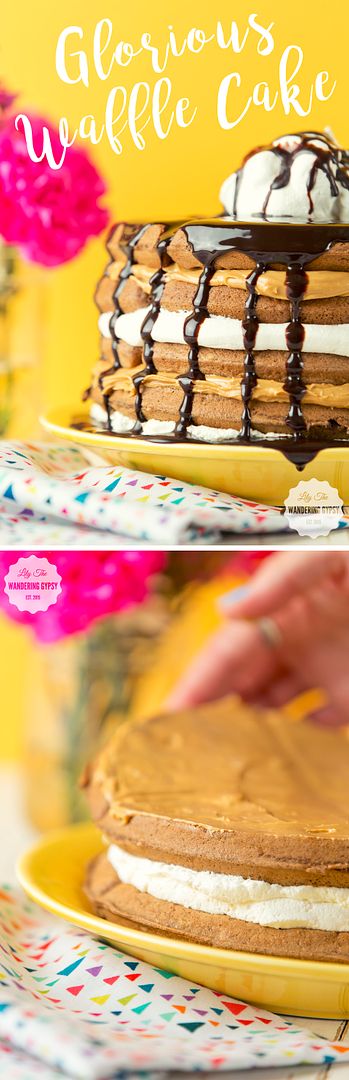
Peanut Butter Happy ~ Waffle "Cake" Recipe + A Quick and Easy Lunch Idea
I love peanut butter. I could eat it on a spoon straight out of the jar for a snack just about any time. When I had the opportunity to create a fun recipe inspired by Jif Spreads, I jumped on the opportunity! Our household definitely prefers Jif to any other Peanut Butter on the shelf! Also, I was recently introduced to Jif Bars, which are also some of the best granola style bars I've ever eaten. Really, though, add Peanut Butter to just about anything, and I'm a happy woman! Just the thought makes me peanut butter happy! #peanutbutterhappy
Since I wanted to showcase the Peanut Butter as a spread, rather than inside the recipe, I opted to layer up homemade chocolate waffles, Jif Spread, and also a bit of cool whip, and created the most amazing Waffle "Cake" to date. I also realized that this fun recipe was not complete without chocolate syrup drizzled over the whole creation.

- 1 box chocolate cake mix
- water
- vegetable oil
- 3 eggs
- Cool Whip (2 containers)
- Jif Creamy Peanut Butter
- Chocolate Sauce
- Waffle Iron
- Non Stick Spray

TO MAKE THE WAFFLES:
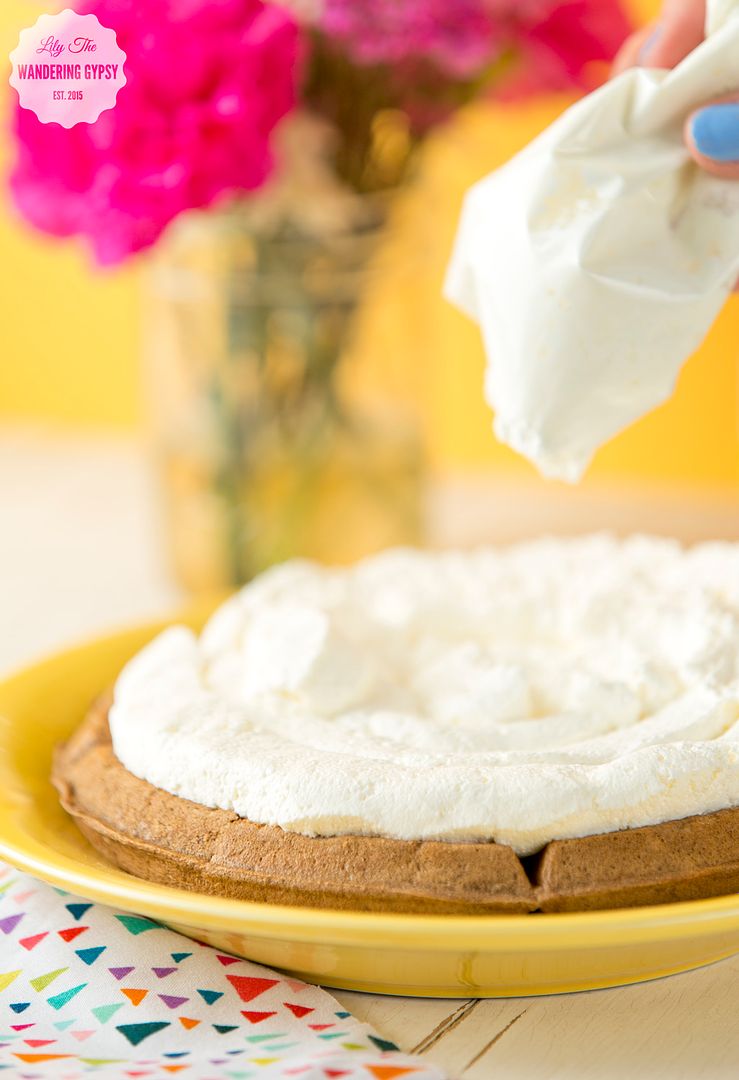
I used a super simple recipe to make the homemade chocolate waffles. Simply mix 1 box of cake mix, 1 C. water, 1/3 C. vegetable oil, and 3 large eggs. Alternately, you can substitute about 1/3 of the cake mix with other waffle batter so they are more fluffy, because the cake mix waffles can be a bit dense. Heat the waffles for about 3 minutes each, and set them aside on a cooling rack if you have one - this way, the waffles won't get soggy while you're working on them. I used 5 waffles here.
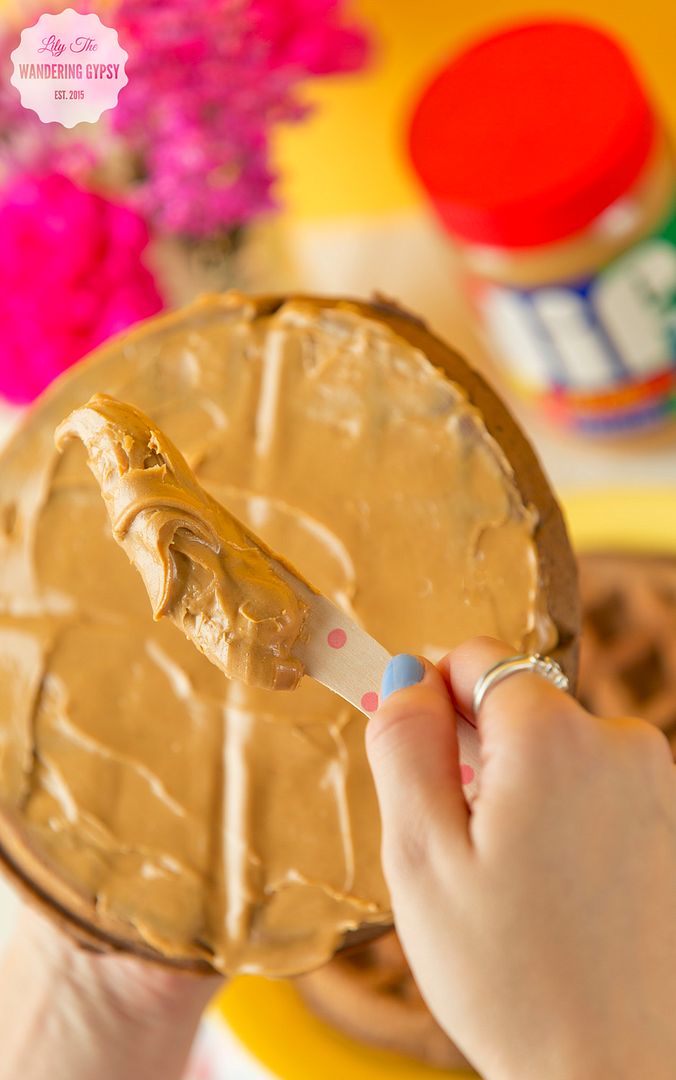
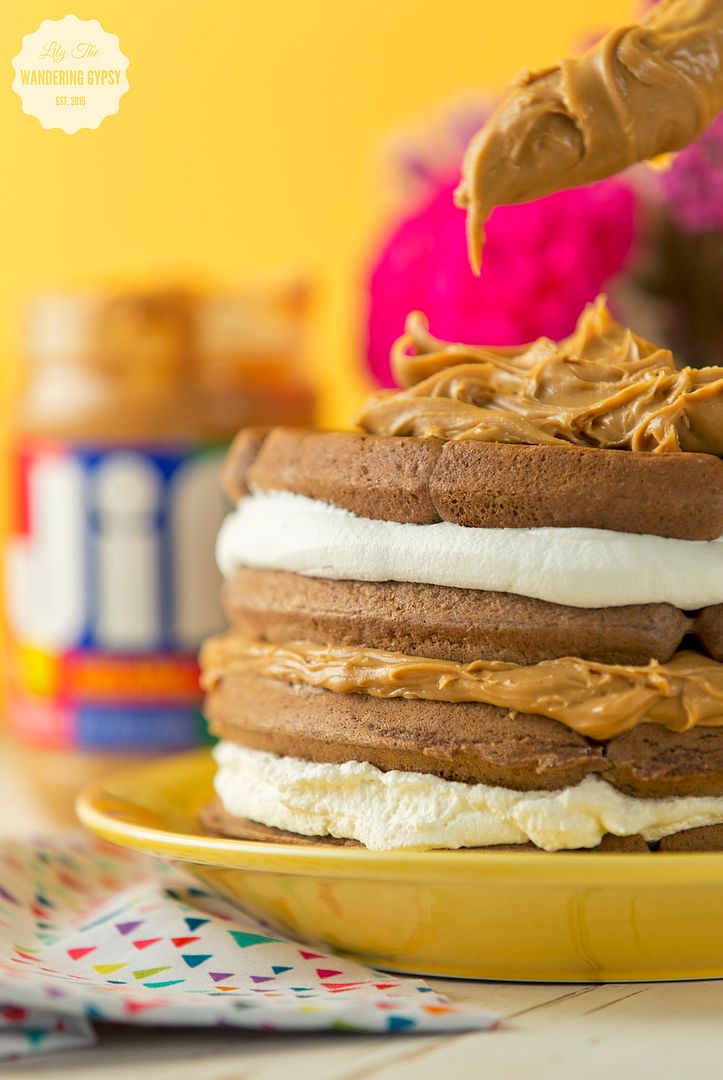
After making the waffles, it's time to create your waffle "cake"! Place one waffle on the plate, then add a layer of Cool Whip all across the first waffle, to create a thick layer. I like scooping the Cool Whip into a Ziploc bag, and then cutting off the tip to create a sort of pastry bag. Next, layer another waffle, Jif Creamy Peanut Butter, waffle, Cool Whip, waffle, more Peanut Butter, then your last waffle.
I topped the dish with a big dollop of Cool Whip, and then drenched it in chocolate syrup!
This would be such a fun way to surprise someone on their birthday, or even if they're just having a bad day. Really love how this divine creation turned out!
Here is an Iobatta link where you can find the products I am sharing in this post:
Jif Spread -https://ibotta.com/app/retailer/any/offer/51534

 This is a sponsored conversation written by me on behalf of The J.M. Smucker Company. The opinions and text are mine alone. #peanutbutterhappy #ad
 These Jif Bars inspired me to show you a quick and easy lunch idea, that you can prepare in just a few minutes. A jar salad is a great way to jump start your mid day hunger. I also love the idea of bringing a fruit like cherries or grapes in a jar, so they won't get squished or make a mess. And, a classic PBJ (featuring Jif PB of course), and my favorite raspberry jelly. And, I love packing the Jif Bars as my dessert, because they're portable and taste seriously SO good!
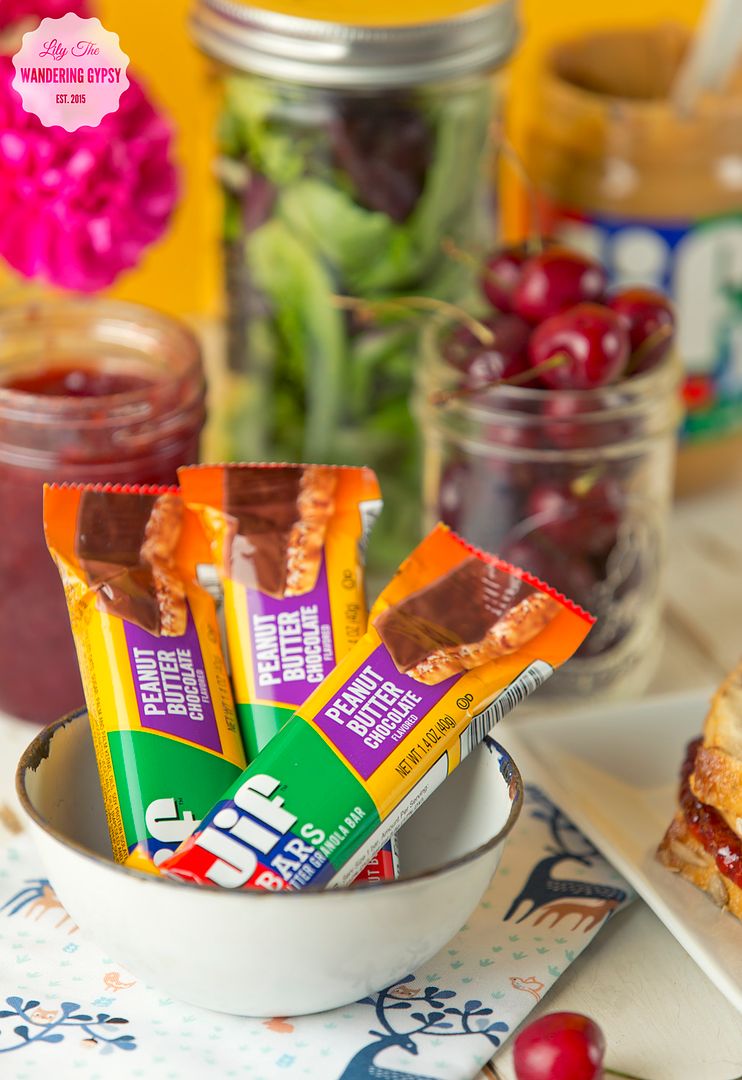 These Peanut Butter Chocolate Bars were the bomb! There are other flavors as well, like Crunchy Peanut Butter, and Creamy Peanut Butter.
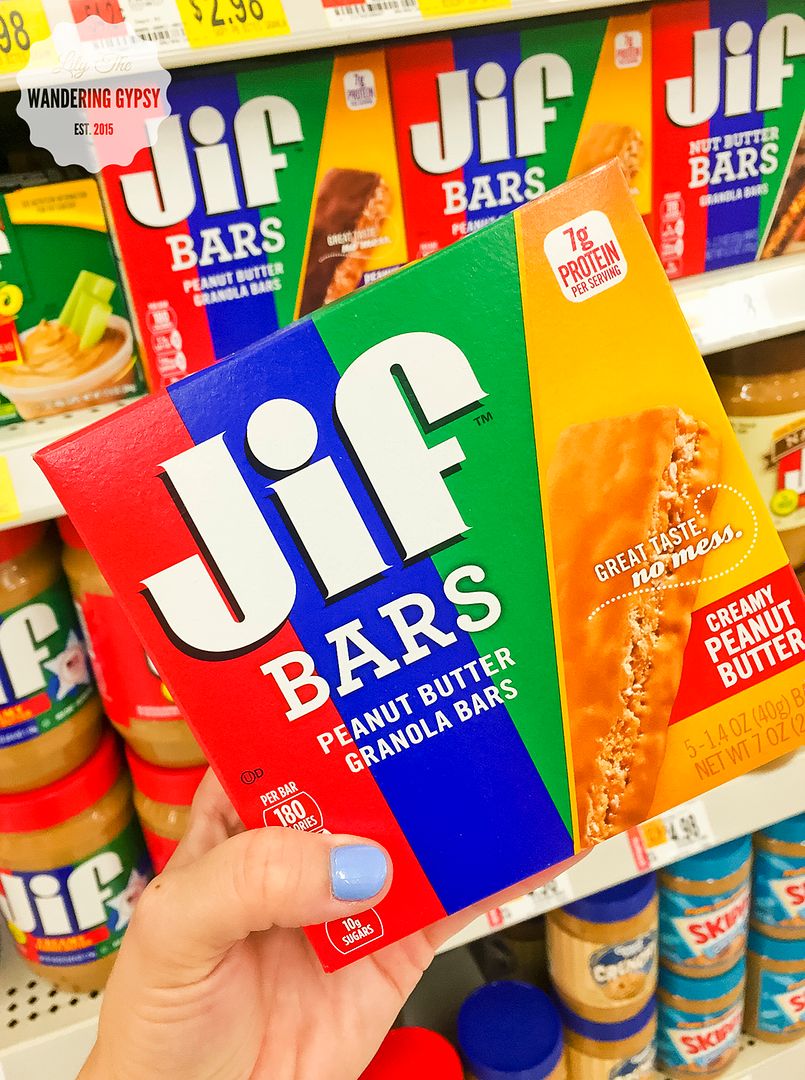 I found the Jif Bars right above the Peanut Butter at Walmart, and their prices are some of the best I've found for these items.

This is a sponsored conversation written by me on behalf of The J.M. Smucker Company. The opinions and text are all mine.

Bluegrass + The Farmer's Market
I have written about the new Carbondale Community Farmer's Market before, but this week, I was so inspired by the live music that Hey Honey played! I created this fun video to showcase how vibrant this market is, so check it out here, or on my YouTube channel!
Visit the Carbondale Community Farmer's Market every Wednesday from 3-6 pm, next to the Town Square Market, at the 200 block of Washington Street in Carbondale, IL. You will have access to seasonal produce, meat, eggs, bread, hand crafted sodas, sandwiches, baked goods, and more. You can even pick up some dinner at the market from Longbranch Cafe (I had the most amazing Sloppy Joes this week), and you can bring something home to snack on, or use for your meals throughout the rest of the week. I always like visiting each and every booth to see what's in season!
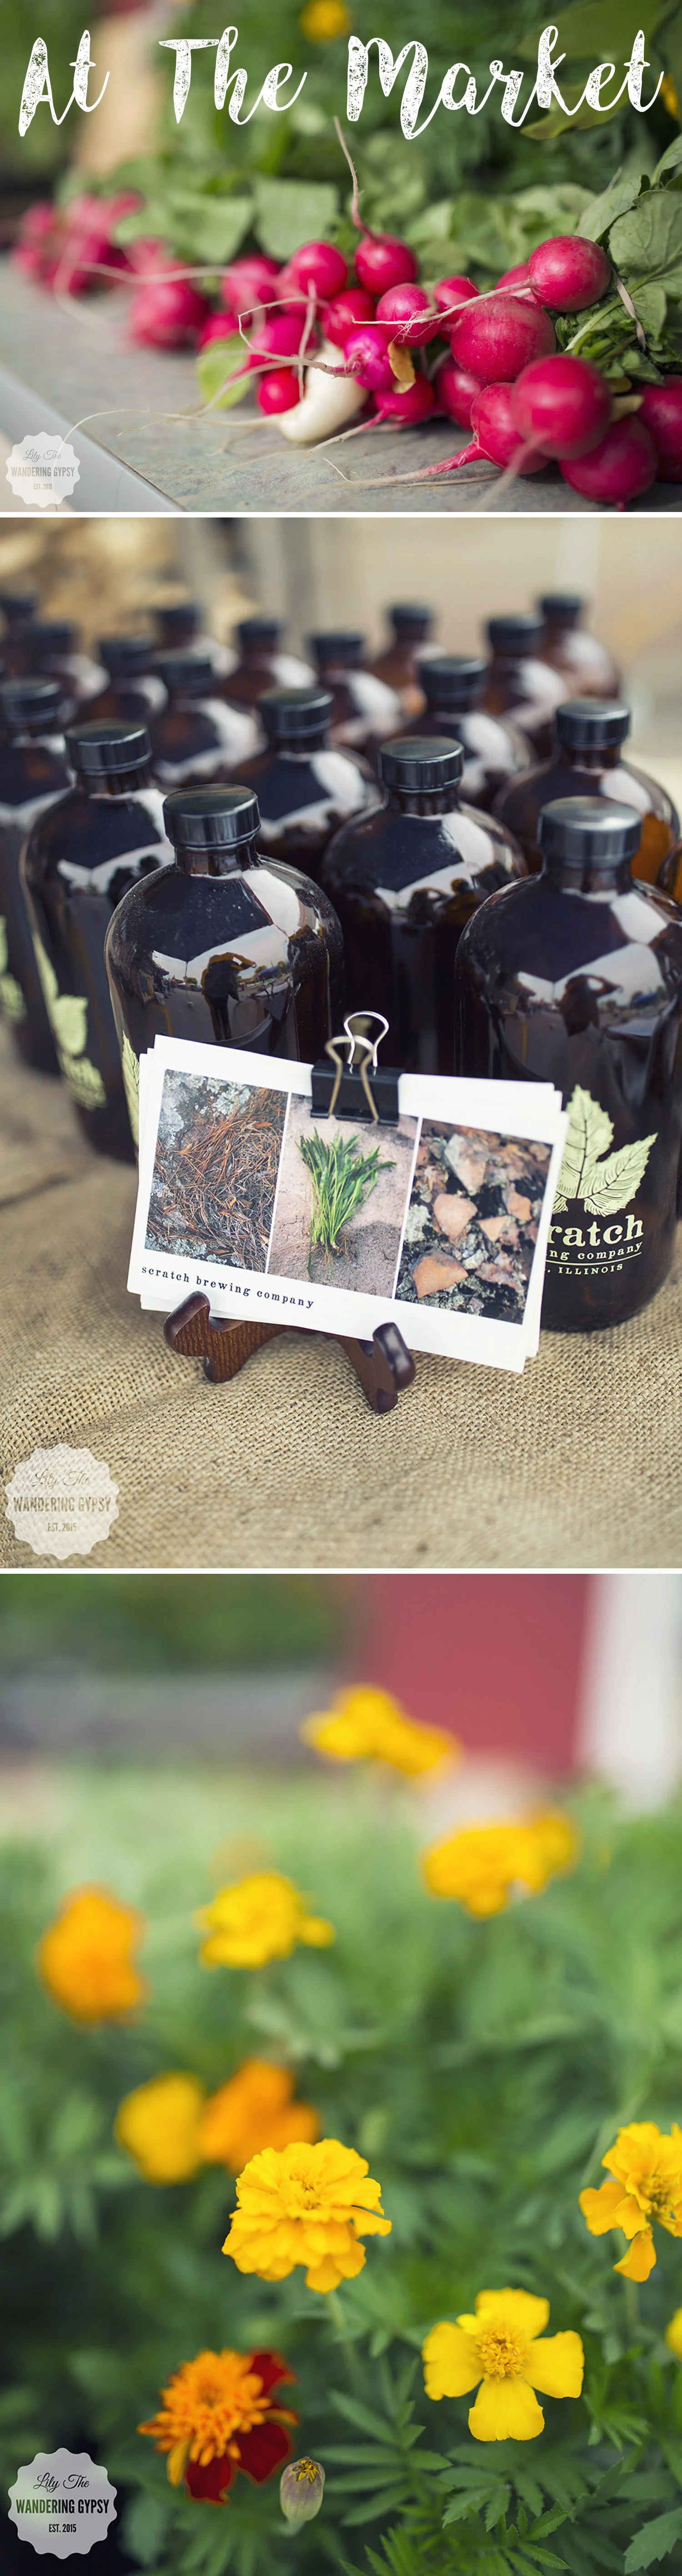
Hope you can stop by the market soon!

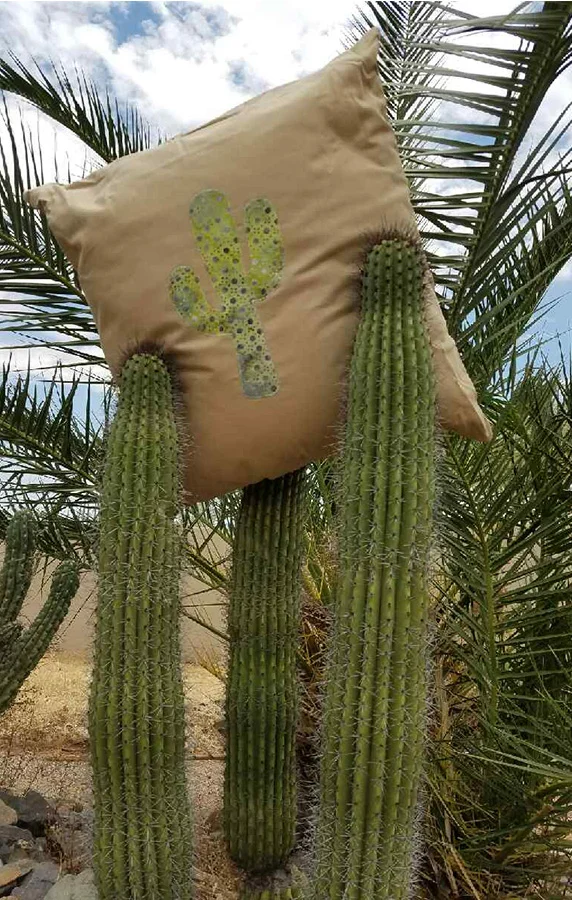
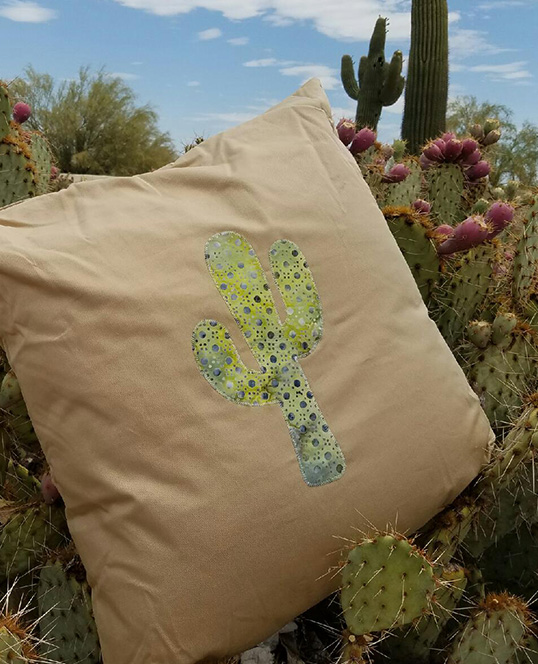
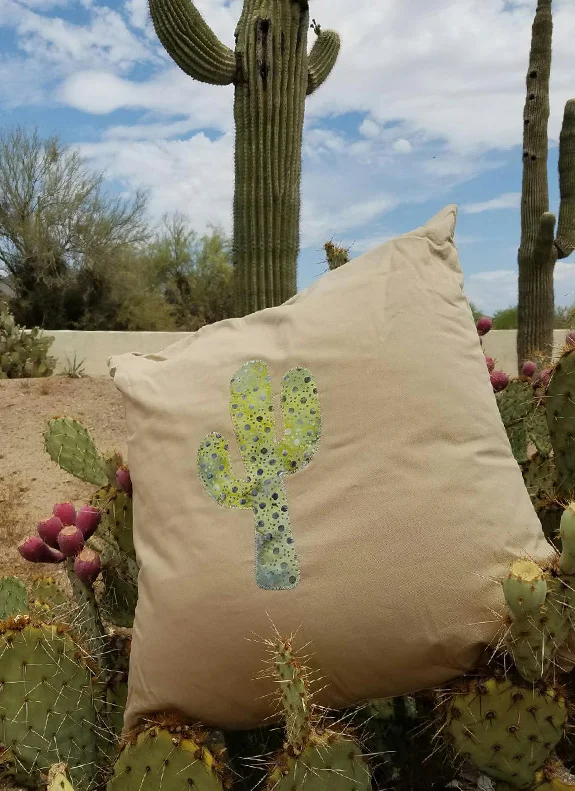
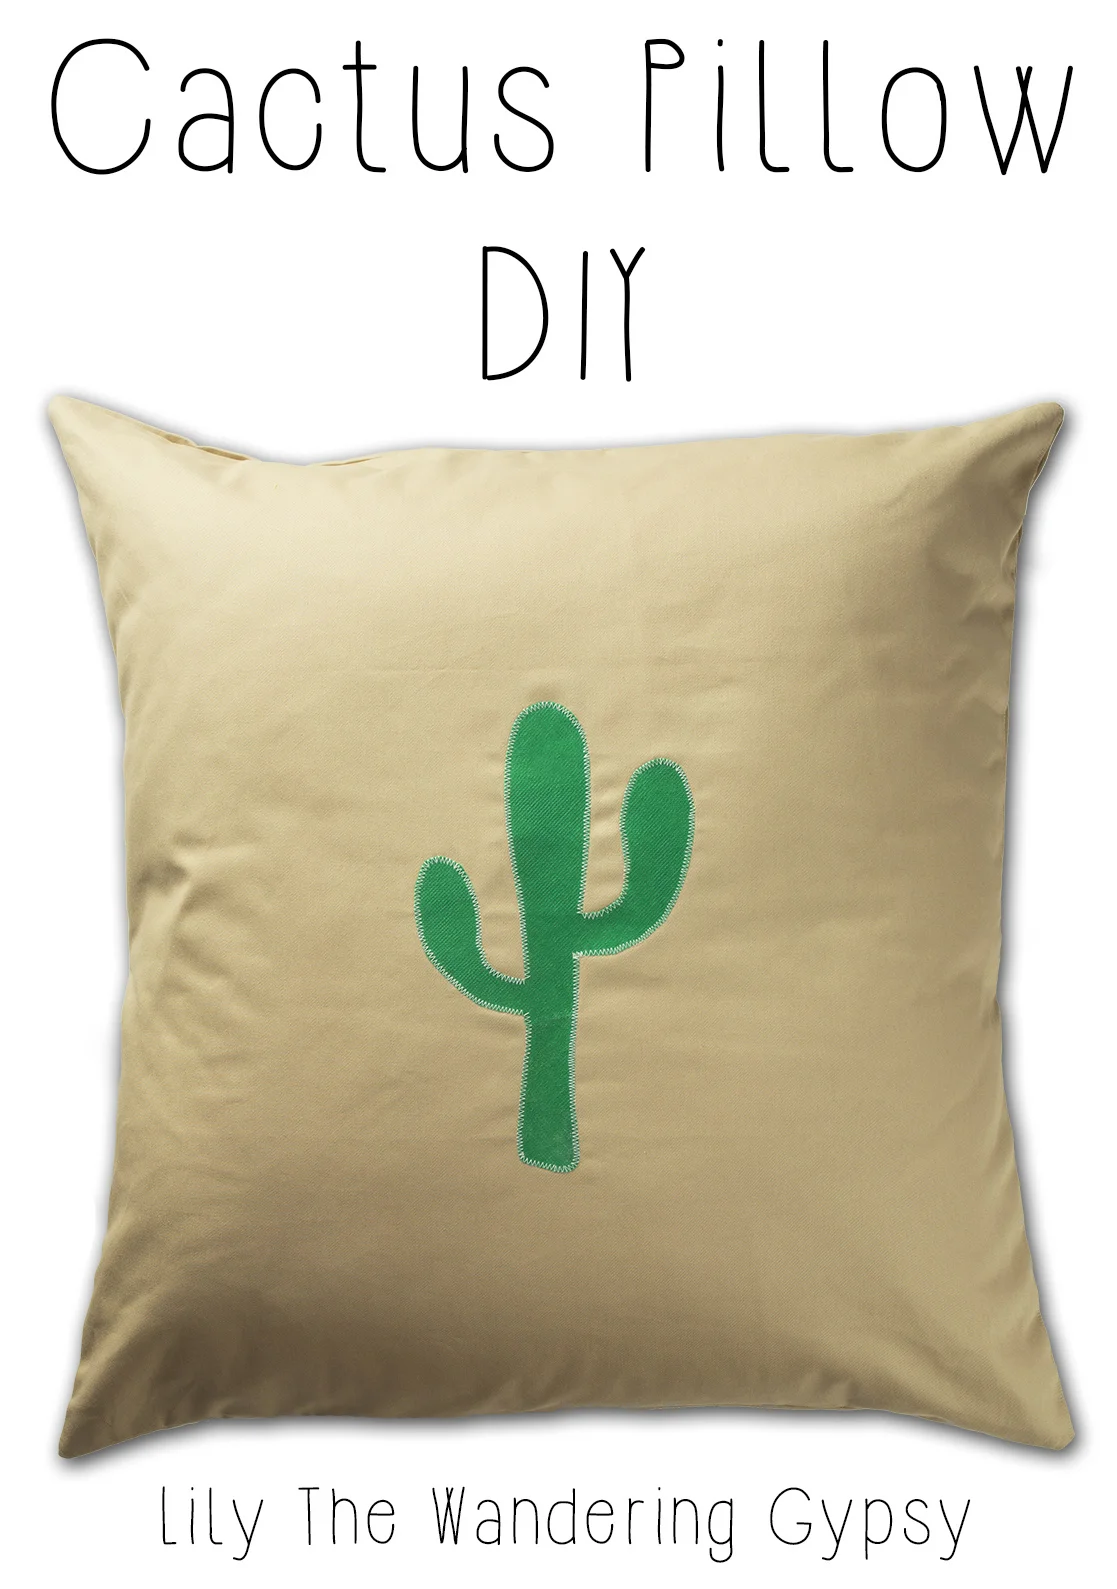
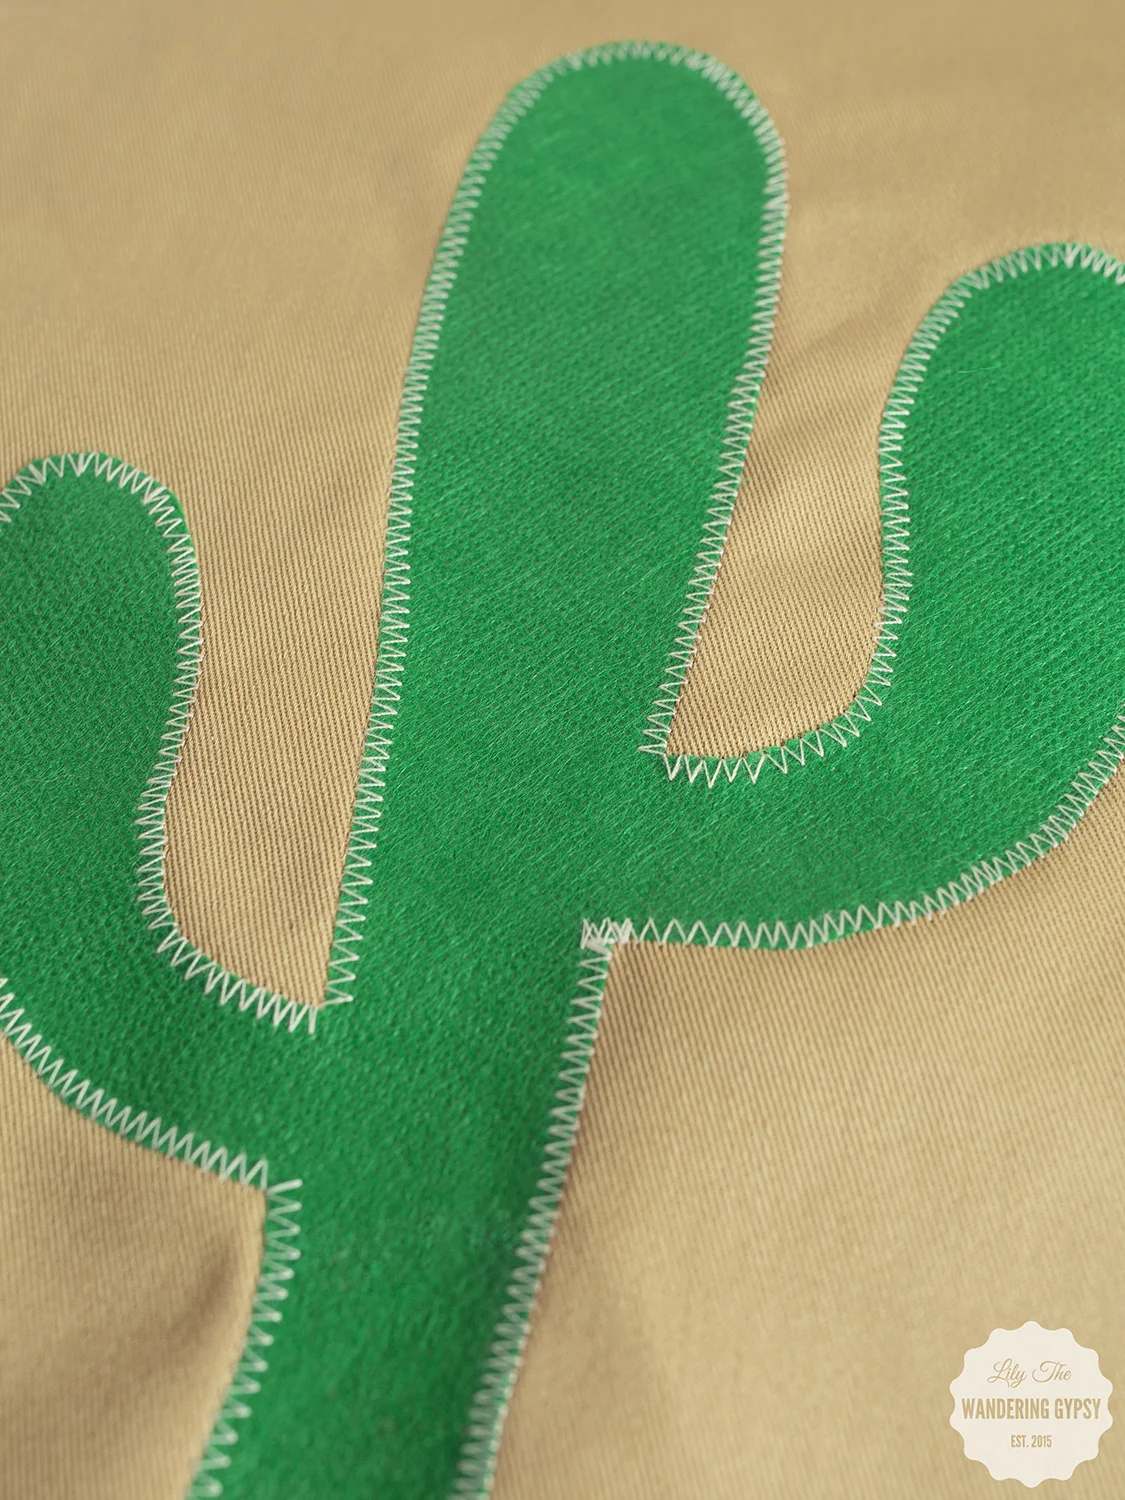
Cactus Pillow DIY
This is an amazingly awesome DIY project! Perfect to make for yourself, or to give to someone else. In this tutorial, I used a pillow form from an existing pillow (which was cheaper than buying a pillow insert by itself! I got a pillow that was on super sale at Hobby Lobby - I thought that was pretty great!
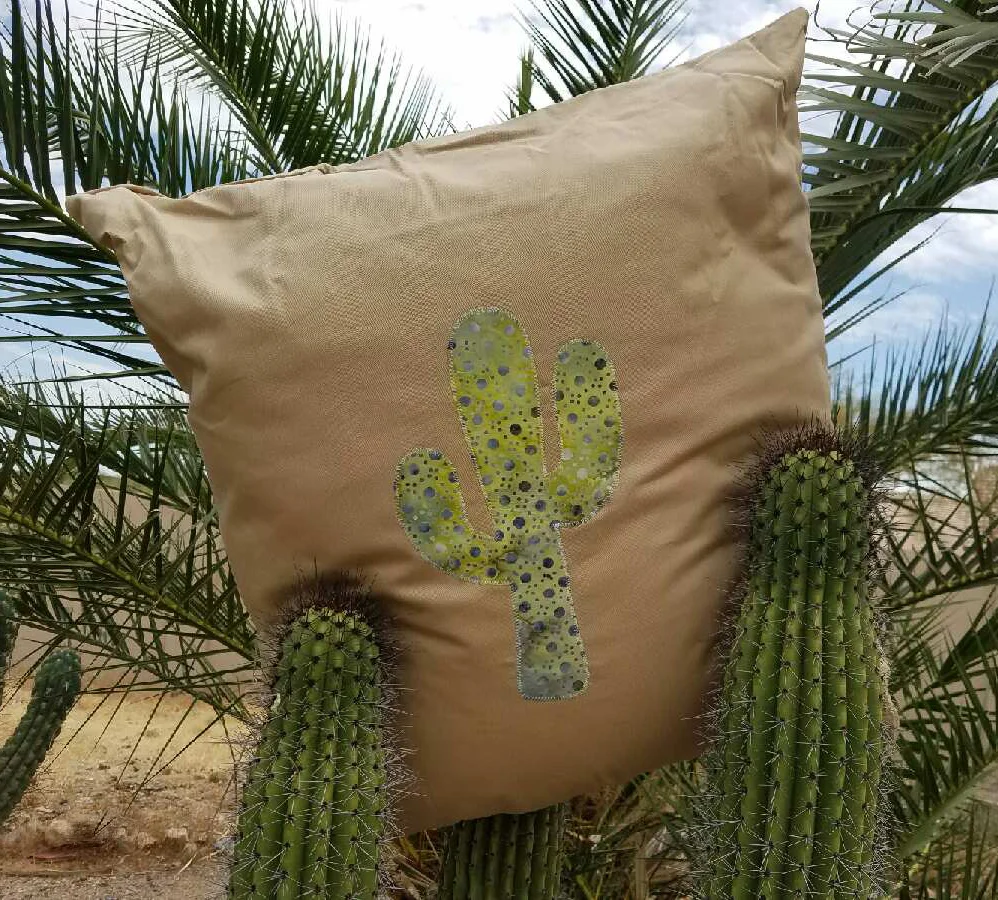
My Step Mom was kind enough to take photos of a similar pillow, that I sent to my dad for Father's Day
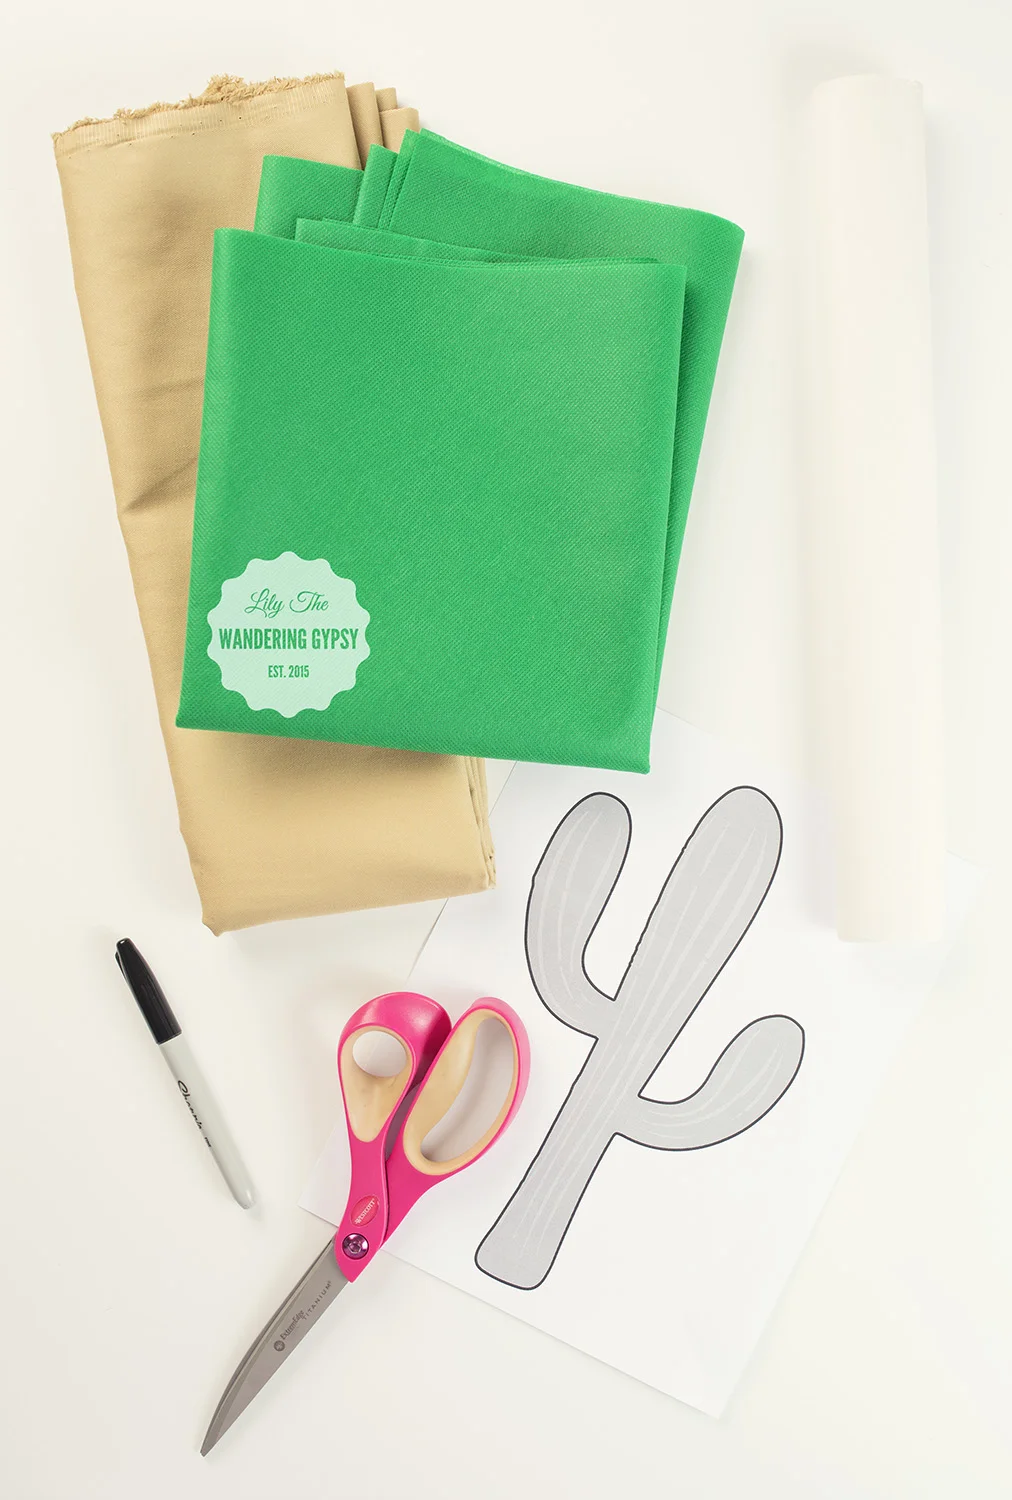
MATERIALS NEEDED:
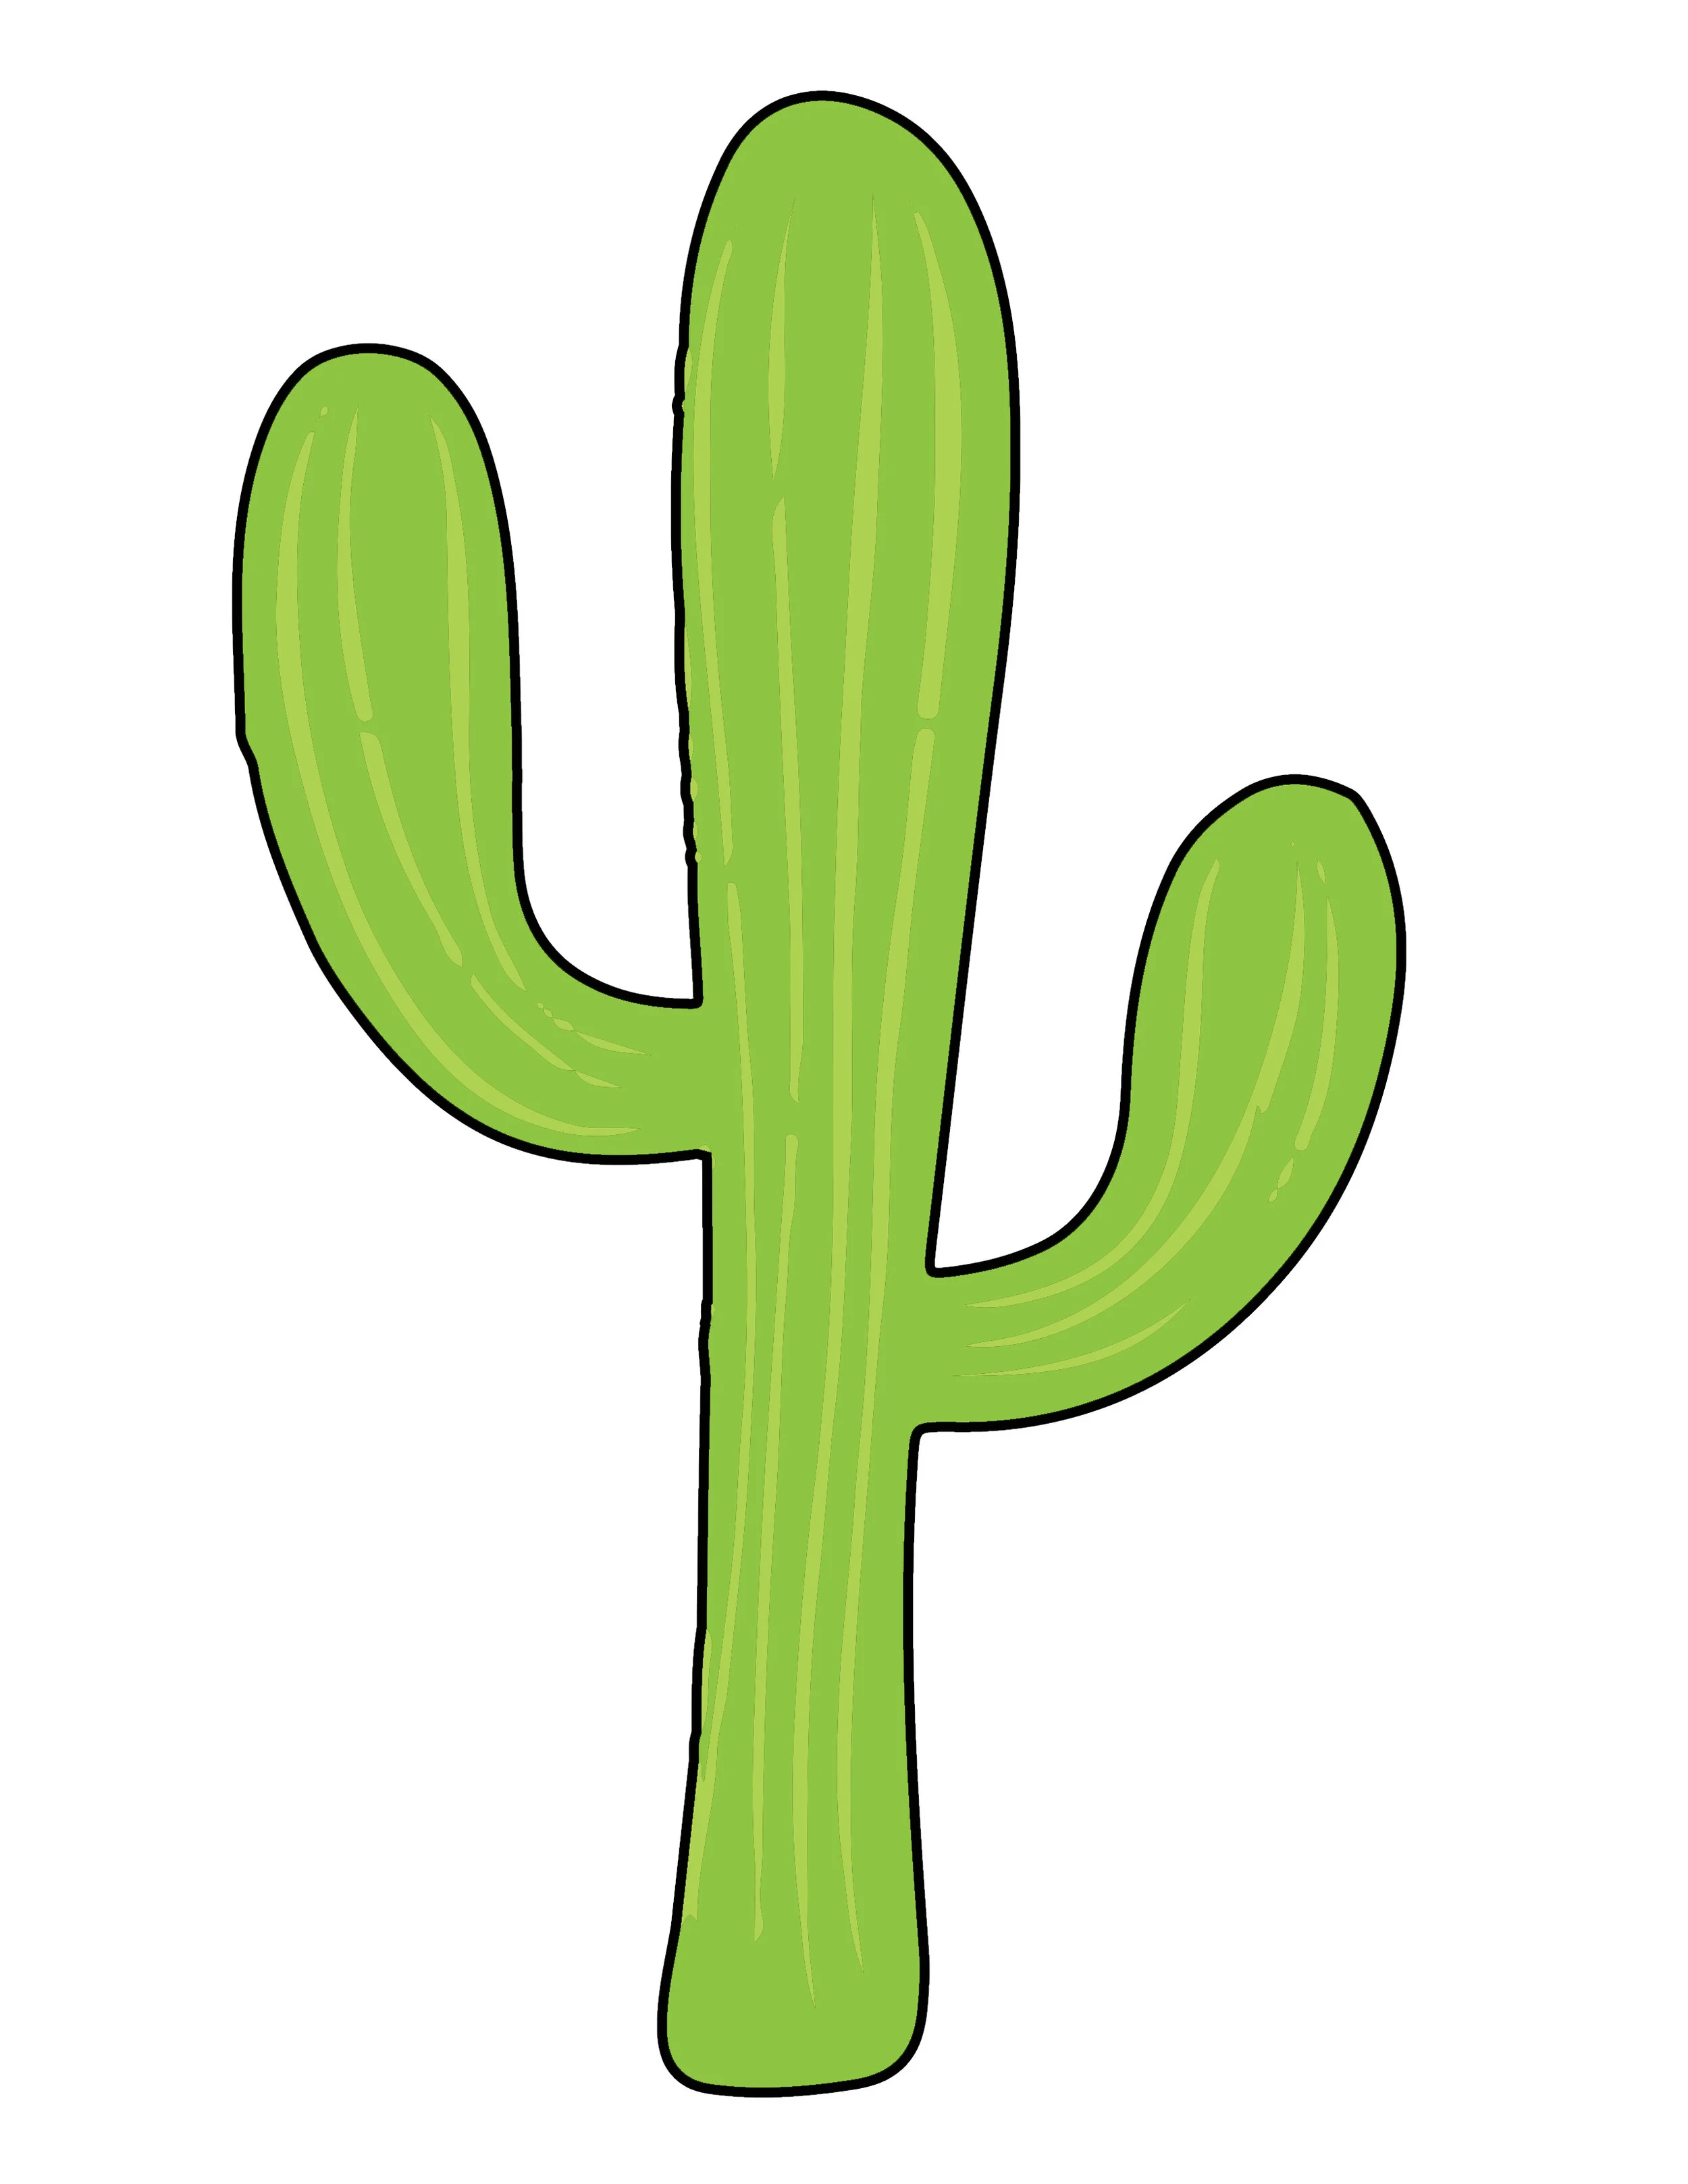
Right click this image to save it, then print at 100%.
- Pillow Form
- Solid Tan Canvas (or similar) material That will cover your pillow 1.5 times (I will explain below)
- Green Cotton Fabric (for cactus) - Note - Only 100% Cotton Material works, because you will be ironing it.
- Fusible Webbing (the only kind I would EVER suggest would be Heat N Bond Lite Iron-On Adhesive. It's hard to see, but it's the paper-like material in the top right of the image, right.
- Iron + Ironong Board
- Sewing Machine, Thread, Scissors
- Printed out image of cactus, right.
INSTRUCTIONS:
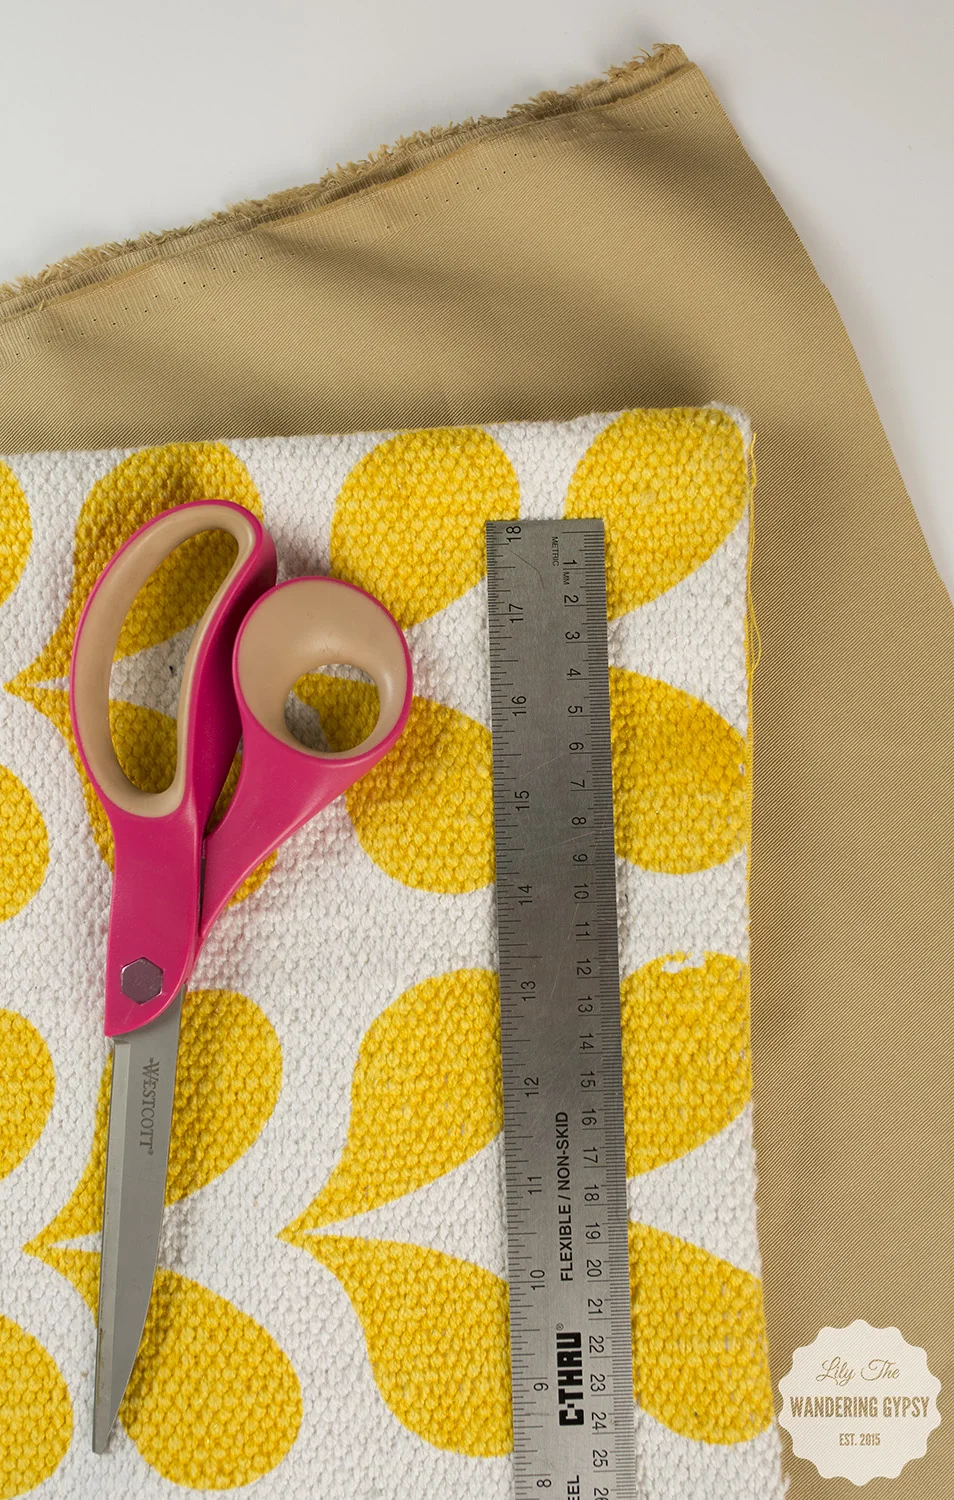
1.) Iron canvas material if needed. Remove pillow case from pillow form, and lay it down onto the canvas fabric. Cut one piece the exact same shape as the pillow case - this will be the front of your pillow. Alternately, measure your pillow form, and use those measurements instead.
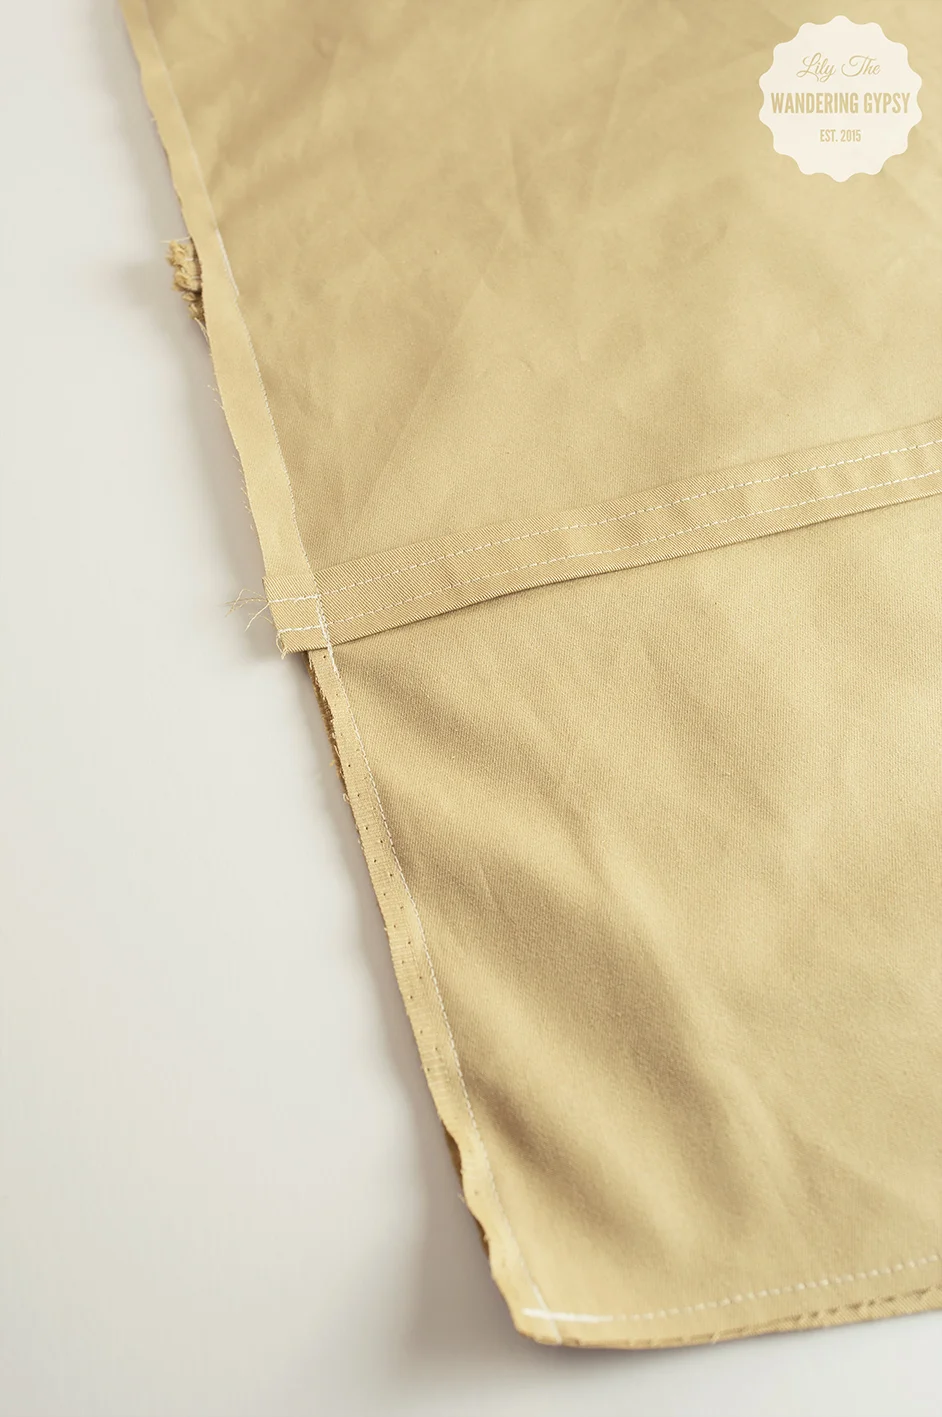
- Next, to cut the back part of the pillow, you need two pieces to create the envelope flaps.
- Using the same width as the front piece, cut a second piece of fabric about 1.5 times the length of the front piece. For instance - if my front piece measured 10" x 10", my second fabric piece would measure 10" x 15".
- Cut the long piece into two pieces, a bit off center, so one piece is longer then the other by a few inches.
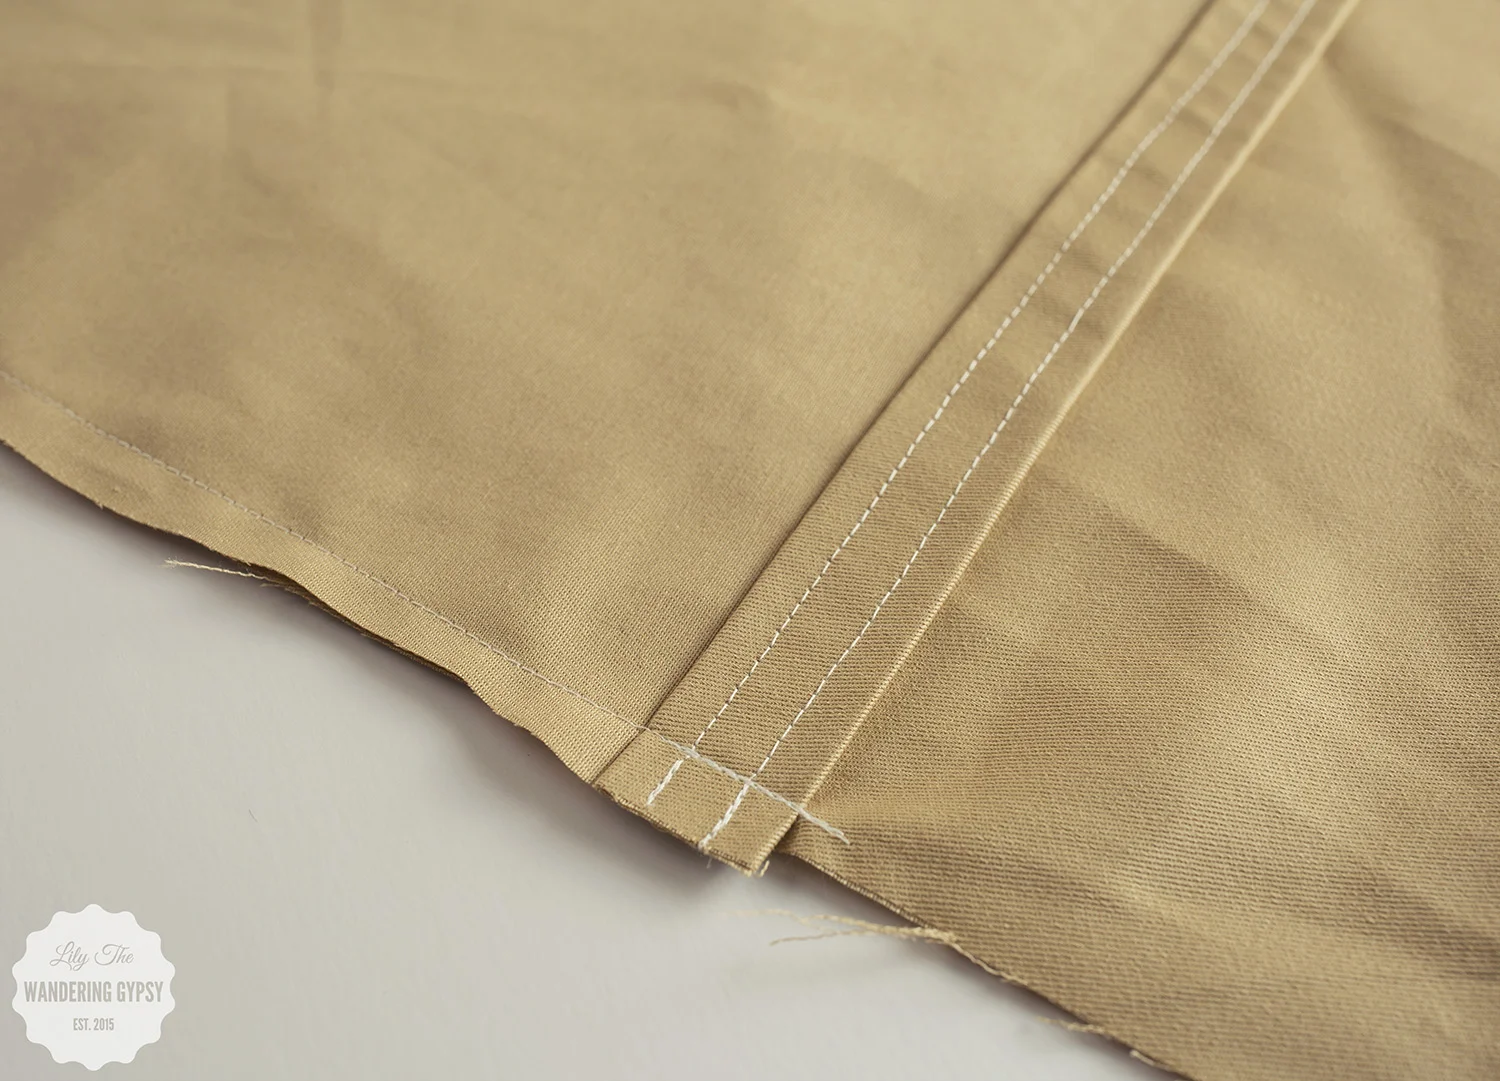
2.) Next, you will create a nice hem line for the two back pieces. With an iron, fold down one edge of each piece (going horizontally), over twice. This will create a nice finished edge. Sew the hem line down a couple of times to secure it. Iron again, if you want.

3.) Now, let's make an applique!!
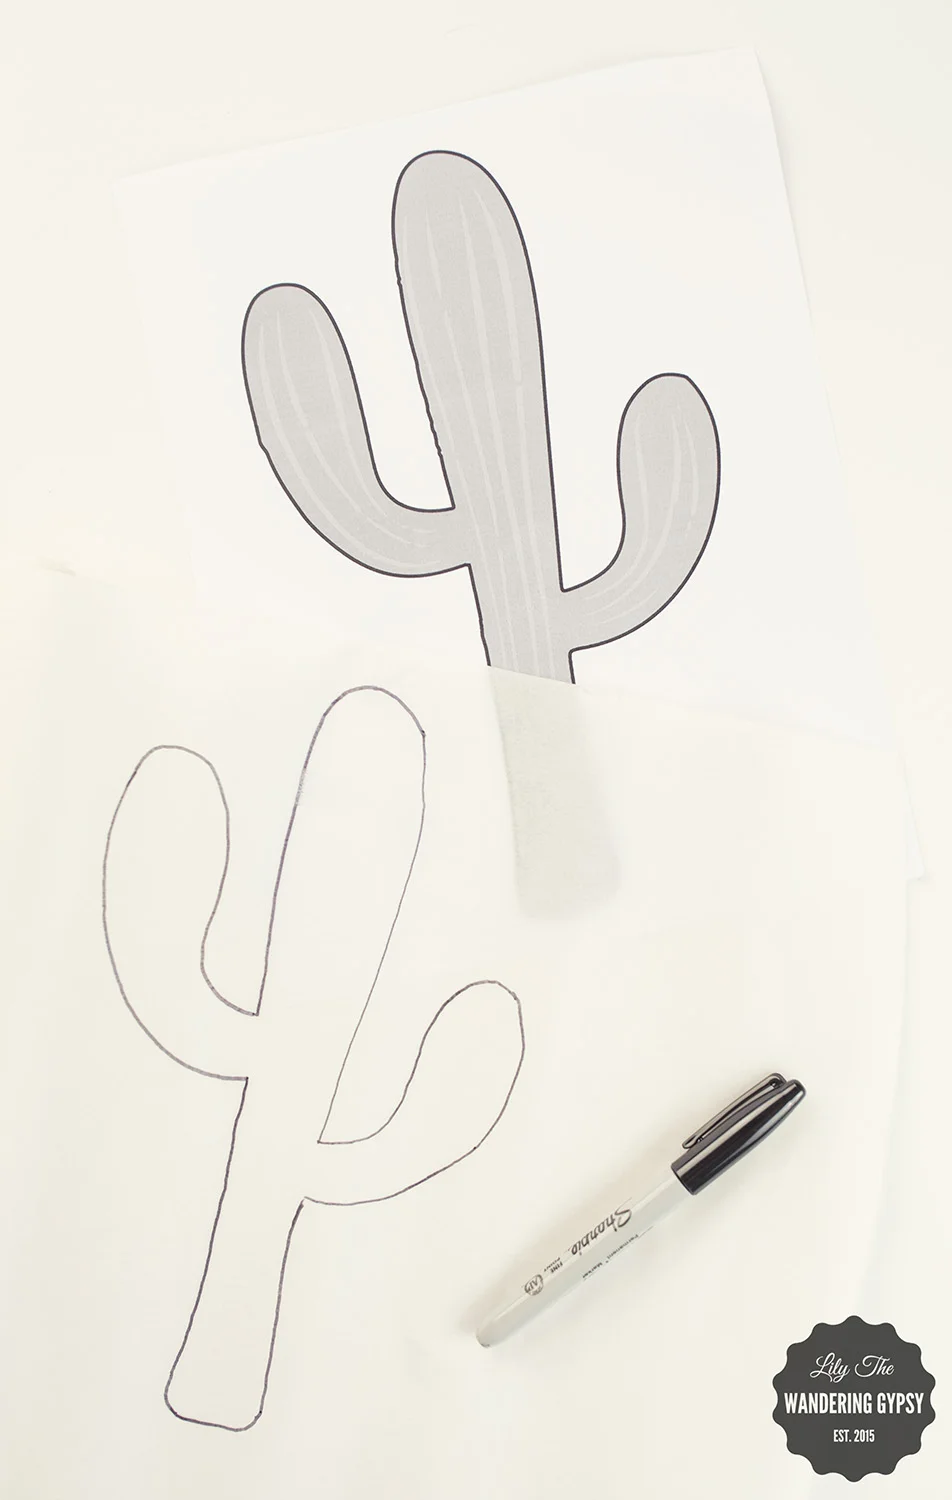
- Trace the cactus shape onto the paper/smooth side of the fusible webbing material with a permanent marker.
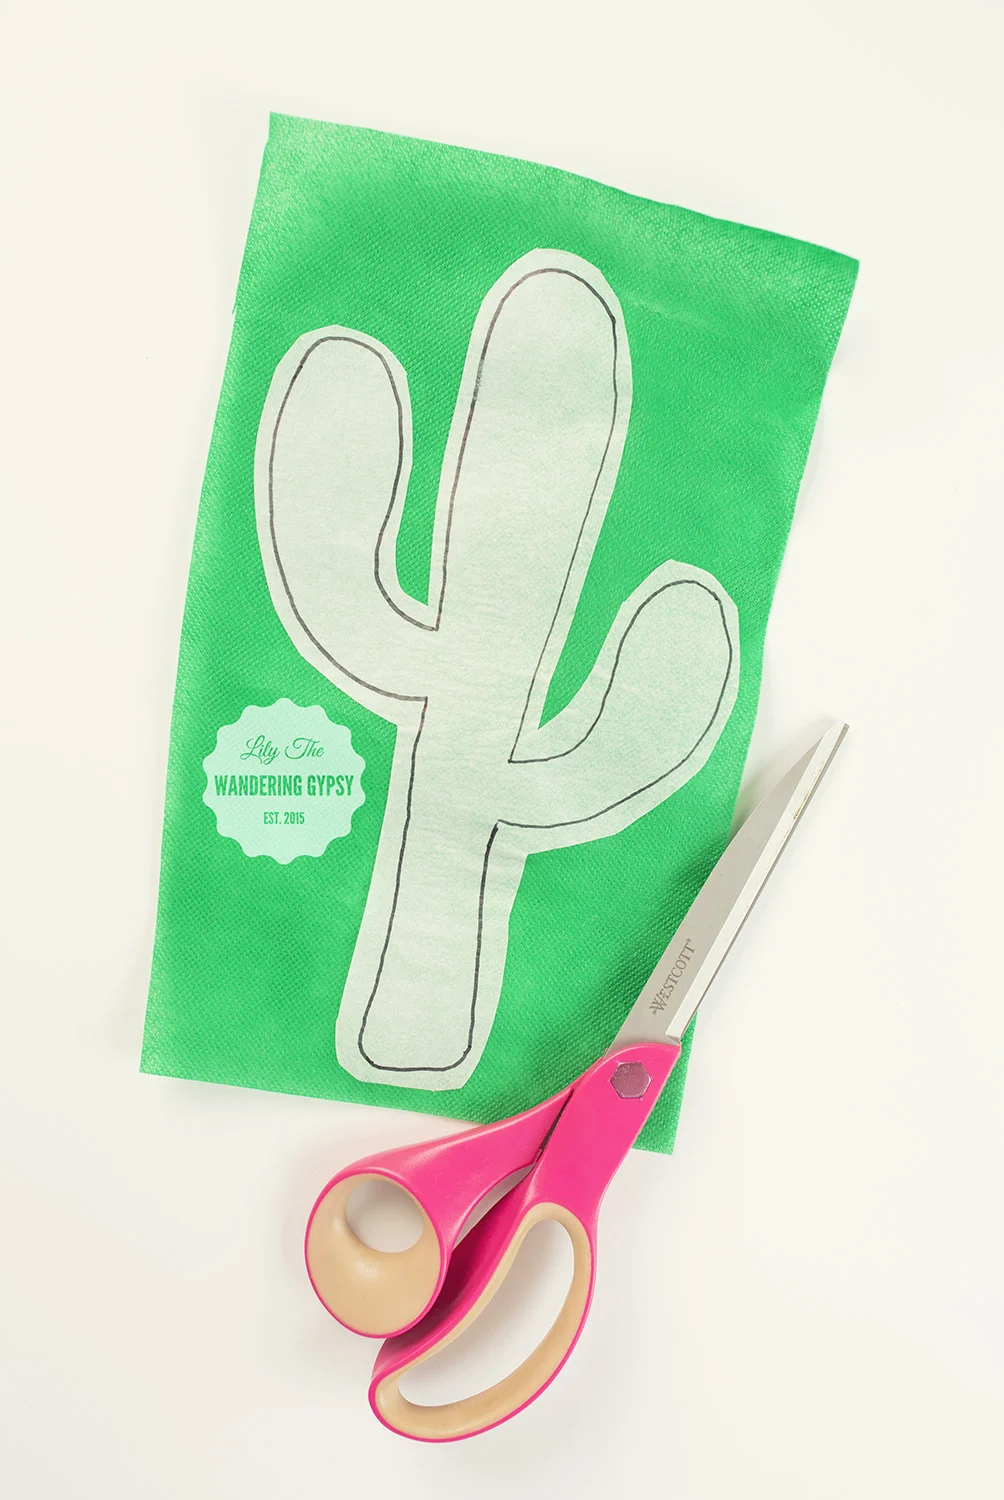
- Cut out the cactus shape you drew, and iron it onto the green fabric. Like I mentioned before, only 100% cotton can be used for this! The green material I chose wound up being 10% polyester and got stuck to my iron, and melted! No fun!
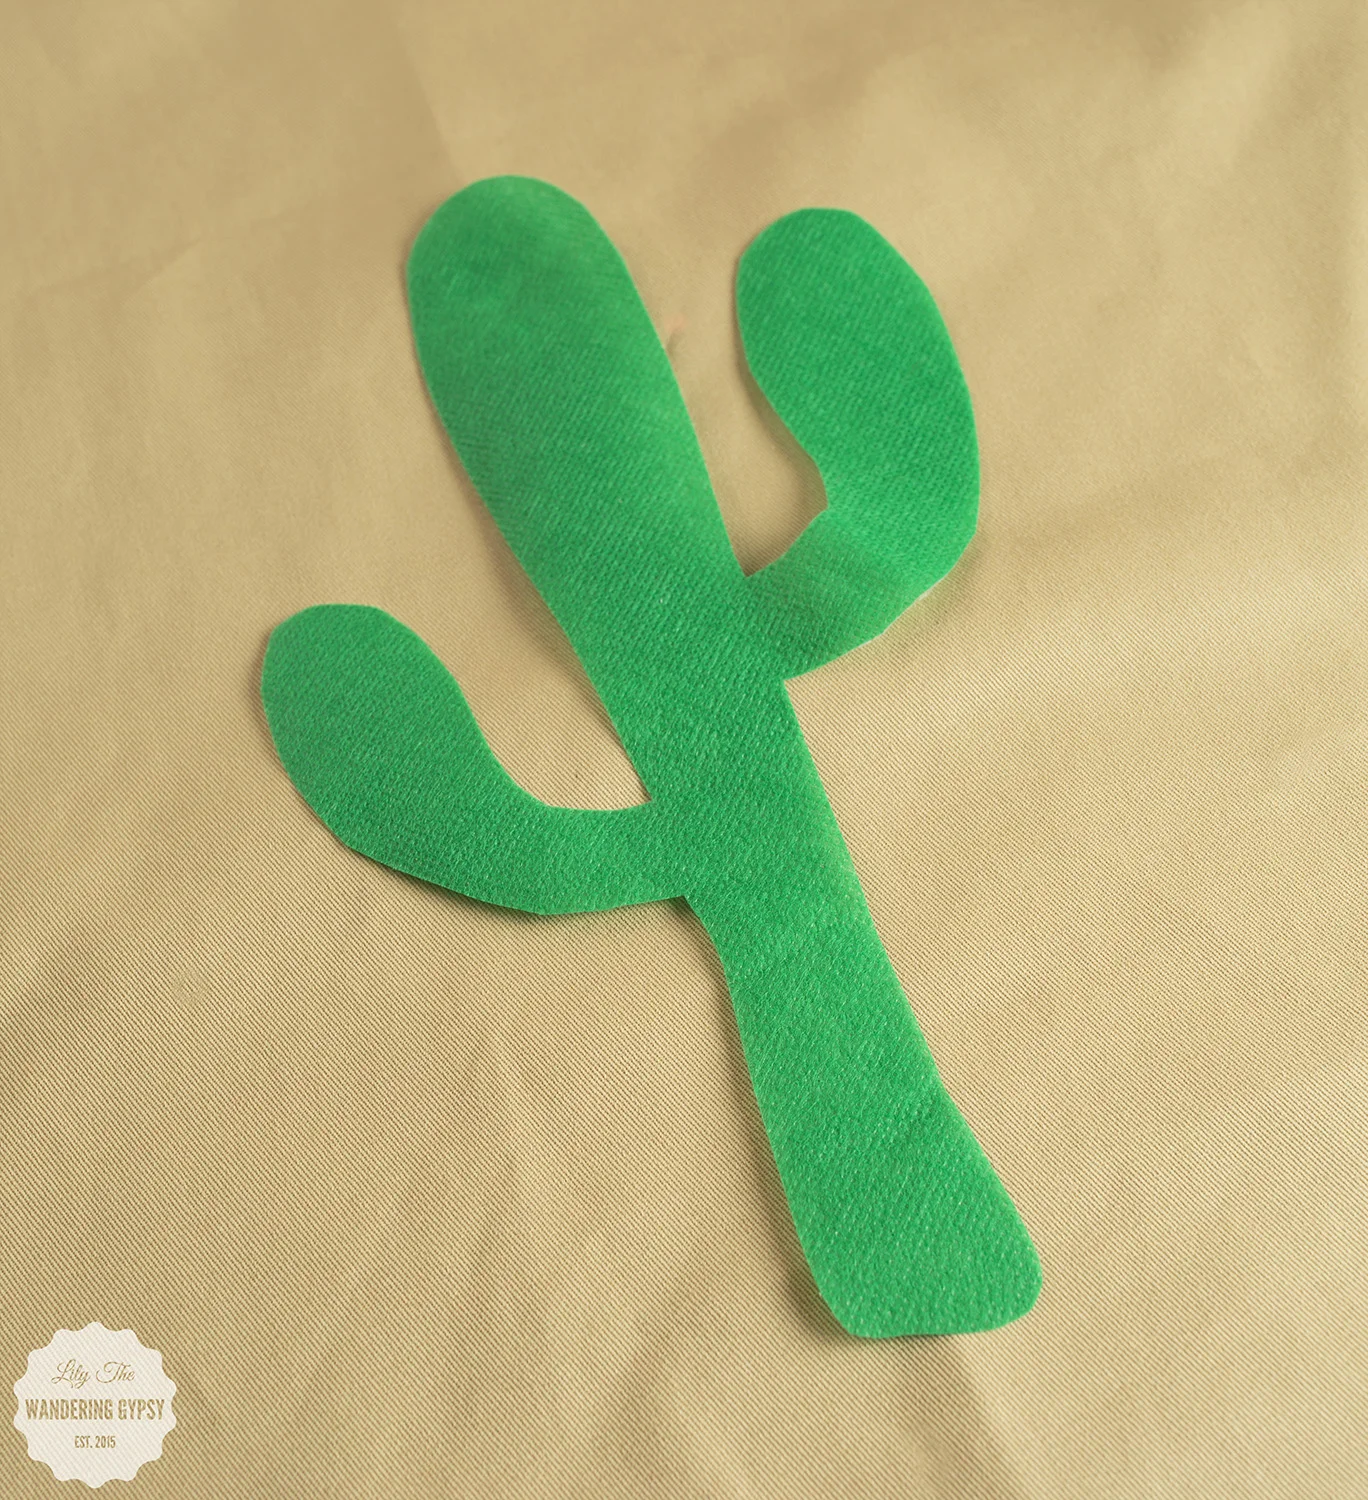
- Cut out the cactus shape you ironed onto the green fabric, and peel the paper backing off of the shape. One trick I use, is to slightly score the paper backing, to start the "peeling" process :)
4.) Time to iron on the cactus. Fold the front piece of tan material in half and then half again, to find the center. Use this to line up your cactus shape. Then, iron the shape onto the front of the fabric. Iron the whole piece of fabric, and get ready to sew on the applique!
5.) Using a zig zag stitch or a straight stitch, sew all around the cactus shape. Tie any loose thread ends on the back side of the fabric.

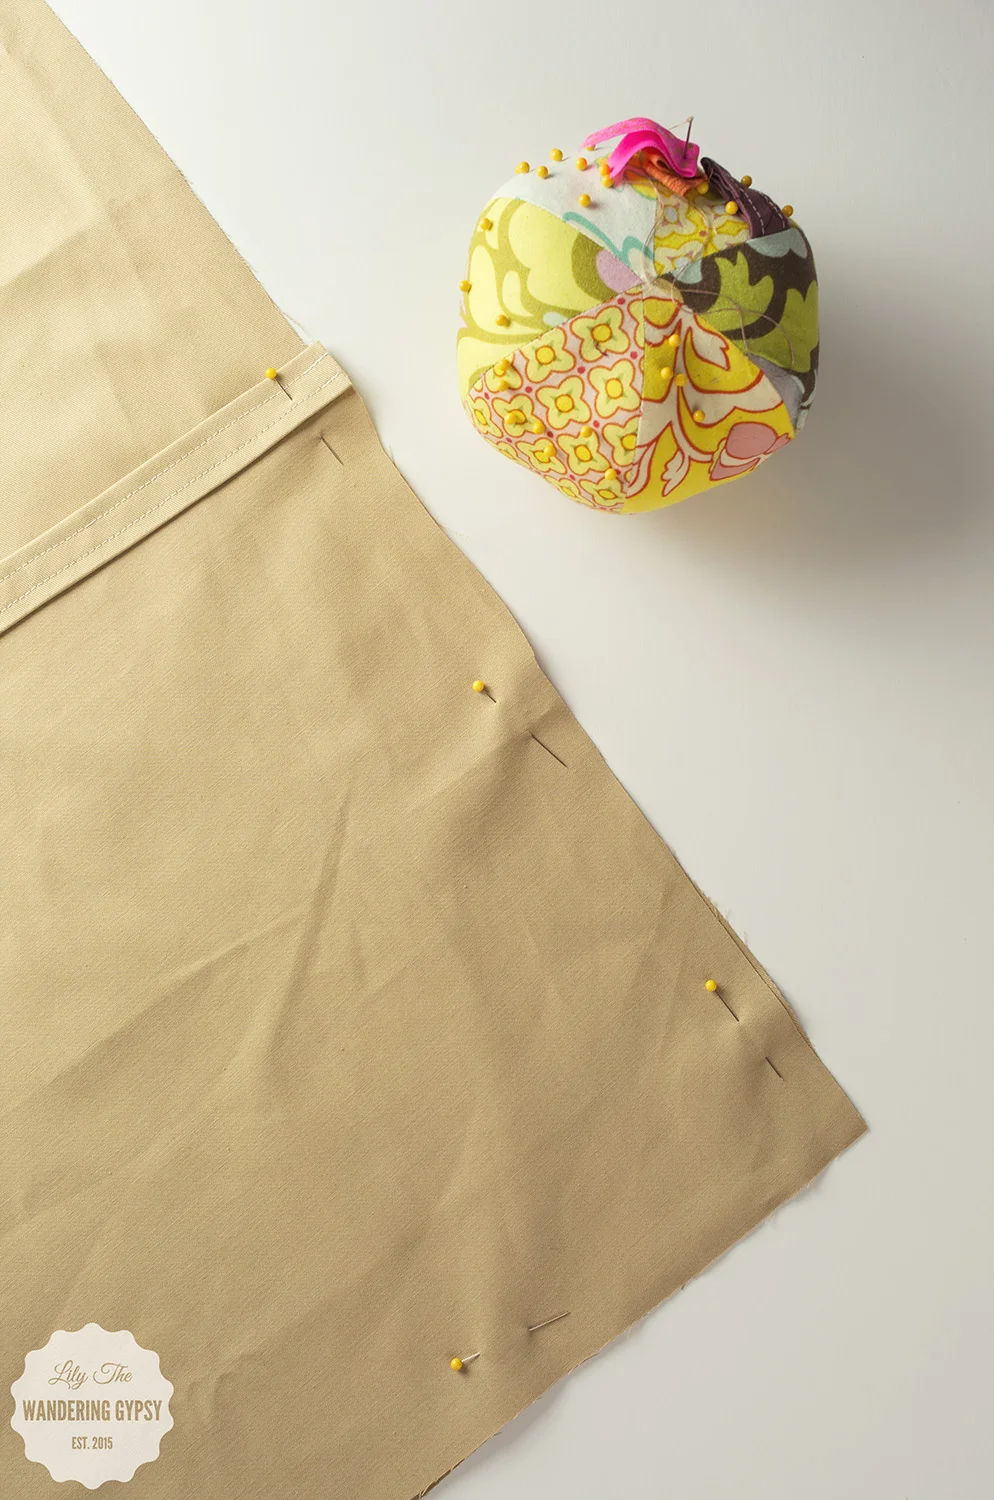
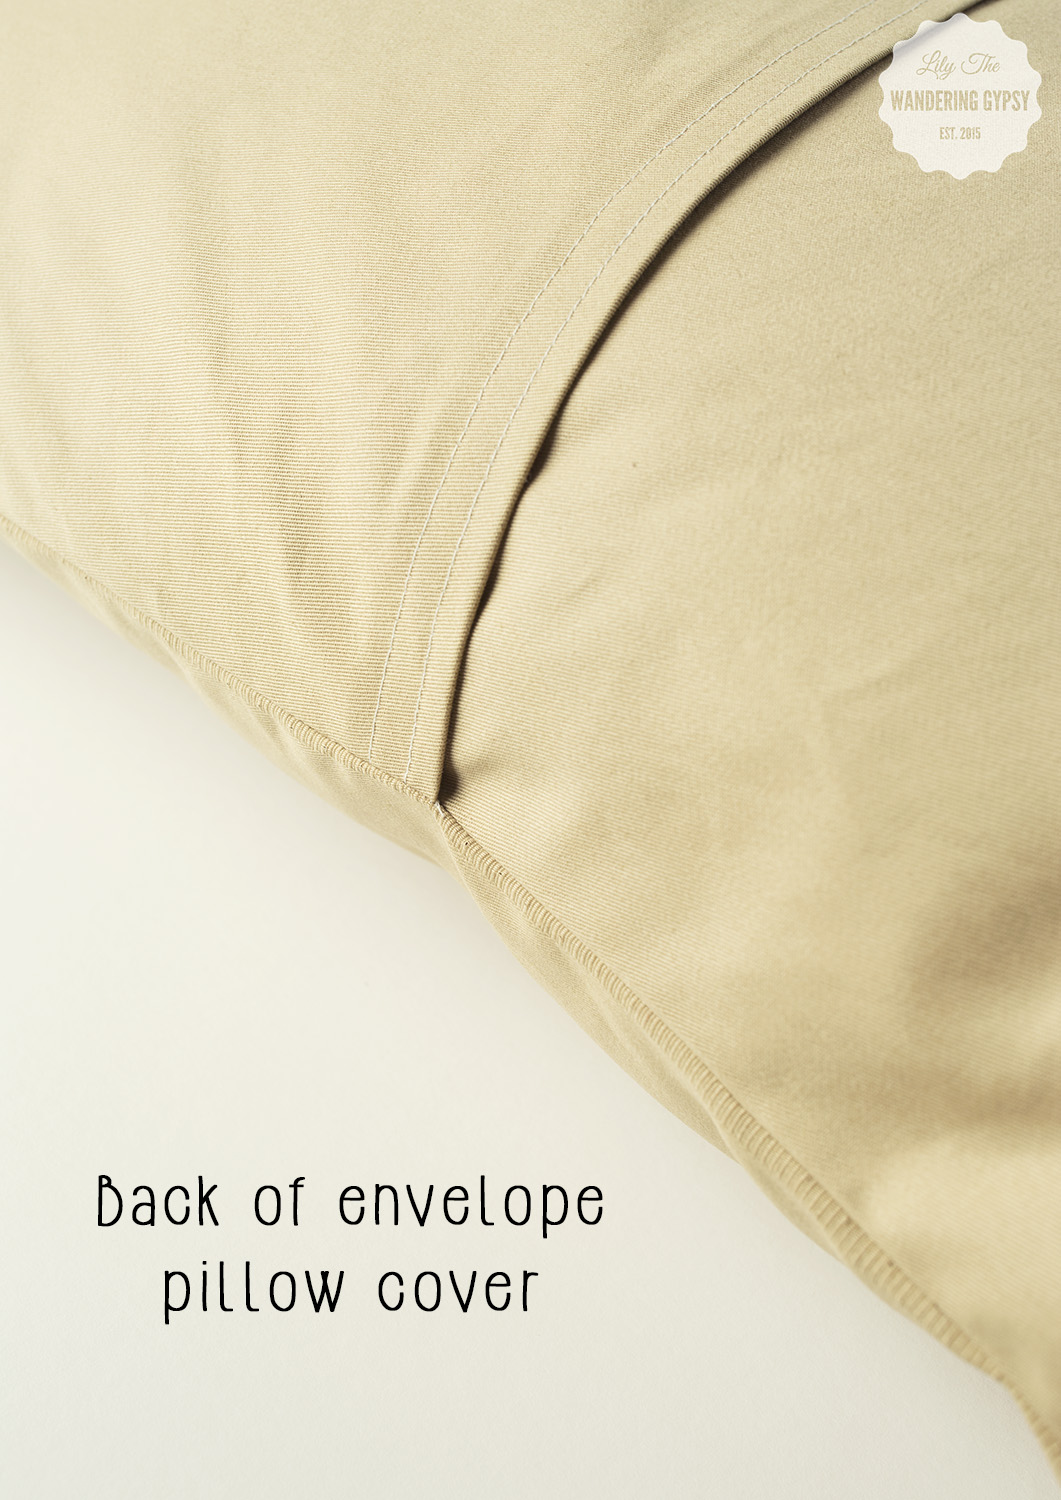
6.) Time to sew and construct the pillow case! This is such a great way to make a pillow case - it's removable and washable, too!
- Pin the shorter back piece with the hem line going horizontally in the middle. Pin the front panel and the first back section together - right sides together. Pin, and sew around the edges. Clip loose threads.
7.) Now, pin the longer back piece up to the ones you just sewed. Line raw edges up, and again, pin and sew around the edges
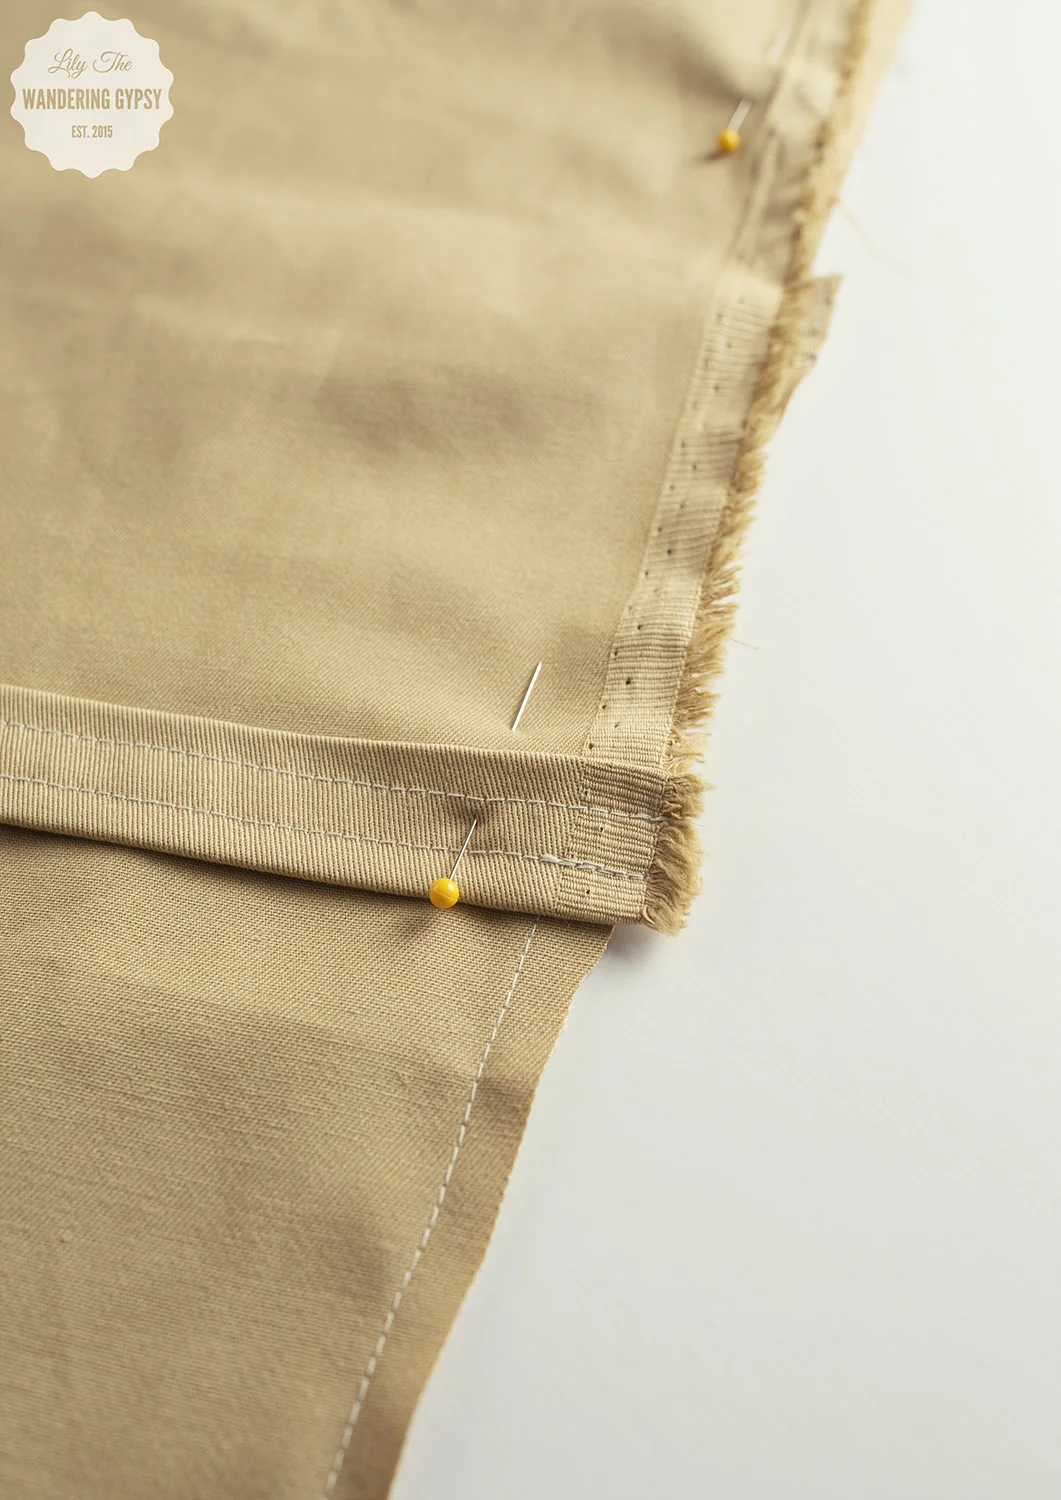
8.) Trim any excess fabric around the edges, and turn your pillow right side out. Iron, if you want, and you're DONE!!!

I hope you enjoyed this tutorial! If you wind up making one of your own, please link to it in the comments below! Happy Sewing, friends!!