TULA Skincare at Target - Clear Skin for Back To School

I have battled with adult acne since having to wear face masks back during COVID. I washed my mask before each time I wore it but still, the acne scars remain from years ago. Crazy it has been that long.

So, I finally braved up and asked a friend how she gets such clear, soft, beautiful glowing skin and she clued me into my favorite new brand of face wash and facial scrub, TULA.

I figure that this week, since everyone is going back to school, it would be the perfect time to tell you about my successes with finally achieving the clearest skin I have had in years.

Shop All TULA at Target Here.

TULA SO PORELESS AT TARGET - Shop Now

So, I literally waited MONTHS to finally get their scrub, because it was sold out EVERYWHERE. Now that Target carries this brand via ULTA, I assume it will be in stock for a while now, but you may want to act fast!

Built on the power of probiotic extracts & superfoods with a focus on being healthy, not perfect. Clean, cruelty-free & effective. - TULA

Below, I wish I had found THIS price on the one I ordered, but Target has their amazing Purifying Facial Cleanser - 6.7 oz for only $34.00. Find it here.

Moral of the story: GET THIS FACE WASH if you want clear, bright even skin tone without wondering if it will work. I saw results in about 2-3 days or less, and my bf Travis keeps telling me how nice my skin looks, so that is a major plus in my book. Check out all the TULA products at Target before they sell out again!

Top Camping Gear At Walmart For Under $100 - Under $50 - Under $20

If you are anything like me, you want an affordable camping product while still having a product that will last for many years. We find basically everything we need at our local Walmart and here are some of my favorite items so far:

The Coleman 6 Person Clip and Camp Dome Tent, Only $79.00.

CAMPING GEAR UNDER $10.00

This adorable mint headlamp by Ozark Trail is just adorable for under $2.00, it is sure to be a handy addition to your camping gear. It is so important to have several flashlights with you when camping and this one is perfect as a backup light. It would also be just perfect for children or for a great gift.

Mint Headlamp - ONLY $1.88 at Walmart.

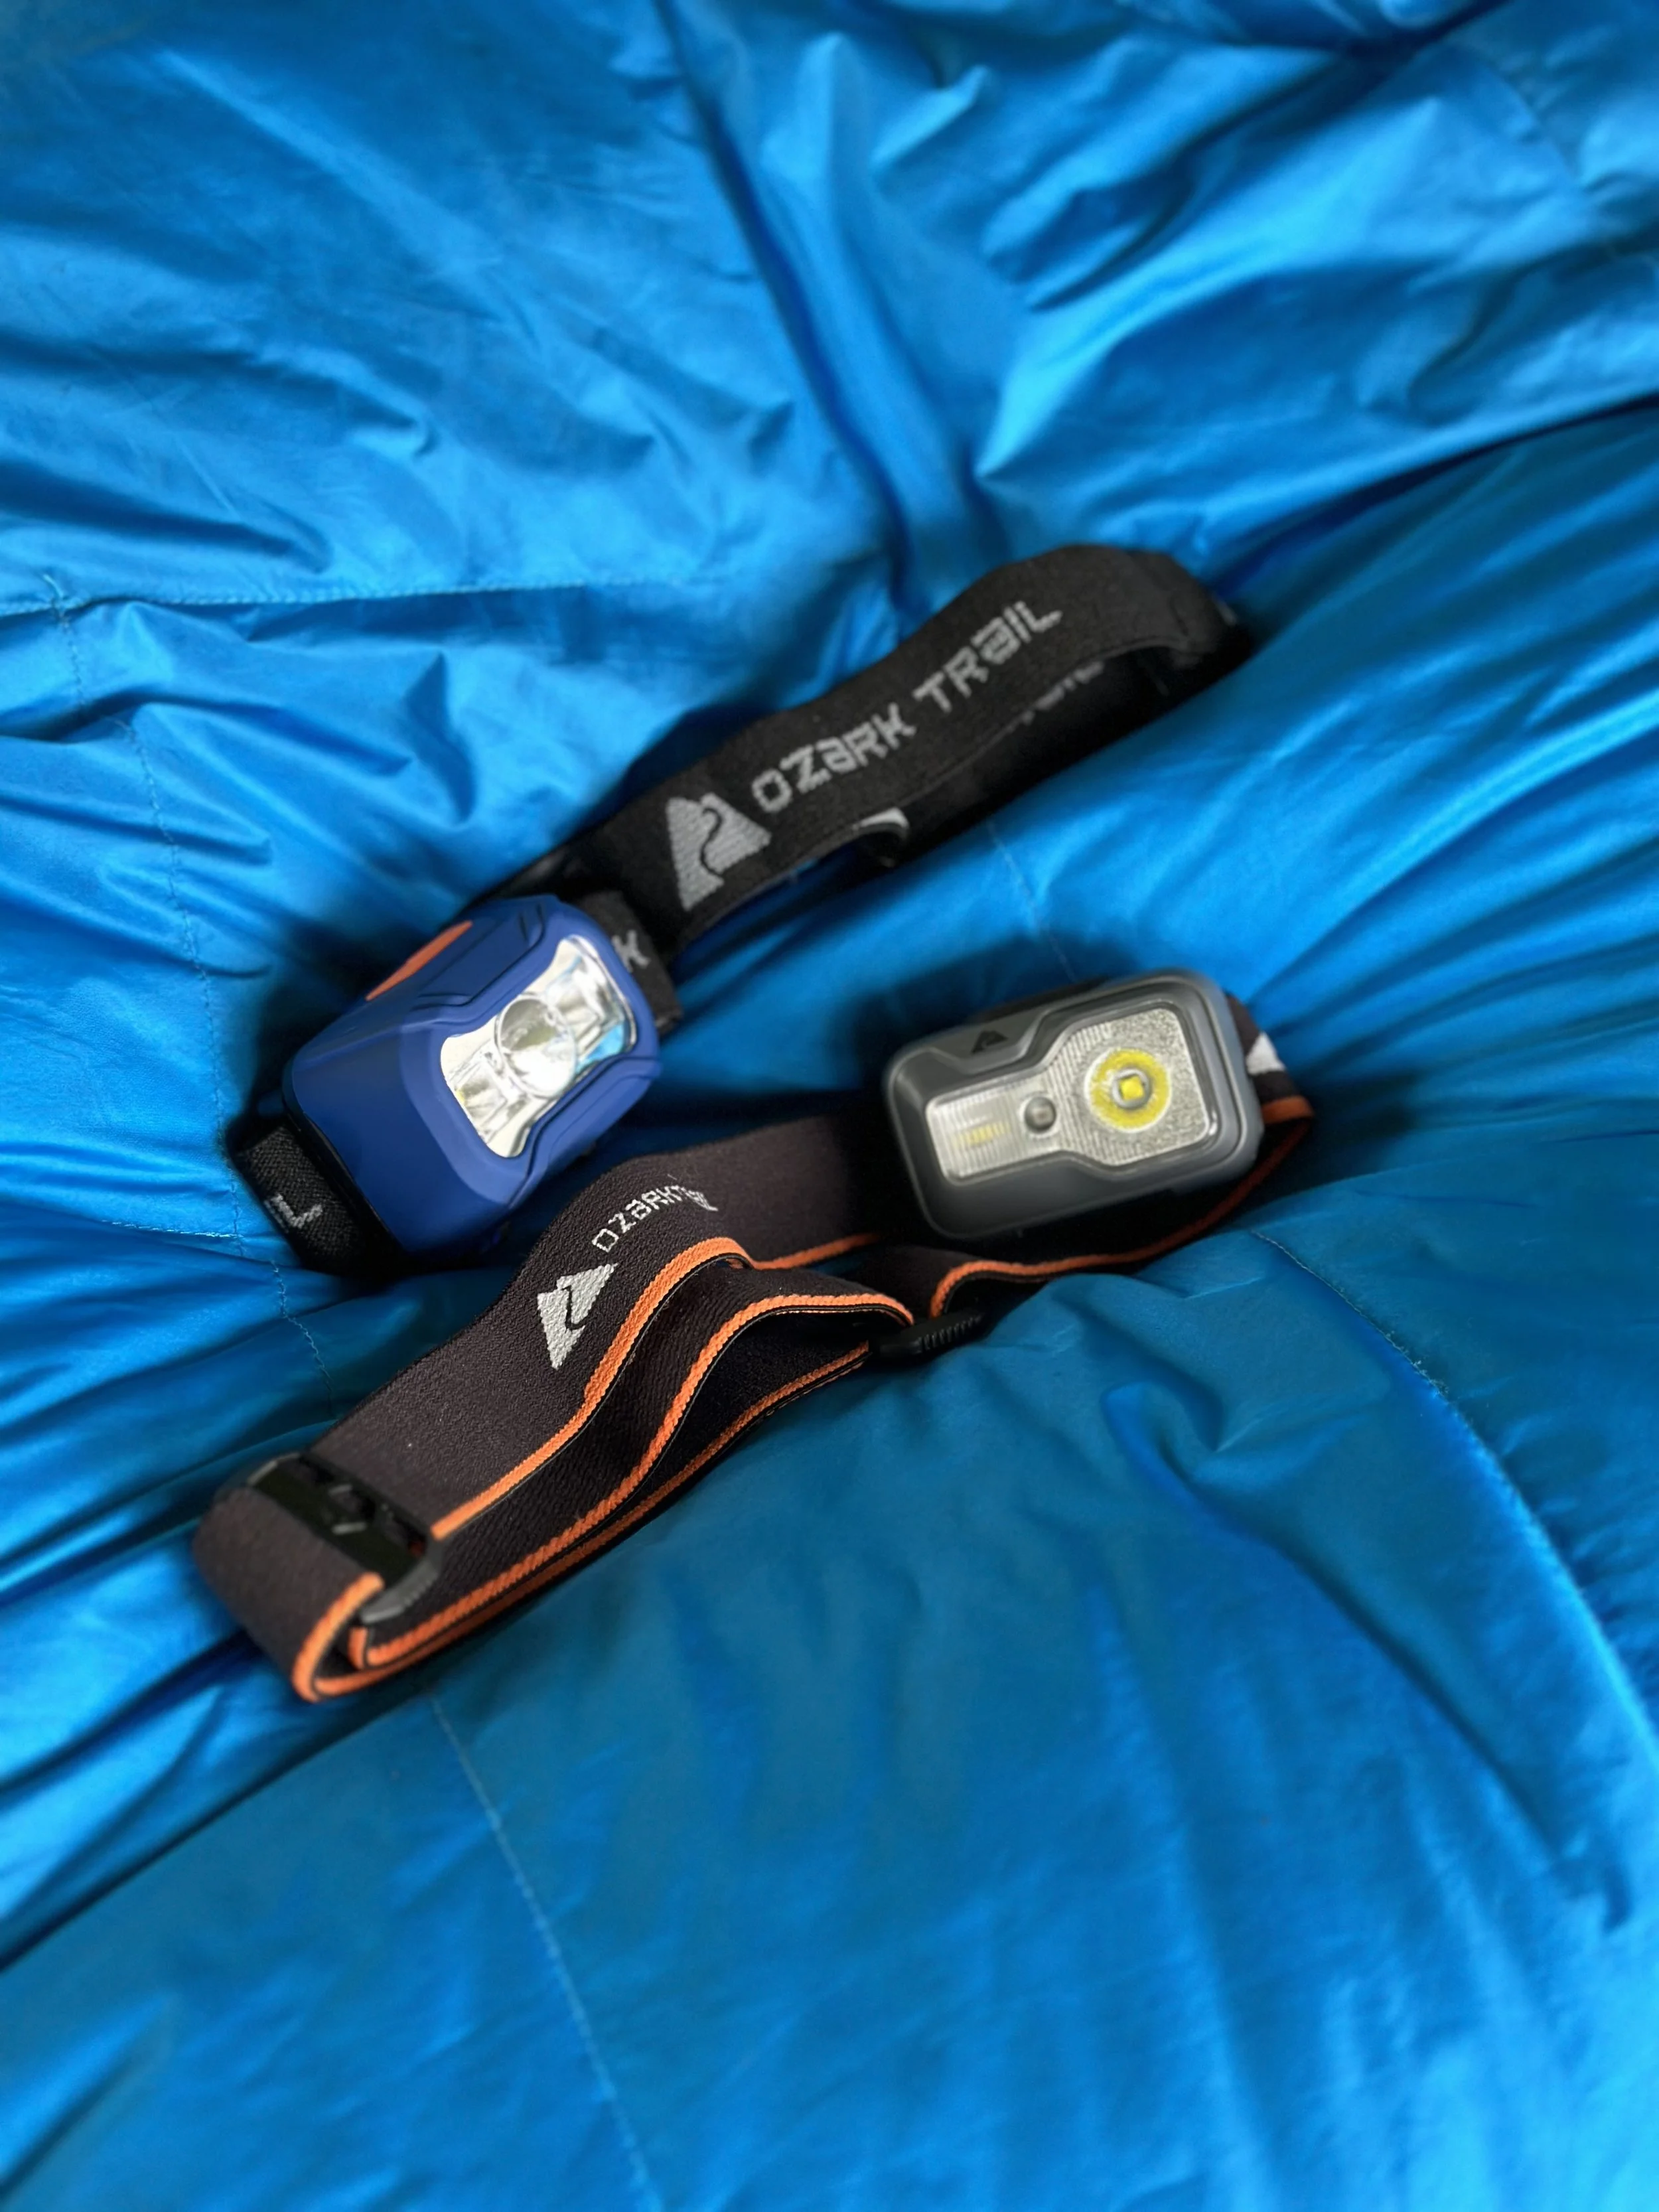
We also got ourselves the below two headlamps so far they have been great. Top headlamp is the Ozark Trail 100 Lumens Headlamp for only $3.98 with also comes with batteries. The bottom headlamp is the Ozark Trail 500 Lumens Headlamp which was almost too bright and still only $8.97, but great if you will be in complete dark or just prefer to be able to see further ahead.

Below, this sweet Kids’ Camping Chair is so adorable in Mint!! Great choice for only $9.88 at Walmart.

Kids Camping Chair in Mint. Only $9.88 at Walmart, Ozark Trail.

Lightweight Day Pack Backpack for Only $4.98! I got myself one of these and use it almost every day now. This bag is great for waking the dogs to hold water bottles, or for running everyday errands. It is just perfect.


CAMPING GEAR UNDER $50.00

We have weighed the options with every single portable camping air pump and always come back to this one. It is the only one that plugs into your car AC adapter (aka the lighter thingie), and works well to blow up our giant air mattress pretty quickly. Find this at Walmart for only $13.88. This has been our most useful piece of camping equipment because it also blows up our inner tubes!!!

Below is a camping chair that I have always wanted!! It has a cooler bag on the side and I just LOVE the color of these lime green colored Adult Camping Chairs. Find them at Walmart for only $24.98.

Lime Green Camping Chair With Cooler - ONLY $24.98 at Walmart.

The below set of reusable camping cook wear is also something I never leave home without for a camping trip. These are also good for road trips and other adventures too. The utensils are very strong, and won’t bend and the collapsible bowls make the perfect addition to any campfire dinner. Find it at Walmart for only $17.97, which beats having to buy a package of single use products for each item provided here. Don’t forget the biodegradable soap!


CAMPING GEAR UNDER $100.00

We just purchased THIS TENT from Ozark Trail and WE LOVE IT SO MUCH! I love how tall it is, so I can stand up and change clothes easily. This will be easy to setup now that we had some practice. Our Queen Air Mattress fit perfectly inside of it (thankfully it fits THROUGH the door, because our smaller tent had a very small door and the mattress did not fit like it does in this one. The pups still had tons of room at the foot of the air mattress to be able to sleep comfortable. We had a fantastic night’s sleep in this tent and would recommend it to anyone! It fit two us adults and two dogs just perfectly.

Ozark Trail 6-Man Clip and Camp Dome Tent at Walmart - $79.

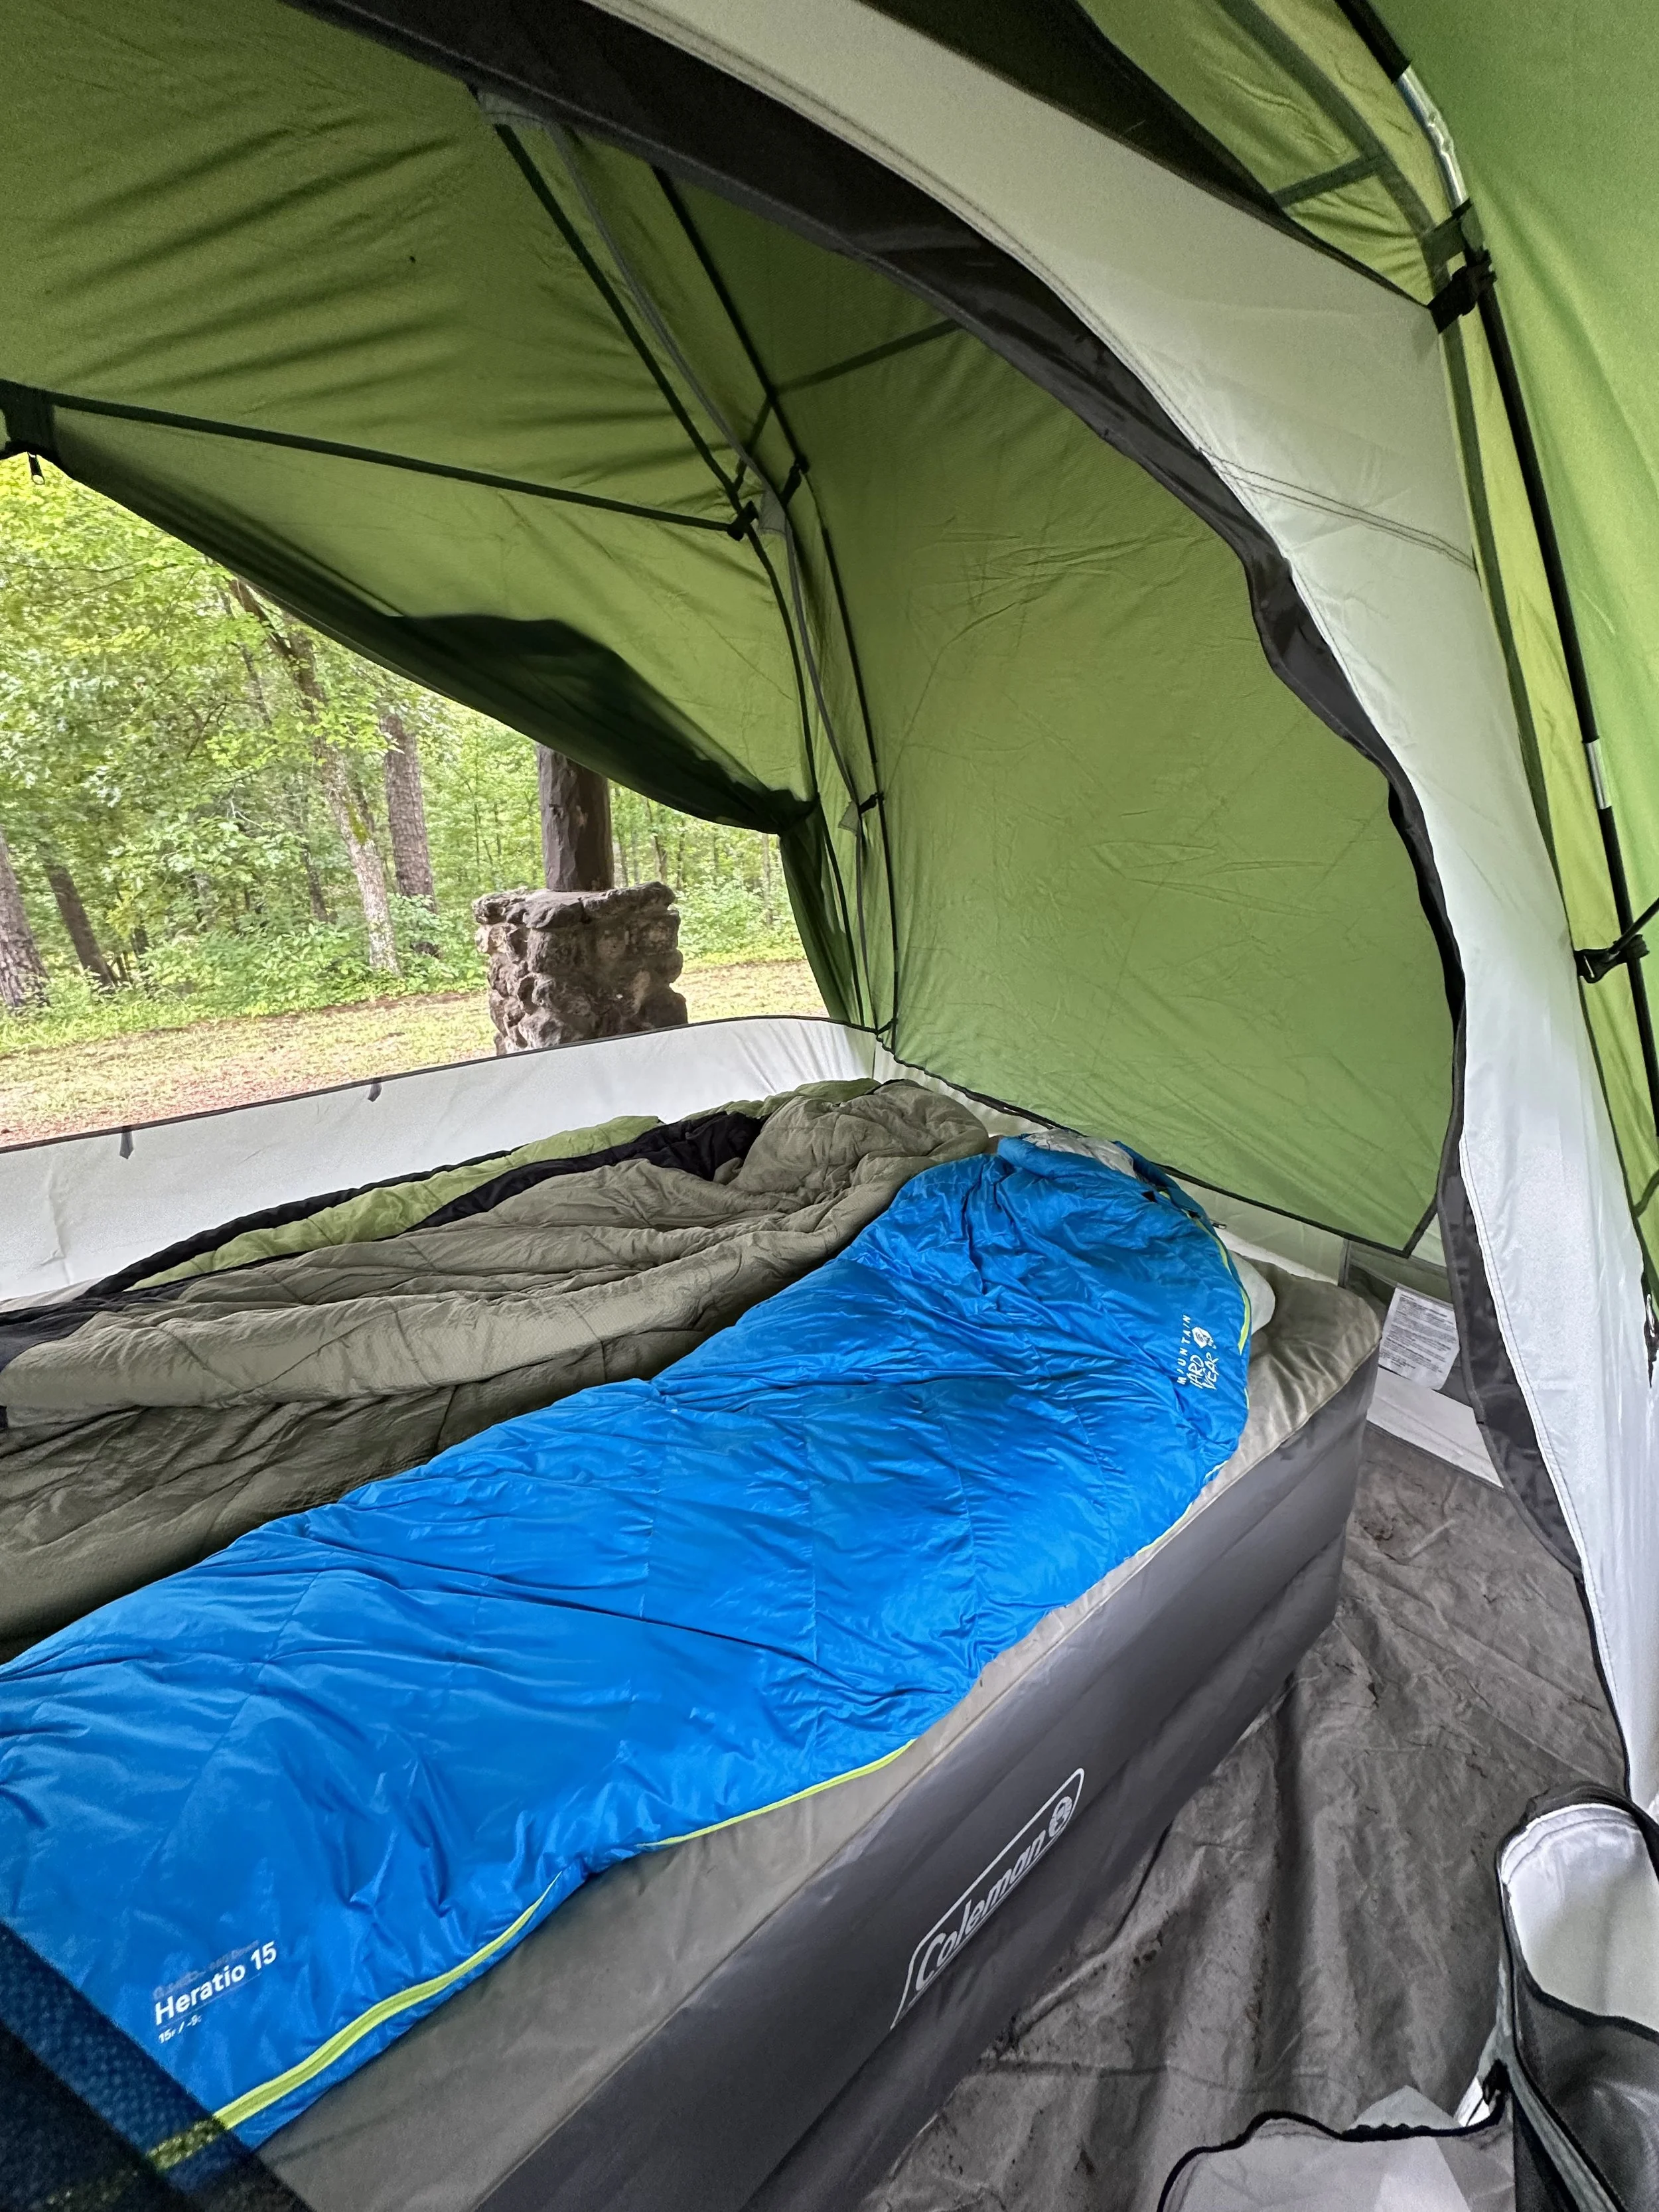
Get yourself a good night’s rest with THIS Coleman 22” Tritech Queen Air Mattress, shown below. DO NOT FORGET YOUR AIR PUMP (we use this one here)! You will not believe how difficult it is to find the ONE AND ONLY style of air mattress that does not require DD batteries OR does not plug in for a power source. We found this one worked with our handheld air pump that has the car charger included. This one is a winner.

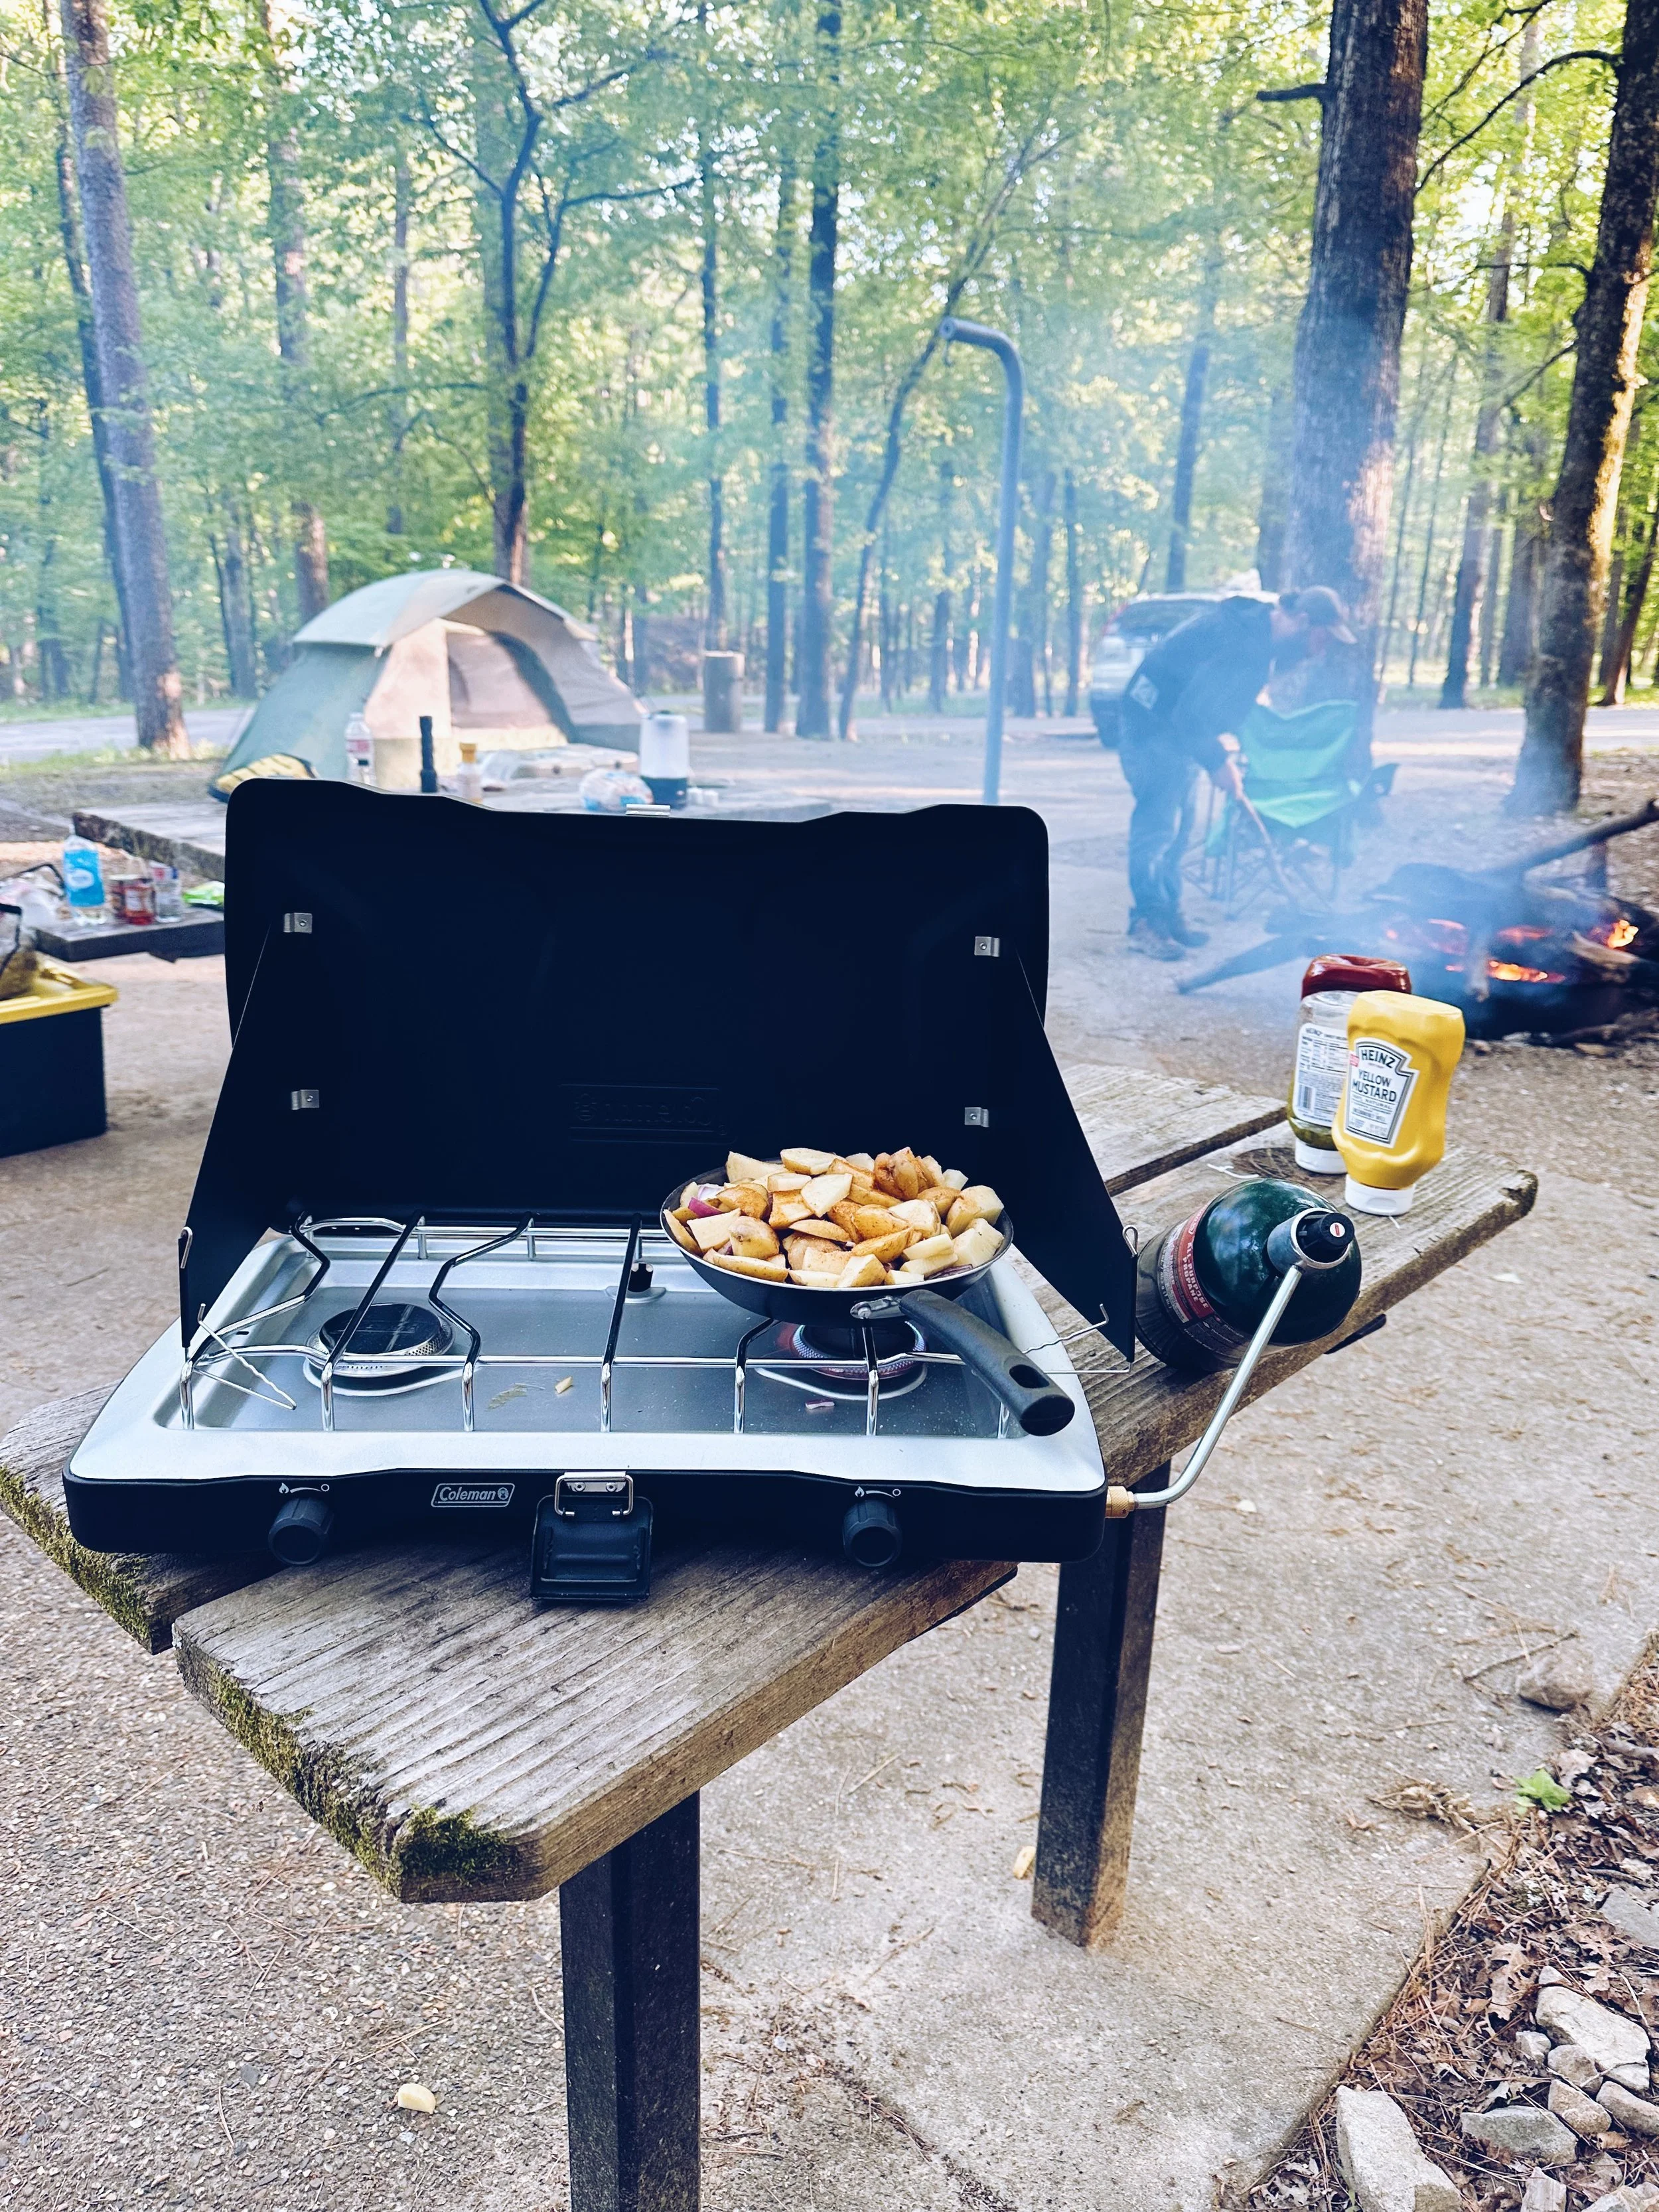
Below, this Coleman Triton 2 Burner Camping Stove has also been wonderful. It’s nice to use when it is either too wet or too hot to make a campfire. The new model of the Coleman camping stove is also super easy to clean. ON SALE NOW FOR $104.51 at Walmart. Don’t forget your Propane Gas for the stove, found here.

What are YOUR all time fave camping items you can’t leave home without?

Top Jumpsuits for Late Summer and Early Fall - Under $20 - Comfortable Travel Outfits

If you are anything like me, you like to be comroftable yet feel put together while traveling. Now that the weather is getting a bot cooler at the end of summer, I wanted to share some of my fave new fashion obsessions, these glorious jumpsuits on TEMU.

You may ask yourself, what should I wear with a romper or jumpsuit outfit? Well, you should have some adorable sandals or flat white tennis shoes, leave your hair down straight, natural, or curled, and add a few bracelets and a stylish statement necklace. Always bring a cute denim jacket or similar for layering if your shoulders get chilly. You do not really have to do much to make these look stylish and the best thing of all is that they fit a wide variety of sizes!!!

I have been obsessed with these flowy, comfortable-as-can-be jumpsuits for a while now, and I am finally happy to be able to share a few with you here! Let ms know what you think! Most of these shown are under $25.00 on TEMU.

Black Jumpsuit Shown Below - ONLY $13.73

Light Blue Ruffle Layer Jumpsuit / Romper - ONLY $23.49 - Shown Below.

Black Drawstring Jumpsuit - shown below. $36.49

Blue Belle Tank Top Romper - ONLY $13.47 - Shown Below.

Pretty Tan Stretch Jumpsuit - ONLY $14.19.

Black Long Sleeve Jumpsuit - $19.99.

Textured Button Crew Jumpsuit in Blue, shown below. ONLY $15.99.

And lastly, this Cute Floral Jumpsuit - ONLY $14.27.

Below, this brown sleeveless jumper would be perfect with so many outfit ideas and accessories. $15.27.

Flyway Family Mushroom Farm - Makanda, IL

I met Mike and Jess at the Carbondale Farmer’s Market years ago, and they are some of my favorite people to this day. They sell their incredible, gourmet mushrooms at the market every Saturday throughout the entire season from April - November. You can also find their mushrooms at various local restaurants, grocery stores like The Neighborhood Co-Op, and at the Urbana, IL Market.

Connect With Flyway Family Farm on Facebook and Instagram!

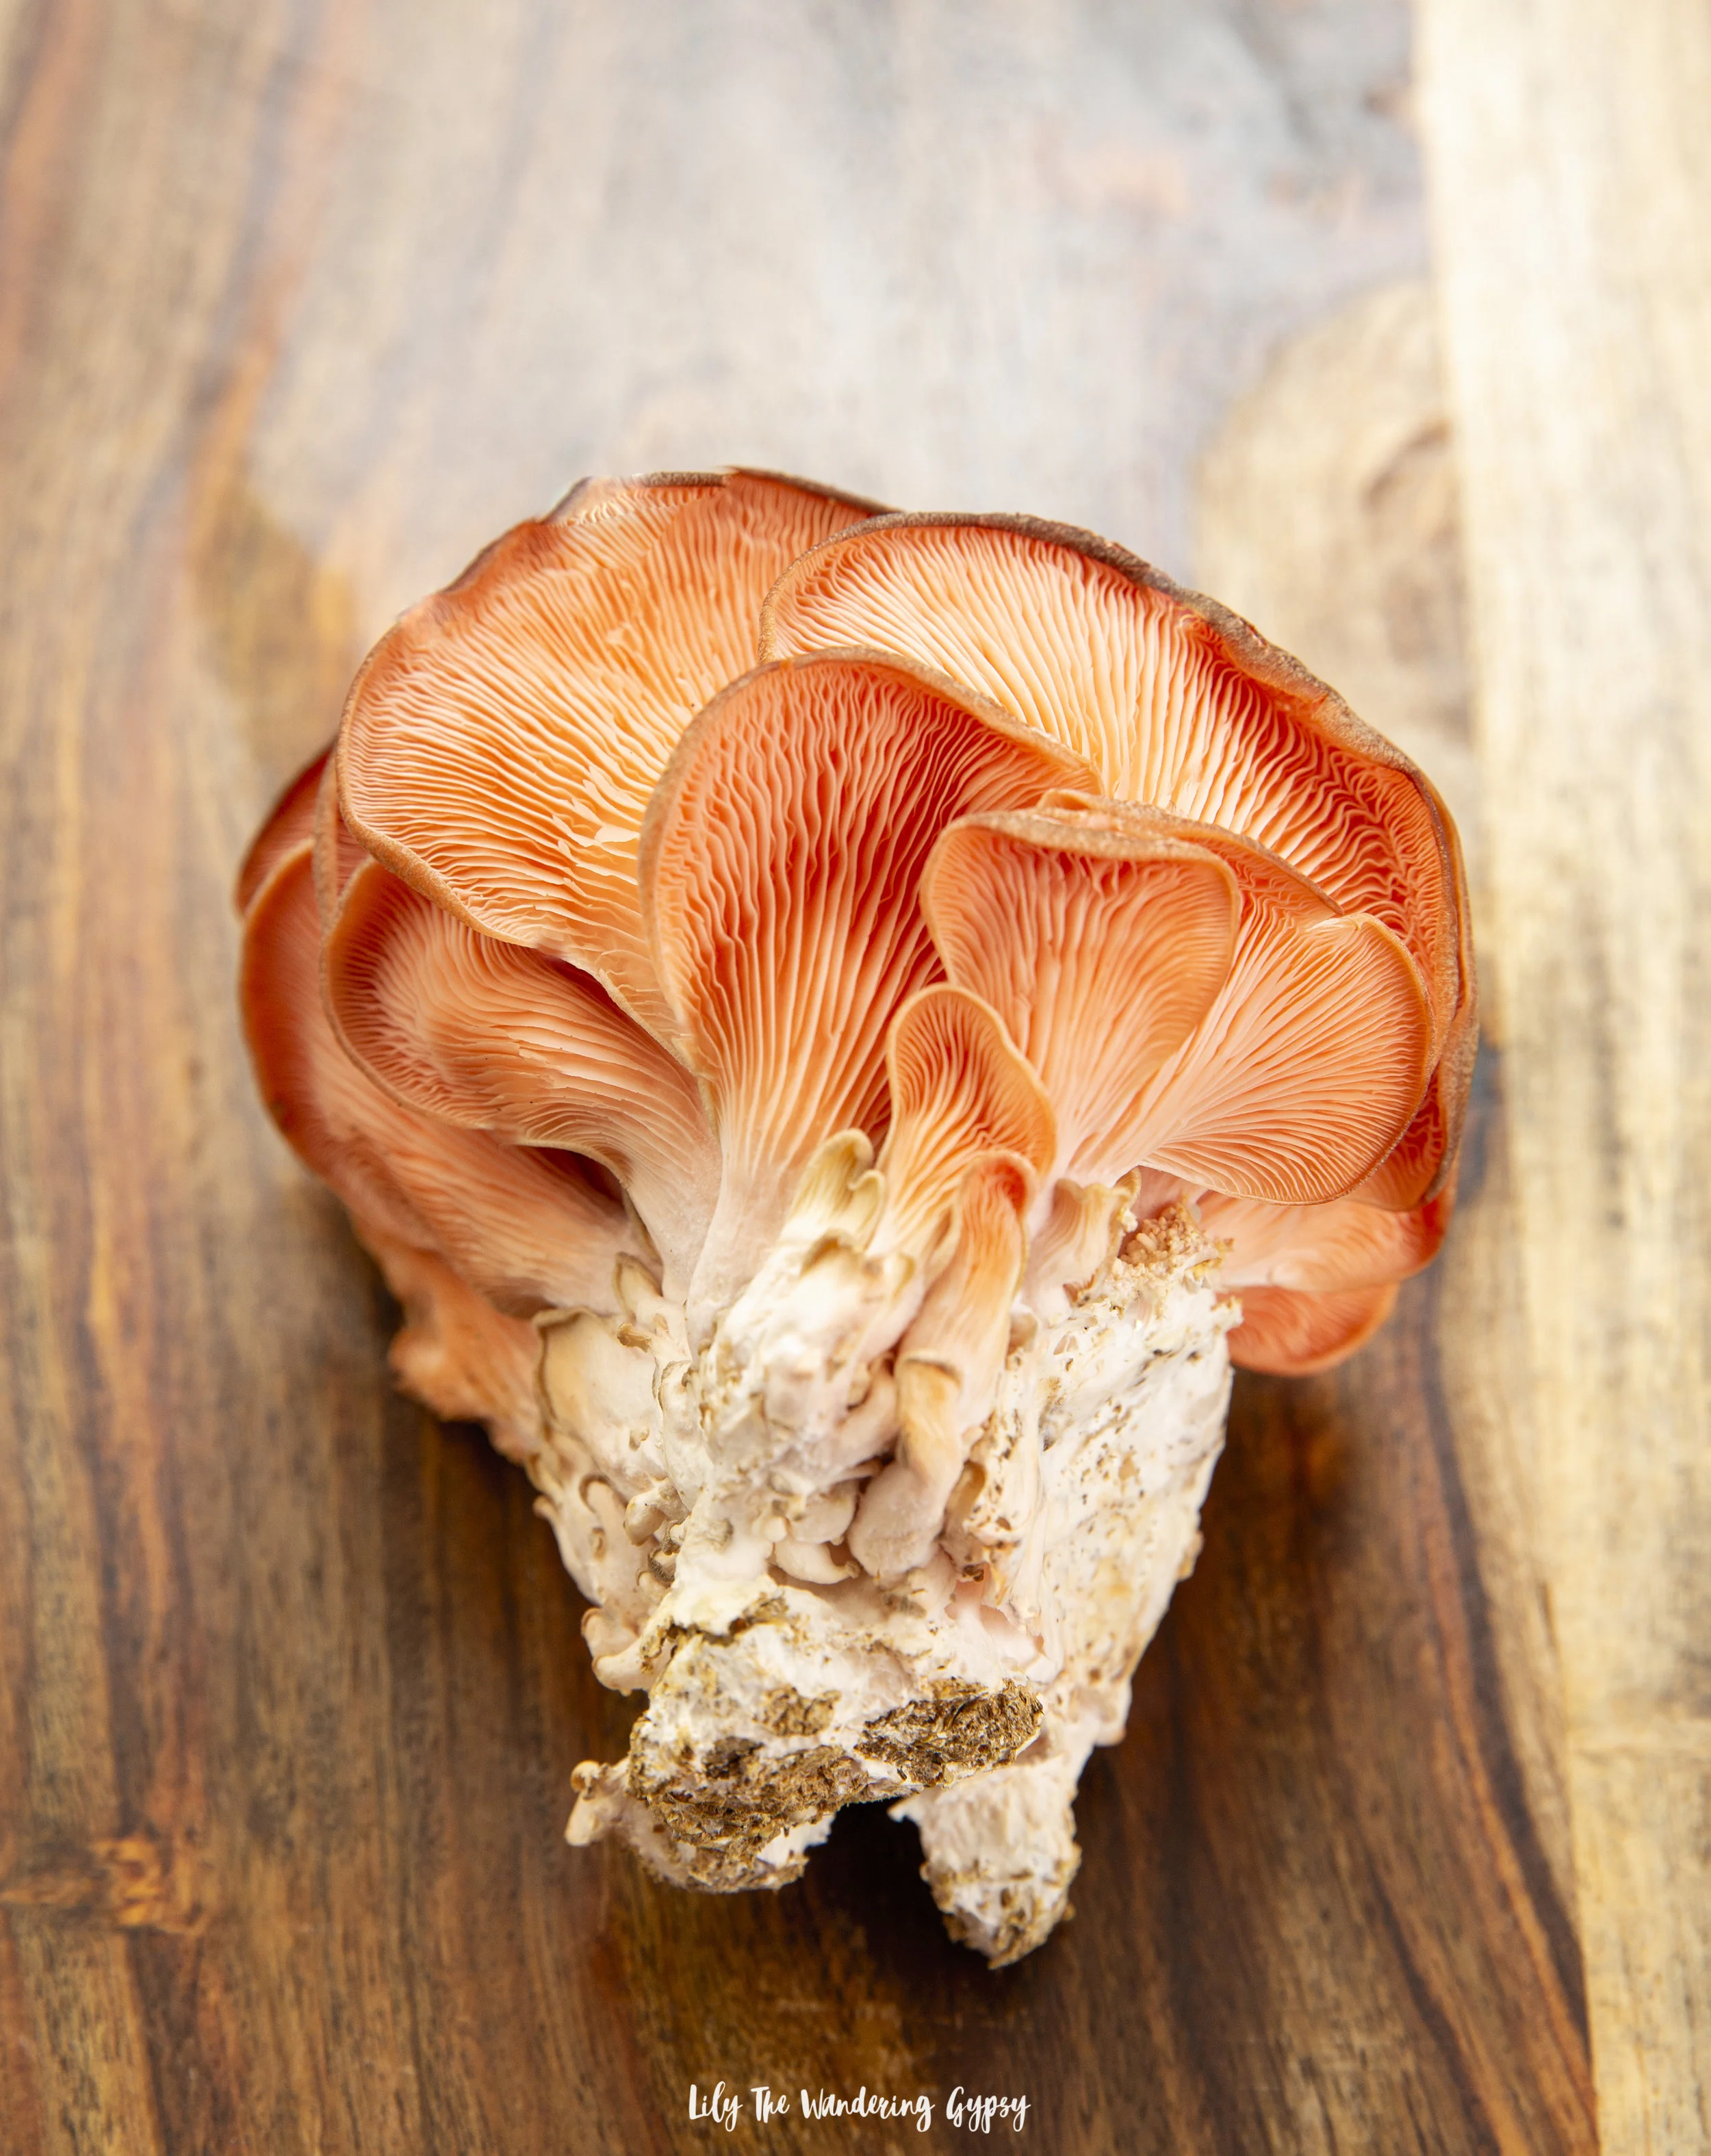
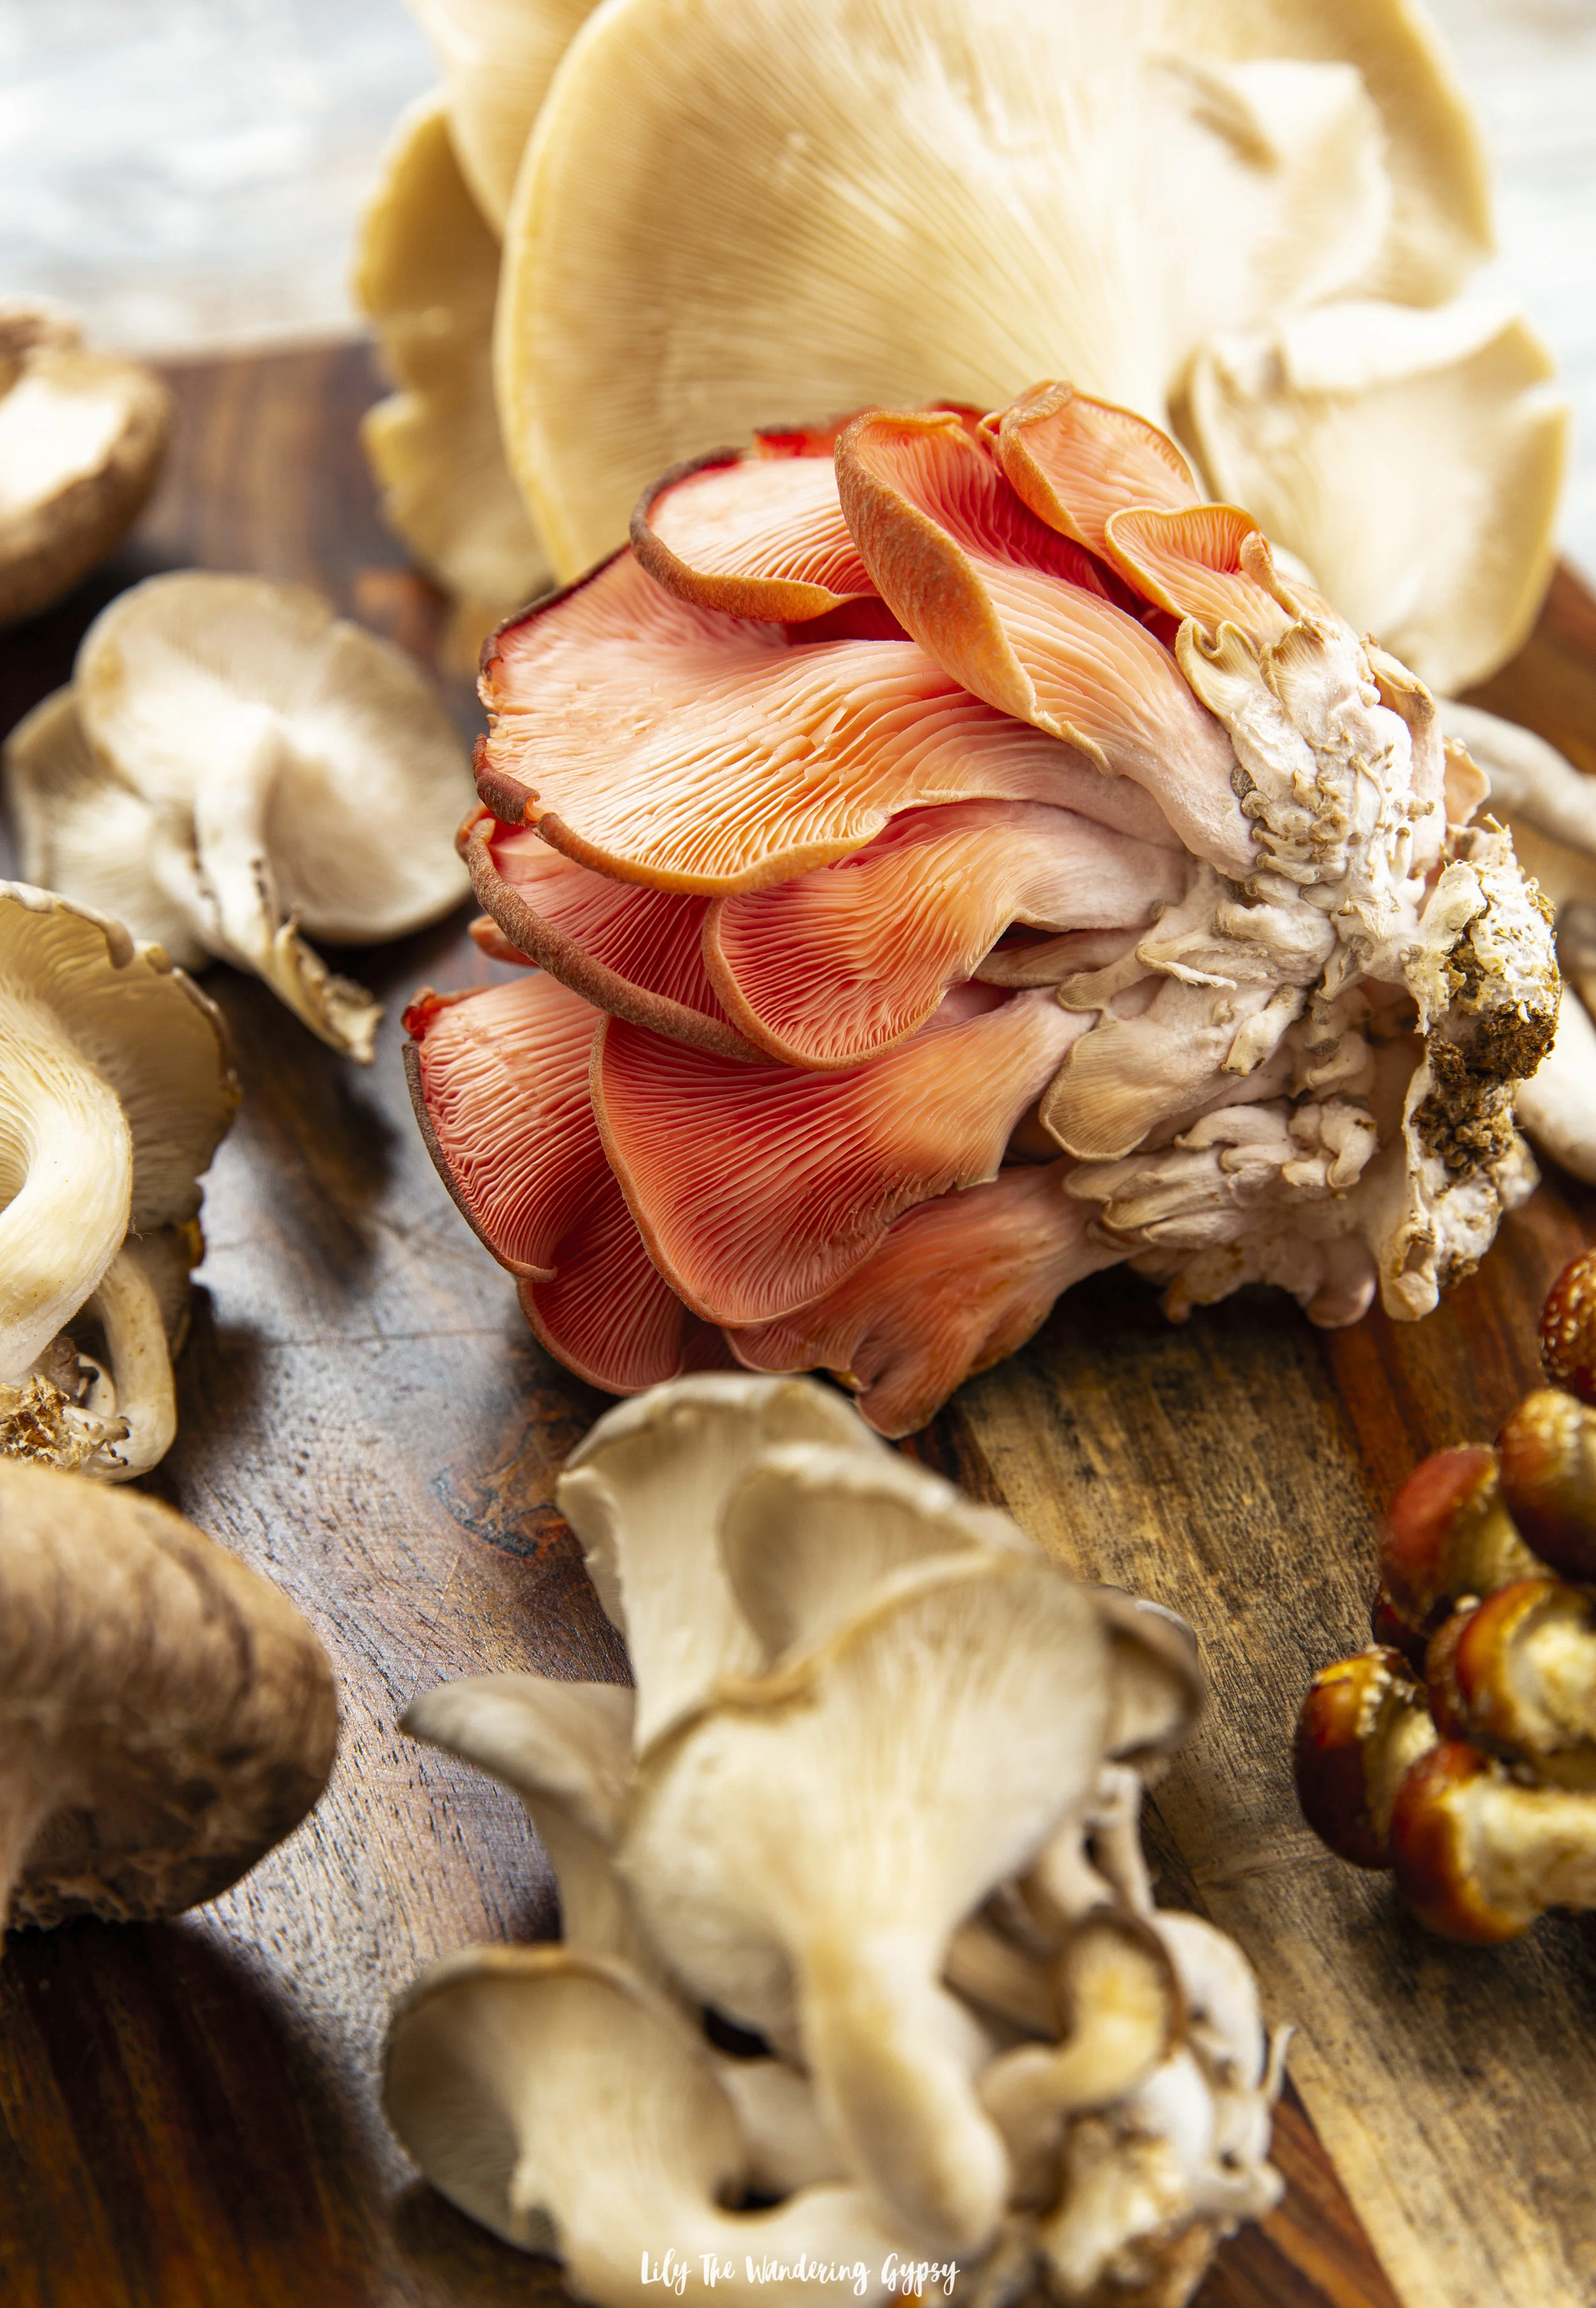
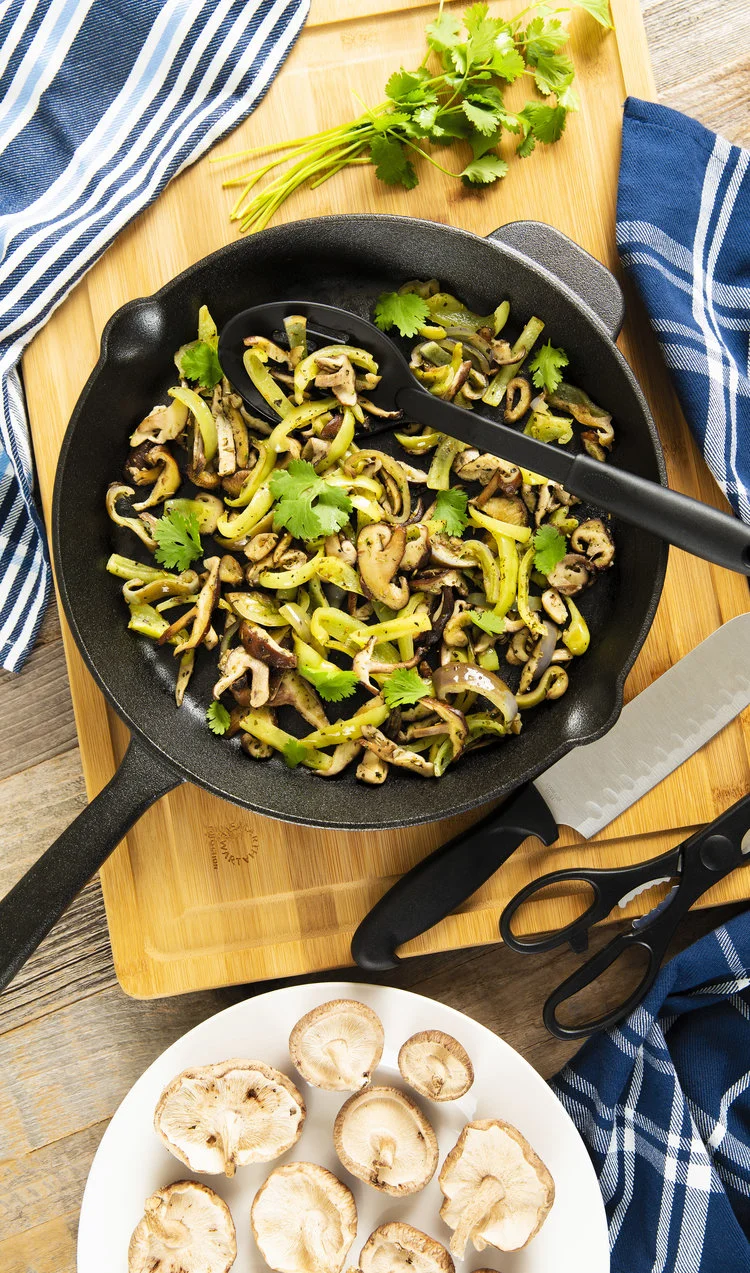
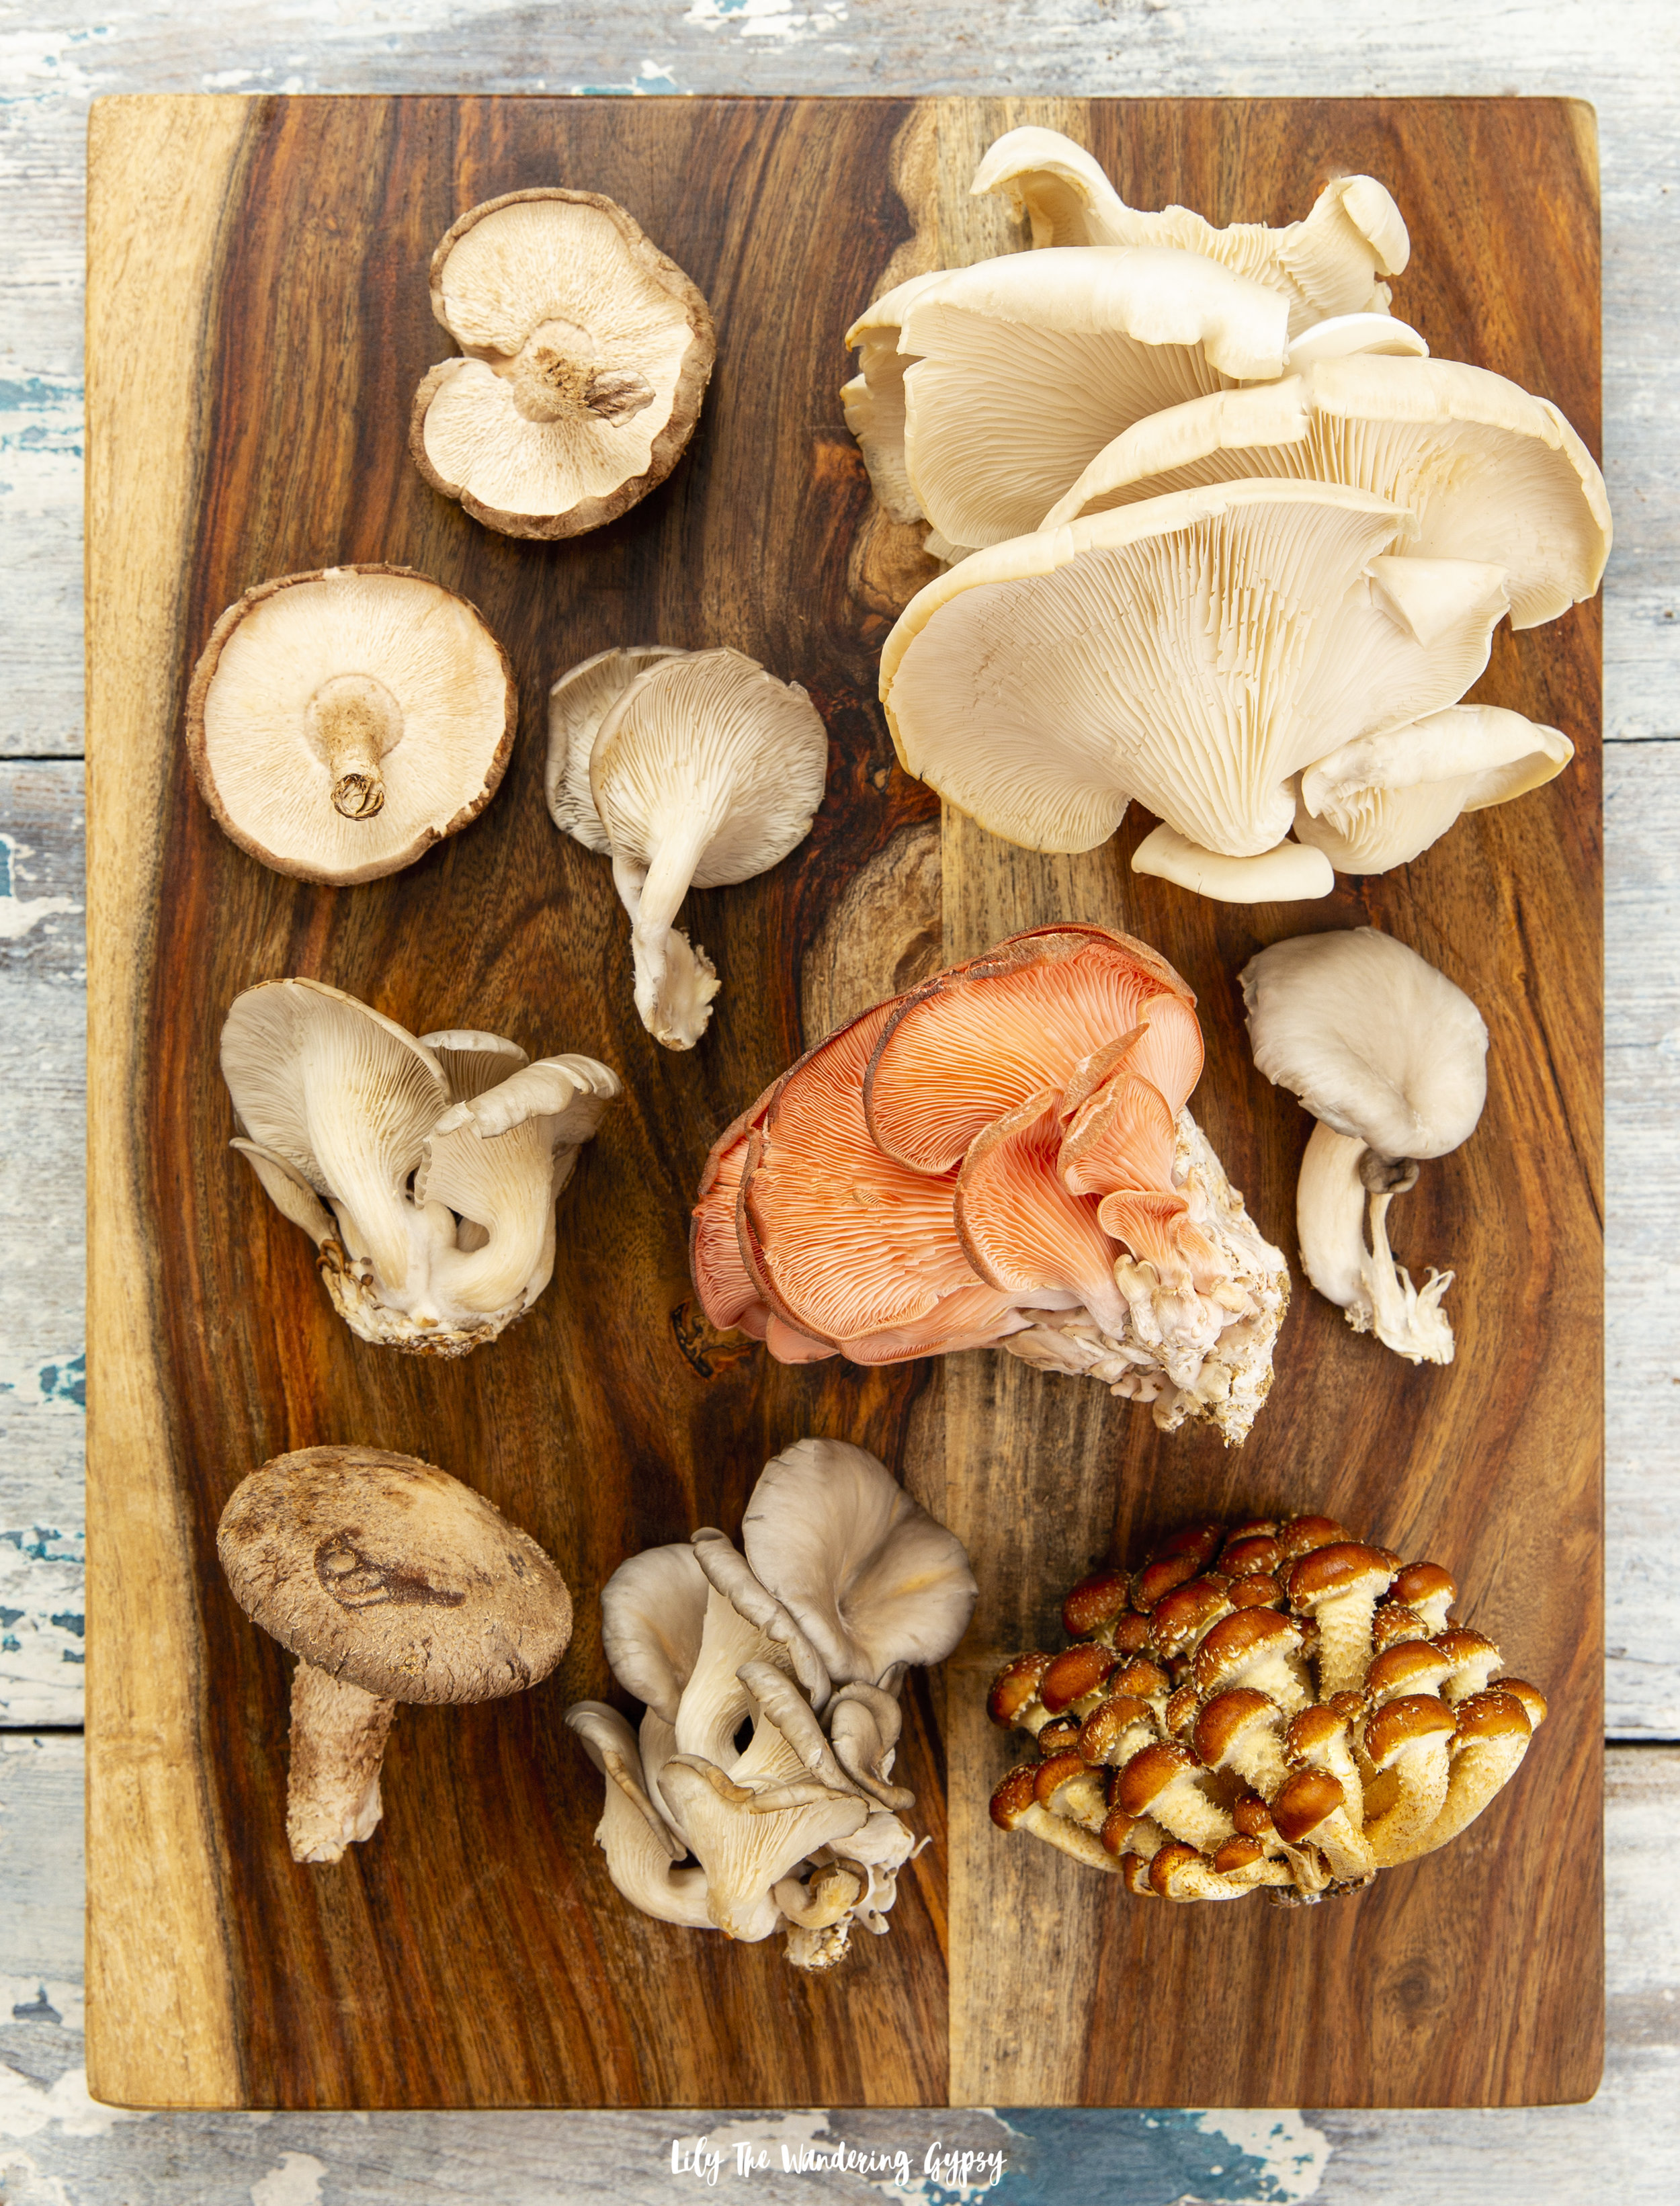
I recently had the honor of capturing some of their current offerings. They have a Chef’s Mix, which contained some of each. These pink oyster mushrooms were so incredible in a mixed veggie skillet we made recently while camping.

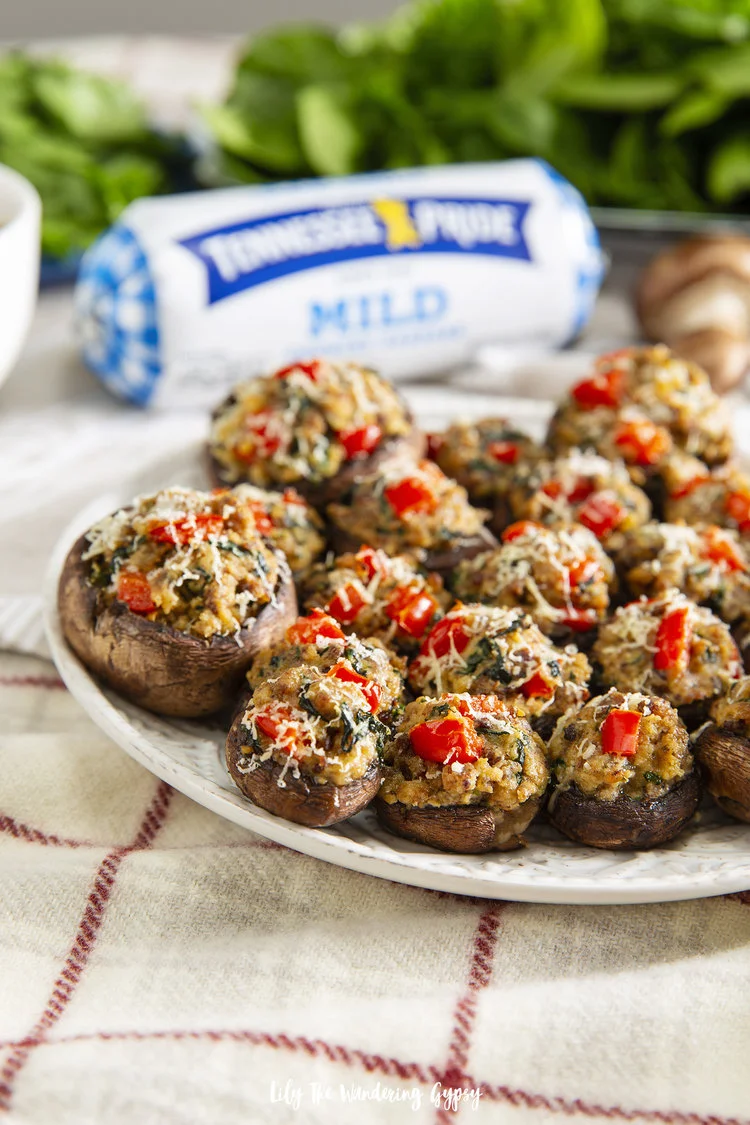
Last year, we also created a really incredible post for Martha Stewart, featuring several of the Flyway Family Farm mushrooms, which I also found at the Farmer’s Market.

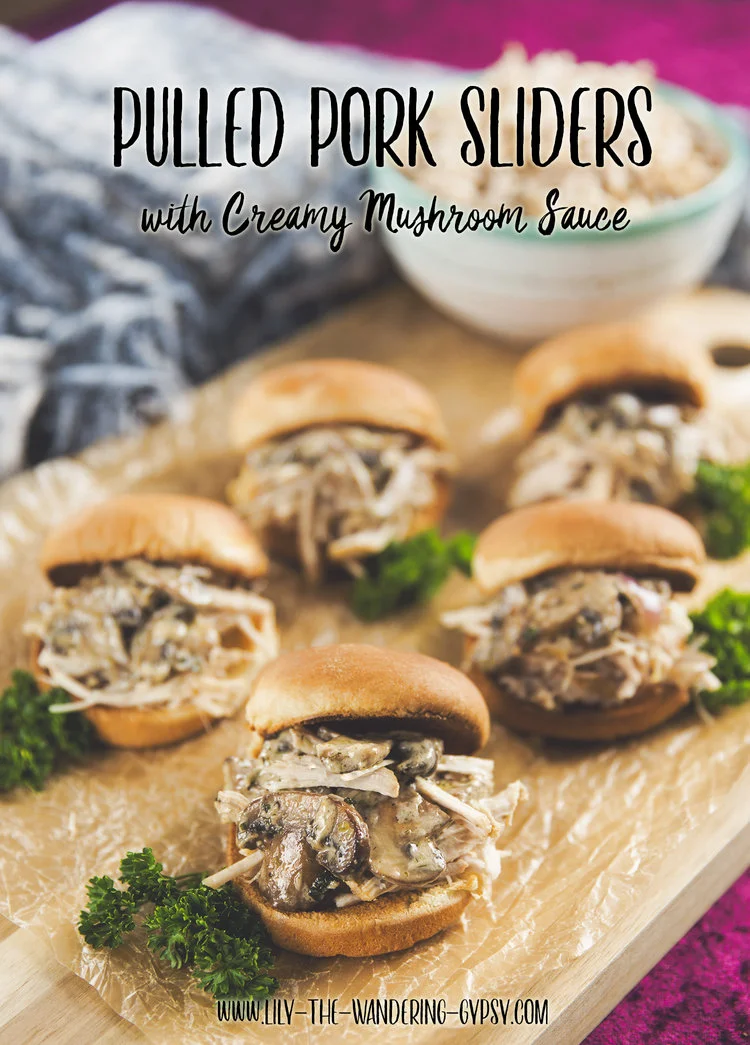
Looking for a delicious marinated mushroom recipe? They can be made ahead of time, and enjoyed for up to five days.

TRY THESE RECIPES

Glitz N Glam Christmas Party Recipes with 7UP + Canada Dry Ginger Ale at Target

This post was sponsored by Keurig Dr Pepper. All thoughts and opinions are my own. Must be 21 or older to consume alcohol. Please drink responsibly. #SipSipHooray

So excited to share a drink recipe AND a fun candy-making recipe that you’re definitely going to want to incorporate into your next holiday gathering. Show your friends and family just how much you care about them by making this year’s festivities extra Glitz N Glam too. Let’s raise a glass to this fun time of year and get to celebrating! I am so excited to share two fun holiday recipes that both incorporate 7UP and Canada Dry Ginger Ale, and I know you’re going to be so inspired to visit Target and incorporate some of these ideas into your next shindig!

If you are someone who believes it’s not a great party without some sort of theme and décor, then you are just like me. I love everything to coordinate and look polished and put together, but I don’t want to spend a ton of time working on setup when I could be prepping food and drinks instead. This décor idea is simple and very easy to recreate, and can be very good for your party budget as well.

The holidays are the absolute perfect time to go a little more on the sparkly, glitzy, and glam-inspired look. After years of styling parties for my blog, and for my friends, and family, I really know what works and what is not so much worth the trouble. For instance, I used a backdrop décor theme of white and silver, and made sure the overall color scheme reads shimmering winter, which allows the food and drinks to be the star of your party. Any time I can incorporate metallics into a party theme, I do it because a bit of shimmer really classes things up, and makes the party feel even more special! This sort of color scheme is also great because silver and white are colors that are pretty readily available at most craft stores and can even be found year round!

Luckily, I was able to find most of my ingredients and party supplies at Target, my FAVORITE place to get inspired for parties and holidays! I love walking their home décor, food, and party aisles to get ideas for upcoming events and parties. They seem to have just about everything and more. You can sSave on Canada Dry and 7UP with Cartwheel, now in the Target app.

I also love how silver and white portray a very classic and elegant look, which makes it incredibly versatile for all ages!

This drink I created, the Orange Spice Punch, is PERFECT for those who love a flavor that is a little more tart with sweet undertones. Also, using a cinnamon stick for garnish was neat because you could stir the drink with it, then the cinnamon taste and aroma was in the drink too.

Also, orange and dark chocolate are a delicious pairing, so making these chocolate truffles with a darker chocolate was a really good idea. The 60% cacao chocolate chips really tasted amazing to use as the base of the chocolates.

7UP ORANGE SPICE PUNCH

(Recipe Found Here)

INGREDIENTS

  • 1 qt. orange sherbet

  • 2 L. 7UP®

  • 12 oz. Canada Dry® Ginger Ale

  • 6 oz. orange juice

  • 6 oz. cranberry juice

  • 1 cup Canadian whiskey (optional)

  • Lemon, lime, and orange slices; cinnamon sticks; and pumpkin spice, for garnish

  • Prep Time: 4 minutes

  • Ready In: 6 minutes

  • Serving Size: 30 people

DIRECTIONS

  • Add everything except for sherbet into a one-gallon punch bowl.

  • Float scoops of sherbet on top.

  • Let sherbet soften in the punch for a few minutes before serving.

  • Garnish with lemon, lime, and orange slices, cinnamon sticks, and a touch of pumpkin spice.

Please drink responsibly.

Best served in something extra fancy! 

7UP FIRECRACKER CANDY TRUFFLES

(RECIPE FOUND HERE)

INGREDIENTS

·       POPPER CANDY

·       Confectioners’ sugar for dusting

·       1 cup granulated sugar

·       2 tbsp. light corn syrup

·       1/4 cup 7UP®

·       1 tbsp. baking soda

·       1-2 tsp. citric acid (optional, adds flavor)

·       Pink food coloring

·       TRUFFLES

·       1-2/3 cups heavy cream

·       1 bag of chocolate chips (good quality 60% cacao), chopped + 6 oz. more for coating truffles (I used 1.5 bags of chocolate chips altogether)

·       Pinch of salt (I used large grain salt, it worked super well)

·       1/2 tsp. ground cinnamon (optional)

·       3/4 tsp. cayenne (optional)

·       1/2 tsp. chili powder (optional)

  • Prep Time: 15 minutes

  • Ready In: 2 hours 15 minutes

  • Serving Size: 10-12 people

DIRECTIONS

·       POPPER CANDY

·       Prepare a baking sheet with parchment and dust with confectioners’ sugar.

·       Place granulated sugar, corn syrup, and 7UP® in a pot, whisking to combine. Bring mixture to a boil, and cook until a temperature of 300° is achieved. Watch your temp, or this can burn relatively easily.

·       Remove from heat, and stir in baking soda, (optional) citric acid, and food coloring of your choice. The citric acid just adds flavor, which is super tart. So, if you would prefer to just have a sweet topping, do not include the citric acid.

·       Pour onto prepared baking sheet, sprinkle with remaining citric acid, and set aside to cool while preparing truffles.

·       TRUFFLES

·       To make the truffles, bring cream to a simmer in a shallow saucepan.

·       Place chocolate in a shallow bowl, and pour warm cream over chocolate.

·       Let stand for 10 minutes.

·       Stir with a rubber spatula until chocolate mixture is smooth.

·       Season with a pinch of salt, ground cinnamon, and cayenne.

·       Pour into a shallow baking dish, and chill in refrigerator until firm. This step was a bit tricky, but I found that spreading the chocolate in a pretty thin layer worked best and was the fastest.

·       To form truffles, scoop with a small ice cream scoop, melon baller, or kitchen spoon and roll into a balls. Feel free to re-freeze chocolate if it’s not firm enough to make the balls. Note – this step was a bit tricky. At first, the chocolate was way too soft to form balls from. I also had the chocolate freeze completely, because I left them in the freezer too long. Just check on the chocolate ganache at 15 minutes, then every 5 minutes after that.

·       Place truffles in freezer to firm up again before covering with more chocolate. Below, you can see an image of the chocolate balls after they have been frozen for about 20 minutes.

·       Once popper candy is cooled and hard, place in a large resealable bag and break up into pieces with a rolling pin or mallet.

·       Cover chilled truffles with melted chocolate, and then sprinkle with popper candy…“pop” one in your mouth and enjoy!

Above, you can see how I covered the truffles in melted chocolate – it was really fun, and I ate SO much chocolate in the process, LOL!

TIP

·       Keep in refrigerator, and be aware that popping candy need to be used quickly because of its delicate nature. Enjoy!

You can find more recipe inspiration at 7UP.com.

Setting up a Glitz N Glam holiday party is easy if you stick to these fun décor ideas, as well as offer guests food and drinks that they cannot resist! What is your favorite color scheme and recipe ideas for your holiday parties?

#SipSipHooray

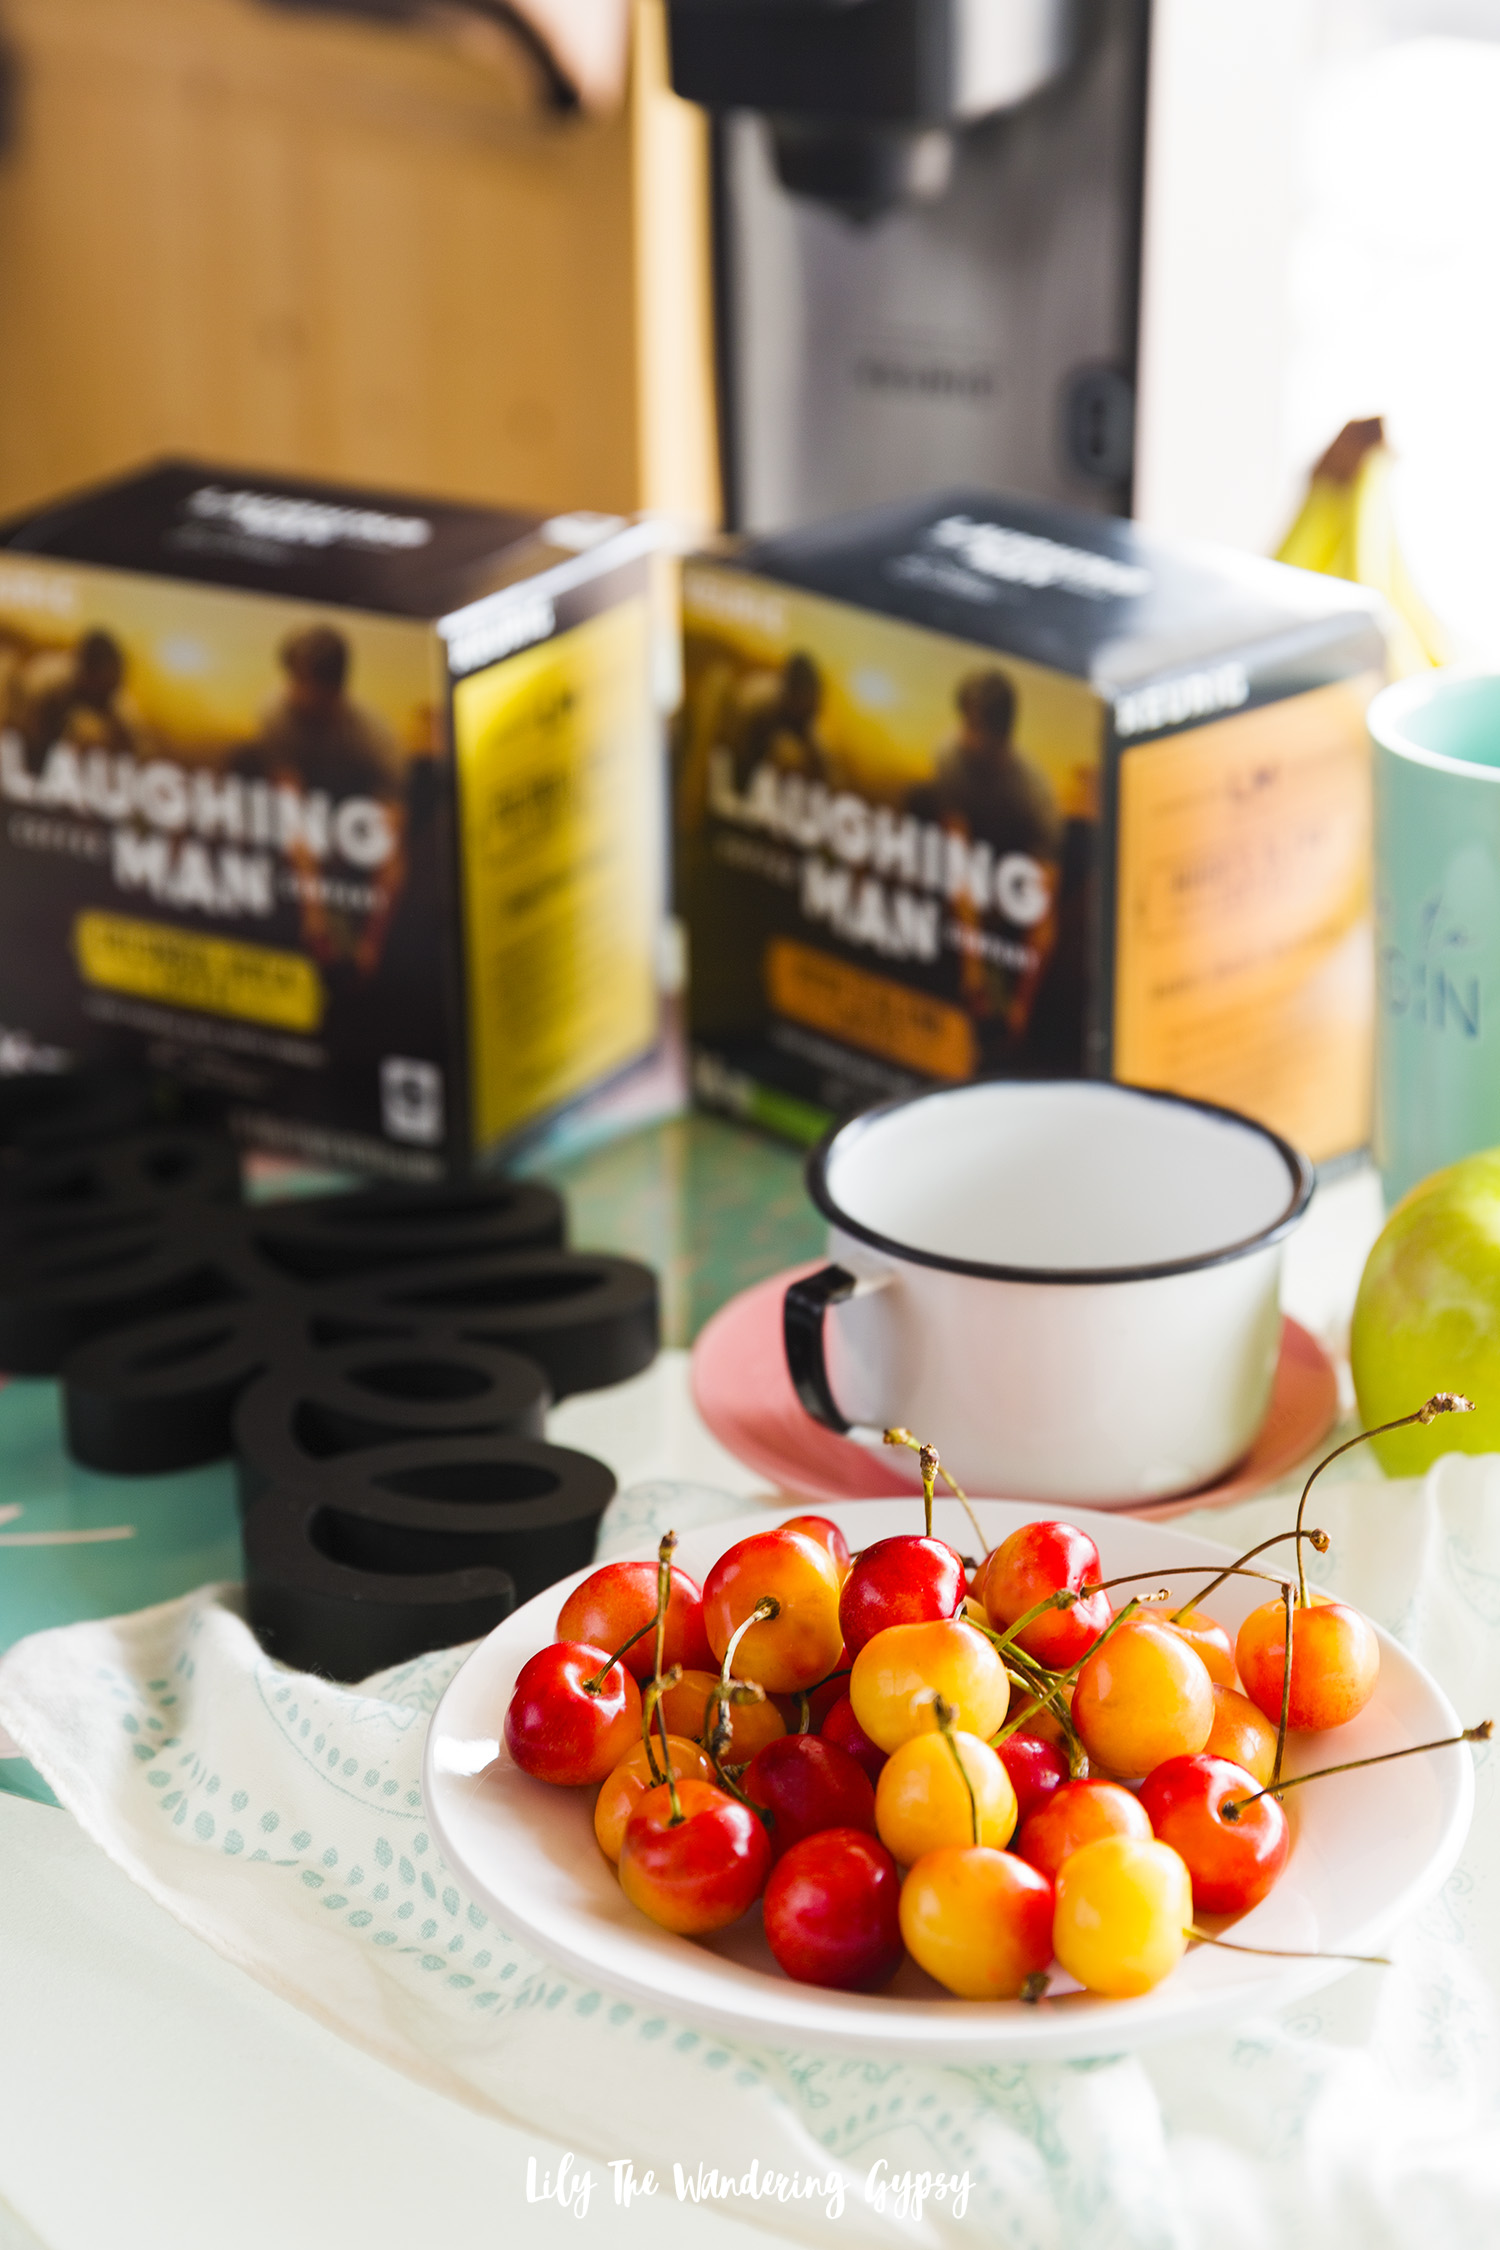
‘Make Every Cup Count’ with Laughing Man® Coffee from Target

This post is sponsored by Laughing Man® Coffee but the content and opinions expressed here are my own.This post is sponsored by Laughing Man® Coffee but the content and opinions expressed here are my own. #LaughingManCoffee #MakeEveryCupCount #Target

Sometimes I notice, that at the tail end of any season (the end of summer, for example), I sometimes get into a little slump. As a blogger, we are always having to think a month or more in advance for projects, and while it’s always fun to think about the new season ahead, I do sometimes need a little boost of caffeine in the mornings to get me through it and to stay motivated! A cute coffee cup never hurts, either! ‘Make Every Cup Count,’ friends – the motivating power of coffee is really amazing.

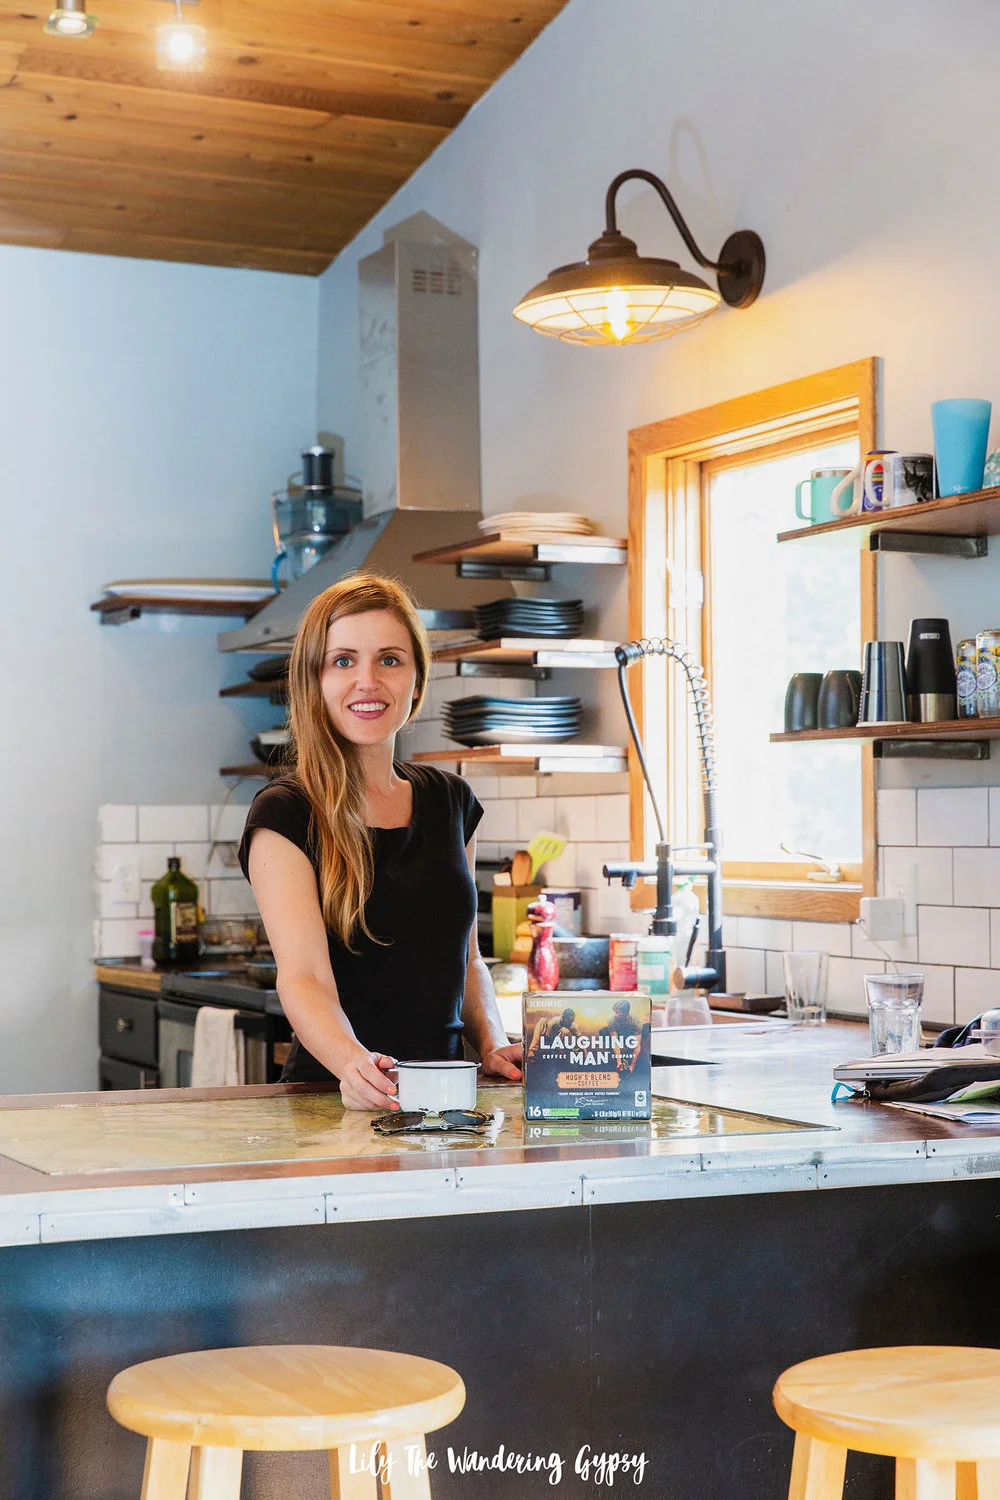
I recently tried delicious offerings from Laughing Man® Coffee, which I found at my local Target, and also on Target.com. I really, truly enjoyed this coffee! Bobby tends to prefer his coffee more black than I do, and wow, that fresh coffee aroma was absolutely intoxicating! We drink coffee almost every day, sometimes multiple times a day – who’s with me?! The flavors we loved most include the Columbia Huila and Hugh’s Blend. Have you ever tried this brand before?

Laughing Man® Coffee was actually co-founded by Hugh Jackman after an inspiring visit to Ethiopia, where he met a young farmer named Dukale. Inspired by Dukale’s optimism and determination, Hugh was committed to helping improve the lives of coffee farmers and share their Fair Trade Certified™ coffees with the world.

Since its inception, Laughing Man® Coffee has always strived to ‘Make Every Cup Count’ by donating a portion of proceeds from each purchase to the Laughing Man® Foundation, which supports coffee farming communities and programs that clear the way to health, growth and success for coffee farmers and their families. In addition to being available in recyclable K-Cup® pods, consumers can now purchase the brand in ground bagged coffee.

It’s important to have something to keep you fresh and alert, especially when a lot of my projects seem to be due all at the same time. That encourages me to try to burn the candle at both ends, and while I’d love to take a midafternoon (or admittedly a mid-morning nap), I know that’s just not always possible. If I have a warm cup of java nearby, then I can actually get through those rough work days.

LEARN MORE ABOUT THE COFFEE FEATURED HERE:

Colombia Huila – A dark roast coffee of uncommon complexity, Colombia Huila is produced from beans of great character, resulting in an intense, deep-roasted flavor with a black cherry sweetness, and a dark chocolate finish.
Hugh’s Blend™ – With contrasting, yet complementary notes of tart green apple and toasted graham cracker, this smooth and balanced blend represents the cheerful embodiment of the Laughing Man® coffee mission and a reminder that true fellowship knows no borders.

Both available in recyclable K-Cup® pods and bagged from Target.

I also like to enjoy a cup of coffee on the weekends – after all, a blogger’s job is never really done after Friday at 5pm, it’s a constant and very fulfilling job and I do love it!

What sorts of ways do you try to prep for the seasons ahead? I am finishing up lots of late summer and back to school projects, but soon enough, Fall and Winter projects will be in the works.

Whether you’re a blogger or not, I am sure we all feel the motivation to look ahead. It’s sometimes hard to create Fall projects when it’s still warm out, but I love having a delicious cup of coffee nearby, so I can get that extra boost of motivation!

Learn more about these amazing coffees here! Thanks for stopping by, friends!

Summer Grilling at Kroger with Smithfield + Yuengling

This is a sponsored post written by me on behalf of Smithfield®. The opinions and text are all mine. #GrillOutChillOut

Summer is JUST getting started, and I would love to know what your plans are for the next few months! Going anywhere fun or exciting? Planning out any cookouts or summer parties? I love using summer as an excuse to get together with friends, family, and good food – there’s nothing that tops the fun and excitement I get when I know there is something fun on the horizon.

Last year, I had the opportunity to feature Smithfield® Yuengling® Traditional Lager Bratwurst from the Smithfield® Craft Collection™ in a post about making summer grilling easier and MORE delicious. You can read that post here. This is the flagship beer from America’s Oldest Brewery!

This time around I decided it would be fun to serve these brats in a traditional manner with buns and grilled onions, PLUS it could be cute to serve these brats in more of a finger food / appetizer style - cut into slices and served with mustards.

Find everything you need for summer celebrations at your local Kroger or Kroger. The bratwurst are infused with real Yuengling Traditional Lager (a.k.a. DELICIOUS!!), and are made with premium cuts of pork and a special blend of sweet and savory spices. I just love the unique taste of these, and it’s so nice to not actually HAVE to cook them in beer before grilling, because the Yuengling flavors are already there.

Since I was incredibly inspired by the history of brats in general, I was particularly inspired by German or Bavarian offerings. I found that bratwurst generally contain fresh sausage, and if you’re looking for something that is already cooked, then sausage is typically available in dried, cured, or fresh varieties. This means that the brats do need to be cooked or grilled until their internal temperature reaches 165 degrees F. 
I decided to offer guests five or more different styles of stone ground or other higher end mustards, with slices of the bratwurst, then we could all try something new.

If you’re “brave” enough and want to experiment with even more pairings, feel free to offer guests some sauerkraut (which is a finely cut cabbage that is fermented, and tends to have a stronger smell if you’re not used to it), which would add an even more authentic taste to this meal.

I kept thinking about how these foods would be served at a traditional festival where brats and beer are the main focus, and I thought more of a party platter (in my case a wooden cutting board with a handle) full of small bites was definitely the way to go.

Mustards are something that I am just beginning to enjoy. BUT, my boyfriend and a few of our friends seem to “compete” to see who can eat mustard with the largest number of different foods. I am fine if I don’t win that contest, but mustard is such a versatile and traditional condiment that I want to even learn to make it soon.

I found five different mustards at the store, ranging from Stone Ground varieties to Dijon mustards and even one mustard that is bourbon barrel aged! 

I basically just looked to see which ones had the most texture (as in more mustard seeds), plus which ones would offer more of a visual variety and also as many different tastes as possible. This could be a great way to get rid of some mustards in the fridge that are only half full – just offer them up and I am sure they’ll get eaten!

As far as other foods to serve, I love the idea of offering fresh homemade soft pretzels plus hard pretzels (like the smaller crunchy ones), plus perhaps some slices of super crunchy bread or similar.

Below, you will see those lovely grill marks on the brat buns! This added SO much more flavor and visual interest to the meal.

CONNECT WITH THE BRAND ON SOCIAL:

Instagram- @smithfieldbrand, @yuenglingbeer

Facebook- @cookingwithsmithfield, @yuengling

Twitter- @smithfieldbrand, @yuengling_beer

Pinterest- @smithfieldbrand

Feel Love. Feed Life. Feed Side By Side.

This post was sponsored by Side By Side as part of a Two-Post Influencer Activation for Influence Central and all opinions expressed in my post are my own.

If you read this blog for even a few seconds, you may notice I have an affinity for my two dogs, Cabbie and Porter. They are the loves of our lives, and I recently had the chance to spend some good, quality time with the girls. We brought some of our new favorite dog food called Side By Side, a Telluride-based brand of holistic dog food and treats, where they take a new approach to pet nutrition that cherishes each individual pet. These ingredients are used to deliver the best in whole food nutrition.

I was so lucky to have a recent consultation with one of the most knowledgeable individuals regarding pet nutrition that I have ever met, and also the Founder of Side By Side. Marney Prince explained the importance of feeding raw and/or freeze-dried food and treats to your  dogs, and I couldn’t agree more! Side By Side believes the best way to cherish our pets it to honor them with premium whole food nutrition made with love in small batches.

Side By Side even offers their proprietary Pet Assessment process, an online tool (found here) that allows the brand to make nutrition recommendations curated to meet your pets’ individual needs.

Since my first introduction to Side by Side, I immediate felt the passion and caring commitment displayed in all that they do., I received a phone call from the Founder of Side by Side, Marney Prince to discuss her personal recommendation on products!  During our phone conversation, I immediately knew that Marney truly cares for all animals, and I felt her compassion for my dogs as if they were her own.  I talked with her for about 45 minutes about my two dogs, Cabbie and Porter. She was extremely thorough when asking about my dogs, like what issues my dogs were having, and more lifestyle questions pertaining to how much and what types of activities we do each day, how much we interact with them, and even asked about their personalities and eating habits. I left my conversation feeling extremely good from her positive comments about my dogs and me as a dog owner.

The food and treats are amazing! Since these three varieties of treats are freeze-dried, they make for an excellent treat with very few ingredients. The dogs seemed to like the  Duck l’Orange  treats the very best; they were a great size for even our large dogs.

Here is a brief write up of what Marney told me during our assessments for the pups:

PORTER’S REVIEW:

“Porter sounds like a super fun, energetic girl that tends to hold onto a little internal heat but overall appears very balanced. I think our main concern is preventing to onset of joint degradation, since she loves to play hard, has boundless energy and is a large breed dog. As far as the allergic reaction she gets on her tummy; this sounds like a seasonal allergy, not food related but once she's on a whole food diet that moves through her body at the appropriate speed (the 24 hr/12 hr ratio of kibble/real food), you will see a reprieve in the bumps. We are releasing a supplement called Cool Down Dog the first week of June for seasonal allergies and we can certainly try that if the food alone doesn't remedy the reaction. It's a bunch of eastern and western herbs. Otherwise, we would recommend that Porter transitions to our Harmony raw, either freeze-dried or frozen, because it will provide a little higher protein for our athlete, has beautiful whole wild Alaskan salmon, duck necks, yucca (cassava root), and turmeric in it for her joints, and it is considered a neutral recipe, which is ideal for a sweet natured, happy dog. I'm going to recommend our Beef lungs and Duck L'Orange treats but she'd do great on any of our options. I love that you give her yogurt regularly, please continue”.

CABBIE’S REVIEW:

“And, for Cabbie, who sounds like an absolute doll! Again, she sounds happy, healthy and balanced. The only change I'd really like to make is to slow her aging process and prevent the onset of disease. For Cabbie, our Genial recipe, either frozen or freeze-dried, would be wonderful. It is a cooked recipe, which more appropriate for a mature woman, and contains a small amount of whole oats which support the thyroid gland and metabolic system, whole Alaskan salmon for joints and beef heart which in Chinese Medicine promotes self-confidence and Shen (heart/love) energy. I'd also like to suggest our So Hip  supplement to increase the protection of her joints, plus this formula helps the body to clear toxins and free radicals within the existing joints. Cabbie is welcome to enjoy any of our treats, but just for fun, let's try the Chicken Hearts first”.

This food far exceeded our expectations, and I loved the convenience of the individually wrapped so they are basically mess free, and we were able to recycle some of the containers too! It really looks like everything is made with extremely high quality ingredients, which is of top importance to me.

If feeding your dog ingredients you trust is important to you, then I would absolutely recommend Side By Side dog food and treats! Side By Side is dedicated to the preservation of the nutrients, from sourcing the best ingredients, to minimal processing, to development of a complementary line of food diets, treats, supplements, broths, and toppers –with carefully crafted recipes utilizing only natural sources of protein, vitamins, minerals, fiber and the purest herbs, to provide a personalized nutrition plan for your pet.

Take the free Side by Side personalized Pet Assessment for a personalized nutrition plan today! Also, you can get 25% off your first order and 15% the subscription service with code: LILY

Music Festival Camping Tips with Coleman at Target

This post has been sponsored by Coleman®. All thoughts and opinions are my own.

Happy Memorial Day Week!

This weekend, I am attending the Summer Camp Music Festival and I am so excited. It’s been almost ten years since I first attended, so I am really looking forward to seeing old friends and listening to some live music. (I will share some photos of the event in this post throughout the weekend!!)

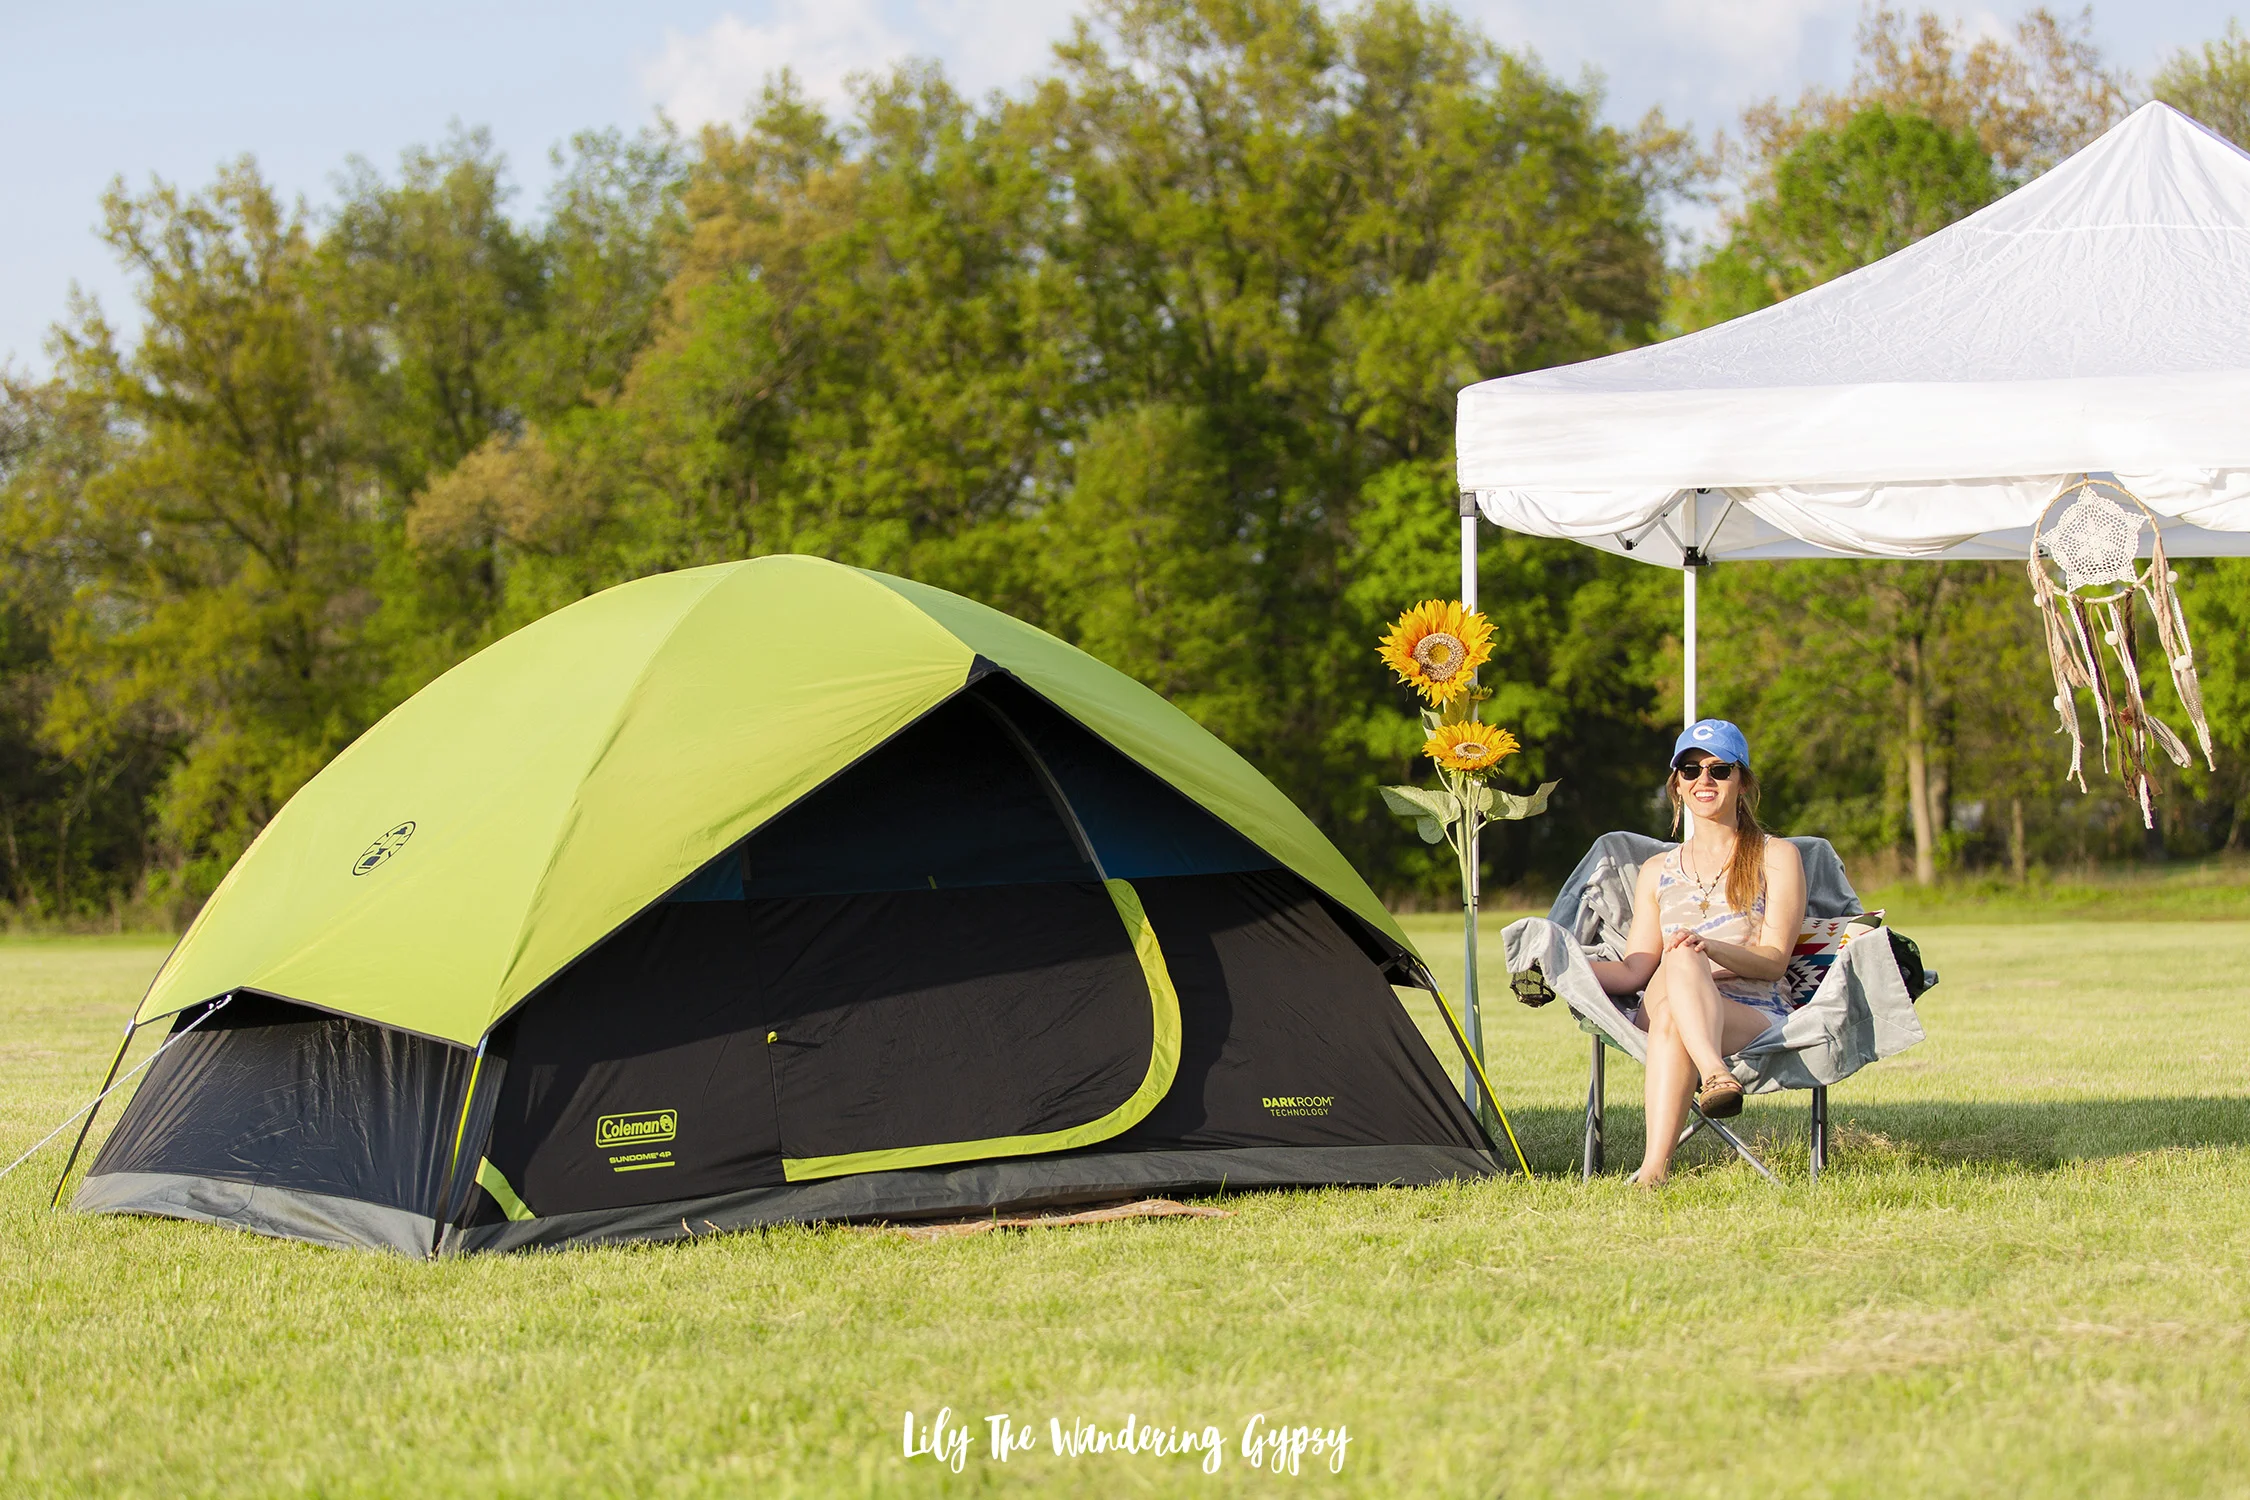
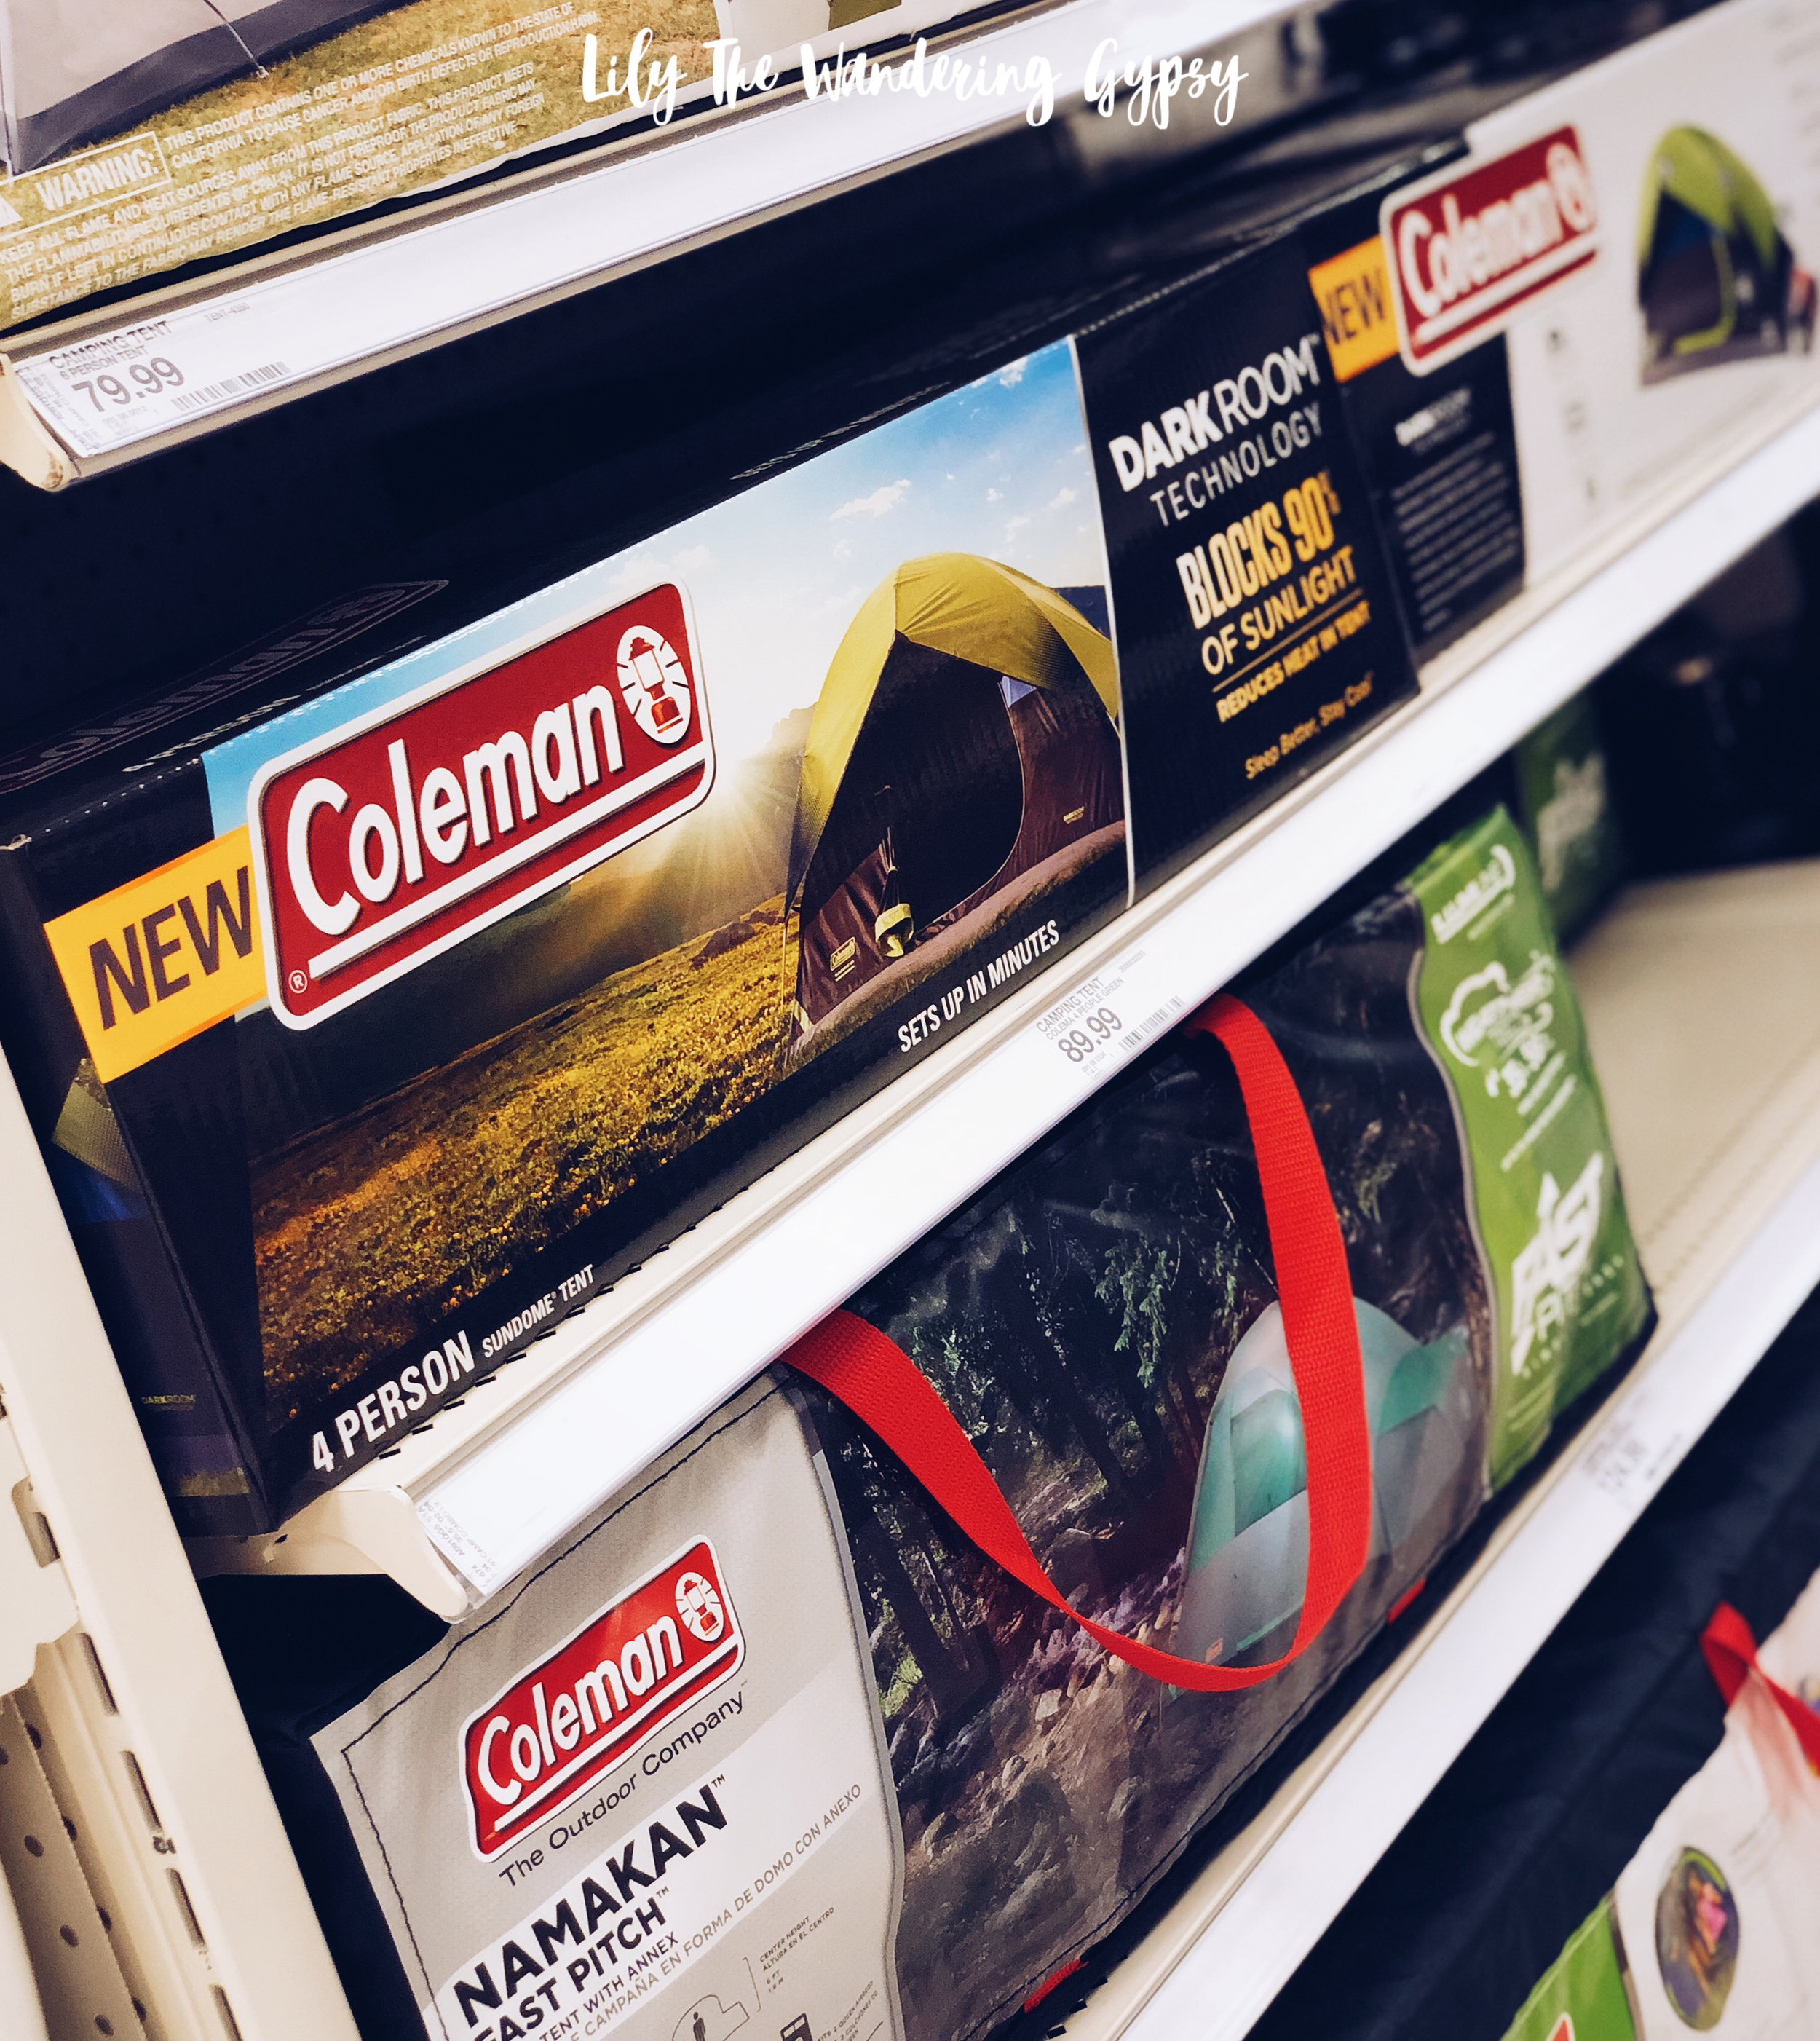
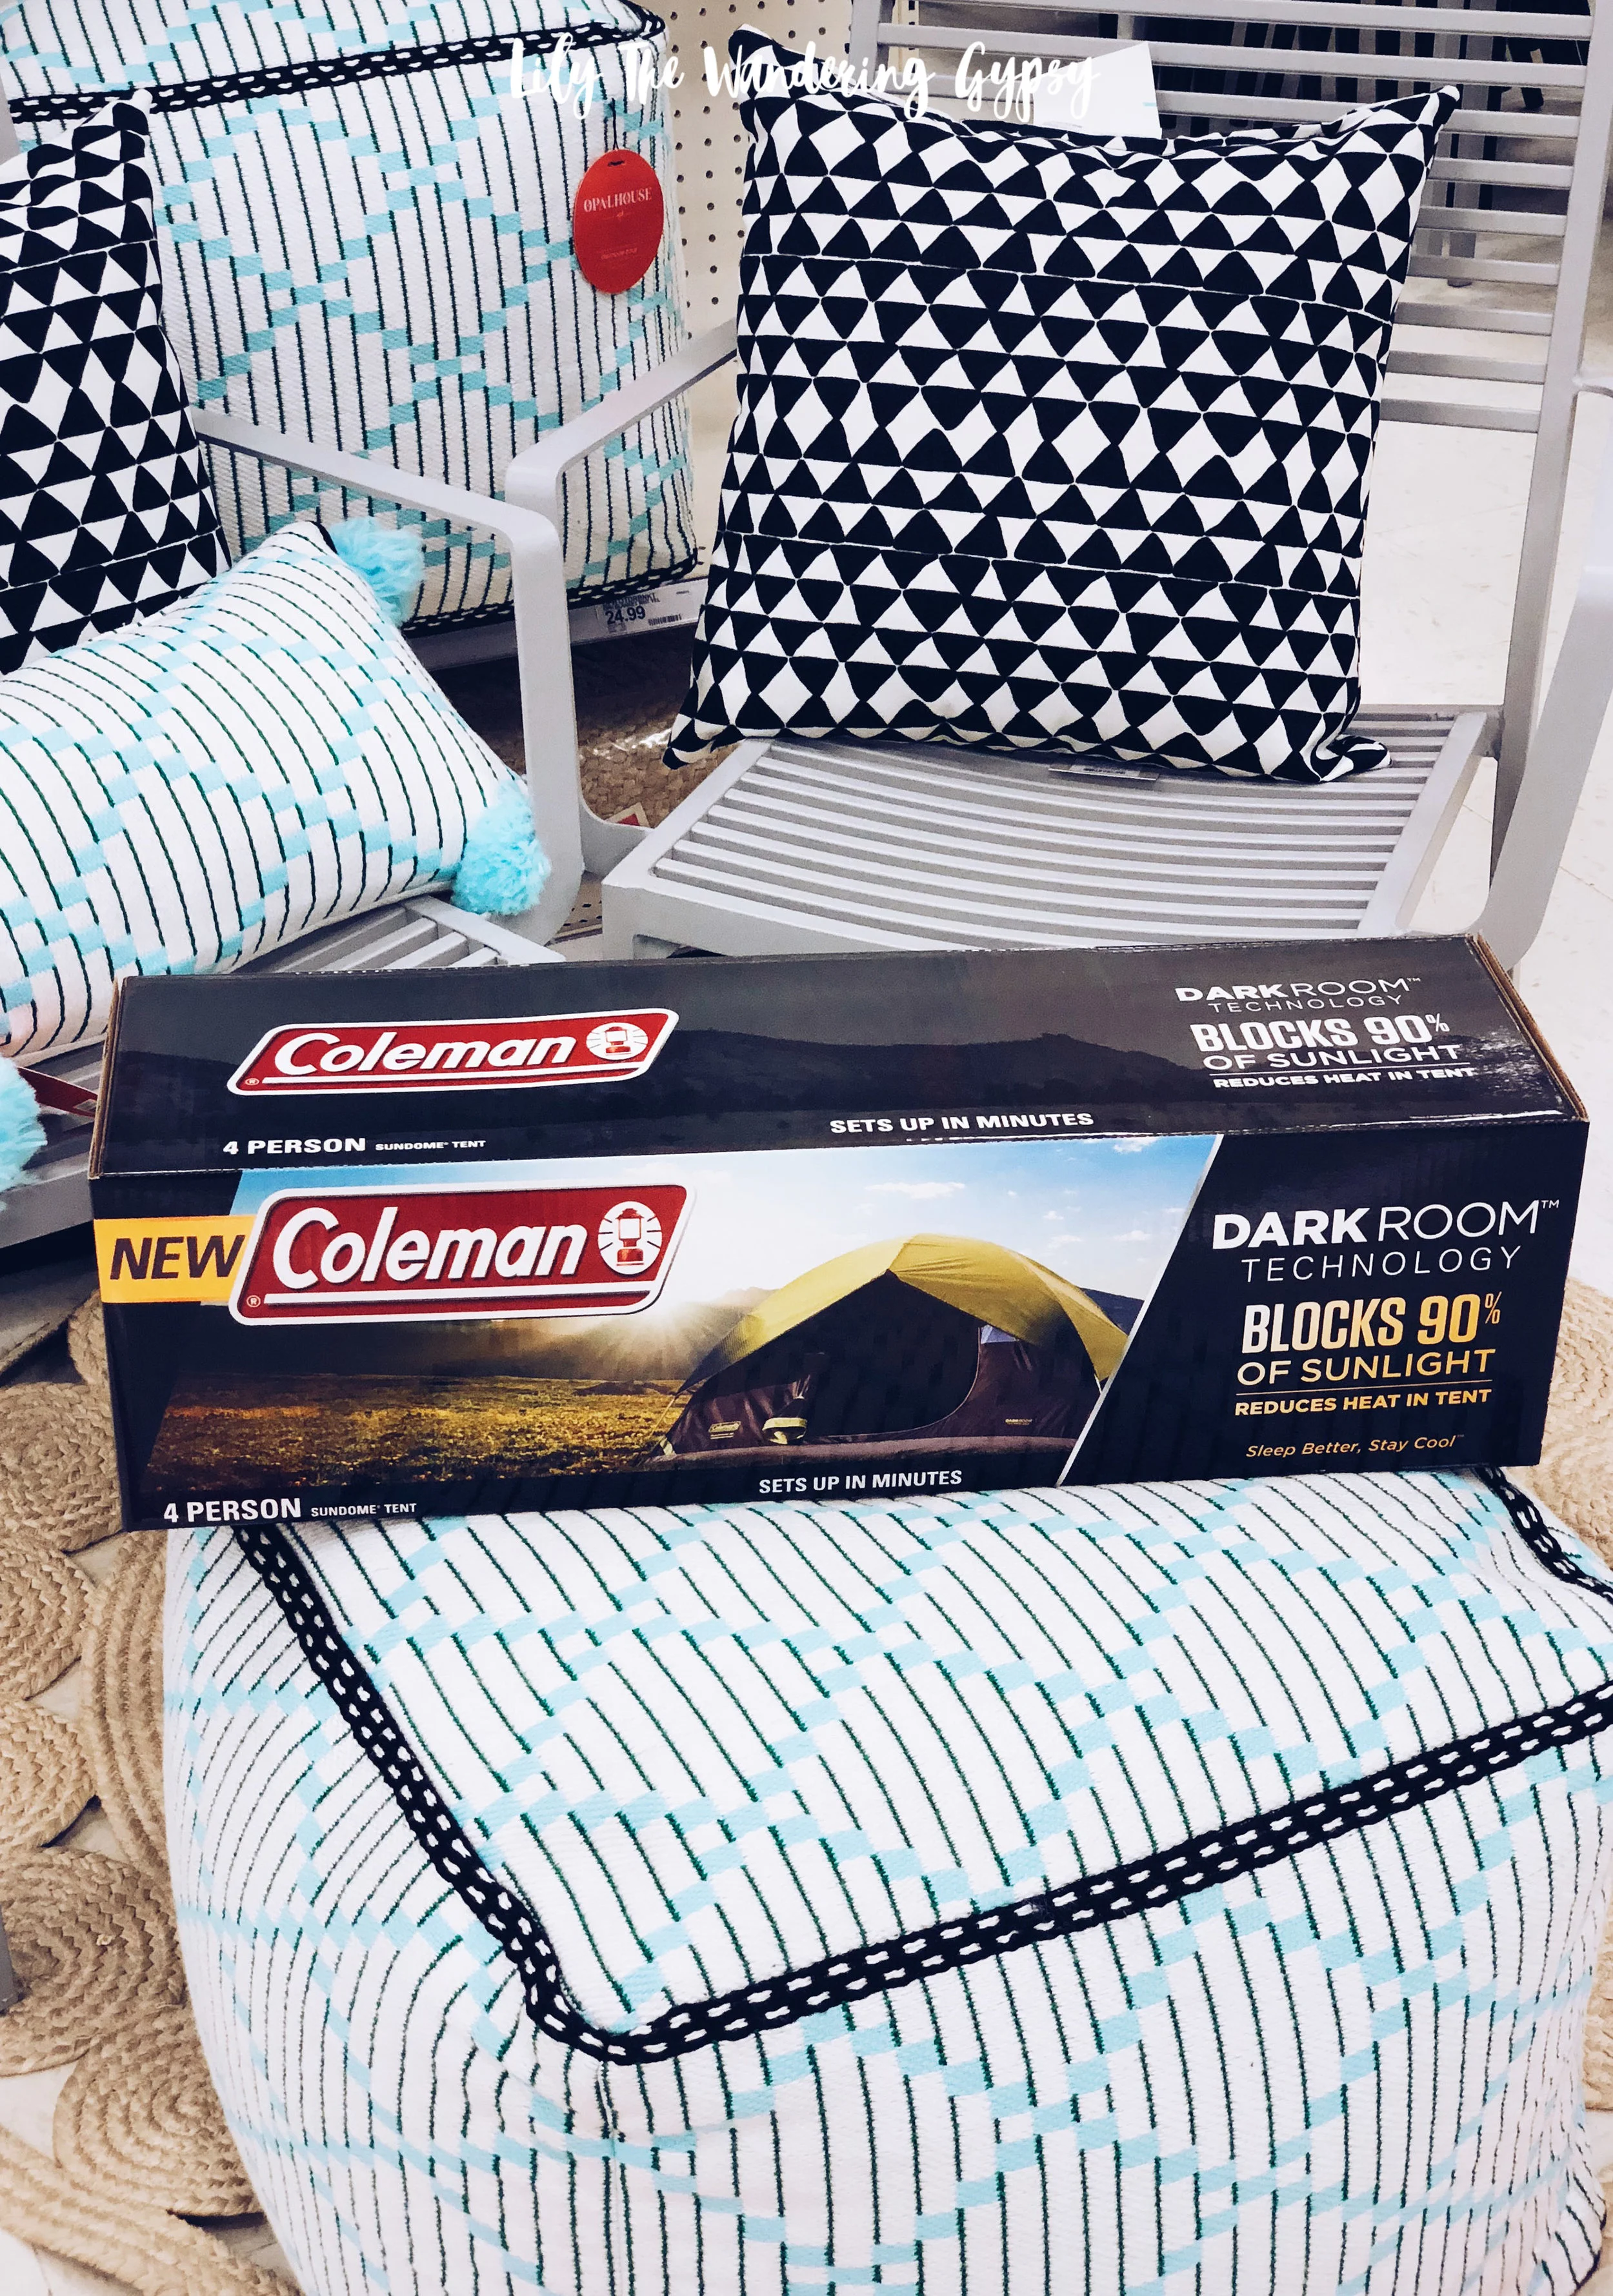
It’s important to set up a cute campsite to have as your home base for the weekend, and the NEW Coleman® Dark Room Tent is a great option you might want to consider! Head to Target to find everything you need for all of your upcoming adventures, and save on Coleman products with this Ibotta rebate offer here!

Since music festival season is upon us, I wanted to share some tips and tricks on how to make camping at a music festival even better, beginning with considering your tent.

This tent comes with a convenient carrying bag too!

Head to Target to get inspiration for your upcoming festivals and summer gatherings!

One of the features I find most appealing about the Coleman® Dark Room Tent would be the roomy interior, which is great for holding everything during the festival - plus, being able to change in the tent is priceless! There is more than enough room for us in here.

I love the dark outer fabric (which is considered their Dark Room Technology), that blocks light! Since you will likely be camping around a lot of other people, it’s so sweet that this tent’s rainfly blocks 90% of sunlight so you can sleep in past sunrise. Since a lot of music festivals have festival goers camp in open fields without trees, shade is very important. If your tent gets super hot in the morning the moment the sun shines on it, think of just how HOT you would be when you’re trying to get some good rest before another big festival day. Getting a little extra sleep is really amazing.

This tent is pretty easy to set up. I would recommend at least having two people on the job, but it’s pretty easy to find a friend to help you set up your tent in this situation. There are three poles, two that go into the actual tent, and one pole that gives the rainfly a nice awning, which would reduce any water dripping into your tent.

Speaking of rainy weather, you never know what to expect here in the Midwest, but this tent will keep you nice and dry because of the WeatherTec system, which uses a tub-like floor with welded corners and protected seams.

One of my favorite parts of any camping trip is actually when we get to head to bed. I do love that part of the night where we get to retire into our ultra comfy sleeping bags, cots, and our awesome, sunlight blocking tent.

In addition to awesome camping gear, we have lots of fun ideas of how to decorate our campsite, a few of which are shown throughout the post.

A dream catcher was so adorable and easy to hang, plus it brings that whimsical element into your campsite.

My favorite décor item would probably be adding an extra large sunflower (from a craft store), which I attached with zip ties.

Use 2 white twin sized sheets and zip ties or ribbons to add inviting softness and volume to your tent. I first folded one sheet in half to find the center. I then attached that to the sheets in an arched pattern. I used two sheets, but you could use a few more to get an even more festive and inviting look.

Think of your campsite as a living room of sorts, and try to create a relaxed, comfortable environment for your group, or for friends you might meet at the festival. Use outdoor rugs, tapestries, solar lights and more to personalize your campsite and make it stand out.
 

Prepare for the summer with the Coleman® Dark Room Tent and enjoy!

Vegetarian Cashew and Superior Green Filled Cheesecake Recipe

This post is sponsored by FoodScience of Vermont. All opinions and content are my own.

#LiveSuperior

Looking to add more Superfoods to your diet? Learn how to infuse a cashew-based “cheesecake” with health-boosting ingredients!

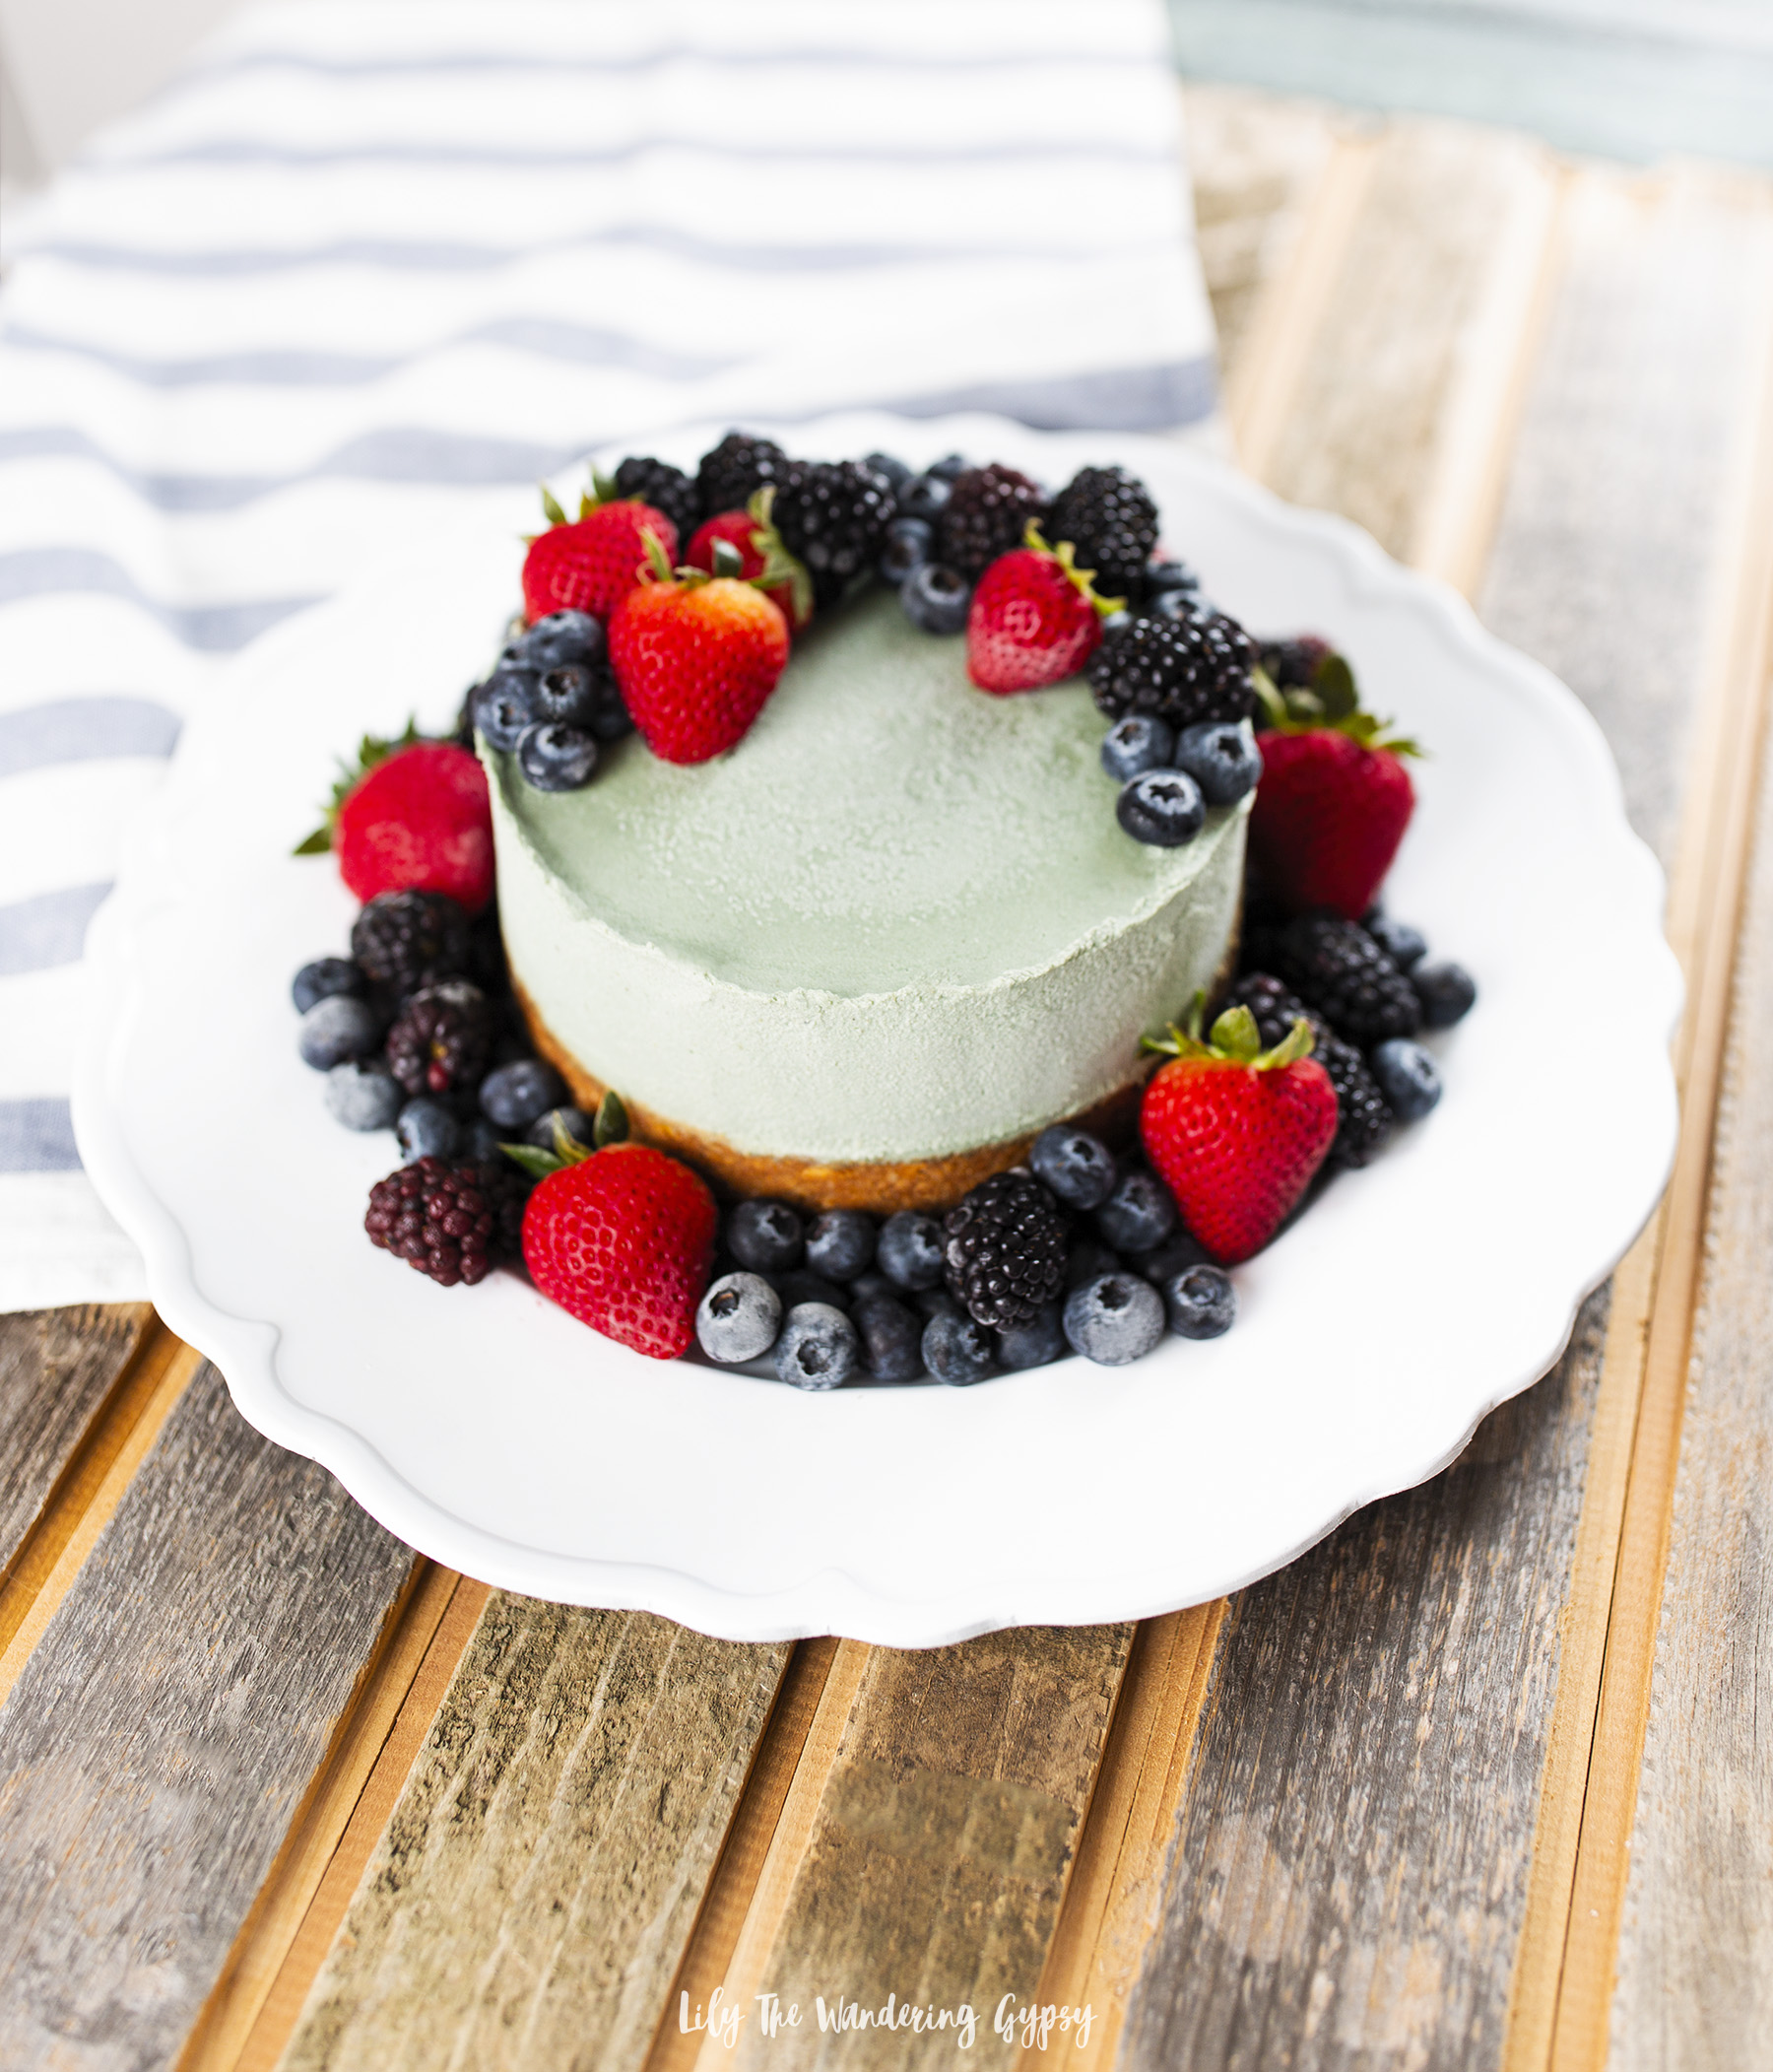
This delicious cashew-based version of a traditional cheesecake is filled with all natural ingredients thanks to FoodScience of Vermont Superior Greens, which contains whole fruits and vegetables, promotes healthy aging and radiant skin, mental clarity, and a healthier immune system while offering a boost of healthy enzymes to support your immune system, plus probiotics. It’s amazing how this one line of Superior Powder products can offer so much!

Try it, you’ll love it. Find the product at Rite Aid® and RiteAid.com here!

I love incorporating unique and health conscious ingredients into my recipes, like the FoodScience of Vermont Superior Greens, which contains three servings of fruits and vegetables in each ½ scoop – which means that this ultra concentrated version of some of the healthiest ingredients on Earth really will work quickly and efficiently!

This recipe is divine! I believe this would be great for someone looking for healthier alternatives to dessert recipes, or someone who has never ever tried a cashew based cheesecake before. It’s fun to introduce friends and family to things like that.

I have been very interested in the detox process as well as considering eating as many whole foods as possible. This FoodScience of Vermont Superior Greens is a great step, in addition to more exercise and lots of water intake, towards reaching my nutrition and other health goals I have set for myself.

While the product can be enjoyed in a smoothie or mixed into a glass of cold water, I thought it would be exciting to introduce this product to my wonderful readers, friends, and family through a mouth-watering dessert recipe.

Perfect for summer when you don’t want to bake a ton, or when you want something that’s not overly sweet but deliciously frozen, this is the recipe that will check all of those boxes! Bring this to an event, or serve it to friends at a summer gathering and just look at everyone’s faces light up when they realize that this is not the “cheesecake” they were expecting, but one that is WAY, WAY better for them, but still tastes indulgent.

Now, as for the crust, I know the traditional vegan cheesecakes are made with dates, and are basically no bake, but my favorite part of a cheesecake IS the crust, so I wanted to keep it traditional with lots of additional natural ingredients to sweeten things up naturally. Feel free to use a date crust here too.

Food Science of Vermont provides us with ways to get 3 servings of fruits and vegetables in each ½ scoop. The scoop is provided, so it’s very easy to measure out just how much you will need.

While the traditional use for this product is mixed into smoothies, cold water, and other drinks, I thought it would be genius to use the delicious taste and the nourishing super food ingredients to infuse this recipe with a unique taste and twist.

The crust is made from a delicious mixture of coconut, walnuts, oats, graham crackers and vegan “butter”. I used a spring form pan, similar to a traditional cheesecake, but really modernized this recipe with almost all vegan ingredients and that extra boost of has helpful enzymes and probiotics, making this an all around awesome dessert or snack. Give it a try, I bet you’ll enjoy it!

INGREDIENTS:

(Makes “Cheesecake” in 6 in x 3 in spring form pan):

Crust Ingredients:

10 - 12 full graham cracker rectangles

¼ c. oats

¼ - ½ C. or more walnuts

½ C. or more dried coconut pieces/flakes

¼ tsp. cinnamon, optional

6-8 (or more) TBSP salted Vegan Butter or regular butter

¼ C. Sugar

*Note: Feel free to use less graham crackers and more of the oats, nuts, or coconut if you prefer and even healthier crust.

Filling Ingredients:

3 C. soaked cashews (soak for at least 3-5 hours)

1 can chilled coconut milk (use the top thicker part and save or discard water)

¾ - 1 C. macadamia milk, coconut milk, or similar

4 – ½ C. agave or maple syrup

½ - 1 tsp. vanilla

2 TBSP FoodScience of Vermont Superior Greens Powder


INSTRUCTIONS:

For The Vegan Filling:

1. Soak cashews for 3-5 hours, and strain. Add to a blender with coconut milk, and process until smooth. If the mixture does not pour well, then add a bit more macadamia milk or agave. Taste the filling to make sure it is to your liking. Time to make the crust!

For The Crust:

1.    Preheat oven to 350 degrees F, and prepare your spring form pan by using non stick spray inside, and using a paper towel to wipe pan for a more even finish. Also, you may cover the bottom of the pan so the butter does not drip out while baking. Alternately, bake on top of a sheet pan to prevent spills in the oven.

2.    In a food processor, blend up graham crackers (use hands to make pieces smaller before processing), coconut, walnuts, and oats. Feel free to mix in some whole oats after processing for that “whole oat” look in your crust.

1.    Once processed to an even powder, mix with melted butter, sugar, and pour 2 ½ cups into pan. Use a flat bottomed glass or candle holder to press and flatten the crust down, making sure to clean up the edges with a knife for a neater look once the spring form pan is removed.

4.    Bake crust for 15-20 minutes, until edges begin to brown. The crust will firm up quite a bit once cooled, so even if it’s soft after baking, it may already be done. Let crust cool completely, and fill with filling until there is about ½-1/4” until the top of the spring form pan. Freeze for 2-3 hours or overnight.

5.    Time to CAREFULLY remove it from the spring form pan. I would recommend using a sharp knife or skewer along the top edge to break the seal with the pan. At first, mine looked like it was cracking, so I re-tightened the outside of the spring form pan, ran a skewer along the top edge, and once I loosened the pan again, it removed pretty easily. Just be patient with it. At this point, feel free to place it back into the freezer

6.    Place “cheesecake” onto a plate to decorate. Top with fruits like blackberries, strawberries and blueberries (the two latter are actually ingredients in the FoodScience of Vermont Superior Greens powder). I sliced the strawberries in half and left the green parts on because the full strawberries just looked too big. The “cheesecake” would be fine to serve right now, or place back into the freezer for 2-4 hours so the berries begin to freeze and they get a beautiful frosty look to them.

FoodScience of Vermont offers three uniquely designed powdered drink supplements loaded with phytonutrients, stabilized probiotics, and many other beneficial natural ingredients. I really hope you enjoy!

Head to your local Rite Aid® or visit bit.ly/FSSuperiorPowders to get your Superior Powders.

Follow FoodScience of Vermont on social:

Follow the brand’s hashtag on Instagram #livesuperior

Facebook: https://www.facebook.com/FoodScienceVT

Twitter: @FoodScienceVT

Pinterest: https://www.pinterest.com/foodsciencevt/

Instagram: @foodscienceofvermont

Recipe For The Perfect Mother's Day #SpreadTheLove #ButterChardonnay 

Thank you JaM Cellars for sponsoring this post. Looking for Butter Chardonnay near you? Check out their easy-to-use Store Locator! Just pop in your zip code and the Butter will be waiting! This wine melts in your mouth, is creamy-licious, and everything is certainly Better with Butter! 

I am so inspired by the warmer weather that is finally here, gracing us with sunshine and more reasons to celebrate the ones we love. One sip of Butter Chardonnay will transport you to a more relaxing and uplifted place! This Chardonnay is easy drinking wine that has light, crisp flavors that will surely please moms everywhere!

I have lots of mother figures in my life and I am extremely grateful for each and every one of them! My mom, my step mom, Bobby's mom, and my friend who just became a mom for the first time. I don't have any grandmother figures in my life anymore, but they are always in my heart! There are a few ways to treat any mother figure to something special for Mother's Day Weekend, so here are a few ideas to treat them well.

I also thought that making sugar cookie bars would be perfect, because they travel well and are such a versatile treat for Mom. 

It's fun how wine can also accompany some great times. It's seriously so fun to sip a glass of wine with my mom and sister and do some baking. We do tend to love doing projects together, so this whole post was just such an incredible inspiration for me!

I will also be heading to Louisville, KY this weekend to see my sister graduate college AND to celebrate Mother's Day with a brunch to end the weekend. I will definitely be bringing one of these bottles of wine to that celebration as well. I am SO excited!!! 

Butter Chardonnay melts in your mouth just like smooth, rich butter!

This wine is made from California grown grapes, is cold fermented, and is aged in oak. 

 If you sip this delicious Butter Chardonnay, you might even taste hints of stone fruit or baked lemon with a vanilla finish.

This wine is best served chilled and has such a nice, complex flavor without being too sweet. This is the perfect choice for summer and beyond!

Keep reading to get the full recipe for these amazing Sugar Cookie Bars with Edible Flowers!

Jump to the bottom of this post to grab the recipe for these sugar cookie bars. A couple of other fun ideas for making Mother's Day great would be some thoughtful gift ideas. Check out my ideas, below!

Why not give mom a gift basket with all of these items inside?! That would make her smile for sure. 

SUGAR COOKIE BAR WITH EDIBLE FLOWERS RECIPE

{Adapted from a recipe, found here}

Ingredients:

  • Dough:
  • 1 1/2 cups butter, softened to room temperature
  • 2 cups sugar
  • 4 eggs
  • 1 tsp vanilla
  • 1 tsp almond extract
  • 5 cups flour
  • 1 1/2 tsp salt
  • 1/2 tsp baking powder

Frosting:

  • 8 oz cream cheese, softened to room temperature
  • 1/2 cup butter, softened to room temperature
  • 5 cups powdered sugar
  • 1 tsp vanilla
  • 1/2 tsp almond extract
  • dash of salt
  • Food coloring (optional)
  • 2-3 tsp milk if needed
  • 8-10 edible flower heads, I used violas, but marigolds, violets, and others would work too.

TIPS ON FINDING EDIBLE FLOWERS:

To find the best edible flowers, look no further than your local hardware store or garden center. I found Violas on sale for about $2 per container. Look for the package with the most blooms on it. Cut the flowers off to garnish your sugar cookie bars or any other treat for Mom, even cocktails. The great thing about buying flowers this way, is that you can then plant them in a sunny spot in your yard and they will keep growing throughout the year, just as love for Mom grows all the time.

Alternately, I have seen a cute package of edible flowers at our local Co-Op, packaged similarly to the refrigerated herbs.

Instructions:

  1. Cookie bars: Cream butter and sugar in a large mixing bowl. Add the eggs, vanilla, and almond extract. Beat till well blended. Whisk together the flour, salt, and baking powder in a small bowl. Add to the wet ingredients and stir till well combined.
  2. Press into a 17" x 12" rimmed baking sheet that has been sprayed with non-stick spray. Bake at 350° for 15-20 minutes or until barely light brown. Cool completely, then get ready to frost. See frosting instructions in next step.
  3. To Make Frosting: Beat softened cream cheese and butter in a large bowl until smooth. Add powdered sugar, extracts, salt, and food coloring. Beat till smooth and creamy, adding milk as needed. 

4. Carefully cut edges of sugar cookie bars with a large, sharp knife so the edges are straightened up, as shown below. 

5. To evenly cut sugar cookie bars, cut down the middle both ways, then cut each of those sections in half again. To ensure a cleaner cut, always wipe off the excess cake and icing between each slice. After slicing, add edible flowers and serve! These stay good a few days left out at room temp or in the fridge. Enjoy!

Aren't these just so beautiful?! 

I hope you enjoy theButter Chardonnay and these sugar cookie bars as much as my mom and I will! Have a wonderful Mother's Day, friends!

Make sure to check out more from JaM Cellars Butter Chardonnay here!

I was selected for this opportunity as a member of CLEVER and the content and opinions expressed here are all my own.

PIN IT FOR LATER...

Fall Tailgating With Coleman


Sponsored Post: This post is sponsored by Coleman but the content and opinions expressed here are my own. #TailgateWithColeman

Gearing up for some Fall Tailgating with Coleman! I am excited to head to Walmart tomorrow to grab all the necessary items. I am going to give this tailgating post a more upscale experience by thrift shopping in the adorable town of Bozeman, Montana for lots of soft textiles, cute plates, dishes, and fresh foods to enjoy during the day. I will also head to Walmart to grab some tailgating essentials from Coleman, like this 25-piece set of red Enamelware Plates, mugs, and flatware. I have had my eye on it for a while now. I would also love to find the perfect cooler, so I can transport food and drinks to the tailgate, as well as a portable stove or grill, to make the best food imagineable! Hmmm....what recipes shall I make? We will see soon :)

Shop the entire collection here. 

Thank you so much for helping me prep for the best Fall Tailgate experience ever! Cannot wait to share everything with you soon. 

The Best Way To Stay Cool This Summer! Summer Fun With Dr Pepper

This is a sponsored conversation written by me on behalf of Dr Pepper®. The opinions and text are all mine. #PickYourPepper #Walmart

Summer is definitely here, friends! I’m trying to enjoy the outdoors as much as possible before it gets too dreadfully hot and humid here in southern Illinois. Luckily, there are lots of great picnicking areas and lakes available to us here in and around the Shawnee National Forest so we recently headed out to cool down!

I brought the sweetest summer essentials with me too – cold drinks, SPF, and my new 90s-inspired inflatable float :)

There’s nothing like floating in the lake or river while enjoying a cold drink and some fresh air. I always love to bring a big, floppy hat to protect my face and shoulders from excessive sun. Plus my ever-important sunscreen and my favorite shades - that’s about all I ever need to have a good time.

Dr Pepper sent me this float as part of their new Pick Your Pepper campaign with packaging that was made by millennials, for millennials, that I picked up at Walmart. It’s so unique and I was pleasantly surprised at how big the float was once inflated – it held me afloat in the water just fine! It was a little taller than me, so I could lay back and just float. I am excited to use this all summer and next year!

To claim your very own Dr Pepper Shaped Pool Float, or one of their other cute prizes, get the details below.

When you buy any Dr Pepper 6/15-8/15 this summer at Walmart, you can upload your receipt here to get the prize featured in my blog and/or other prizes like:

Spend $5, get a unicorn beverage holder inflatable

Spend $10, get a Walmart e--Gift Card worth $5

Spend $20, get a 6-pack can/bottle holder with ice pack

Spend $40, get a Dr Pepper bottle shaped pool float

I wound up getting almost everything for our day at the lake at my local Walmart! They have lots of cute summer items left, and some are even going on sale – get everything now before it’s gone.

I found everything from this tie dyed beach towel, which I absolutely LOVE, to my Dr Pepper, snacks, bowls to put the snacks into, summer-themed plastic cups, colorful straws, a cute sun hat, flip flops, and my new favorite summer clutch!!  

What are some of your favorite locations to visit during the summer to enjoy the outdoors? Do you tend to stay local, or do you like to drive a few hours to enjoy something even better? Leave a comment below and let me know – we are always on the lookout for travel suggestions!

Also, what are your favorite picnic day snacks to enjoy outside? I went for classic options, and everything paired well together. An ice cold drink always helps the temp cool from inside and out!

This day, we got the most perfect weather ever! A little on the warm side, but the slight, cool breeze really helped keep things feeling great – and luckily kept mosquitoes at bay! It had actually rained earlier in the day, but the clouds cleared just enough to allow us to enjoy the sunset (the best thing in the world to me!). The water was so calm this day.

Now, let’s talk lakeside fashion! I loved this Made You Look Sun Hat from Walmart! Each one of our local stores seems to have a bit of a different selection, so I tried to browse them all for the cutest summer accessories. I also found this pair of mint, crochet-like coverup shorts, near the selection of bathing suits. I also just HAD to grab these donut printed flip flops – after all, it’s summer, right now I’m saying, “I Donut Give A Care” to so many of life’s worries. This great weather is really doing me some good!!!

This "Made You Look" hat is so fun!

In order to offer chilled refreshments on a hot day, I bring a small bag of ice in my cooler, and simply set the drinks into a metal tray. I then dump ice into the tin. The cans chill in about 20 or so minutes, and it’s such a cute presentation! Speaking of presentation, I do love a cute food table display, so I brought out some cute items to the lake with us. I used three tins (one for drinks, one for chips, and one for cookies), two fish-shaped bowls for candies, a wooden box to elevate the drinks, and of course plates and napkins. No utensils were required

Love the three colored tassels on the clutch bag! How adorable for summer!!

Taking a few extra minutes to set up a cute refreshment table really makes a day at the lake even better!

Invite your friends and family out this summer, and connect with them! Create meaningful memories during your summer celebrations that will be cherished forever!

A Memorial Day Party With Balloon Time! Get These Cute Recipes and Decor Ideas!

This is a sponsored conversation written by me on behalf of Balloon Time Helium Tanks. The opinions and text are all mine.

So excited to share this fun post with you today! I am really looking forward to summer, and Memorial Day, to me, is the first big holiday of the summer season. It's a great time of the year to host friends, and why not embrace that red, white, and blue, Patriotic spirit into your party with festive decor and tasty, yet easy to achieve party recipes. I utilized a balloon backdrop, inflated with my Balloon Time Helium Tank, making this whole party setup a very Instagrammable moment!

This party would be adorable for guests of any age, and feel free to add a bit more of your favorite food or drinks for your friends and family to enjoy while we celebrate Memorial Day, and other fun holidays in May and the upcoming summer months.

Tie Dyed Fabric In Indigo and White (See My DIY Here)

Helium-Safe Balloons (I used red, blue, and star-printed latex ones, and 3 holographic mylar ones in star shapes)

Helium Tank (I used one from Balloon Time)

Curling Ribbon included with helium tank

Weights for Balloons (these can be made from just about anything that is somewhat heavy. Or, tape to attach balloons to the back of your table

1.) Get acquainted with your Balloon Time Helium Tank. At first, I had a bit of trouble realizing that there are two steps to working the tank. FIRST, on your helium tab, you will find a green handle, that you turn about 4 times until it won't turn any longer. SECOND, insert your balloon onto the black nozzle, and push down to release the helium into your balloon. I did not realize to do the second part, and thought my tank was empty - oopsies! It was not :)

2.) Fill your three star balloons, and about 5-10 of each of the other colors, red and blue. Adding some white balloons would also be adorable! After filling each balloon, tie about 3-4 feet of ribbon to them, and attach them to your weights, so they won't float away :) I cut each ribbon to be a bit of a different length, so they would have a more layered effect, which I just loved!

3.) Put up your tie dyed back drop behind where your table will go, and then start filling the background with balloons! I started with my stars, then worked out from there, with the other balloons. Put your table in front of that, and begin styling the party!

4.) I love displaying food at different heights on the table, to create lots of visual interest. For this party setup, I used a mixture of wooden crates, galvanized metal boxes,   

5.) Other cute items you might want to offer include patriotic-themed star plates, napkins, cute paper straws, cute sunglasses, and red/white/blue candies in star-shaped glass dishes.  

When I first learned about this project with Balloon Time, I instantly went into research mode. That's how I start every post that I create, so I can learn more about the brands and the products I am about to work with. I also love seeing what other bloggers may have done with and for these brands before, and I was so excited and very honored to be chosen, because Balloon Time has enlisted the DIY and Party Skills of many amazing bloggers that I follow pretty regularly, like Studio DIY, Hostess With The Mostess, A Subtle Revelry, and Confetti Sunshine!

I wanted to put my own spin on this project and include lots of cute dessert ideas, too!

I love these delicious red velvet cupcakes from my local grocery store, which you could use in a pinch, or bake cupcakes from your own favorite recipe. 

WHAT YOU NEED:

Red Velvet Cupcakes, Plastic Wine Glasses, Candies To Decorate

Simply fill glasses 1/3 full with colorful candies. Next, put the cupcake into each glass, and you have an elevated way to enjoy your cupcakes! This makes dessert very easy to carry around, too.

It's funny. The end of May in Illinois can offer gorgeous weather, chilly weather, rainy weather, or just plain HOT weather. Here in Illinois, we just come to enjoy those years when we get good weather for holidays, but it's never 100% for sure that we will even want to be outside. SO, I designed this party for an indoor OR outdoor gathering! 

I found this pack of 6 tiny, plastic dessert bowls at the dollar store, and then, using an ice cream scoop, I added a scoop of cool whip to each bowl. Next, I added one full strawberry to each cup, and then about 6-8 blueberries to one side. These taste SO good, and will be easy for guests to enjoy. Also, I would only recommend making these about 30 minutes before serving, because the strawberries get mushy if you wait much longer. But, I love how these turned out so much! 

Thanks so much for joining me to learn more about my latest party! I hope you have gotten lots of great party ideas too.

See all of the parties I've designed, here!

Enjoy!

This is a sponsored conversation written by me on behalf of Balloon Time. The opinions and text are all mine.

PIN IT FOR LATER:

Transform Your Hair With Vanity Planet + Learn How To Sew This Boho Fabric Headband!


Sponsored Post: This post is sponsored by Vanity Planet but the content and opinions expressed here are my own.
#VPbeauty #VPtransformsummer #VanityPlanet

I have had this urge to refresh my routine lately, and I wanted to share a unique product from Vanity Planet, a company that I have loved for some time now. My hair has been a bit lackluster lately. I am not one to use a lot of heat on my hair, and I try to use sulfate free products whenever I can (mainly shampoo and conditioner). I am also one who washes my hair every single day. I have read so much about not doing this every day, but all of that dirt and oil that is in my hair each morning, makes it nearly impossible for me to miss a day of washing, no matter WHAT the experts say!

So, I am excited to try out this Moisturizing and Restorative Hair Treatment from Vanity Planet soon. The brand was so kind to send this hair treatment and also a neat product called the Groove (a scalp massager). I will also give this tool a try soon, which is supposed to help lather in the product. I have super long hair, and I am thinking this is going to be a helpful tool for someone with short hair, that would not tangle into it like longer hair could. My mom has short hair, so perhaps this could be a cute Mother's Day gift, too!

Also, I now you're going to love this super easy DIY Sewn Fabric Headband, because a good headband, that fist like a dream is hard to find. They're either too tight for me, or never fit just right. I used this fun Hair Treatment as inspiration for this post. See this awesome, DIY Fabric Headband in the photo, below.

Since it's already graduation season, and it's almost Mother's Day, I thought this would be a super cute, very thoughtful gift idea for a woman in your life!

I love having an army of headbands, just in case I need a cute way to keep my hair where it's supposed to be in the car on a road trip, or perhaps I just want my hair to be extra cute?! It gets so hot and humid here each summer, that my hair does what it wants when the temps rise. Also, I love being able to pull on a headband while I'm washing my face - I can't stand when my hair gets drenched while I'm at the sink! 

I also figure that this adorable headband would be amazing for Festival Season! Pair it with jean shorts and a patterned, flowy tank top, or wear it with an adorable dress! Any camping trip would benefit from a cute headband or two. 

Even better, Vanity Planet has TONS of sales going on right now, on products ranging across categories like 25% Off HAIR PRODUCTS, 70% Off SKINCARE, and 70% Off MAKEUP BRUSHES!

LET"S MAKE A HEADBAND!!

1.) Cut your materials: 1 Piece at 20" x 6.5", 1 piece st 8" x 3" and a piece of elastic at 5". I used a curtain-like material, that I loved so much! But, it was slightly difficult to sew. Instead, feel free to even use an old t-shirt, other jersey knit fabrics, or any sort of lightweight cotton or even seersucker material. I have made LOTS of these headbands in the past, and love each and every one!

2.) Fold the 8"x3" piece in half, right sides together, and pin lengthwise. Sew this up to create a tube. Turn it right side out. Also, double fold down a small portion of the long sides of the 20" x 6.5" piece to hide raw edges. Use an iron to make flat folds, or just eye it. 

3.) Attach a large safety pin to one end of your elastic, and pull it through the tube you just created. Line the ends of the tube and the elastic up, and sew them together. Next, pull the safety pin all the way through, so the whole safety pin is out of the tubs. This will scrunch the tube a bit. While holding onto the safety pin for resistance, sew the other end of the elastic into the tube (sew across a few times so it's safe). Cut excess elastic and safety pin away and you have a scrunchy tube!

4.) Now, sew the scrunchy tube to the rest of the material. Place the scrunchy tube on top of the longer piece of fabric, right sides together. Place the scrunchy tube about 2/3 of the way into the bigger piece, and use an accordion fold to sandwich the scrunchy tube into the larger piece. Pin and sew across the fabrics to join them. Attach the scrunchy tube to the other side of the big piece of fabric, and again, sandwich the scrunchy tube into the other piece of fabric with an accordion fold. Cut off lose threads and turn right side out. Now, you're done! 

And, there you have it, the cutest headband around! 

Also, I love my SpinBrush, that I got last year, It's very effective in getting dirt and oil off your face, as well as all those dead skin cells - perfect for rising summer temps. This is a great travel companion, too! Get 70% Off, by using code SpinSpring70 at checkout.

Also, Vanity Planet is offering a huge selection of new products like this set of Makeup Brushes, which you can try out at 70% off, by using code MakeupSpring70 at checkout, too!