Soft Iced Cutout Gingerbread Cookies Recipe

Super excited to share this recipe now that I have perfected it. What a lovely make-ahead gift idea for the holidays, and you can decorate them in any color scheme you would like! O really hope you enjoy this gingerbread cookie recipe, created just for you!

Also, haooy New Year’s Eve! We are spending the last day of 2018 reflecting on the past year, and are also looking forward to planning what the next year will hold for us. This year was filled with so many incredible projects and spending time with people we love and who inspire us! We also have a few exciting projects and travels ahead of us, but for now I wanted to share my favorite cookie recipe of the year!

This recipe was originally posted here - https://theviewfromgreatisland.com/soft-glazed-gingerbread-cookies-recipe/

Soft Glazed Gingerbread Cookies

Prep Time: 20 minutes

Cook Time: 10 minutes

Total Time: 30 minutes

Category: dessert

Cuisine: American, British

Author: Sue Moran

Yield: 12-14 cookies

Serving Size: 1 cookie

Calories per serving: 154

Ingredients

  • wet ingredients

  • 6 tbsp (85 g) unsalted butter, at room temperature

  • 1/3 packed cup plus 2 tbsp (90 g) dark brown sugar

  • 1/3 cup (100 g) molasses

  • 1 large egg yolk

  • dry ingredients

  • 1 3/4 cups plus 2 tbsp (235 g) all-purpose flour

  • 1 tbsp Dutch-processed cocoa powder

  • 1/2 tsp baking soda

  • 1 tsp ground ginger

  • 1/2 tsp ground cinnamon

  • 1/8 tsp ground cloves

  • 1/4 tsp salt

  • 1/4 tsp freshly ground black pepper

  • glaze

  • 1 cup sifted confectioner's sugar

  • 1 Tbs/15g unsalted butter, melted

  • 1/2 tsp vanilla extract

  • 1 Tbsp plus 1 tsp warm water

  • cookie cutters

  • parchment paper

  • baking sheets

Instructions

  1. Preheat the oven to 375F/190C.

  2. Cream together the butter, sugar, and molasses in a stand mixer or with electric beaters. Beat in the egg yolk.

  3. Sift together the dry ingredients. Slowly add the dry ingredients to the butter mixture, beating on low until the dough comes together.

  4. Turn out the dough onto a lightly floured surface and knead it until all the floury crumbles are incorporated. Flatten the dough into a disk and then roll out to about 1/4 inch thickness.

  5. Cut out shapes from dough and transfer them to parchment paper lined baking sheets.

  6. Transfer the cookies to a lined baking sheet and bake for 8-10 minutes. You don't want to over bake these cookies, so do a test cookie or two to figure out the best timing for your oven. The cookies will be soft when you remove them from the oven, but will firm up as they cool.

  7. While the cookies are baking whisk the glaze ingredients together until they become a smooth thin glaze. Add more water if the glaze is too thick, it should have the consistency of maple syrup or a thin honey.

  8. Put the cookies on a cooling rack and brush them with the glaze while still slightly warm. The glaze will dry in about 30 minutes.

These cookie bake up perfectly to a soft cookie that holds it shape after just 5-6 minutes of baking!

I am also super happy with this frosting, because traditional powdered sugar icing tastes WAY too sweet, but with the addition of melted butter, the taste is rich and compliments the strong taste of these gingerbread cookies.

If you plan on freezing these cookies, I would omit the butter from the frosting recipe. It turned a bit white after being frozen on plates in Ziploc bags.

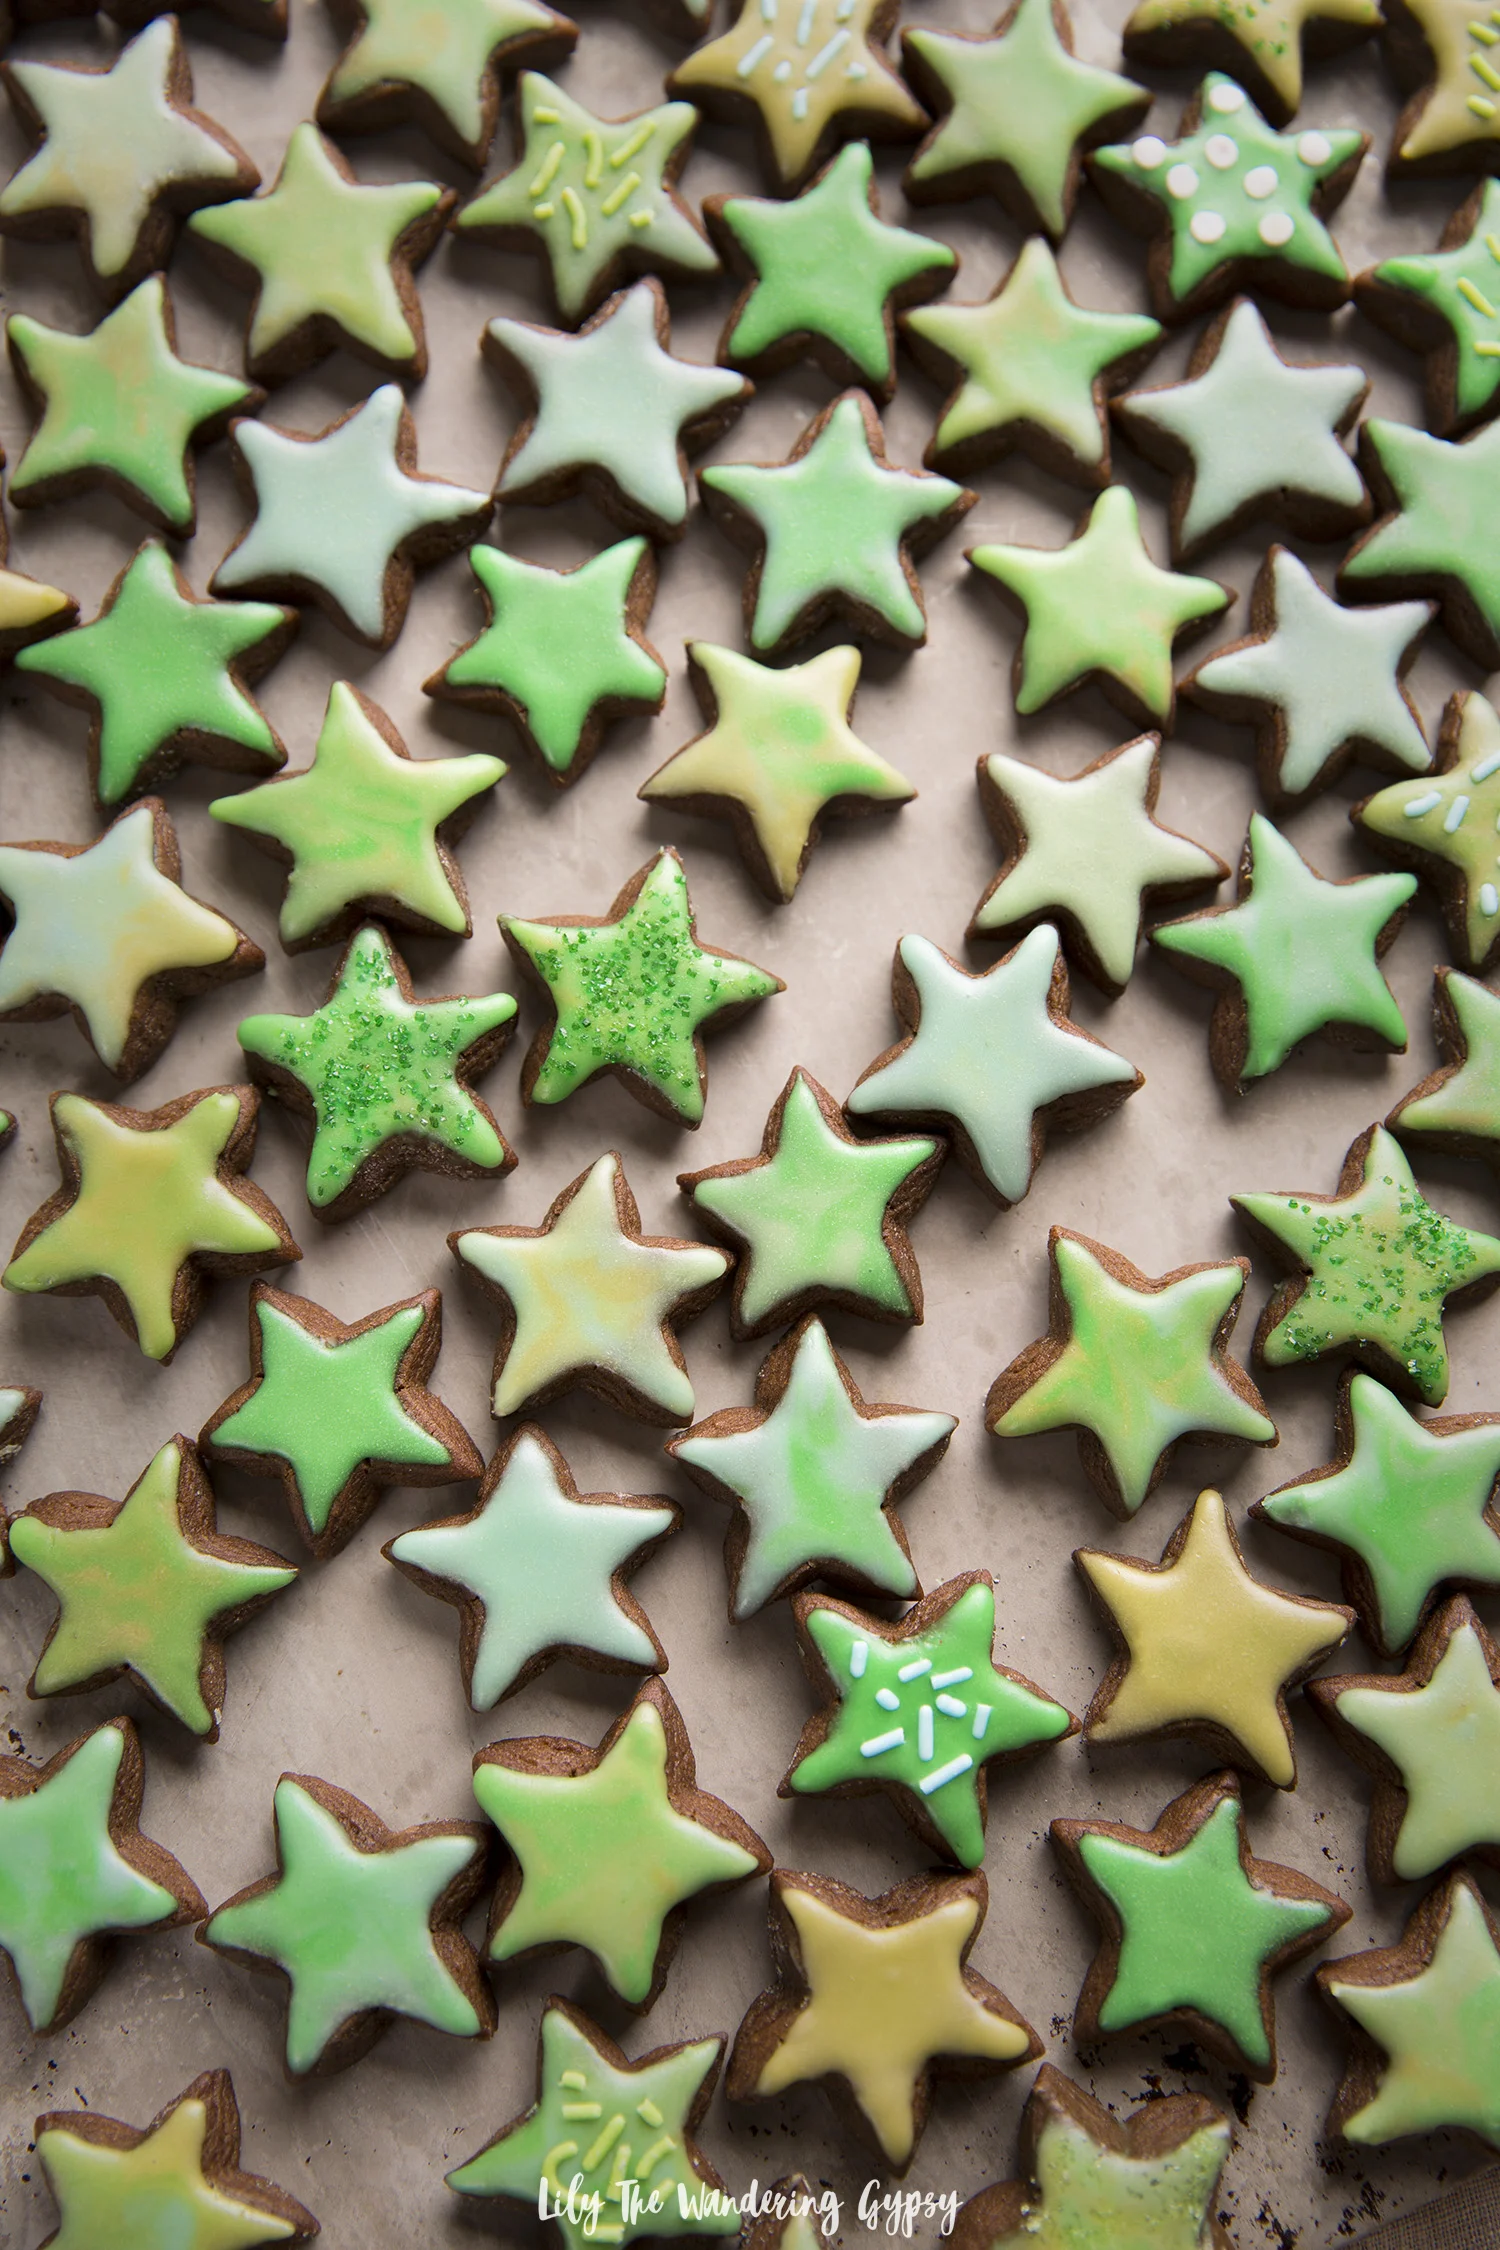
I even marbled a few colors of icing on some cookie by taking a small amount of each color on the toothpick, then transferring it to the cookies, then swirling the colors. Think of all the color combos you could make!

If you wind up trying these cookies out, tag me on Instagram as @happysolez, I would LOVE to see what you create! Happy New Year!

Merry Christmas! Our Christmas Cookies

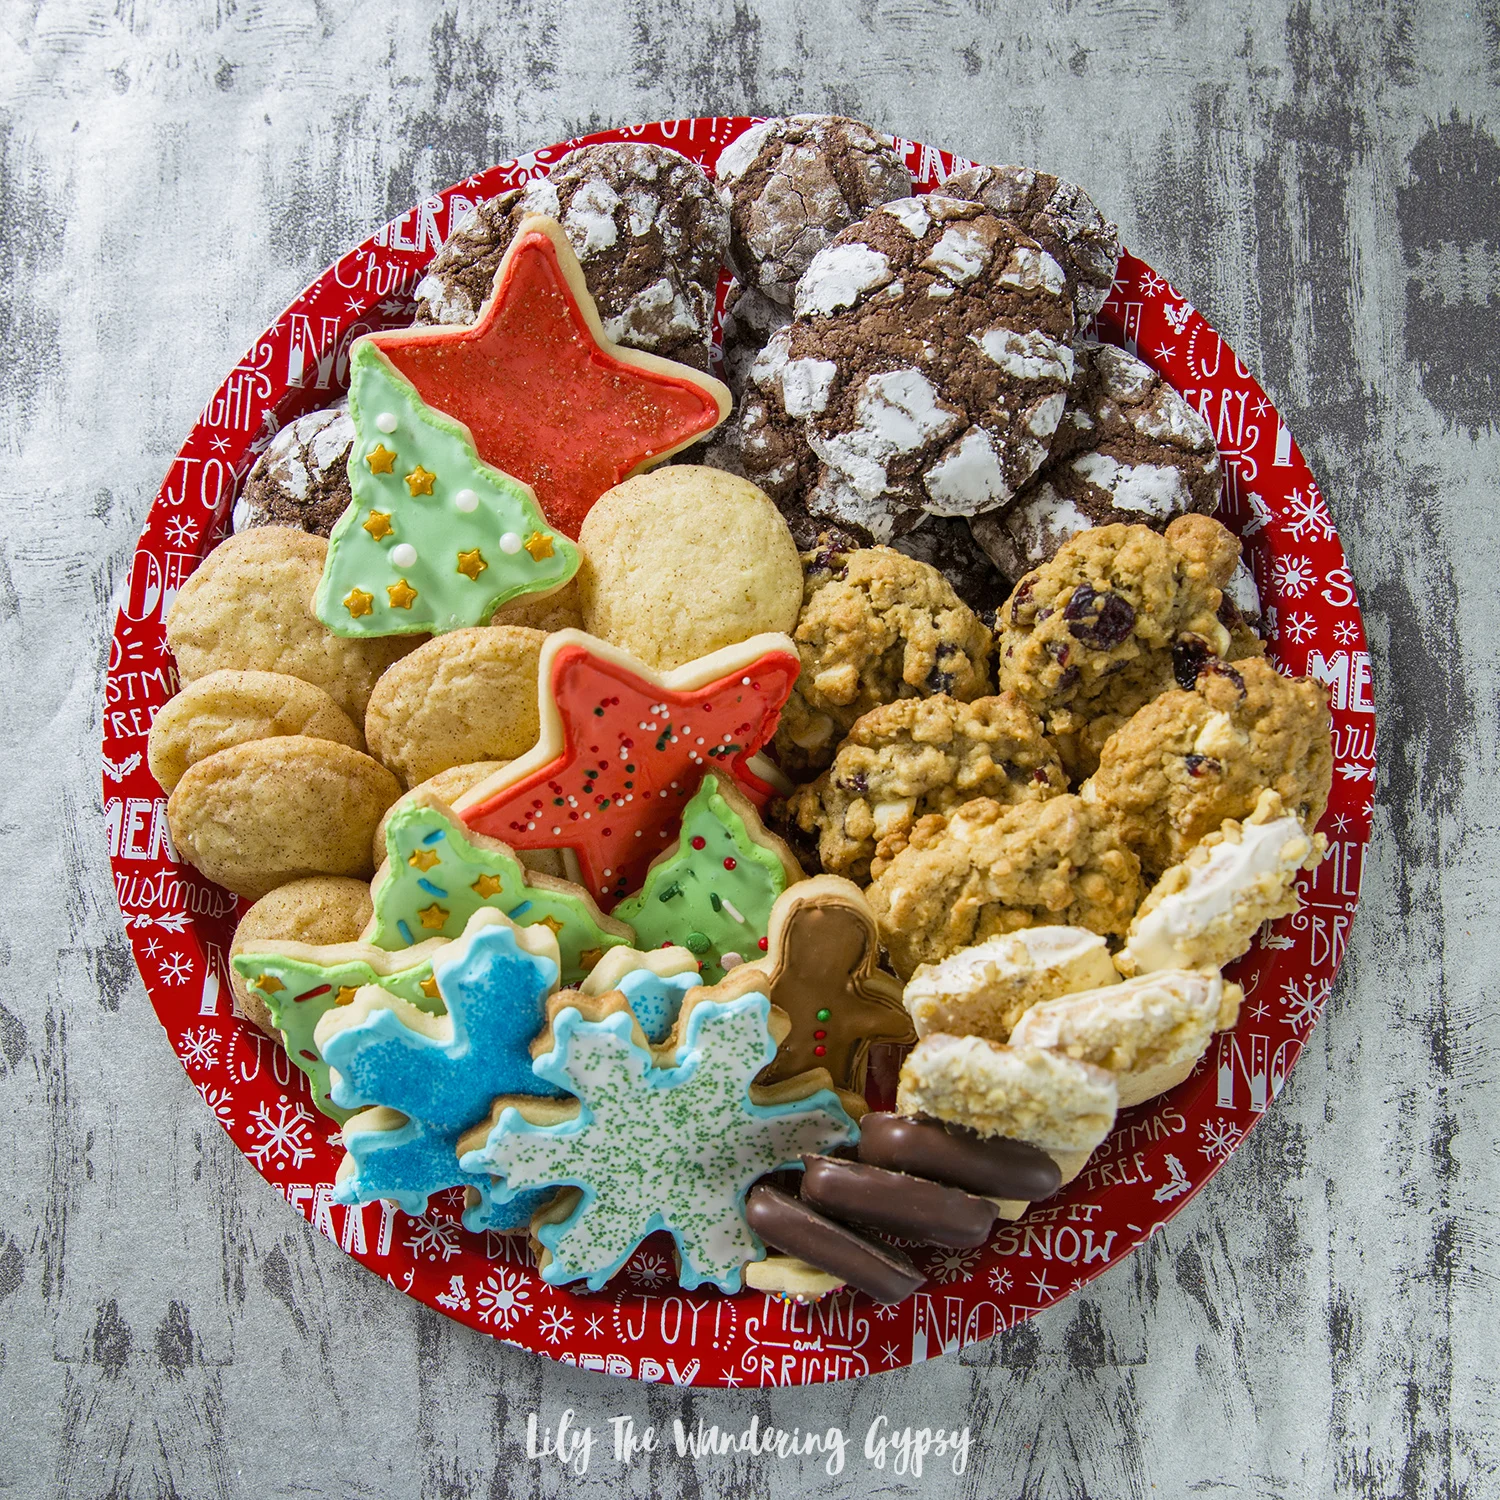
Hello! I hope you’re all having a very merry Christmas! It’s pretty warm out today, so it’s not a white Christmas, but I would always prefer to the cold. I got to participate in a fun cookie baking experience this year. The four of us got to take home TONS of cookies and everything turned out so well. The goal was to make enough cookies so we could all bring cookie platters home and also enjoy a few others along the way. I learned SO much about making the perfect cutout sugar cookies too :)

The cookies we created include:

Cutout Sugar Cookies

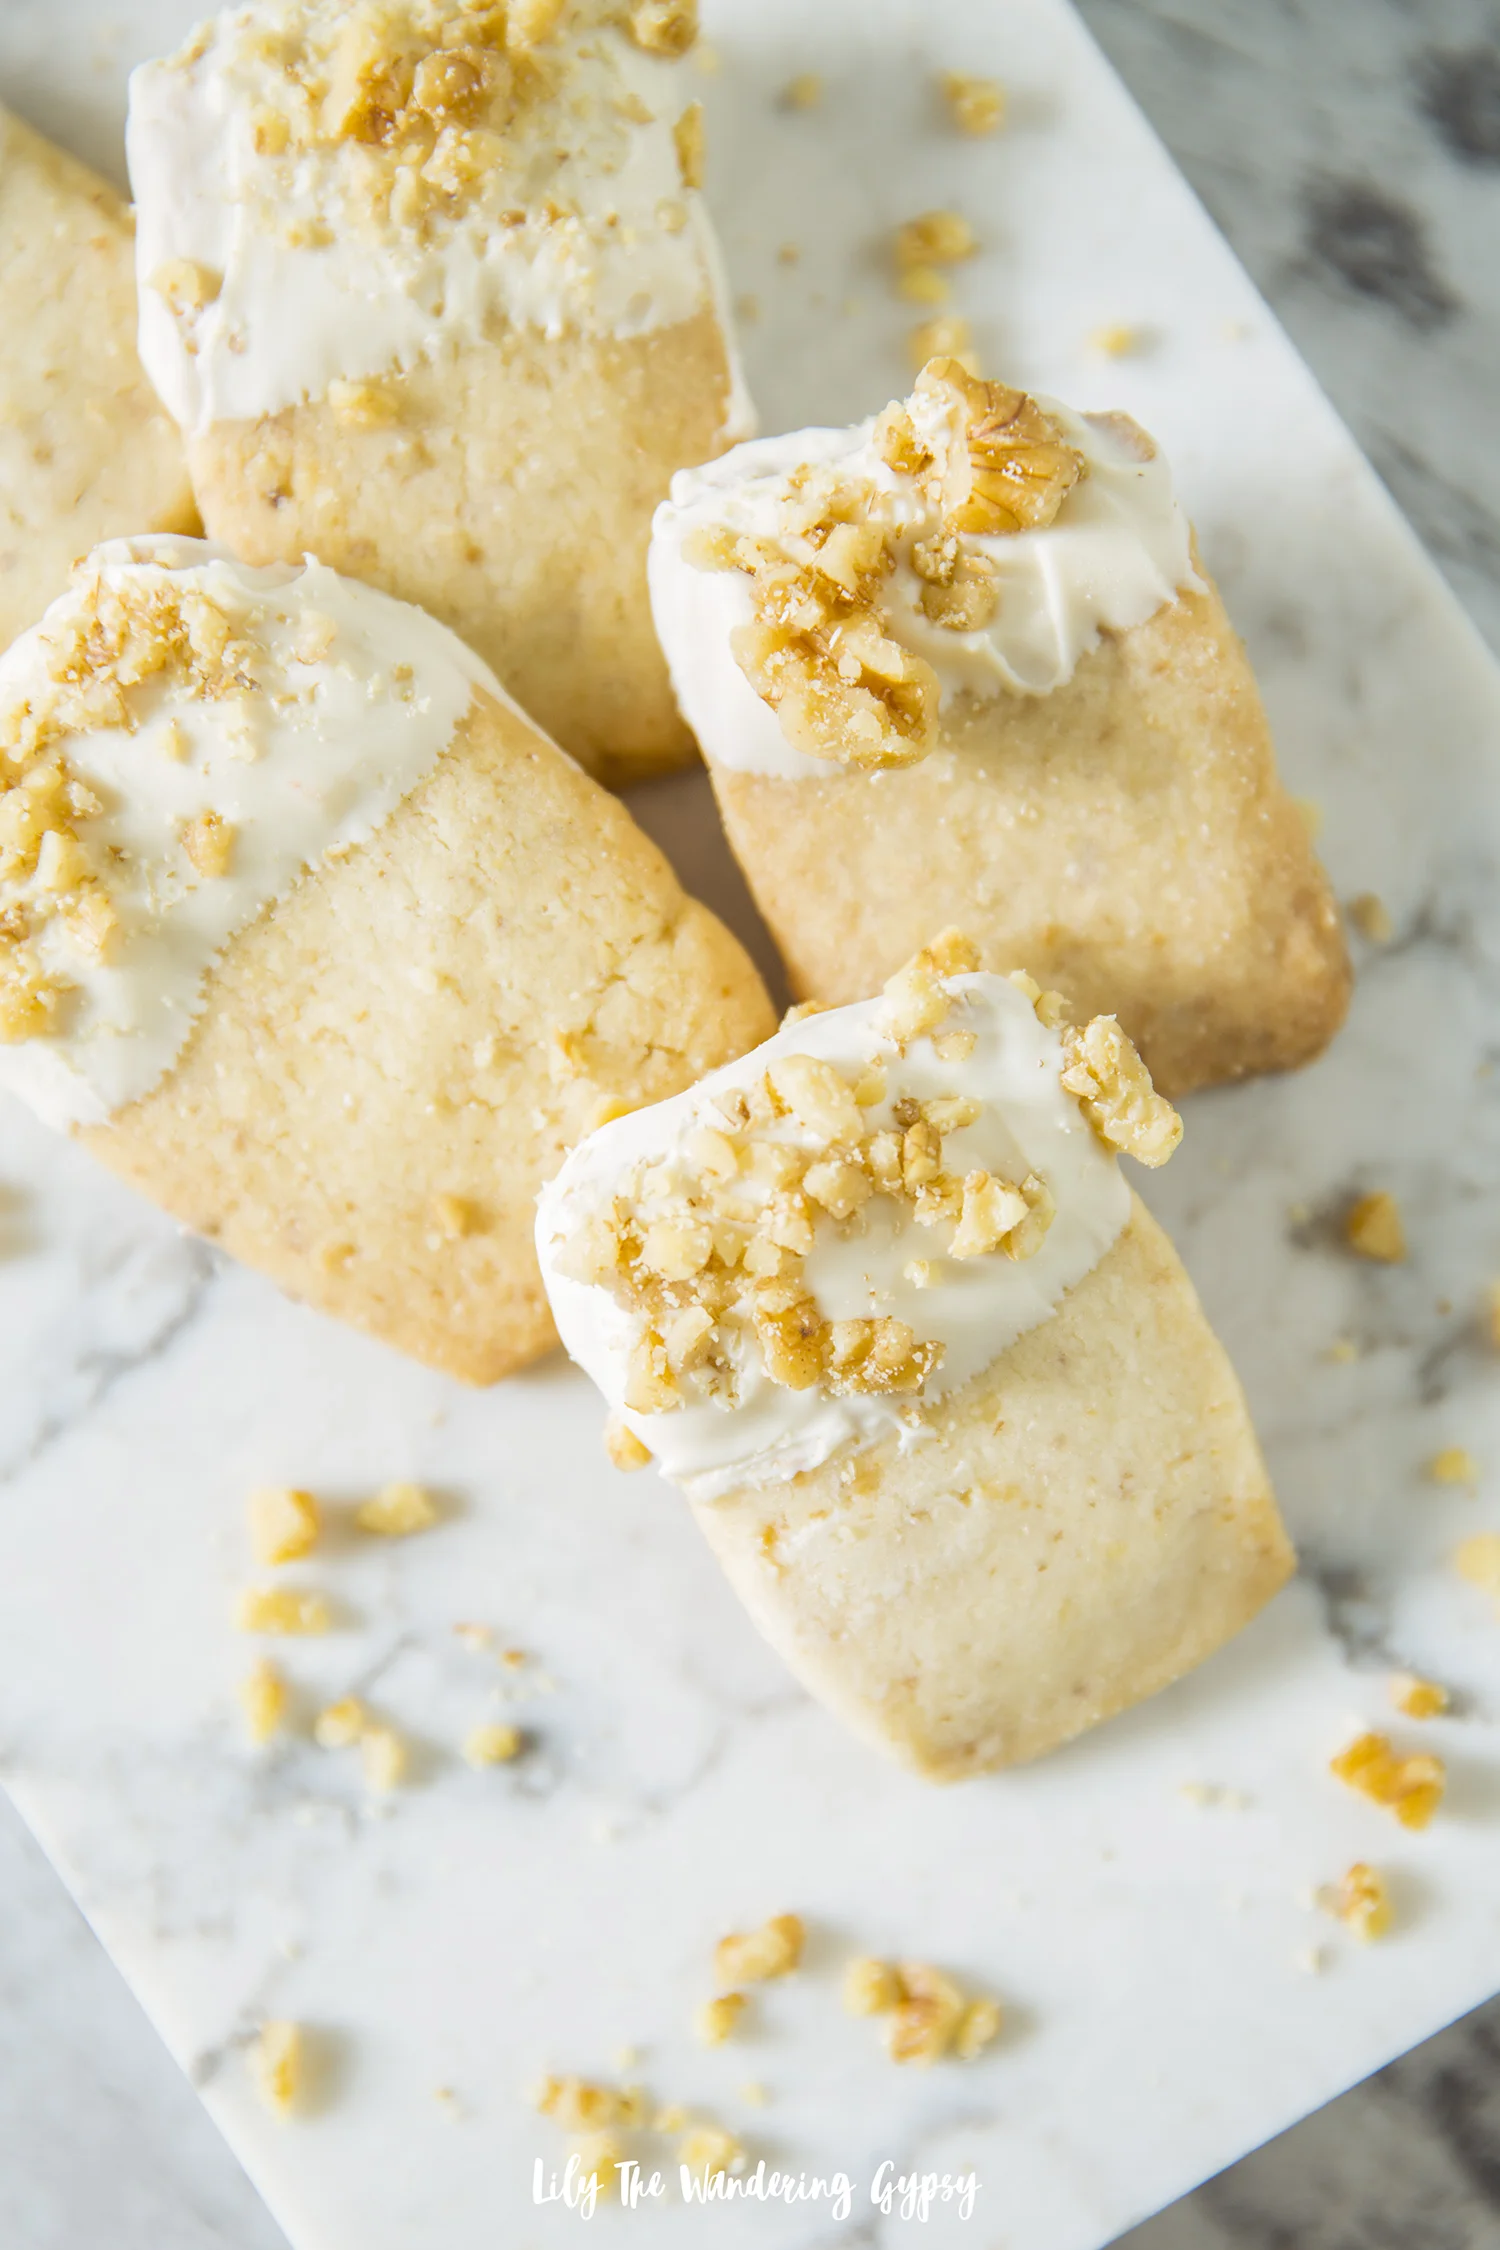
Shortbread Cookies Dipped in White Chocolate and Dark Chocolate

Chocolate Crinkle Cookies

Oatmeal, White Chocolate Craisin Cookies

Snickerdoodles

(Recipes all coming soon!)

Happy Holidays! I hope you all had a wonderful day!

Sheet Pan Spicy Roasted Brussels and Rainbow Veggies Recipe

This post was sponsored by Colman’s, all opinions are my own.

A delicious and health-forward vegan recipe that makes eating your vegetables easy AND delicious. Colman’s Mustard Glazed Brussels Sprouts and Roasted Vegetables make an amazing holiday side dish, snack, or even dinner idea. Colman’s dry mustard does have some heat and spice to it, but it’s a very nice, subtle warming flavor which I just love.

Flavors of mustard grace the outer edges of a wide array of vegetables, in every color and crunch level –you’re going to love these veggies! The mustard flavor also paired exceptionally well with the other marinade ingredients like honey and soy sauce.

Plus, these vegetables make a very elegant dinner or side dish, and go very well with lots of different refreshments. I just love how pretty the Brussels sprouts are when they are cut open. They are like mini cabbages, and while they do have a stronger and sometimes more acquired taste than other vegetables, they are said to be high in vitamins, minerals, and antioxidants. The more vegetables one can incorporate into their diets, the happier their bodies might be. While everyone is of course different, I love treating my friends and family to healthier meal options.

I always love creating plant-based meals that offers a new alternative to dinner or a side dish. Impress just about anyone (even if they are “newbies” to or unsure about Brussels sprouts, these are definitely a crowd pleaser.

By incorporating Colman’s dry and wet mustards into the glaze for these vegetables, I absolutely LOVED the new, unique flavors that came through from baking the ingredients with such a great marinade. If you can imagine a potato or egg salad containing mustard, that is where I got the idea that potatoes, Brussels sprouts, and so many other veggies would pair perfectly with the Colman’s mustards.

Colman’s has been creating mustards since 1814, using time-honored traditions and the highest quality ingredients.

INGREDIENTS (Serves 4-5):

Marinade:

2 Tbsp Colman’s Dry Mustard

2-3 Tbsp Colman’s Wet Mustard

1/3 C. Olive Oil or more, to ensure all veggies are fully coated at the end

2-3 tsp. seasoned salt

1 Tbsp balsamic vinegar

2 Tbsp honey

Suggested Vegetables:

2 Cups Brussels Sprouts (cut into halves, and cut some into quarters)

½ -1 C. thinly sliced Russet potatoes

½ C. sweet potatoes – chopped into small pieces

½ C. yellow zucchini

½ C. green zucchini

¼ C. corn – from cob or canned

1 head of garlic

INSTRUCTIONS:

1.) Prep all veggies, and cover sheet tray(s) with foil, Spray with non stick spray and preheat oven to 400 degrees. Carefully cut off top of garlic head. Set aside.

2.) In a medium to large mixing bowl, mix up all marinade then add veggies to mixing bowl. Use tongs to coat all vegetables, then transfer all veggies to sheet pan(s). To create the garlic head, simply cut off the top of the garlic to expose the cut tops of each clove, while still leaving the rest of the head in tact.

3.) Bake 20 minutes covered with foil, then CAREFULLY remove foil (there will be lots of steam, which can burn someone easily). Bake 10-15 more minutes, and then remove from oven. Transfer to serving tray or large bowl, OR transfer into plastic containers to give to busy families during the holidays. Enjoy!

Here are a few more images of the finished veggies and head of garlic. Definitely recommended!

Have an amazing holiday! And enjoy this delicious, health-forward dish today!

Check out Colman’s Dry and Wet Mustards today, and spice up just about any savory dish you can imagine!

Holiday Entertaining With Blue Diamond® Gourmet Almonds & Nut Thins®

This post was sponsored by Blue Diamond®. The opinions and text are all my own. #NutsAboutTheHolidays

I recently created a gorgeous, holiday-inspired charcuterie and party spread that turned out so well! Inspired by these delicious Blue Diamond® Gourmet Almonds and Blue Diamond® Almond Nut-Thins® from Walmart. Best enjoyed with those you truly love spending time with during the holidays.

In this post, I will show you a few inspiring ways to incorporate almonds, crackers, and other delicious ingredients into a stylish snack board platter, perfect for a holiday party and more!

While I have created my fair share of charcuterie boards in the past, I will admit, I have also spent a lot of time researching new ways to style charcuterie boards, chocolate boards, and other gorgeous platters of food. That’s just the food stylist in me, I guess! For this post, I was incredibly inspired by those images you may have seen of bountiful, well placed ingredients with lots of varied textures and flavors – something for everyone, I guess you could say!

RECREATE THIS SNACK BOARD

I consider this offering more of a snack board than a charcuterie board, because traditionally, the word charcuterie relates to a variety of meats. I am eating meat less and less these days, and my friends and family members are too, so I figured that I would just offer a vegetarian selection of goodies and call it a Holiday Snack Board.

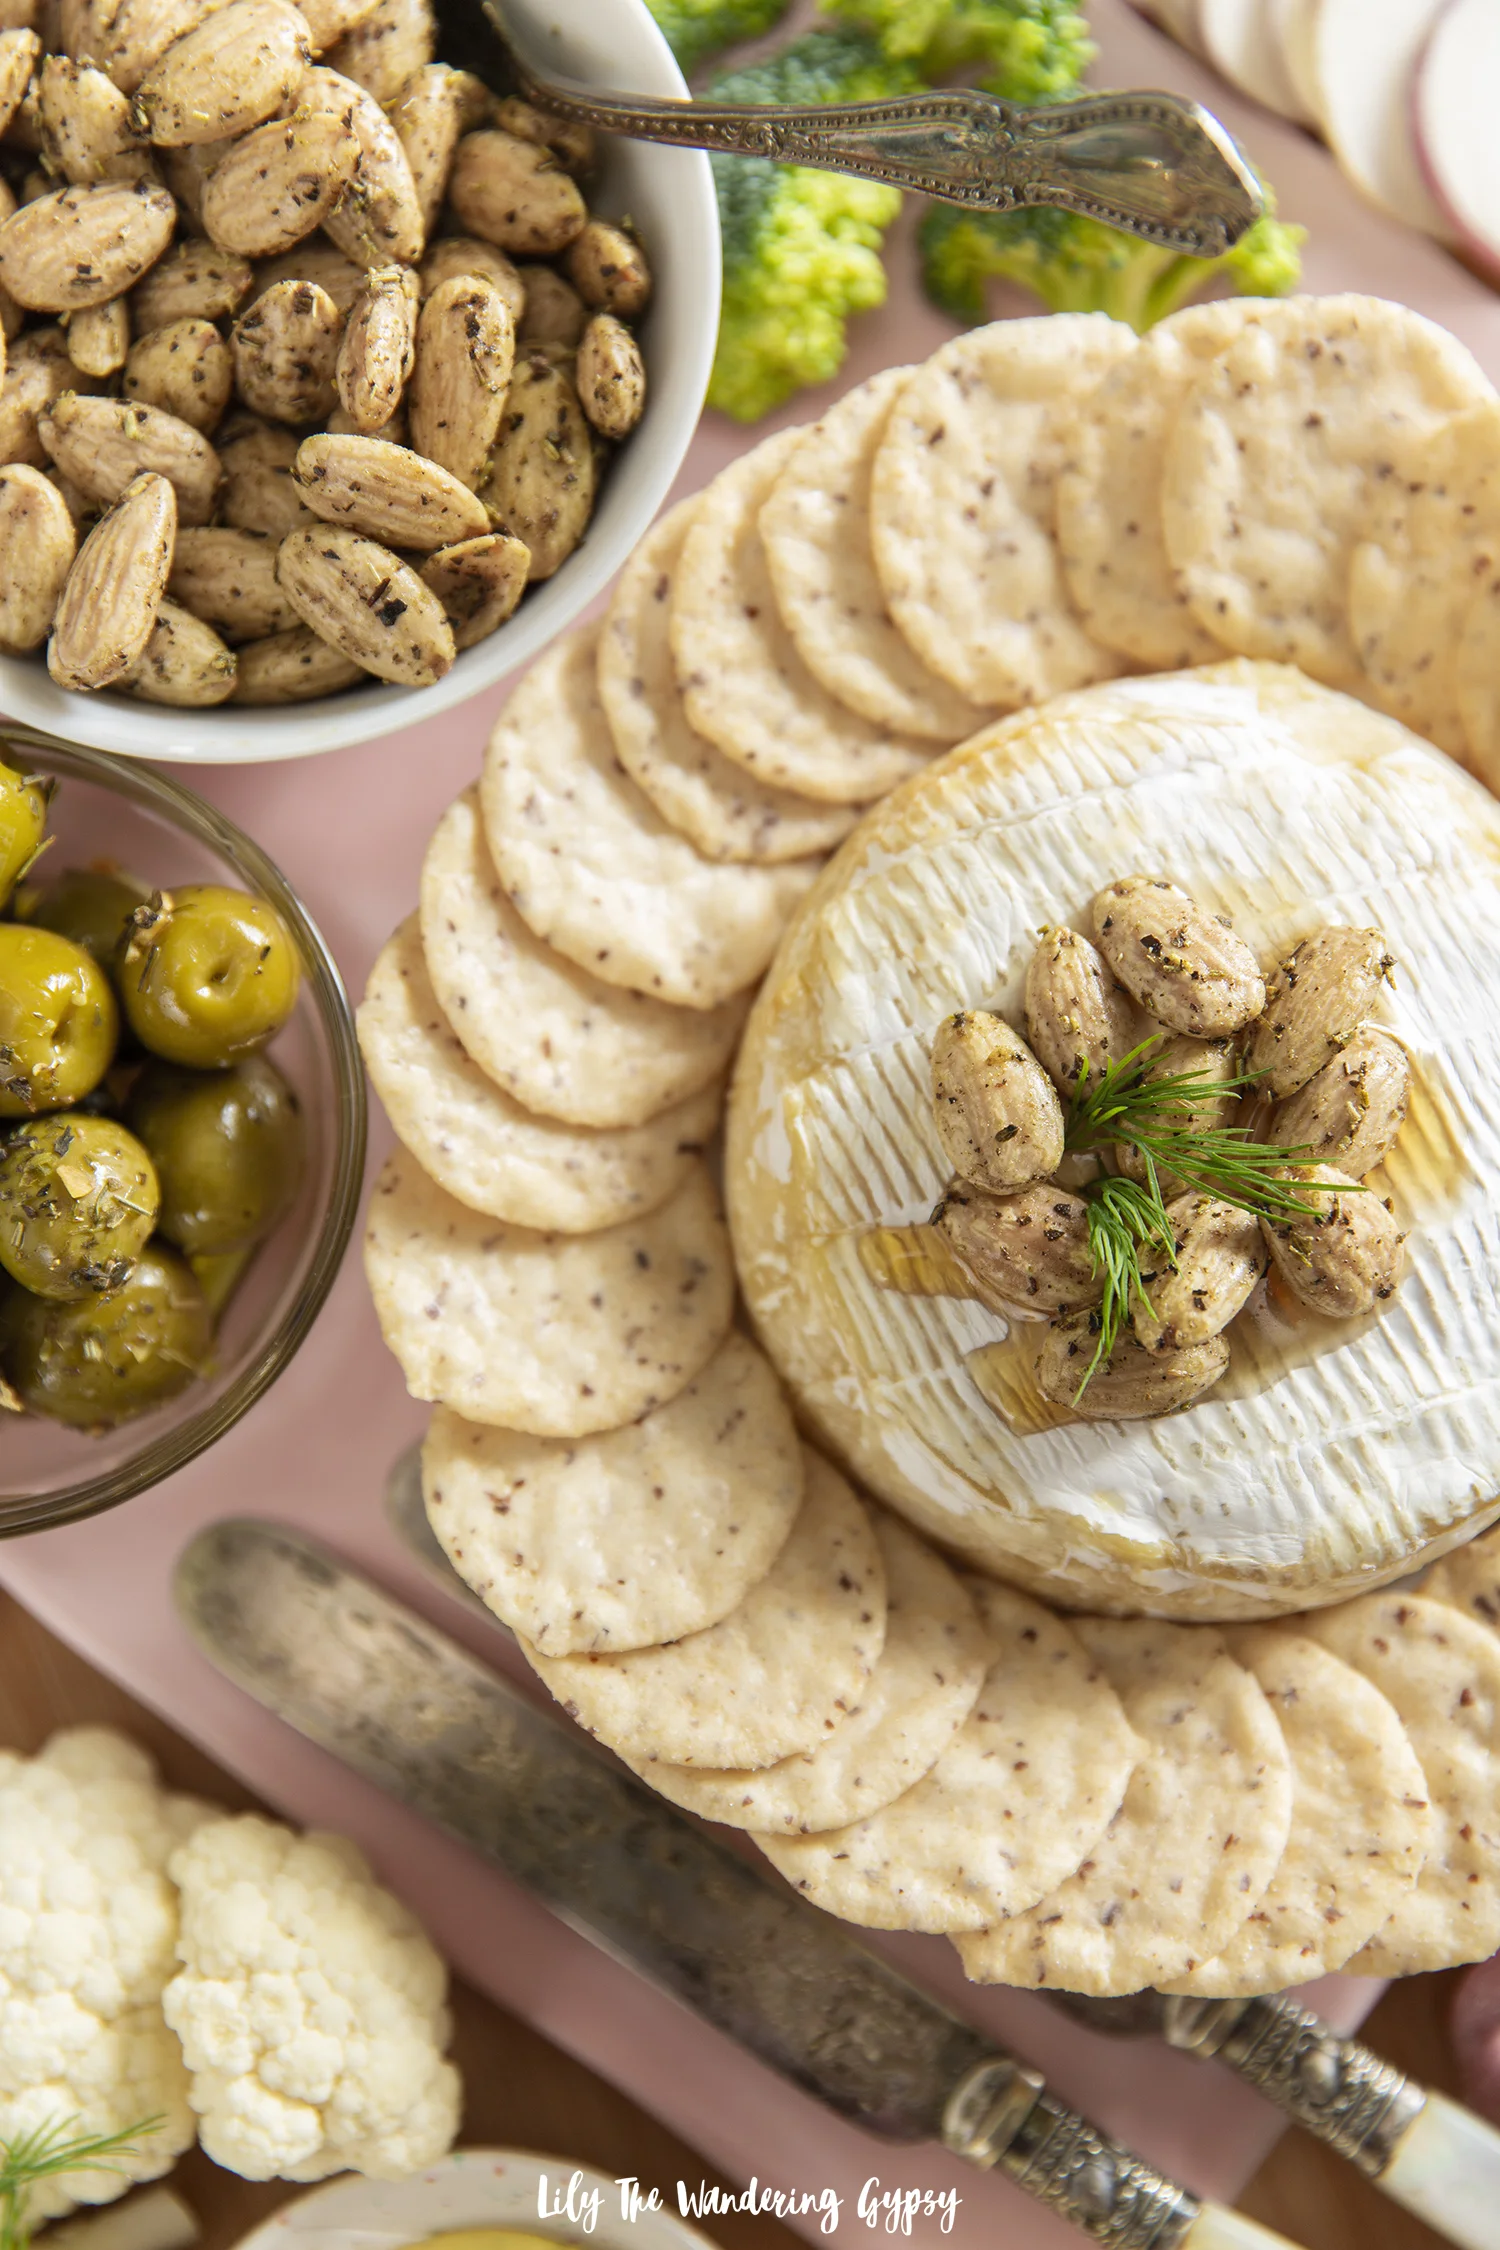
One of the highlights of this snack board is definitely the brie cheese; with honey and herbed Blue Diamond Gourmet Almonds on top. It looks so elegant, and like it took a very long time to create. It was finished in less than 20 minutes and was the perfect pairing with the Blue Diamond Almond Nut-Thins.

Ingredients:

1 bag Blue Diamond Gourmet Garlic Herb and Olive Oil Almonds

1 box Blue Diamond Almond Nut-Thins

1 8oz. round of brie or similar cheese

3-4 Tbsp. honey (2 Tbsp. in small star shaped dish + 2-3 Tbsp. to top cheese)

2 cups cauliflower and broccoli florets

1 package of dill or parsley, or any other green herbs for garnish.

1-2 cups green olives, marinated in olive oil, a pinch of salt, and Mediterranean seasoning mix

1 cup red peppers, sliced small and thin

Any other cheeses you would like to add to your board, or that you already have on hand.

Instructions:

1.)   Bake brie cheese in a heat safe container, or on a baking sheet at 375 degrees Fahrenheit for 10-15 minutes, covered in foil, until middle is fully molten. Carefully check if the middle has melted yet by applying pressure with a spoon or other utensil. You will sort of be able to tell of the cheese is liquid inside yet or not. Once that is fully baked, top with 2-3 Tbsp. honey and ¼ cup or a small handful of Blue Diamond Gourmet Garlic, Herb and Olive Oil Almonds.

2.) Place the brie onto a small round plate (mine measured 6.5” across), then arrange Blue Diamond Almond Nut-Thins around the plate. They fit there perfectly, and this made for an exceptional way to enjoy the crackers and cheese! I also placed a tiny sprig of dill on top, but any fresh green herb would work here, but is not necessary.

3.)   Place the brie in the center of your board as the focal point, then begin placing bowls of seasoned almonds, olives, and any sauces or dips on there too. Then, place crackers, fresh ingredients and any other fun goodies you have around the board to make a full, elegant snack board. Guests will LOVE what you have provided them with.

I was able to find so many incredible items to add to my snack board from Walmart, and I was so inspired by their large selection of snack items! Browse the fresh section, the cracker and nut aisles for the Blue Diamond products, plus the candy and snack aisles to find as many different flavors and textures as possible for your snack board.

This year for décor and styling, I am all about a pink Christmas and as always, shimmering accents and as many trees as possible. I used a large wooden cutting board for the base of the snack board, then used a pink ceramic cutting board with a handle as the main focus. That pale pink was everywhere this year, and I love it so much! It goes so well with whites, light wood tones, and other shimmering accents.

Happy Holidays! Make sure to check out the Blue Diamond website for more holiday entertainment inspiration!

Gourmet Game Day Dipping Station

This post has been sponsored by The Kraft Heinz Company. All thoughts and opinions are my own.

If you’re anything like me, you’ll agree that it makes life easier to let guests serve themselves so you can enjoy the festivities too. That’s why this Game Day Dipping Station is absolutely genius! This spread was a huge hit, and I cannot wait to show you all of the details. Get the recipes for two delicious dips, and also get ideas on how to style your next game day gathering. 

This Gourmet Game Day Dipping Station is sure to be a huge hit!

RECIPES (Serves parties of 6-8)


Featured Products + Ingredients


HEINZ Ketchup

KRAFT Mayo

KRAFT Ranch Dressing

KRAFT Mustard

Chicken Strips

Chicken Nuggets – 2 bags

1/3 – ½ C. chopped cilantro

1/3 – ½ C. fresh jalapenos, finely chopped

1/3 – ½ fresh dill, chopped

1 bag of curly fries – any brand you like

Juices

Glass Carafe to hold juice(s)

2 decorative bowls to hold dips

Floral arrangement – 2 packages of pine branches or source your own + 1 jar with water in it.

Small cake stands – optional

12 crispy rice treats

12 paper straws

1 cup white chocolate or almond bark – melted until smooth

Check out Kraft products at Dollar General, and get great savings on everything from Kraft in store as well!

Dip 1

1/3 C. cilantro + 1/3 C. finely chopped fresh jalapeno + 1 16oz. bottle of KRAFT Ranch

Dip 2

1 – 1 ½ C. KRAFT Mayo + ½ C. KRAFT Mustard + 1/3 – 1.2 C. fresh chopped dill

Instructions:

1.) Preheat oven to 400 degrees and prepare 3 baking sheets with parchment paper. Spread out Chicken Nuggets onto one, Chicken Strips on another, and fries on the last sheet. Set aside.

2.) Make both dips. In one medium mixing bowl, add 1 bottle of KRAFT Ranch, plus the cilantro and jalapeno. Stir until everything is combined. For the second dip, add mayo, mustard, and dill, and stir until combined. Transfer dips to two decorative serving bowls and provide serving spoons for guests. They're perfect when paired with the Chicken Strips and Chicken Nuggets!

3.) Bake food as instructed on packaging, and begin to prepare your delicious Game Day Dipping Station. I used a piece of light grey colored stretchy velvet as the table cloth, then I added one striped green and white kitchen towel to the center of the table. Place a small cake stand and floral arrangement in center of table and build out from there as symmetrically as possible.

I placed two decorate serving bowls with dips in the center, then Chicken Strips behind that, and lastly, the Chicken Nuggets and curly fries on the outsides.

4.) To make the treat pops, stick paper straws into crispy rice treats. Melt white chocolate and use a spoon to apply it to the treats, one at a time. Place them onto a prepared sheet pan, and also add sprinkles if you would like in team colors or others! These added a lot to the display and made a great dessert.

Dollar General is great - I found ALL the necessities there!

And below, you can see my two helpers. They love taking rides to the store with me! They are the best, and they'll definitely be enjoying game day with us. Have an amazing game day! 

Dulce De Leche No Bake Dessert Recipe

Do I have a delightfully easy no bake dessert for you! This one would be PERFECT to serve during the holidays, and if you make it in a larger dish, this would be great for a crowd! These desserts are seriously incredible, and I think they would even taste great with chocolate syrup as well.

INGREDIENTS:

1 pint heavy or light whipping cream

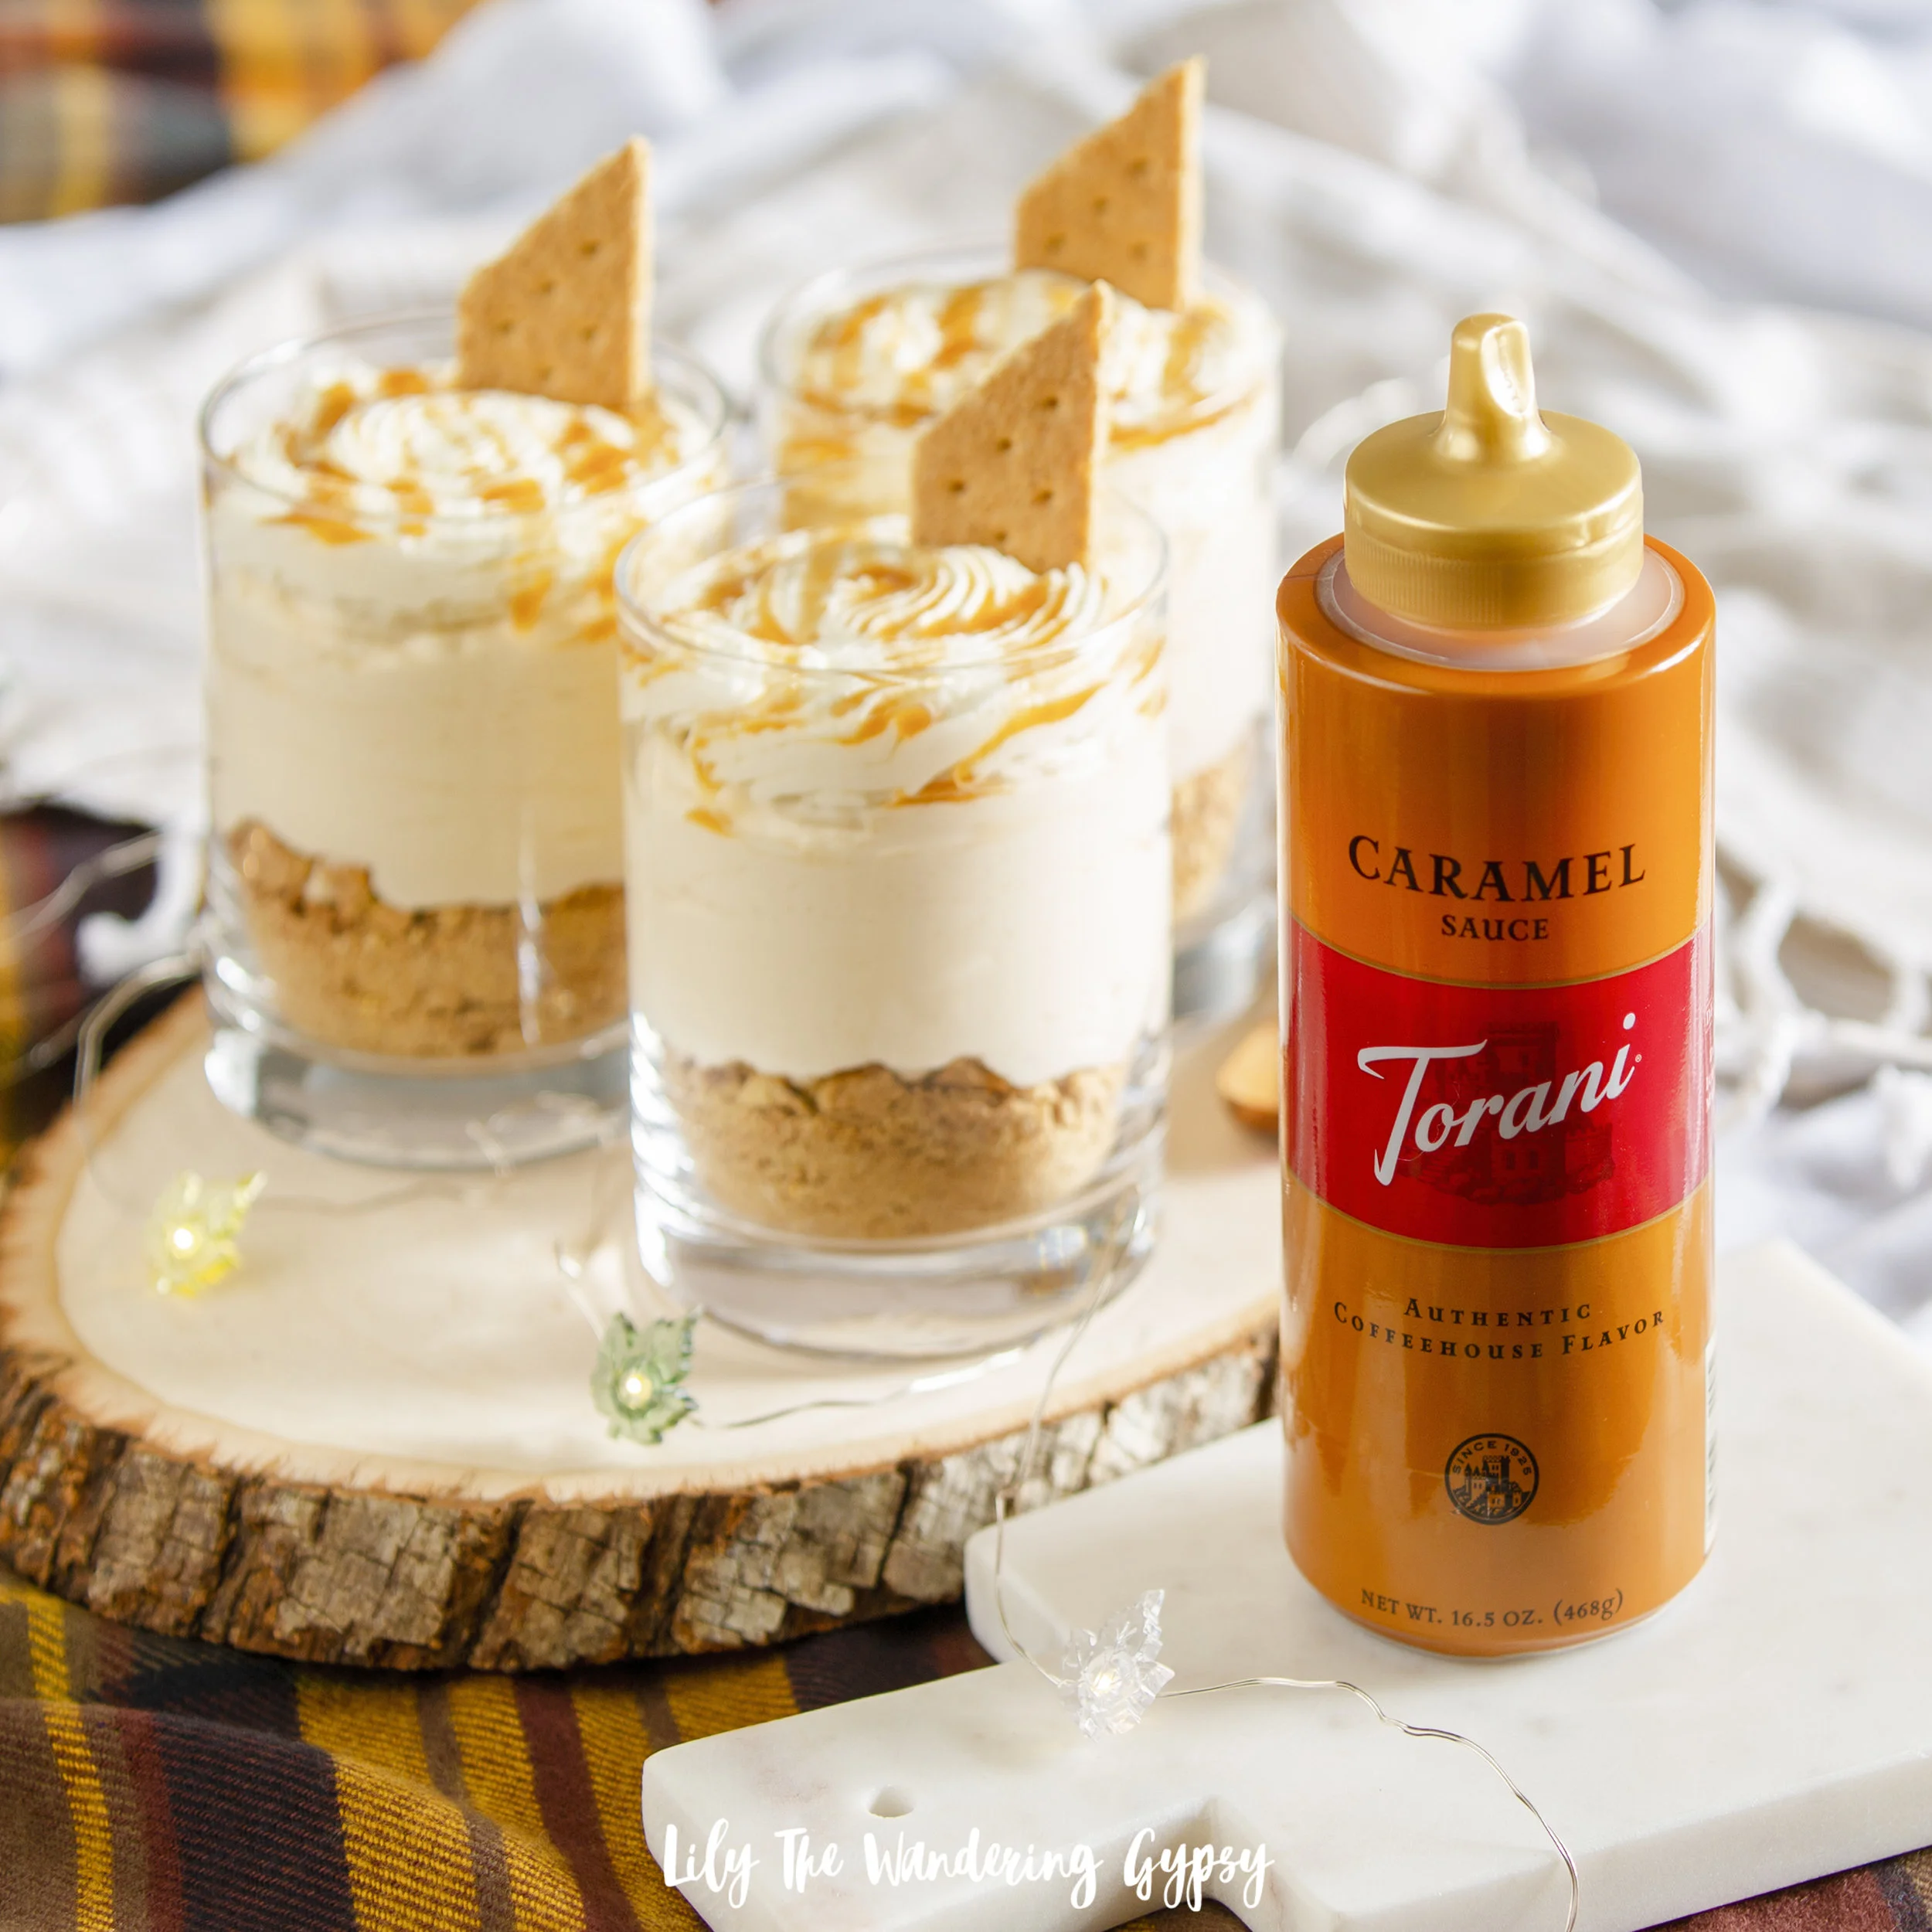
1/2-1 cup Torani Caramel Sauce (found at Walmart in the coffee aisle, near the chocolate sauces)

1 box of graham crackers (reserve several for top garnish)

INSTRUCTIONS:

1.) Place three medium-sized glasses on your work surface, and crush up graham crackers as small as possible. I placed 15 or more graham crackers into a stronger Ziploc bag, closed the bag, and then used a jar to crush up the crackers.

2.) Divide the crushed up crackers between the three glasses. Now, to make your filling! Beat heavy whipping cream for several minutes, until stiff peaks form. Reserve about 1/2 Cup of the whipped cream for your topping, then, add vanilla and Torani Caramel sauce, then finish mixing to combine everything. Divide the filling between the glasses.

3.) For the garnish, I used a sharp knife to carefully cut the graham cracker squares in half, then I cut a diagonal angle as well. This is totally optional, I just thought it was cute. Also drizzle more Torani syrup over the top of the dessert and enjoy.

Winnie The Pooh Mini Bear Sandwiches

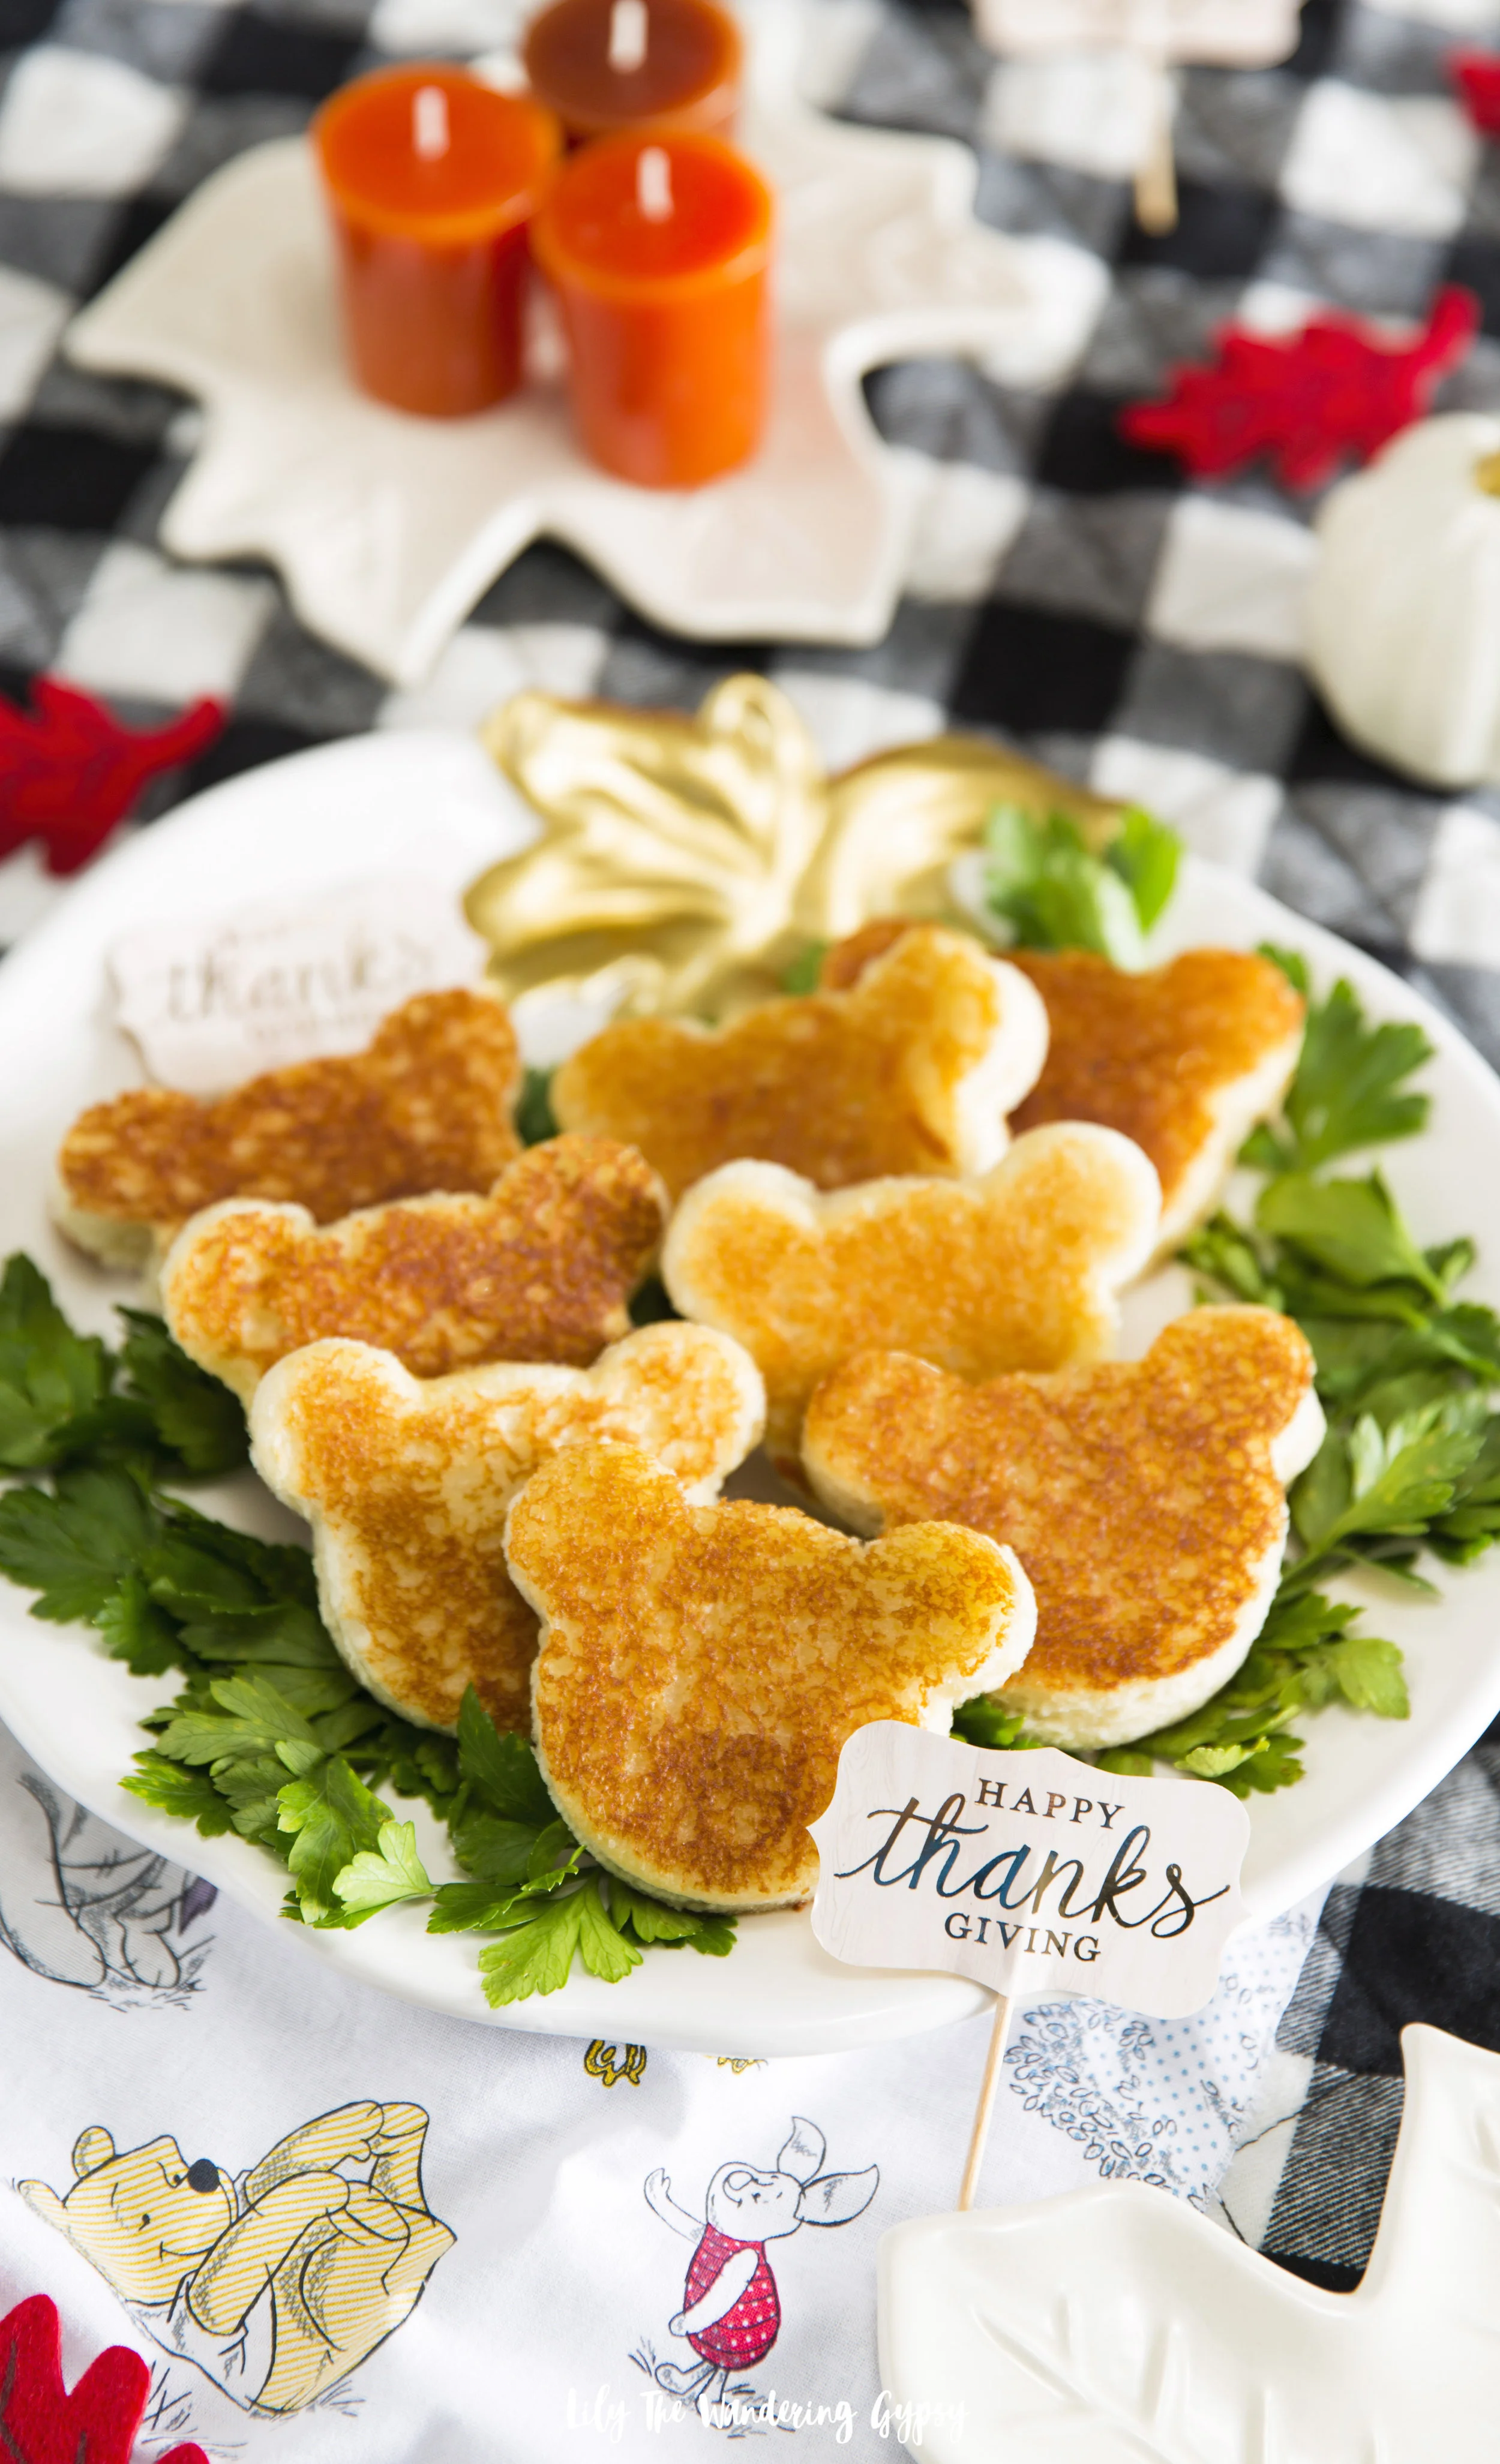
These little mini grilled cheese sandwiches are inspired by Disney’s new movie, Christopher Robin. I found these to be incredibly fun and easy to make and can even be partially prepped ahead of time if you will be making a lot of them for a crowd. #WisdomByPooh

INGREDIENTS (makes 10 sandwiches)

  • 20 pieces of sliced bread

  • cookie cutter in your favorite shape

  • up to 2 cups shredded cheddar cheese

  • butter spread or my favorite dairy free option, Earth Balance

  • skillet

INSTRUCTIONS:

1.) Simply use a cookie cutter to cut shapes from your favorite sliced bread. Those can be cut out up to one day in advance, then stored in an air tight bag.

2.) Heat skillet over medium heat, and add butter to each piece of bread, set aside.

3.) When skillet is hot, add as many pieces of bread as you can, butter side down. Sprinkle approximately 1 TBSP of shredded cheese per piece of bread. To avoid a mess, try to make sure the cheese stays on the bread, rather than getting it all over the skillet to burn.

4.) Place other pieces of buttered bread shapes on top, and let the cheese melt. Use a spatula to VERY CAREFULLY flip over the sandwiches to then heat the other side evenly, until cheese has melted.

5.) serve on a cute platter and enjoy!

I styled these in a Thanksgiving theme, but they would be amazing for just about any holiday. I thought they would be amazing for little ones, to tide them over as the full meal is being made. These could be a fun way to get picky eaters to try something new also.

Chocolate Lover's Gift Guide with GODIVA

I am sure we all have that special friend or family member who loves chocolate and deserves a little treat this holiday season1 Everyone who has had the pleasure of trying these new #GodiaGCubes has absolutely LOVED them and cannot wait to have more. I am so honored to have had the chance to help promote these delicious G Cubes for GODIVA! Here are a few of the cutest and most incredible gift ideas for the Chocolate Lover in your life!

Holiday Entertaining Kahlúa Cold Brew Martini Recipe

This shop has been compensated by Kahlúa. All opinions are mine alone. The following content is intended for readers who are 21 or older. #ColdBrewMartini 

The Season To Shine

We had an amazing holiday party recently and enjoyed chocolate fondue AND a crowd pleasing Kalhúa Cold Brew Martini Recipe, featuring the brand’s original liqueur. Kalhúa is easy to find at Target and Walmart and many other retailers! If you enjoy coffee, then this martini is going to quickly become your new favorite cocktail! We all texted each other the day after the party, wishing we could get together again soon and have a few more cocktails together. It was a great night.

With lots of shimmering details, we set the mood with metallic trees, ornaments, gold tinsel, candy canes, velvet fabrics, faux fur, and of course, Kahlúa and chocolate fondue.

We really loved how the Kalhúa Cold Brew Martinis paired so well with both the warm, rich and creamy chocolate of the fondue and the dippable items. We want to also have a cheese fondue for our next get together because it’s such a fun and interactive way to host friends and family, because it’s all self serve, and people can get as creative as they want. Hover over the image below to shop for Kalhúa.

Kahlúa Cold Brew Martini Recipe

This is one of those 1-2-3 cocktail recipes, making it fun and easy to remember!

Ingredients

1 Part Absolut Vodka

2 Parts Kalhúa Original

3 Parts Cold Brew Coffee

Instructions

Ok, you’ll need shaker. Got it? Good. Now fill it with ice. Add one part Absolut Vodka, two parts Kahlúa and 3 parts cold brew coffee. Easy as 1-2-3. Shake the ingredients hard for at least 10 seconds to create a nice foam. Strain into a cocktail glass to get rid of all the small ice chips. Garnish with coffee beans if you would like. Enjoy!

Party + Fondue Details

Before everyone arrived, I prepped the space by lighting my tall, metallic silver tree, and also setting up a few other white and silver one-foot trees. I loved the color scheme, and I believe it would translate for so many of you, as well! With a more neutral and shimmering color scheme, your party decor gives a more timeless, nostalgic, and elegant feel to any event or holiday.

For the fondue, we melted 2 bags of 60% cacao chocolate chips + 2-3 tbsp heavy cream. We dipped in lots of foods we cut up ahead of time like strawberries, marshmallows, apples, graham crackers, and more!

Lower lighting also helps the strands of lights make an even more magical feeling for the evening. I had so much luck finding gold items in the holiday aisles at Target and Walmart and was so inspired by this year’s finds, as well as a few items I already had from years past.

I even found a couple of yellow trees to use in my decor, that closely matched the color of the globally recognized Kahlúa label. It was a great jumping off point and really made everyone smile.


Kahlúa goes great in so many cocktails, not only coffee-based drinks. It’s one of the most versatile liqueurs. It’s perfect for a casual night in, casual night out with friends, and even brunch, too! Sweet and refreshing to the last sip.

By placing cut fruits onto a holiday themed platter, the holiday mood was set instantly. Feel free to create a gorgeous spread of whatever items you want to dip.

Happy holidays, friends! We really hope you enjoy the amazing as well! This #ColdBrewMartini was a huge hit!
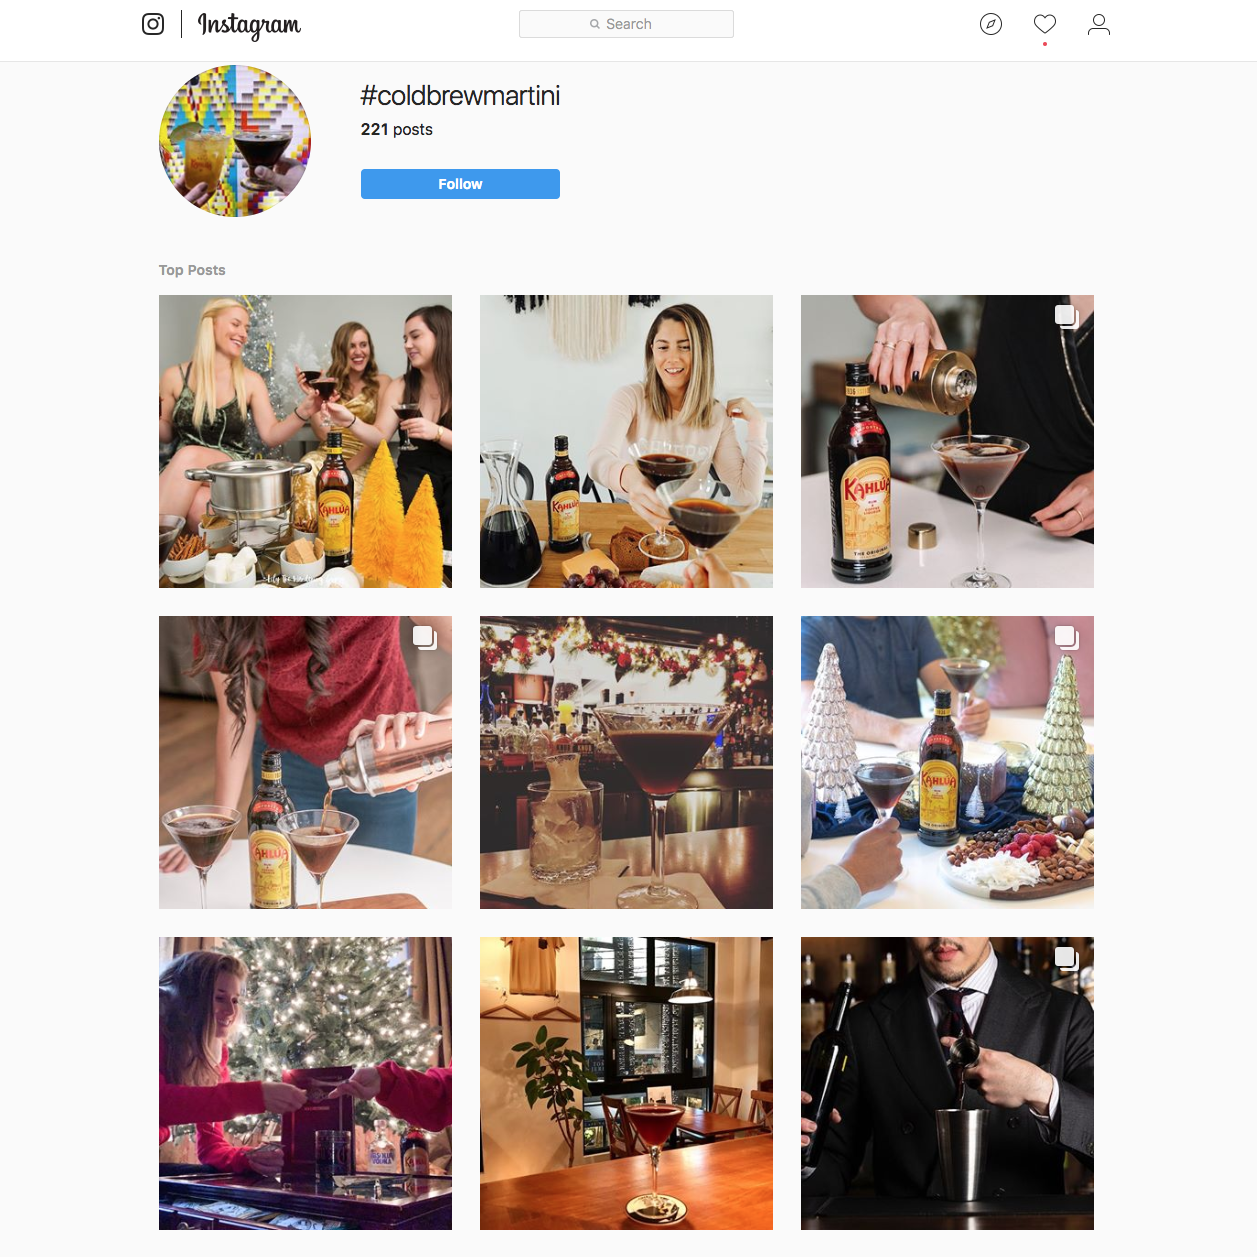
BONUS! Looks like we are featured as the VERY TOP POST for this hashtag! Check us out :)

Glitz N Glam Christmas Party Recipes with 7UP + Canada Dry Ginger Ale at Target

This post was sponsored by Keurig Dr Pepper. All thoughts and opinions are my own. Must be 21 or older to consume alcohol. Please drink responsibly. #SipSipHooray

So excited to share a drink recipe AND a fun candy-making recipe that you’re definitely going to want to incorporate into your next holiday gathering. Show your friends and family just how much you care about them by making this year’s festivities extra Glitz N Glam too. Let’s raise a glass to this fun time of year and get to celebrating! I am so excited to share two fun holiday recipes that both incorporate 7UP and Canada Dry Ginger Ale, and I know you’re going to be so inspired to visit Target and incorporate some of these ideas into your next shindig!

If you are someone who believes it’s not a great party without some sort of theme and décor, then you are just like me. I love everything to coordinate and look polished and put together, but I don’t want to spend a ton of time working on setup when I could be prepping food and drinks instead. This décor idea is simple and very easy to recreate, and can be very good for your party budget as well.

The holidays are the absolute perfect time to go a little more on the sparkly, glitzy, and glam-inspired look. After years of styling parties for my blog, and for my friends, and family, I really know what works and what is not so much worth the trouble. For instance, I used a backdrop décor theme of white and silver, and made sure the overall color scheme reads shimmering winter, which allows the food and drinks to be the star of your party. Any time I can incorporate metallics into a party theme, I do it because a bit of shimmer really classes things up, and makes the party feel even more special! This sort of color scheme is also great because silver and white are colors that are pretty readily available at most craft stores and can even be found year round!

Luckily, I was able to find most of my ingredients and party supplies at Target, my FAVORITE place to get inspired for parties and holidays! I love walking their home décor, food, and party aisles to get ideas for upcoming events and parties. They seem to have just about everything and more. You can sSave on Canada Dry and 7UP with Cartwheel, now in the Target app.

I also love how silver and white portray a very classic and elegant look, which makes it incredibly versatile for all ages!

This drink I created, the Orange Spice Punch, is PERFECT for those who love a flavor that is a little more tart with sweet undertones. Also, using a cinnamon stick for garnish was neat because you could stir the drink with it, then the cinnamon taste and aroma was in the drink too.

Also, orange and dark chocolate are a delicious pairing, so making these chocolate truffles with a darker chocolate was a really good idea. The 60% cacao chocolate chips really tasted amazing to use as the base of the chocolates.

7UP ORANGE SPICE PUNCH

(Recipe Found Here)

INGREDIENTS

  • 1 qt. orange sherbet

  • 2 L. 7UP®

  • 12 oz. Canada Dry® Ginger Ale

  • 6 oz. orange juice

  • 6 oz. cranberry juice

  • 1 cup Canadian whiskey (optional)

  • Lemon, lime, and orange slices; cinnamon sticks; and pumpkin spice, for garnish

  • Prep Time: 4 minutes

  • Ready In: 6 minutes

  • Serving Size: 30 people

DIRECTIONS

  • Add everything except for sherbet into a one-gallon punch bowl.

  • Float scoops of sherbet on top.

  • Let sherbet soften in the punch for a few minutes before serving.

  • Garnish with lemon, lime, and orange slices, cinnamon sticks, and a touch of pumpkin spice.

Please drink responsibly.

Best served in something extra fancy! 

7UP FIRECRACKER CANDY TRUFFLES

(RECIPE FOUND HERE)

INGREDIENTS

·       POPPER CANDY

·       Confectioners’ sugar for dusting

·       1 cup granulated sugar

·       2 tbsp. light corn syrup

·       1/4 cup 7UP®

·       1 tbsp. baking soda

·       1-2 tsp. citric acid (optional, adds flavor)

·       Pink food coloring

·       TRUFFLES

·       1-2/3 cups heavy cream

·       1 bag of chocolate chips (good quality 60% cacao), chopped + 6 oz. more for coating truffles (I used 1.5 bags of chocolate chips altogether)

·       Pinch of salt (I used large grain salt, it worked super well)

·       1/2 tsp. ground cinnamon (optional)

·       3/4 tsp. cayenne (optional)

·       1/2 tsp. chili powder (optional)

  • Prep Time: 15 minutes

  • Ready In: 2 hours 15 minutes

  • Serving Size: 10-12 people

DIRECTIONS

·       POPPER CANDY

·       Prepare a baking sheet with parchment and dust with confectioners’ sugar.

·       Place granulated sugar, corn syrup, and 7UP® in a pot, whisking to combine. Bring mixture to a boil, and cook until a temperature of 300° is achieved. Watch your temp, or this can burn relatively easily.

·       Remove from heat, and stir in baking soda, (optional) citric acid, and food coloring of your choice. The citric acid just adds flavor, which is super tart. So, if you would prefer to just have a sweet topping, do not include the citric acid.

·       Pour onto prepared baking sheet, sprinkle with remaining citric acid, and set aside to cool while preparing truffles.

·       TRUFFLES

·       To make the truffles, bring cream to a simmer in a shallow saucepan.

·       Place chocolate in a shallow bowl, and pour warm cream over chocolate.

·       Let stand for 10 minutes.

·       Stir with a rubber spatula until chocolate mixture is smooth.

·       Season with a pinch of salt, ground cinnamon, and cayenne.

·       Pour into a shallow baking dish, and chill in refrigerator until firm. This step was a bit tricky, but I found that spreading the chocolate in a pretty thin layer worked best and was the fastest.

·       To form truffles, scoop with a small ice cream scoop, melon baller, or kitchen spoon and roll into a balls. Feel free to re-freeze chocolate if it’s not firm enough to make the balls. Note – this step was a bit tricky. At first, the chocolate was way too soft to form balls from. I also had the chocolate freeze completely, because I left them in the freezer too long. Just check on the chocolate ganache at 15 minutes, then every 5 minutes after that.

·       Place truffles in freezer to firm up again before covering with more chocolate. Below, you can see an image of the chocolate balls after they have been frozen for about 20 minutes.

·       Once popper candy is cooled and hard, place in a large resealable bag and break up into pieces with a rolling pin or mallet.

·       Cover chilled truffles with melted chocolate, and then sprinkle with popper candy…“pop” one in your mouth and enjoy!

Above, you can see how I covered the truffles in melted chocolate – it was really fun, and I ate SO much chocolate in the process, LOL!

TIP

·       Keep in refrigerator, and be aware that popping candy need to be used quickly because of its delicate nature. Enjoy!

You can find more recipe inspiration at 7UP.com.

Setting up a Glitz N Glam holiday party is easy if you stick to these fun décor ideas, as well as offer guests food and drinks that they cannot resist! What is your favorite color scheme and recipe ideas for your holiday parties?

#SipSipHooray