Music Festival Camping Tips with Coleman at Target

This post has been sponsored by Coleman®. All thoughts and opinions are my own.

Happy Memorial Day Week!

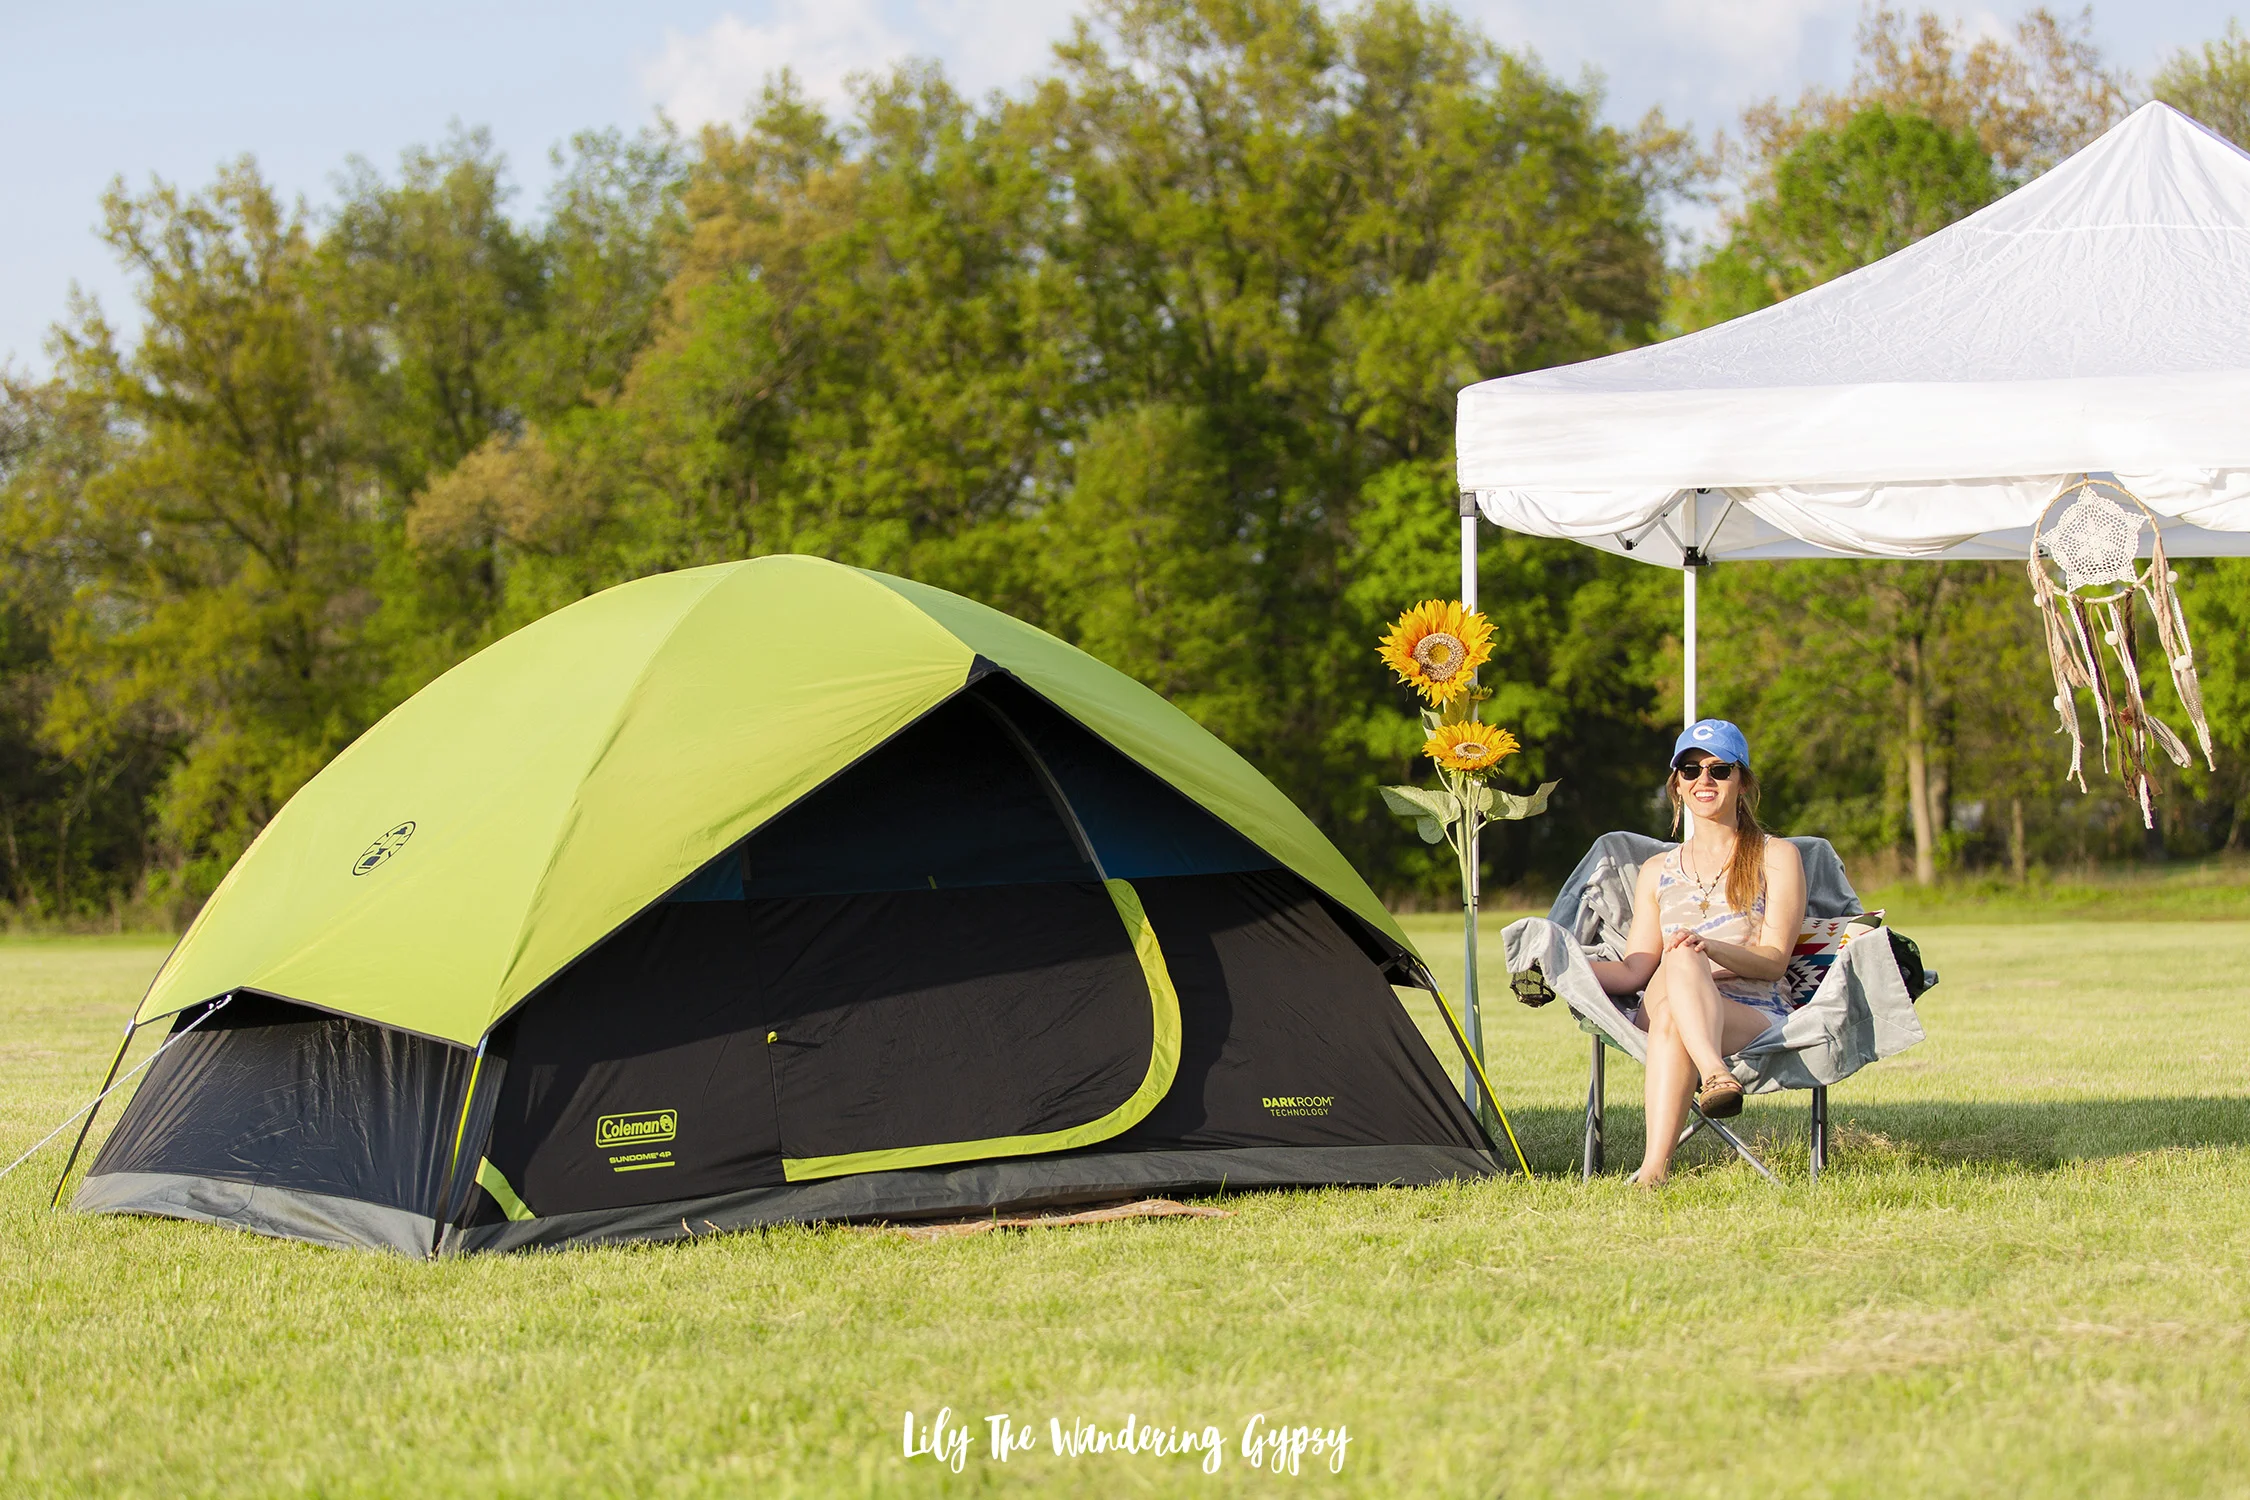
This weekend, I am attending the Summer Camp Music Festival and I am so excited. It’s been almost ten years since I first attended, so I am really looking forward to seeing old friends and listening to some live music. (I will share some photos of the event in this post throughout the weekend!!)

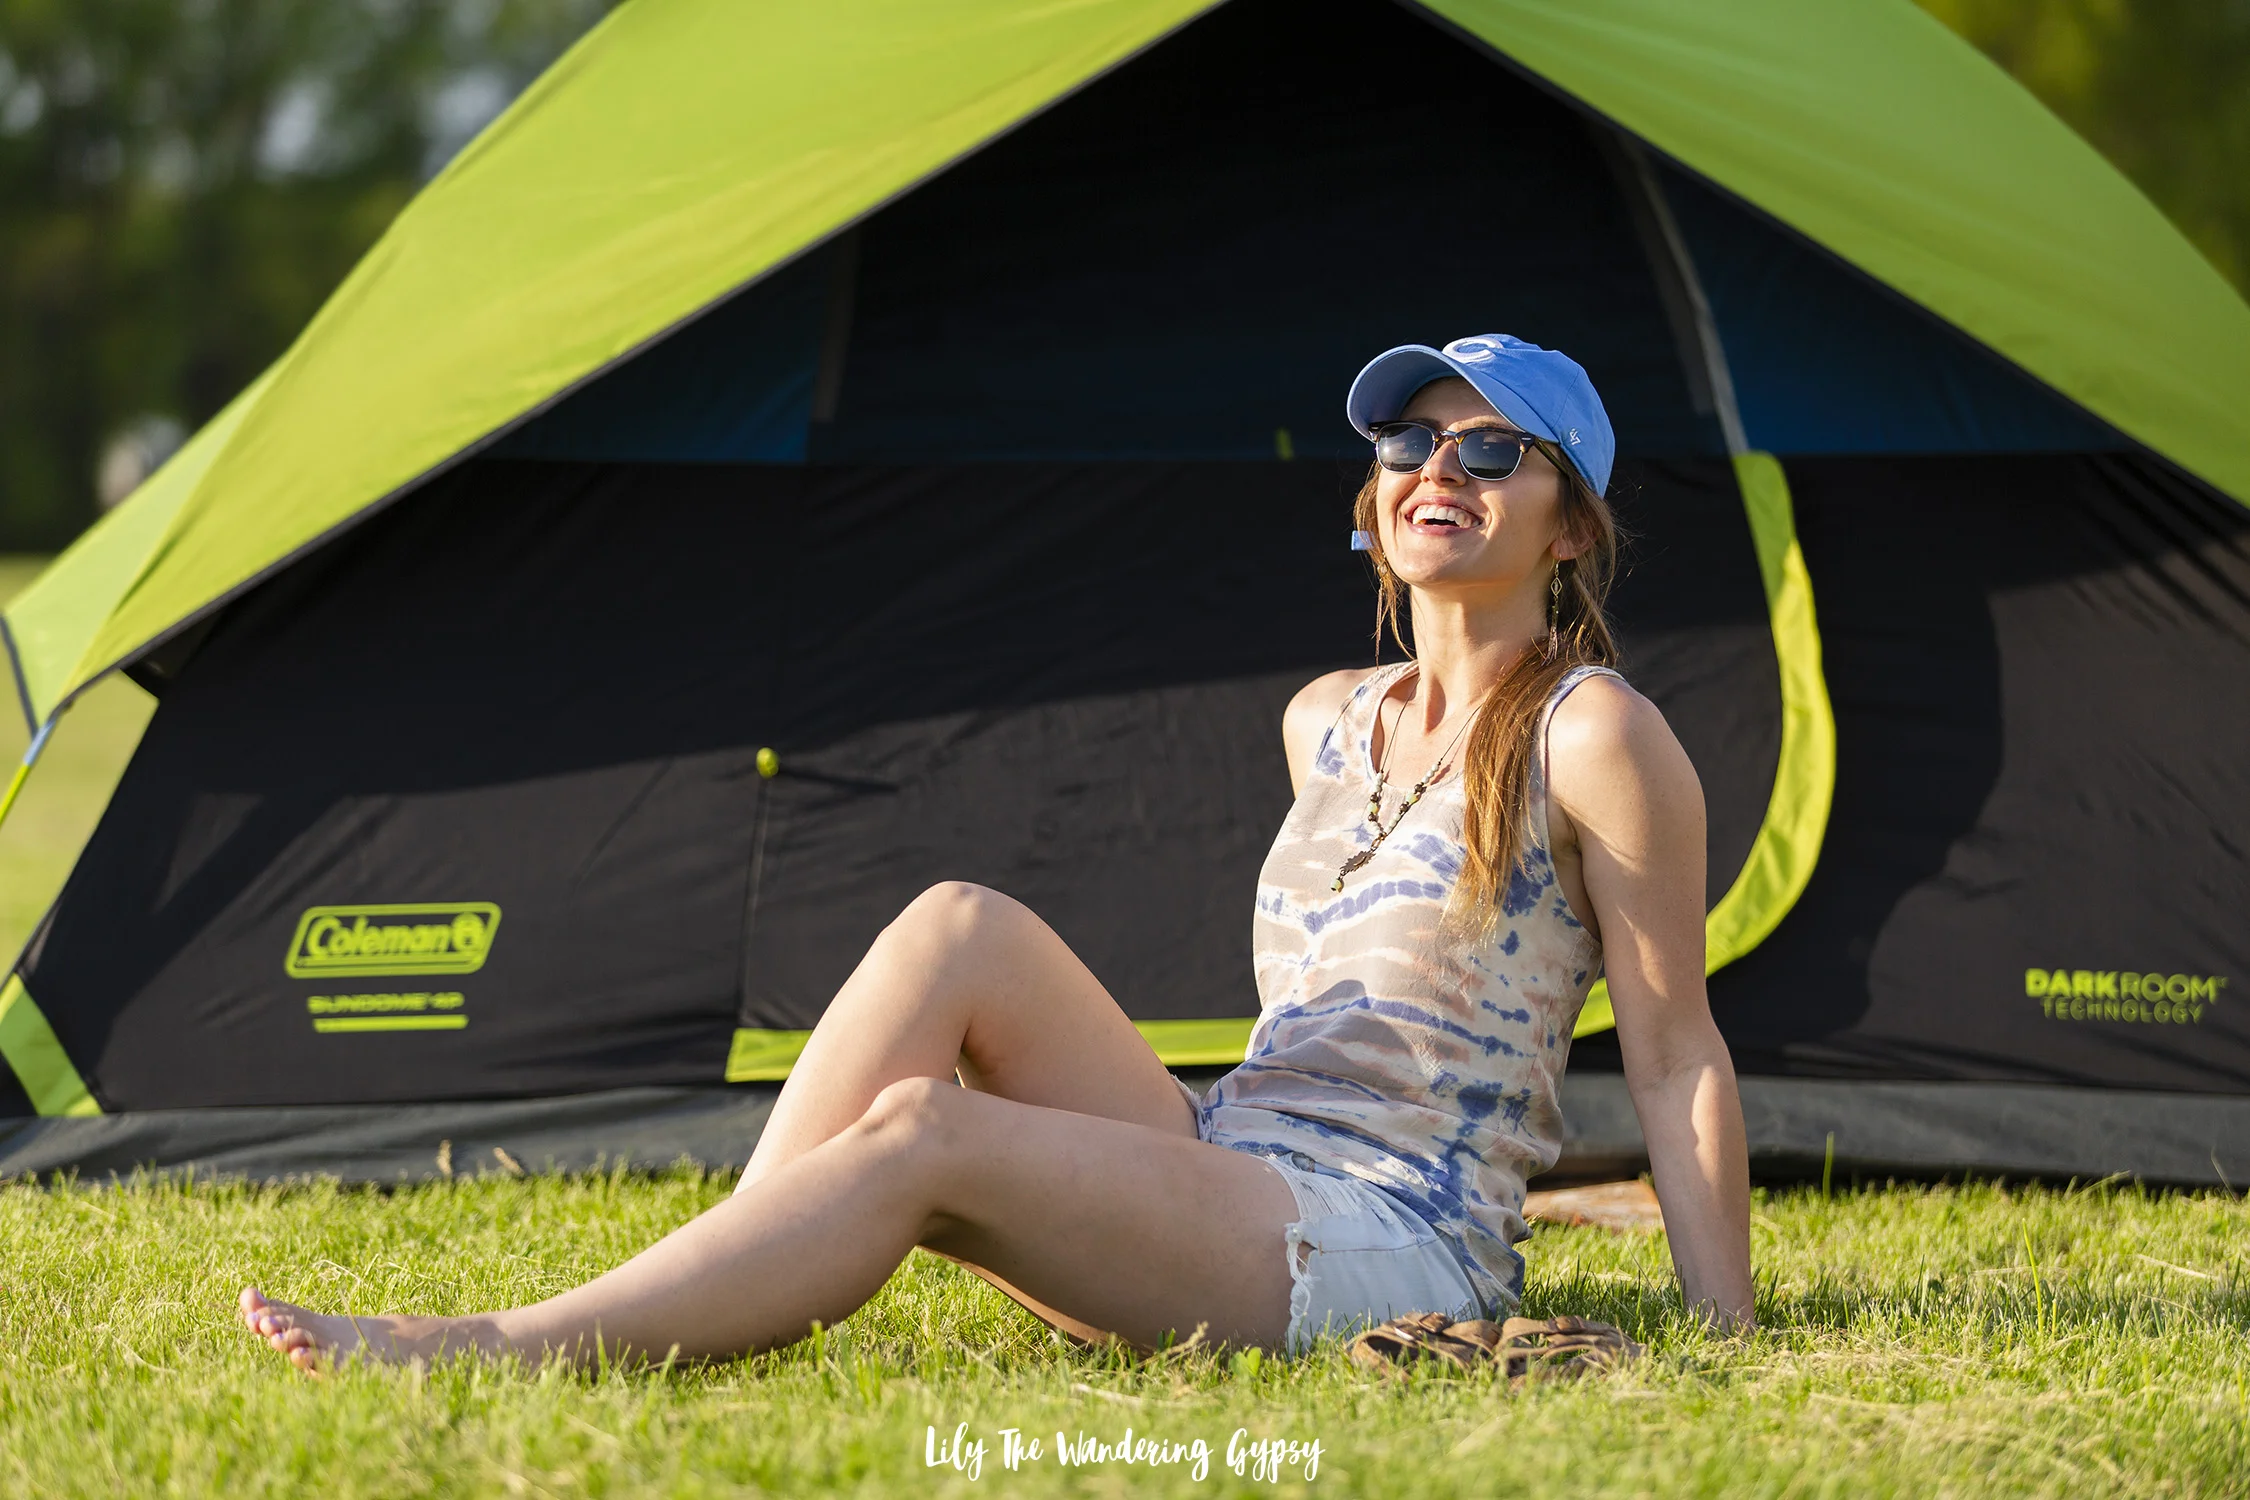
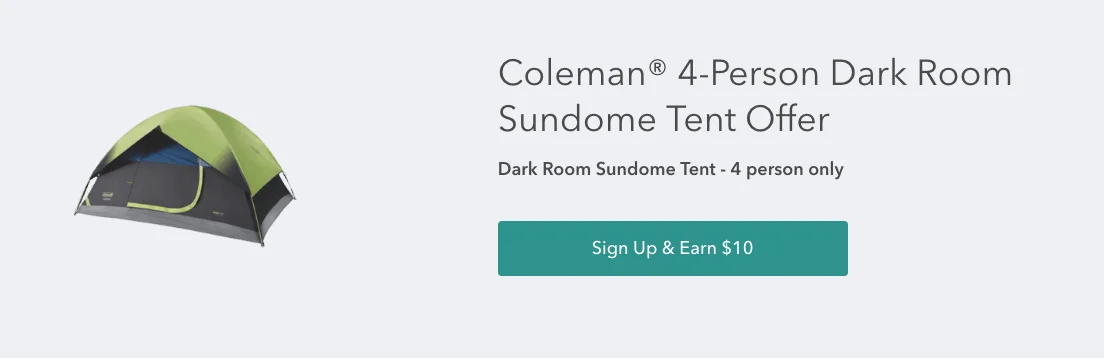
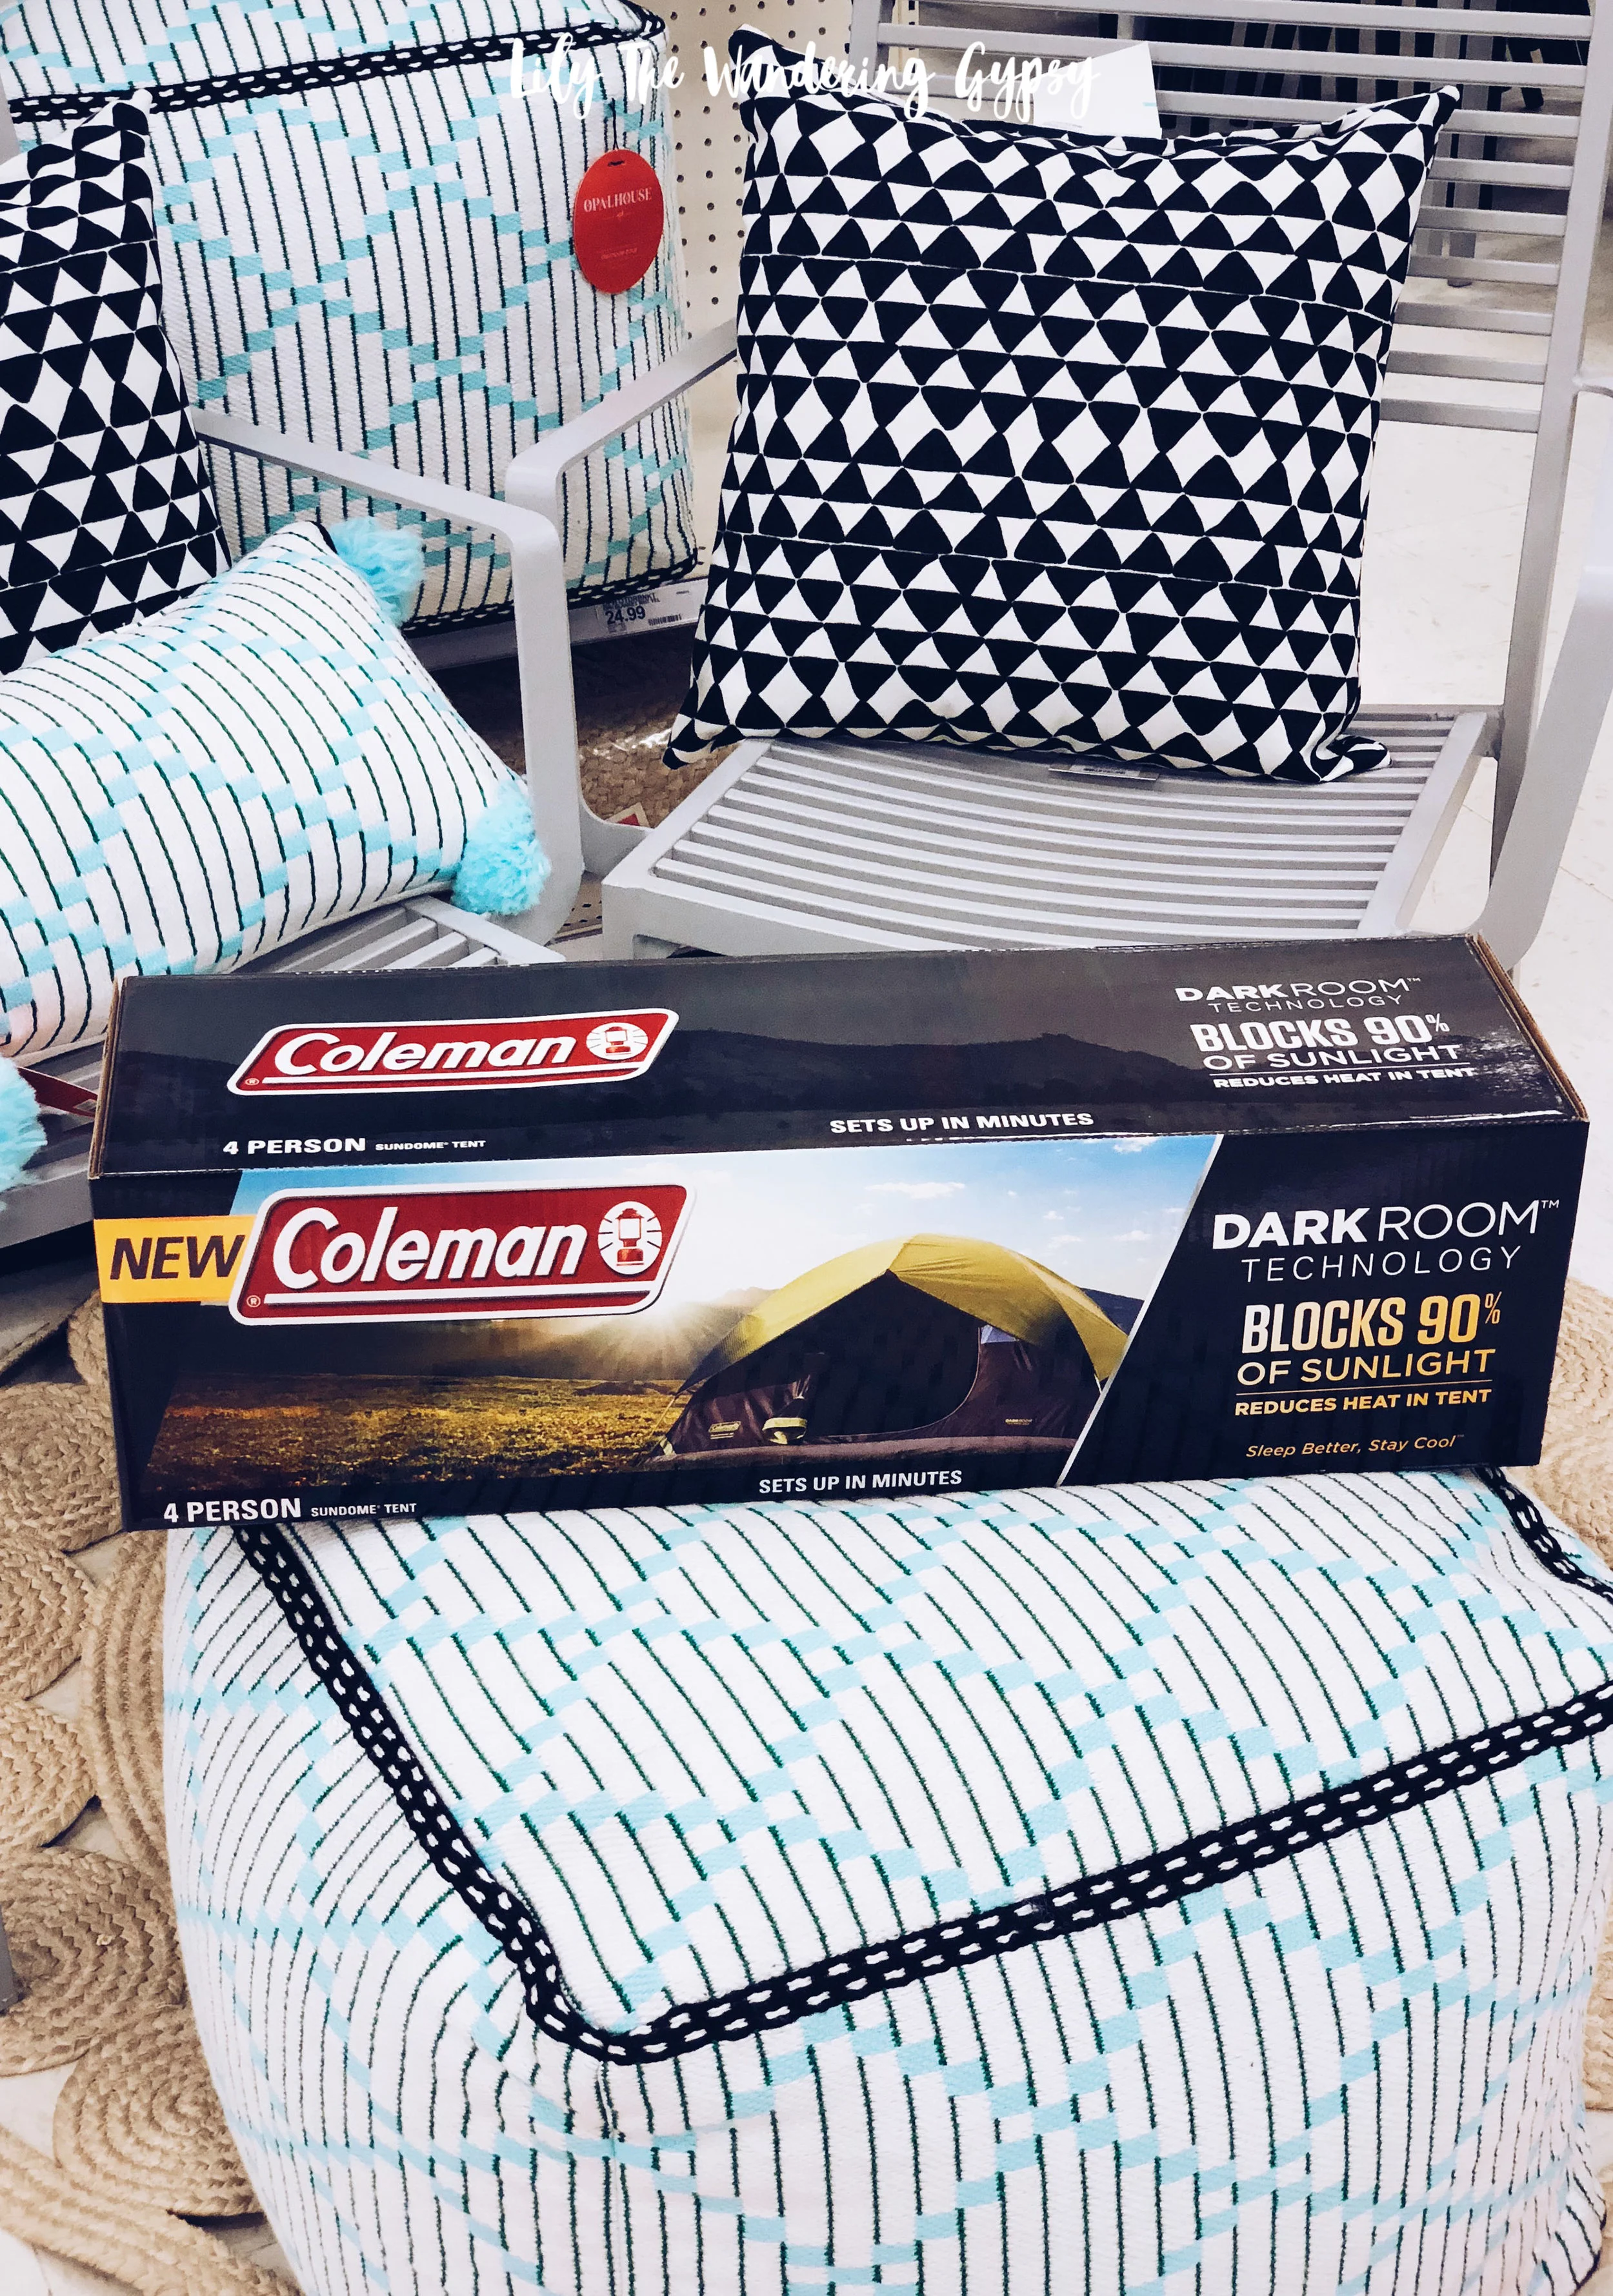
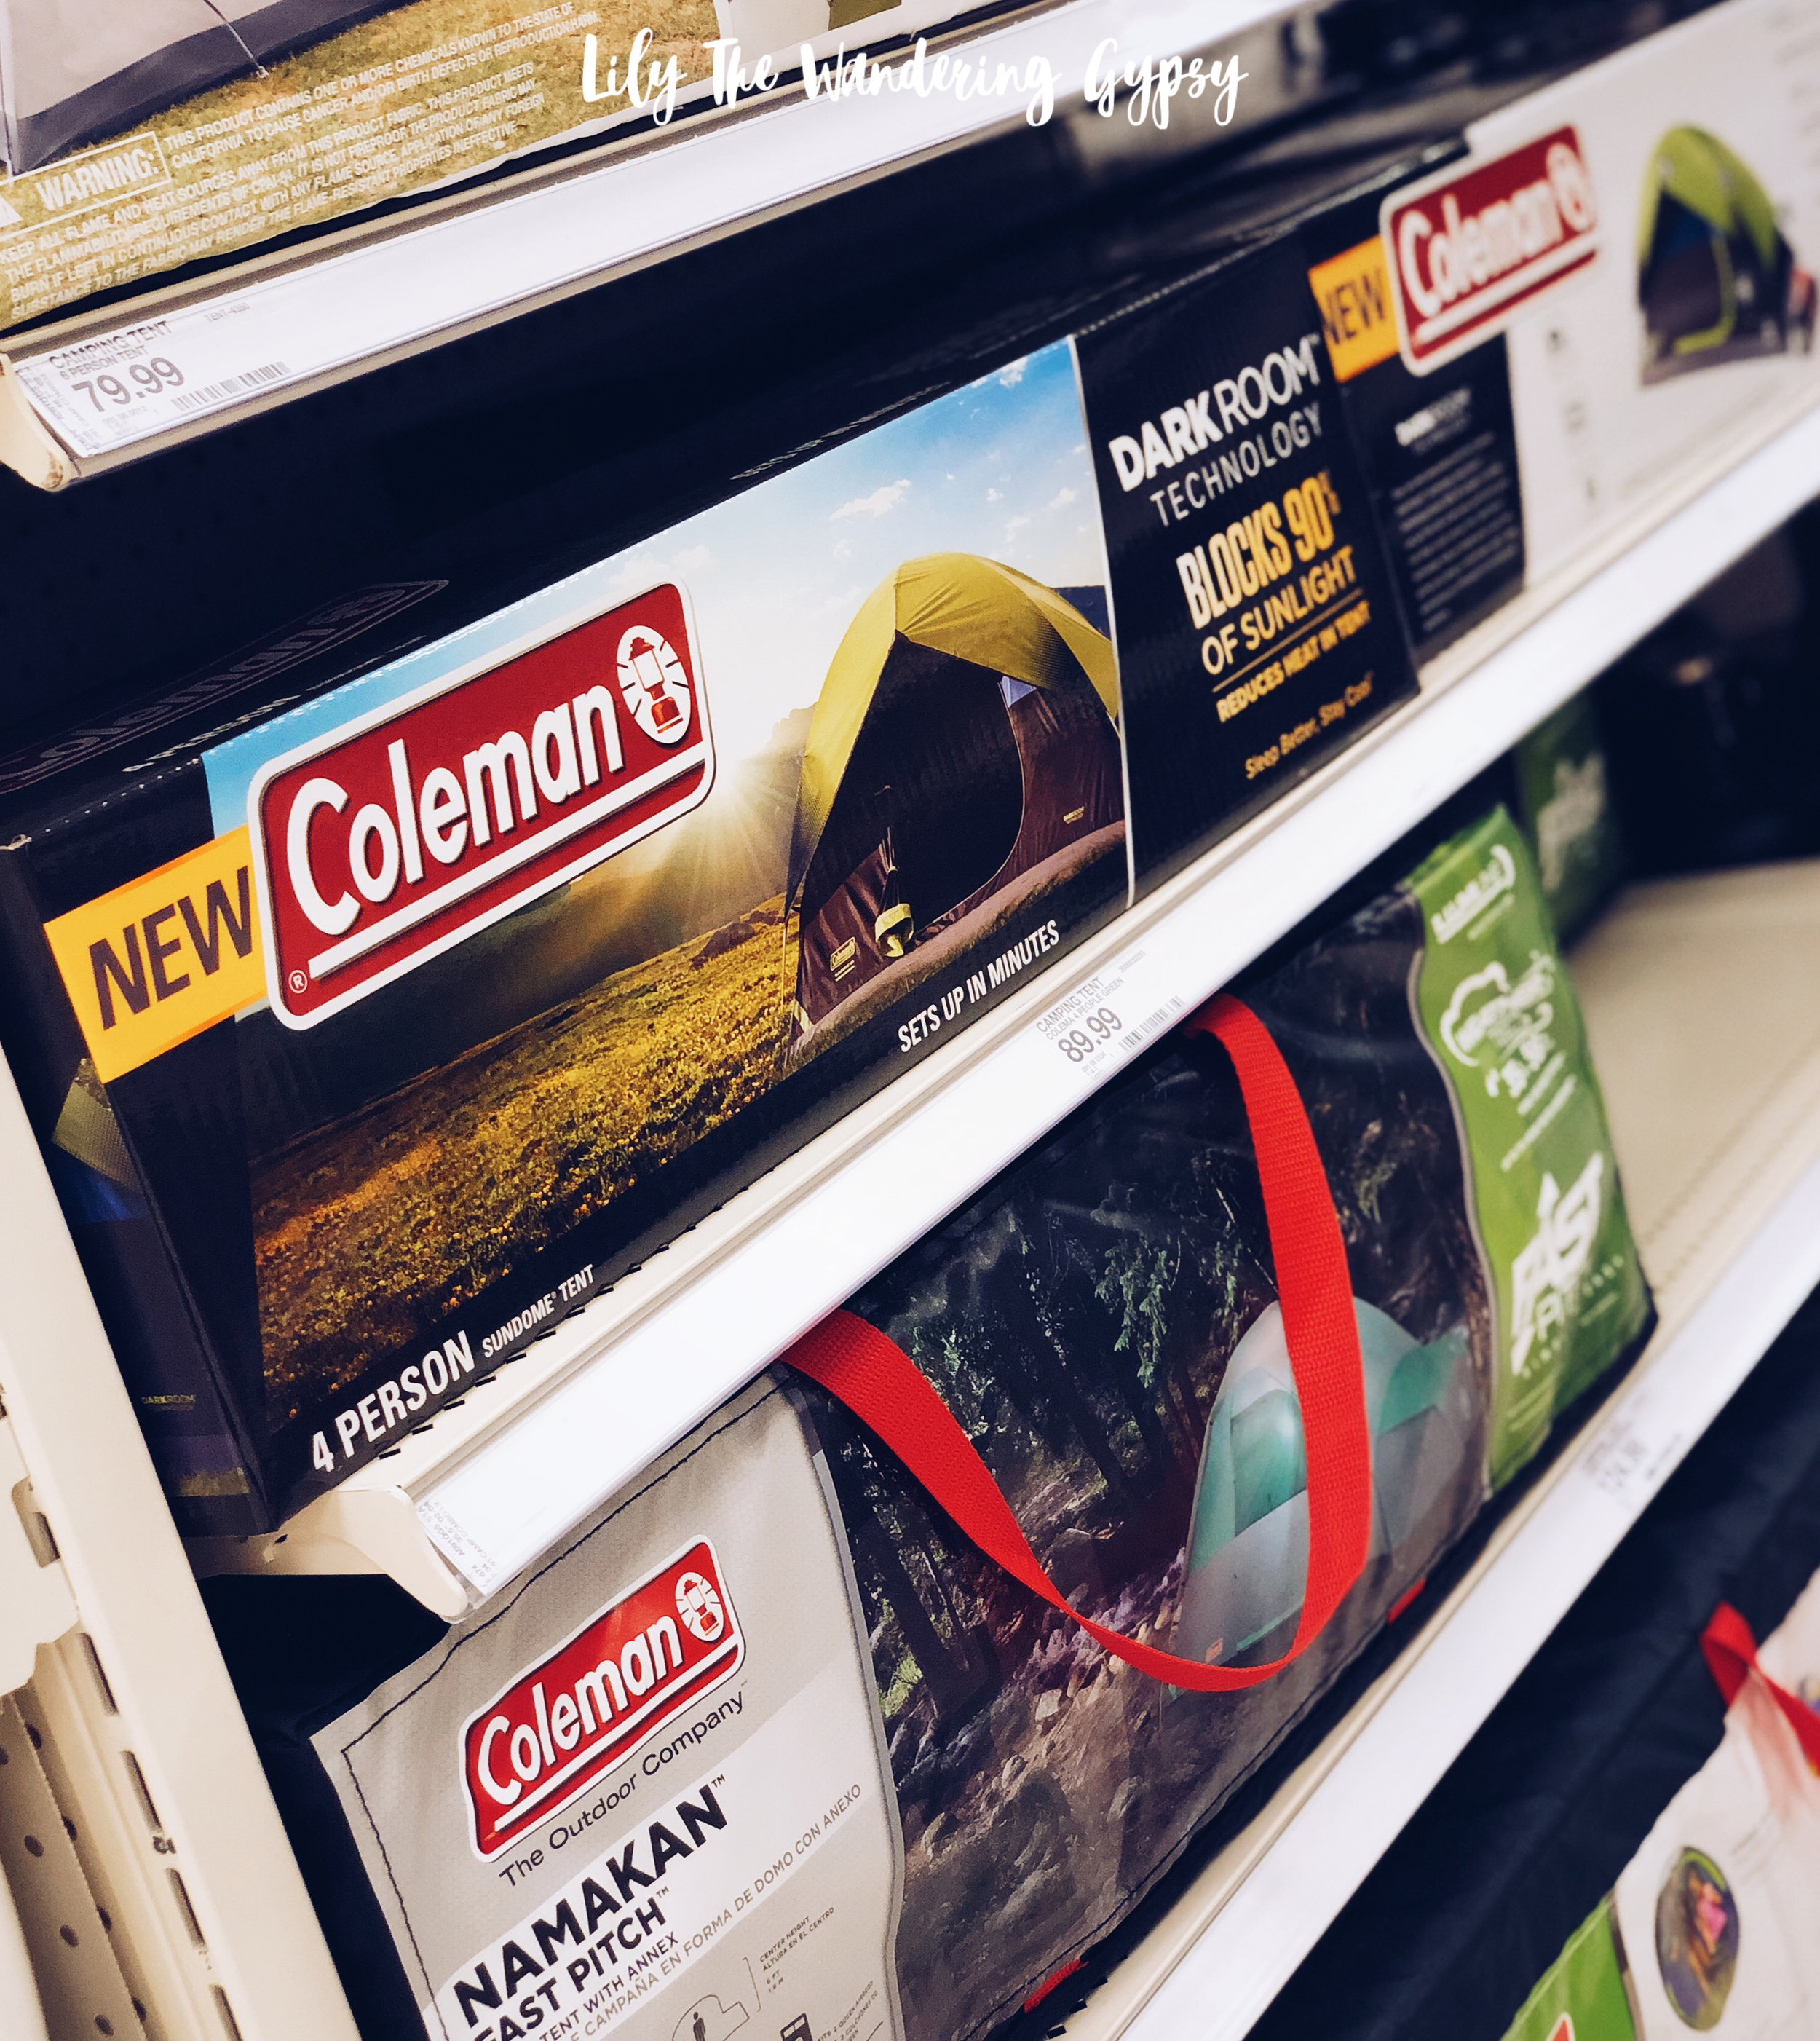
It’s important to set up a cute campsite to have as your home base for the weekend, and the NEW Coleman® Dark Room Tent is a great option you might want to consider! Head to Target to find everything you need for all of your upcoming adventures, and save on Coleman products with this Ibotta rebate offer here!

Since music festival season is upon us, I wanted to share some tips and tricks on how to make camping at a music festival even better, beginning with considering your tent.

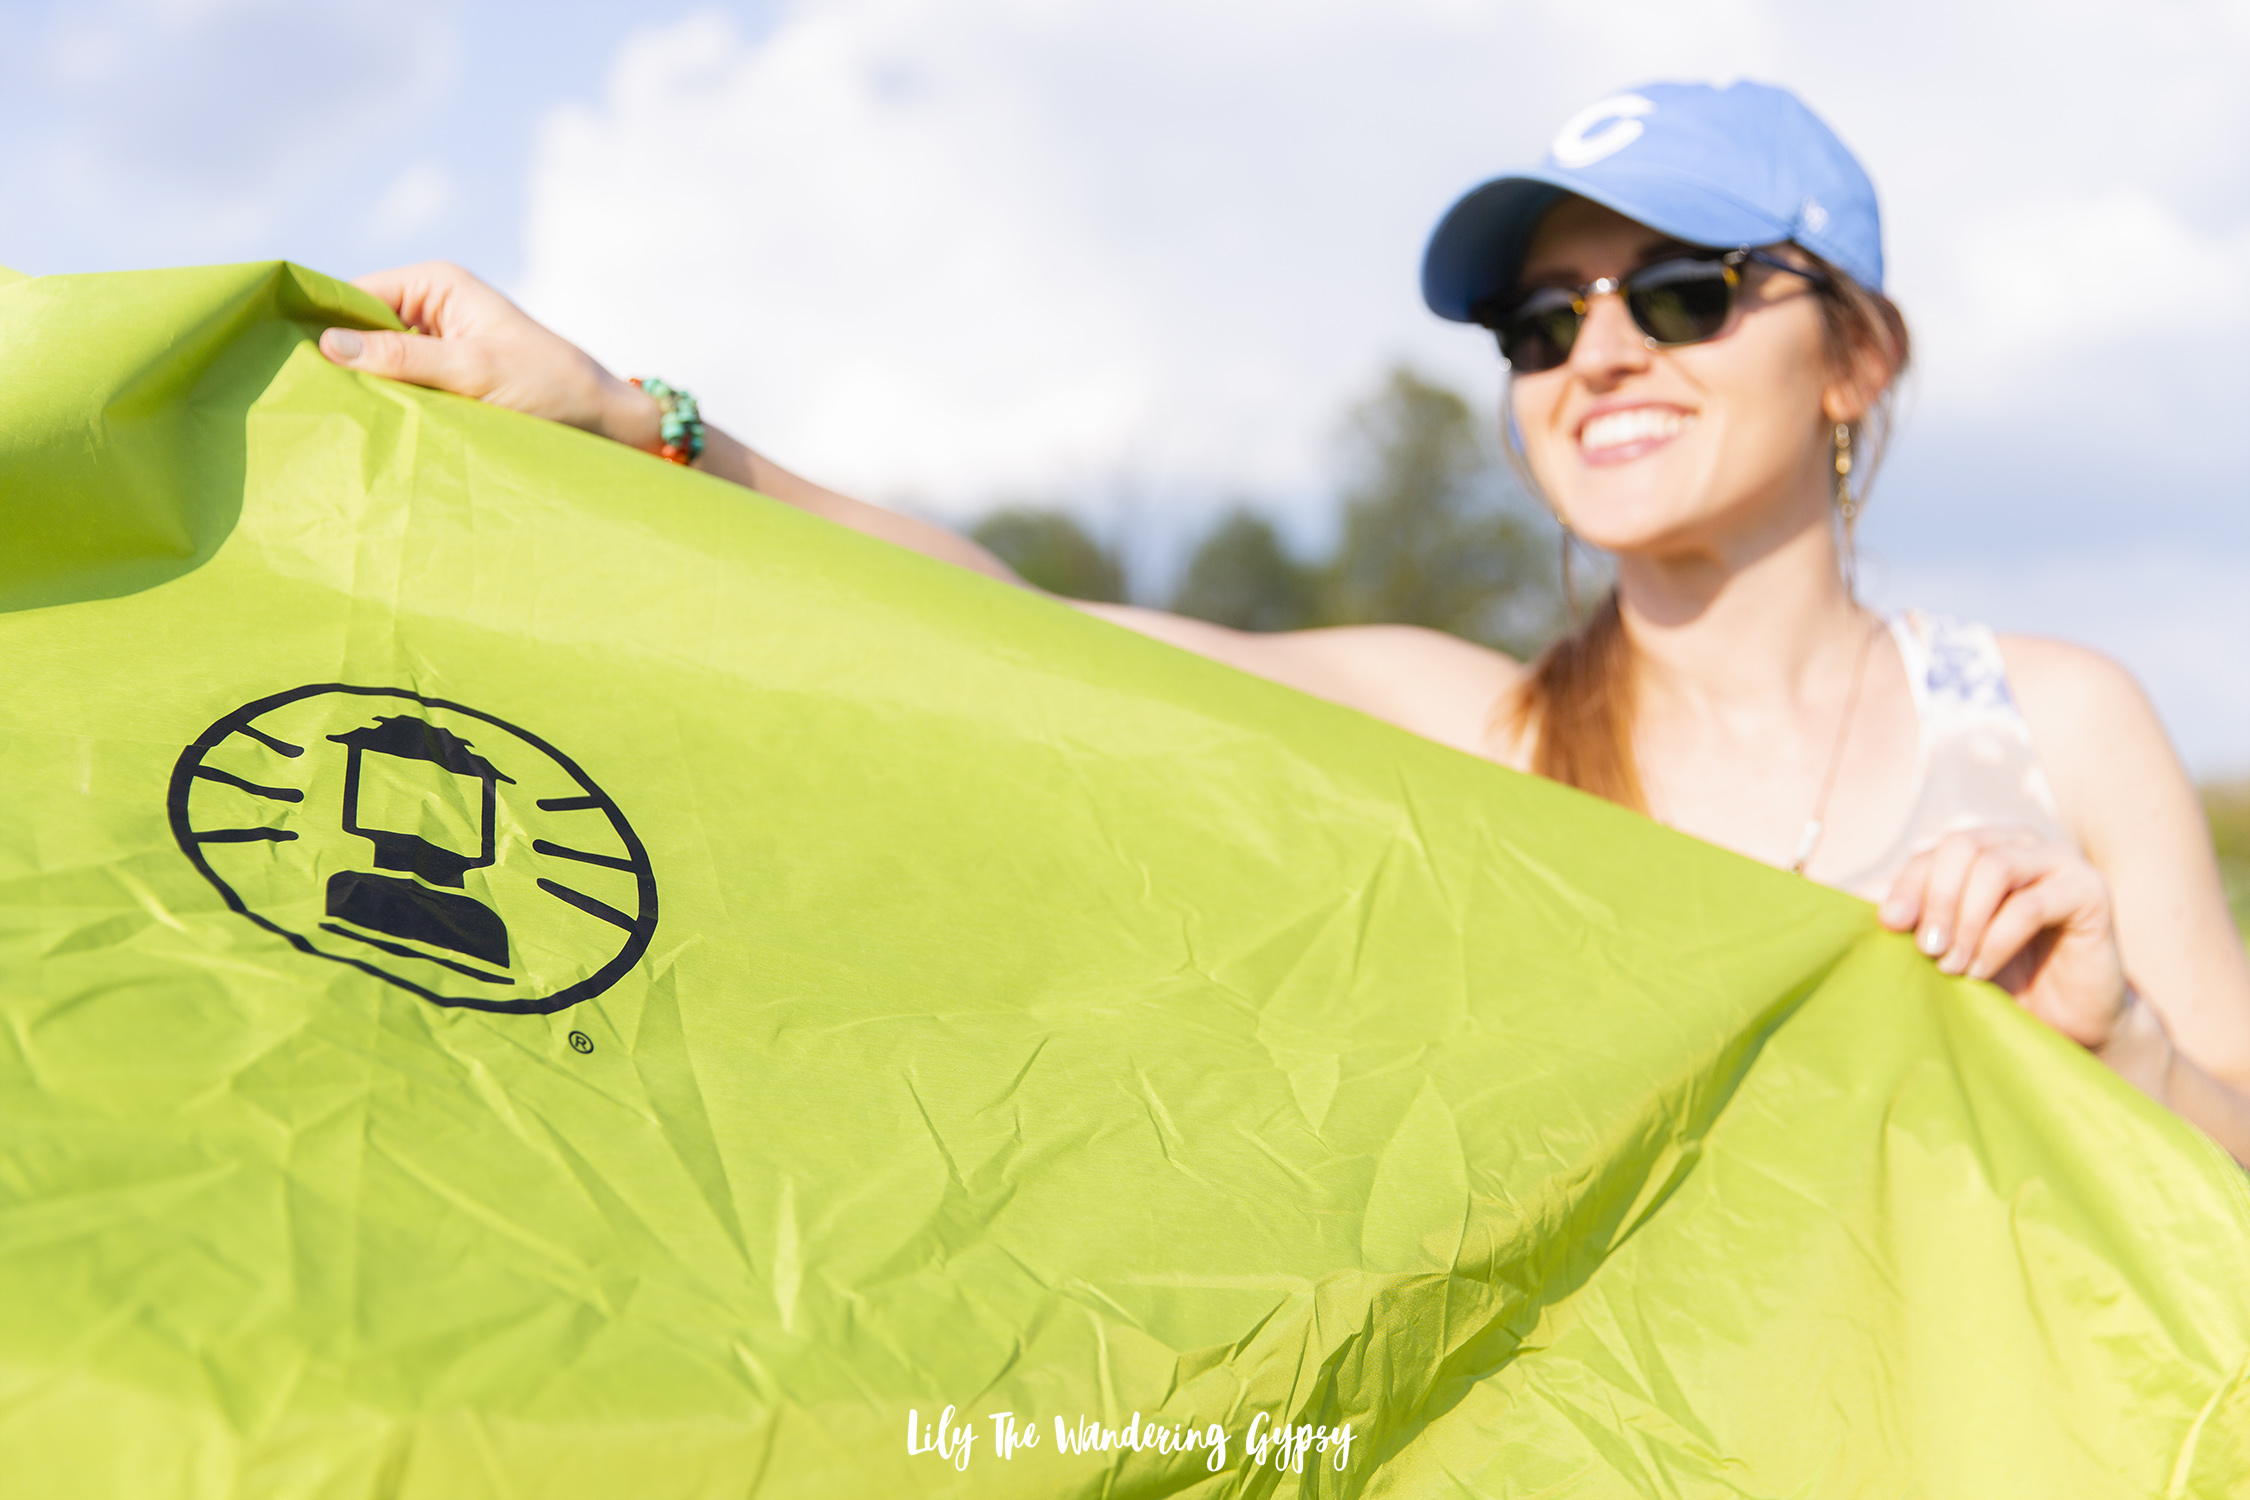
This tent comes with a convenient carrying bag too!

Head to Target to get inspiration for your upcoming festivals and summer gatherings!

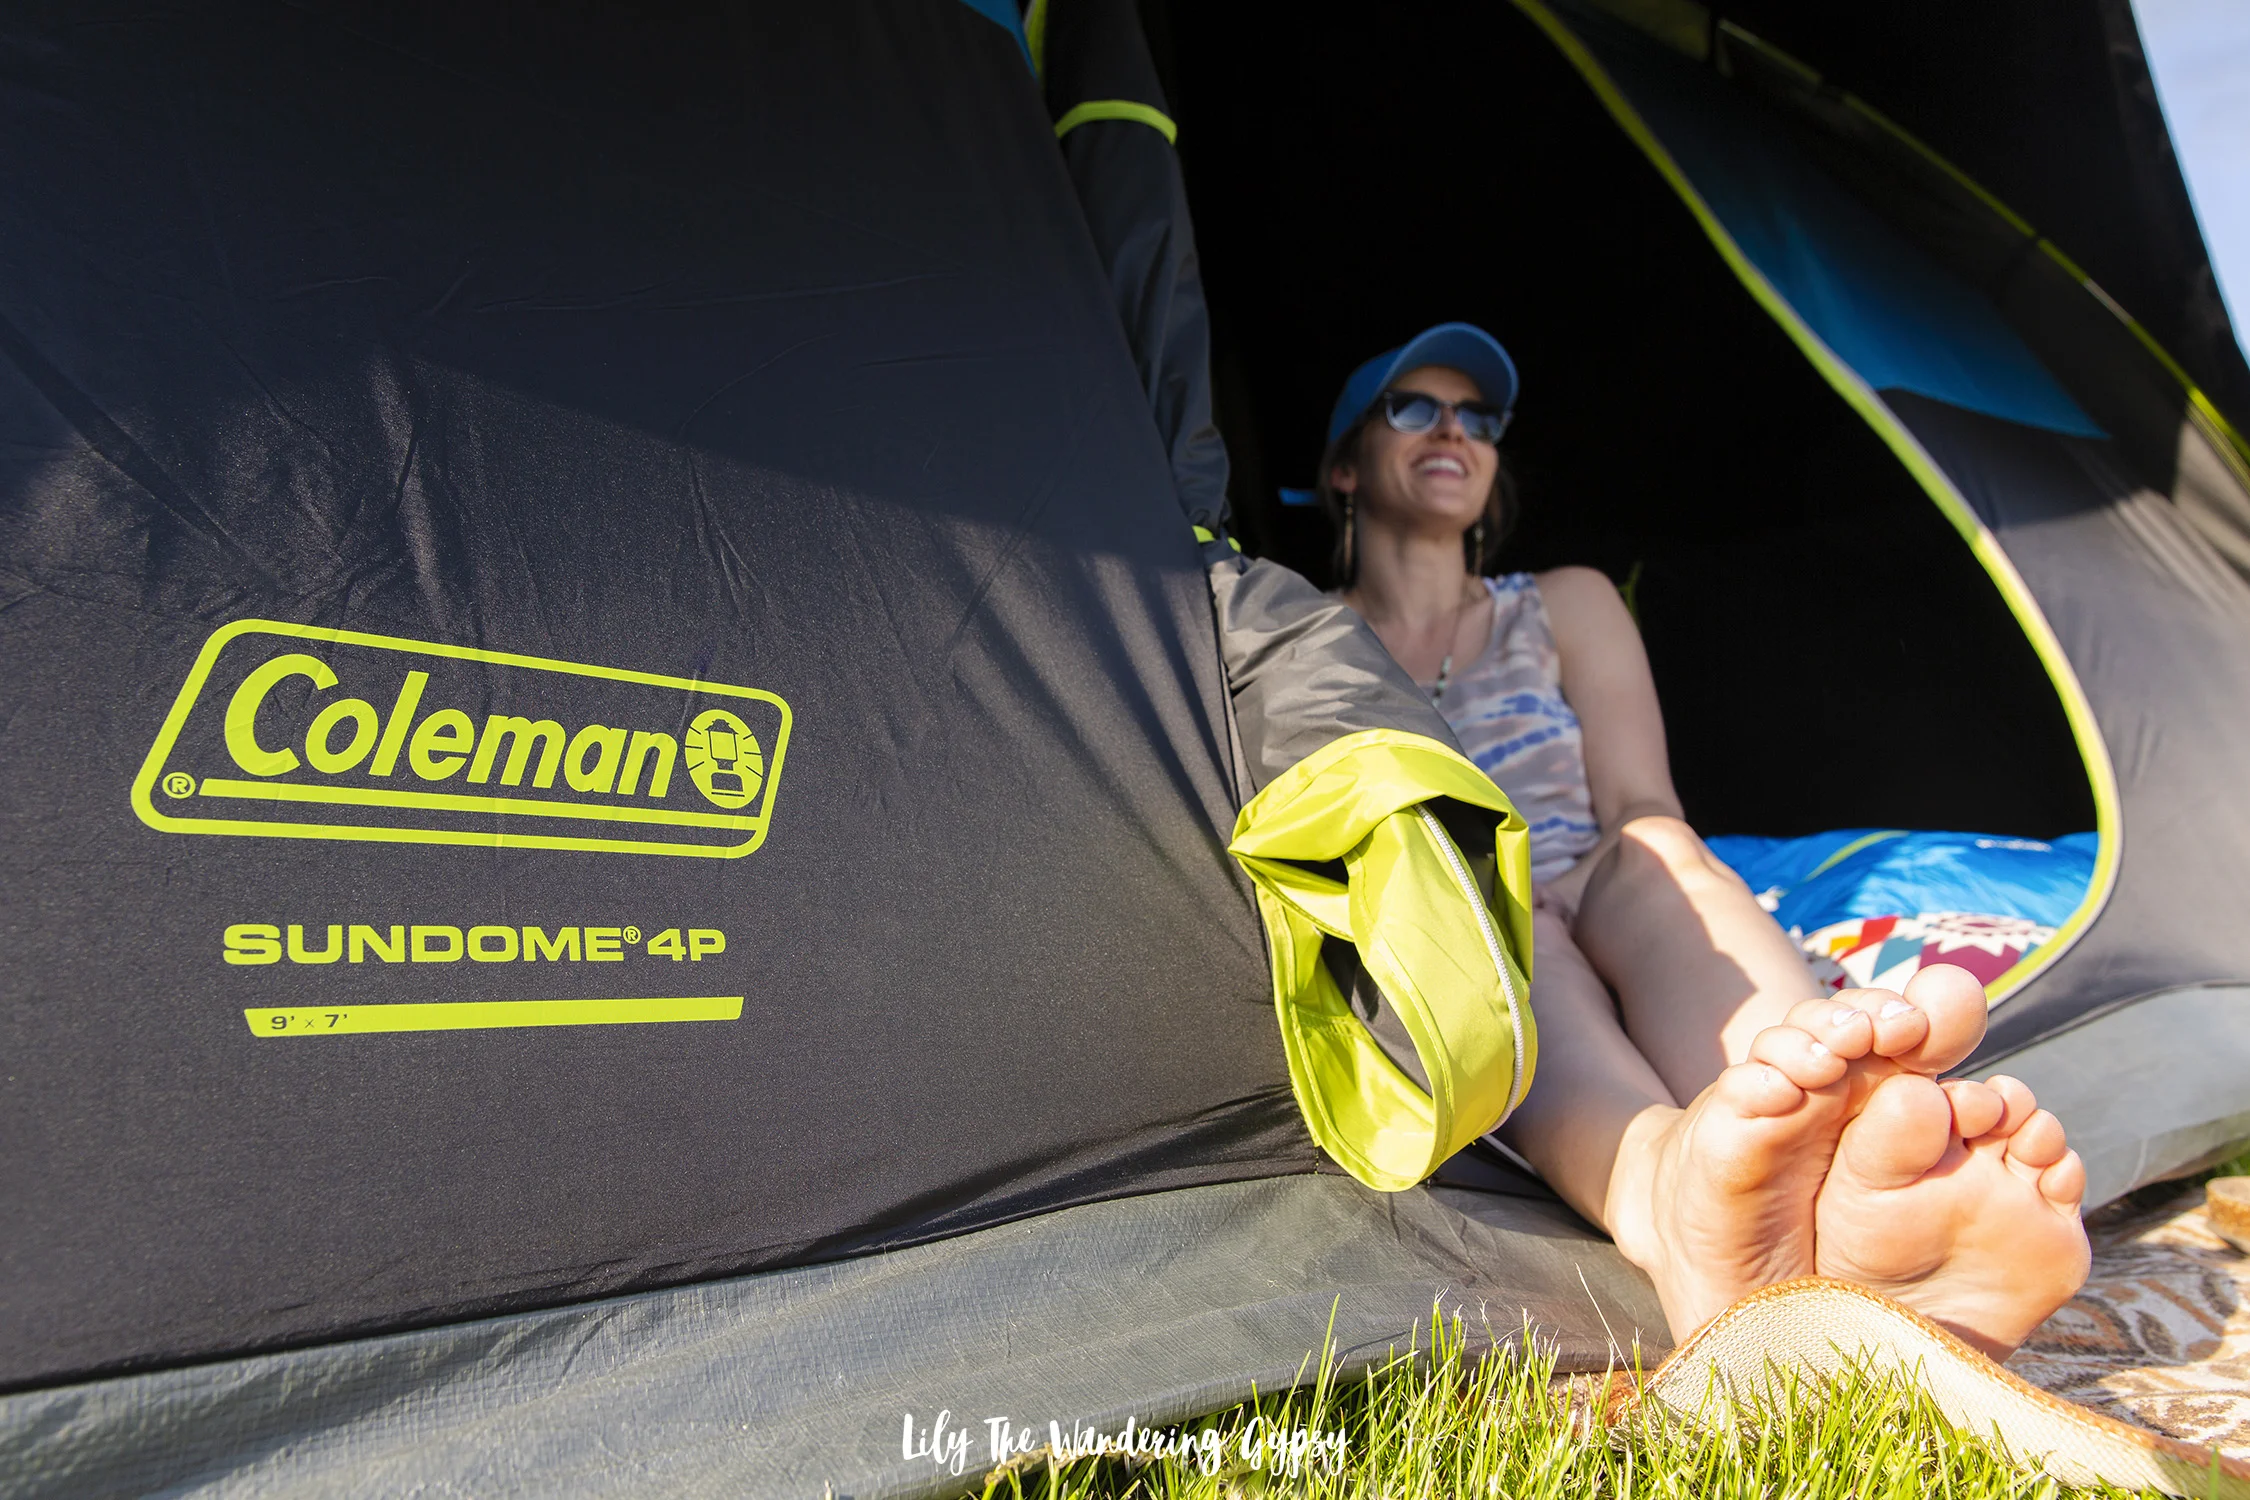
One of the features I find most appealing about the Coleman® Dark Room Tent would be the roomy interior, which is great for holding everything during the festival - plus, being able to change in the tent is priceless! There is more than enough room for us in here.

I love the dark outer fabric (which is considered their Dark Room Technology), that blocks light! Since you will likely be camping around a lot of other people, it’s so sweet that this tent’s rainfly blocks 90% of sunlight so you can sleep in past sunrise. Since a lot of music festivals have festival goers camp in open fields without trees, shade is very important. If your tent gets super hot in the morning the moment the sun shines on it, think of just how HOT you would be when you’re trying to get some good rest before another big festival day. Getting a little extra sleep is really amazing.

This tent is pretty easy to set up. I would recommend at least having two people on the job, but it’s pretty easy to find a friend to help you set up your tent in this situation. There are three poles, two that go into the actual tent, and one pole that gives the rainfly a nice awning, which would reduce any water dripping into your tent.

Speaking of rainy weather, you never know what to expect here in the Midwest, but this tent will keep you nice and dry because of the WeatherTec system, which uses a tub-like floor with welded corners and protected seams.

One of my favorite parts of any camping trip is actually when we get to head to bed. I do love that part of the night where we get to retire into our ultra comfy sleeping bags, cots, and our awesome, sunlight blocking tent.

In addition to awesome camping gear, we have lots of fun ideas of how to decorate our campsite, a few of which are shown throughout the post.

A dream catcher was so adorable and easy to hang, plus it brings that whimsical element into your campsite.

My favorite décor item would probably be adding an extra large sunflower (from a craft store), which I attached with zip ties.

Use 2 white twin sized sheets and zip ties or ribbons to add inviting softness and volume to your tent. I first folded one sheet in half to find the center. I then attached that to the sheets in an arched pattern. I used two sheets, but you could use a few more to get an even more festive and inviting look.

Think of your campsite as a living room of sorts, and try to create a relaxed, comfortable environment for your group, or for friends you might meet at the festival. Use outdoor rugs, tapestries, solar lights and more to personalize your campsite and make it stand out.
 

Prepare for the summer with the Coleman® Dark Room Tent and enjoy!

Revamping My Studio with California Closets X Marie Kondo

Learn more about my home studio renovation and tips on how to create a smart space of your own, inspired by California Closets and Marie Kondo! Schedule your own consultation today!

Thank you California Closets for sponsoring this post. #MarieKondoXCaClosets

I recently had a very inspiring online consultation with Jessica Ballesteros, a very talented Design Consultant for California Closets. She and California Closets recently teamed up with Marie Kondo, the author of "The Life-Changing Magic of Tidying Up" and creator of The KonMari Method. 

I sent Jessica a brief explanation of what I wanted from my space, and she gave me lots of amazing suggestions and explained what one could expect from an in--home consultation, which I will explain further into this post. After that, she inspired me to completely re paint, and then overhaul the closet in my home studio / photo studio space. I am so excited to share my experience and new space with you!

The company's professional design consultants will collaborate with you to create custom designs at a range of styles and budgets.

THE STUDIO

To explain the space a bit better, this is one of our three bedrooms, and we had nice Pergo flooring installed a few years ago, but never got around to painting it. We use the space for our photo studio and any other fun and creative projects we come across.

It's a great size space for our photo studio, and the space basically needs to be kept very neat and tidy because when one project is done, we start the next, The space has to be versatile, and changes depending upon what we are working on. These projects range from food and drink recipes to product photography and home decor projects and more!

BEFORE + AFTER

Below, you can see my studio before the transformation. While it definitely wasn't stuffed to the gills with things (yes, it was at one time), it was not very tidy or inspiring. There are things that had been in this closet for years and years, and I would just keep adding thins to it because I didn't have any place else to put them. That should have indicated to me to get rid of some things, but I never gave myself enough time to really dive into making a more inspiring space.

While I did not install actual pieces from California Closets, I did use their mission to inspire my own design.

WHAT I DID

Painting really did help so much. I chose a light grey color called Filtered Shade from Valspar in an eggshell finish.

I also added a metal shelf to the closet, which holds a lot of weight per shelf. This will be amazing to hold props, my cameras, and anything I am using for current projects. This shelf even now has a few empty spaces that can be utilized in the near future for lots of upcoming projects. 

I also hung my fabric pieces on hangers, which I use for backdrops or as tablecloths in lots of my photos. I like having a smaller selection of fabrics hung, because then it sets the color scheme for lots of my images, making my posts look more coordinated.

I made sure to keep everything in view, without crowding the shelves too much. I was able to easily store the two large camera cases in the closet and this will overall just be great because I will have everything at my fingertips during photoshoots, instead of having to run to different rooms of the house, which does waste time and energy (which never brought me joy).

IN PROCESS / BEHIND THE SCENES

THE KONMARI METHOD

After reading more into the KonMari Method, here are some key points.

Step 1: Decide what you want to get out of your space.

Ask yourself, what is your ideal lifestyle, and how can this space help you attain that? For me, I want to be a professional, very organized lifestyle blogger, and so this closet space needed to help me with that mission.

Step 2: Declutter and divide like items into groups

Take everything out of the space and organize it into piles of similar items. If there are certain items that do not actually make you feel happy, or that distract you from your initial goal(s), then it may be time to pass those items along. Then, you will be able to better organize those things that you do need.

Step 3: Decide what "sparks joy".

Marie Kondo explains what it means to spark joy. Ask yourself questions like

- Does the item contribute to making you feel good about yourself, your job, and your space? 

- Will it help you with that particular job?

If not, then time to remove that item from the space and either discard, donate, or recycle it.

Step 4: Say Thank You and Discard (or Donate)

This is probably the most important and hardest of all of the steps. It's important to first realize how much space you even have for things, because if there are things we just never have room for, it may be time to just simply purge things. It can definitely be "scary" getting rid of things that you are so sentimental or that you have had for along time, but if it's something that you never use, or keep moving back and forth without using or having space for, then it may be time to let it go. 

As suggested by Marie Kondo, say a little "thank you" to the items which have served you in the past, and send the items on their way. Discard, recycle, or donate those items which are not fulfilling your mission to "spark joy" in your life, and then give a quickly tidy up or reorganize to the space to now suite your needs better.

For me, I have gotten rid of tons of clothing, old papers, and other photography and food/drink styling related props by asking myself, would I ever really use this again, or is is outdated? Or, is this s timeless piece that I will be able to use again and again?

The Design Consultation with Jessica

As I mentioned, Jessica is a Design Specialist for California Closets, and you can read more about her in the below articles:

https://www.californiaclosets.com/expert-tips-for-displaying-and-organizing-everything-in-your-new-closet/

https://www.californiaclosets.com/blog/whats-your-organizing-style/

She gave me some expert advice, as stated below:

"If you were wanting to try the KonMari method of organizing your office closet you would first start by removing every single item, and I mean everything.  One by one you would hold each item deciding what to keep (things that Spark Joy) and what to get rid of. Then putting everything back in an organized way. Using bins or baskets is always encouraged to help compartmentalize items by category if no drawers are available. Mari Kondo loves using boxes inside boxes to help divide things into categories."

I loved her ideas, and utilized as many as I could.

What an inspiring project this has been! I know that going forward, my new space will be an amazing home studio that inspires me each and every time I see it! 

Learn more about California Closets Here! And again, check out my studio space after the revamp, below!

California Closets has an extensive range of beautiful finishes to choose from, from clean and simple white, to proprietary textures imported from Italy, all of which are environmentally sustainable and California Air Resources Board (CARB) compliant. You can really go wild and create a dream space of your own.

I was selected for this opportunity as a member of CLEVER and the content and opinions expressed here are all my own.

Vegetarian Cashew and Superior Green Filled Cheesecake Recipe

This post is sponsored by FoodScience of Vermont. All opinions and content are my own.

#LiveSuperior

Looking to add more Superfoods to your diet? Learn how to infuse a cashew-based “cheesecake” with health-boosting ingredients!

This delicious cashew-based version of a traditional cheesecake is filled with all natural ingredients thanks to FoodScience of Vermont Superior Greens, which contains whole fruits and vegetables, promotes healthy aging and radiant skin, mental clarity, and a healthier immune system while offering a boost of healthy enzymes to support your immune system, plus probiotics. It’s amazing how this one line of Superior Powder products can offer so much!

Try it, you’ll love it. Find the product at Rite Aid® and RiteAid.com here!

I love incorporating unique and health conscious ingredients into my recipes, like the FoodScience of Vermont Superior Greens, which contains three servings of fruits and vegetables in each ½ scoop – which means that this ultra concentrated version of some of the healthiest ingredients on Earth really will work quickly and efficiently!

This recipe is divine! I believe this would be great for someone looking for healthier alternatives to dessert recipes, or someone who has never ever tried a cashew based cheesecake before. It’s fun to introduce friends and family to things like that.

I have been very interested in the detox process as well as considering eating as many whole foods as possible. This FoodScience of Vermont Superior Greens is a great step, in addition to more exercise and lots of water intake, towards reaching my nutrition and other health goals I have set for myself.

While the product can be enjoyed in a smoothie or mixed into a glass of cold water, I thought it would be exciting to introduce this product to my wonderful readers, friends, and family through a mouth-watering dessert recipe.

Perfect for summer when you don’t want to bake a ton, or when you want something that’s not overly sweet but deliciously frozen, this is the recipe that will check all of those boxes! Bring this to an event, or serve it to friends at a summer gathering and just look at everyone’s faces light up when they realize that this is not the “cheesecake” they were expecting, but one that is WAY, WAY better for them, but still tastes indulgent.

Now, as for the crust, I know the traditional vegan cheesecakes are made with dates, and are basically no bake, but my favorite part of a cheesecake IS the crust, so I wanted to keep it traditional with lots of additional natural ingredients to sweeten things up naturally. Feel free to use a date crust here too.

Food Science of Vermont provides us with ways to get 3 servings of fruits and vegetables in each ½ scoop. The scoop is provided, so it’s very easy to measure out just how much you will need.

While the traditional use for this product is mixed into smoothies, cold water, and other drinks, I thought it would be genius to use the delicious taste and the nourishing super food ingredients to infuse this recipe with a unique taste and twist.

The crust is made from a delicious mixture of coconut, walnuts, oats, graham crackers and vegan “butter”. I used a spring form pan, similar to a traditional cheesecake, but really modernized this recipe with almost all vegan ingredients and that extra boost of has helpful enzymes and probiotics, making this an all around awesome dessert or snack. Give it a try, I bet you’ll enjoy it!

INGREDIENTS:

(Makes “Cheesecake” in 6 in x 3 in spring form pan):

Crust Ingredients:

10 - 12 full graham cracker rectangles

¼ c. oats

¼ - ½ C. or more walnuts

½ C. or more dried coconut pieces/flakes

¼ tsp. cinnamon, optional

6-8 (or more) TBSP salted Vegan Butter or regular butter

¼ C. Sugar

*Note: Feel free to use less graham crackers and more of the oats, nuts, or coconut if you prefer and even healthier crust.

Filling Ingredients:

3 C. soaked cashews (soak for at least 3-5 hours)

1 can chilled coconut milk (use the top thicker part and save or discard water)

¾ - 1 C. macadamia milk, coconut milk, or similar

4 – ½ C. agave or maple syrup

½ - 1 tsp. vanilla

2 TBSP FoodScience of Vermont Superior Greens Powder


INSTRUCTIONS:

For The Vegan Filling:

1. Soak cashews for 3-5 hours, and strain. Add to a blender with coconut milk, and process until smooth. If the mixture does not pour well, then add a bit more macadamia milk or agave. Taste the filling to make sure it is to your liking. Time to make the crust!

For The Crust:

1.    Preheat oven to 350 degrees F, and prepare your spring form pan by using non stick spray inside, and using a paper towel to wipe pan for a more even finish. Also, you may cover the bottom of the pan so the butter does not drip out while baking. Alternately, bake on top of a sheet pan to prevent spills in the oven.

2.    In a food processor, blend up graham crackers (use hands to make pieces smaller before processing), coconut, walnuts, and oats. Feel free to mix in some whole oats after processing for that “whole oat” look in your crust.

1.    Once processed to an even powder, mix with melted butter, sugar, and pour 2 ½ cups into pan. Use a flat bottomed glass or candle holder to press and flatten the crust down, making sure to clean up the edges with a knife for a neater look once the spring form pan is removed.

4.    Bake crust for 15-20 minutes, until edges begin to brown. The crust will firm up quite a bit once cooled, so even if it’s soft after baking, it may already be done. Let crust cool completely, and fill with filling until there is about ½-1/4” until the top of the spring form pan. Freeze for 2-3 hours or overnight.

5.    Time to CAREFULLY remove it from the spring form pan. I would recommend using a sharp knife or skewer along the top edge to break the seal with the pan. At first, mine looked like it was cracking, so I re-tightened the outside of the spring form pan, ran a skewer along the top edge, and once I loosened the pan again, it removed pretty easily. Just be patient with it. At this point, feel free to place it back into the freezer

6.    Place “cheesecake” onto a plate to decorate. Top with fruits like blackberries, strawberries and blueberries (the two latter are actually ingredients in the FoodScience of Vermont Superior Greens powder). I sliced the strawberries in half and left the green parts on because the full strawberries just looked too big. The “cheesecake” would be fine to serve right now, or place back into the freezer for 2-4 hours so the berries begin to freeze and they get a beautiful frosty look to them.

FoodScience of Vermont offers three uniquely designed powdered drink supplements loaded with phytonutrients, stabilized probiotics, and many other beneficial natural ingredients. I really hope you enjoy!

Head to your local Rite Aid® or visit bit.ly/FSSuperiorPowders to get your Superior Powders.

Follow FoodScience of Vermont on social:

Follow the brand’s hashtag on Instagram #livesuperior

Facebook: https://www.facebook.com/FoodScienceVT

Twitter: @FoodScienceVT

Pinterest: https://www.pinterest.com/foodsciencevt/

Instagram: @foodscienceofvermont

Setting the Pace for Summer

This post was sponsored by Reebok as part of an Influencer Activation for Influence Central and all opinions expressed in my post are my own.

This past month or so has been filled with SO many amazing opportunities with work, home projects and great meals with friends, I can definitely tell summer is just about here. This productive and busy month will surely set the pace for a great summer, and to kick things off I found my new favorite pair of shoes, the Reebok Trilux shoes available at Academy Sports

Tomorrow I head to Louisville, KY to visit my sister who graduates with her nursing degree this Saturday. We are beyond excited for her, and we are so very proud of her. We also expect lots of travel and hopefully some live music along the way. All of that along with fun summer get togethers, leaves me wanting to look and feel my best. I will also have the opportunity to celebrate Mother's Day and see lots of extended family whom I don't ever get to see enough. 

Train in comfort with the Reebok Women's Trilux Run Training Shoes, which offer stretchy forefoot areas for a snug, personalized fit. The carbon-rubber heels guard against wear, and the single-density midsoles deliver a cushioned, responsive ride.

Whether you're wearing these for light exercise, or with a cute and casual outfit, these shoes are extremely versatile and will make you feel like a million bucks!

With all of these fun things taking place, and lots more to look forward to in the coming months, it's absolutely a great time to get in better shape. I always find that I feel more confident when I am eating better and being as active as possible. 

One thing that motivates me is to have cute and comfy workout clothes that allow me to move with easy and don't hold me back. I hate wearing anything that I am constantly having to adjust or is super constricting, and I found that these (SHOES) are perfect for light exercise and lots of day to day activities like grabbing lunch with a friend, shopping, running around with the kids, hanging out with friends, and so much more. 

Why not treat yourself to a pair of new shoes! I find that having so many fun things to look forward to definitely has a positive effect on me. While things can get a bit hectic when the schedule is filled to the brim, it also encourages me to exercise more, and stay looking my best! After all, it's that time of year when we are wearing cuter clothes, and showing a bot more skin, so this is the best time to get out more than ever.

Some ways to cope with that hectic schedule include meditation, breathing, walks, being outdoors in general, and being with those who make you your happiest!

In fact, since Mother's Day is this weekend, and if you haven't found a gift yet, or just feel your mom would enjoy shoes like this, order her a pair, or grab her a pair over the weekend from Academy Sports.

These Reebok Trilux shoes are super comfortable, and I would recommend sizing down 1/2 size if you will be wearing socks, and one whole size if you prefer to wear them without socks. They come in two colors, one as shown in this post, and one pair that is a darker grey and also super sweet (see both colors here).

CONNECT WITH ACADEMY ON SOCIAL:

Academy on Facebook: https://facebook.com/academy

Academy on Twitter: https://twitter.com/academy

Academy on Instagram: https://instagram.com/academy

Academy on Pinterest: https://pinterest.com/academy/

Recipe For The Perfect Mother's Day #SpreadTheLove #ButterChardonnay 

Thank you JaM Cellars for sponsoring this post. Looking for Butter Chardonnay near you? Check out their easy-to-use Store Locator! Just pop in your zip code and the Butter will be waiting! This wine melts in your mouth, is creamy-licious, and everything is certainly Better with Butter! 

I am so inspired by the warmer weather that is finally here, gracing us with sunshine and more reasons to celebrate the ones we love. One sip of Butter Chardonnay will transport you to a more relaxing and uplifted place! This Chardonnay is easy drinking wine that has light, crisp flavors that will surely please moms everywhere!

I have lots of mother figures in my life and I am extremely grateful for each and every one of them! My mom, my step mom, Bobby's mom, and my friend who just became a mom for the first time. I don't have any grandmother figures in my life anymore, but they are always in my heart! There are a few ways to treat any mother figure to something special for Mother's Day Weekend, so here are a few ideas to treat them well.

I also thought that making sugar cookie bars would be perfect, because they travel well and are such a versatile treat for Mom. 

It's fun how wine can also accompany some great times. It's seriously so fun to sip a glass of wine with my mom and sister and do some baking. We do tend to love doing projects together, so this whole post was just such an incredible inspiration for me!

I will also be heading to Louisville, KY this weekend to see my sister graduate college AND to celebrate Mother's Day with a brunch to end the weekend. I will definitely be bringing one of these bottles of wine to that celebration as well. I am SO excited!!! 

Butter Chardonnay melts in your mouth just like smooth, rich butter!

This wine is made from California grown grapes, is cold fermented, and is aged in oak. 

 If you sip this delicious Butter Chardonnay, you might even taste hints of stone fruit or baked lemon with a vanilla finish.

This wine is best served chilled and has such a nice, complex flavor without being too sweet. This is the perfect choice for summer and beyond!

Keep reading to get the full recipe for these amazing Sugar Cookie Bars with Edible Flowers!

Jump to the bottom of this post to grab the recipe for these sugar cookie bars. A couple of other fun ideas for making Mother's Day great would be some thoughtful gift ideas. Check out my ideas, below!

Why not give mom a gift basket with all of these items inside?! That would make her smile for sure. 

SUGAR COOKIE BAR WITH EDIBLE FLOWERS RECIPE

{Adapted from a recipe, found here}

Ingredients:

  • Dough:
  • 1 1/2 cups butter, softened to room temperature
  • 2 cups sugar
  • 4 eggs
  • 1 tsp vanilla
  • 1 tsp almond extract
  • 5 cups flour
  • 1 1/2 tsp salt
  • 1/2 tsp baking powder

Frosting:

  • 8 oz cream cheese, softened to room temperature
  • 1/2 cup butter, softened to room temperature
  • 5 cups powdered sugar
  • 1 tsp vanilla
  • 1/2 tsp almond extract
  • dash of salt
  • Food coloring (optional)
  • 2-3 tsp milk if needed
  • 8-10 edible flower heads, I used violas, but marigolds, violets, and others would work too.

TIPS ON FINDING EDIBLE FLOWERS:

To find the best edible flowers, look no further than your local hardware store or garden center. I found Violas on sale for about $2 per container. Look for the package with the most blooms on it. Cut the flowers off to garnish your sugar cookie bars or any other treat for Mom, even cocktails. The great thing about buying flowers this way, is that you can then plant them in a sunny spot in your yard and they will keep growing throughout the year, just as love for Mom grows all the time.

Alternately, I have seen a cute package of edible flowers at our local Co-Op, packaged similarly to the refrigerated herbs.

Instructions:

  1. Cookie bars: Cream butter and sugar in a large mixing bowl. Add the eggs, vanilla, and almond extract. Beat till well blended. Whisk together the flour, salt, and baking powder in a small bowl. Add to the wet ingredients and stir till well combined.
  2. Press into a 17" x 12" rimmed baking sheet that has been sprayed with non-stick spray. Bake at 350° for 15-20 minutes or until barely light brown. Cool completely, then get ready to frost. See frosting instructions in next step.
  3. To Make Frosting: Beat softened cream cheese and butter in a large bowl until smooth. Add powdered sugar, extracts, salt, and food coloring. Beat till smooth and creamy, adding milk as needed. 

4. Carefully cut edges of sugar cookie bars with a large, sharp knife so the edges are straightened up, as shown below. 

5. To evenly cut sugar cookie bars, cut down the middle both ways, then cut each of those sections in half again. To ensure a cleaner cut, always wipe off the excess cake and icing between each slice. After slicing, add edible flowers and serve! These stay good a few days left out at room temp or in the fridge. Enjoy!

Aren't these just so beautiful?! 

I hope you enjoy theButter Chardonnay and these sugar cookie bars as much as my mom and I will! Have a wonderful Mother's Day, friends!

Make sure to check out more from JaM Cellars Butter Chardonnay here!

I was selected for this opportunity as a member of CLEVER and the content and opinions expressed here are all my own.

PIN IT FOR LATER...