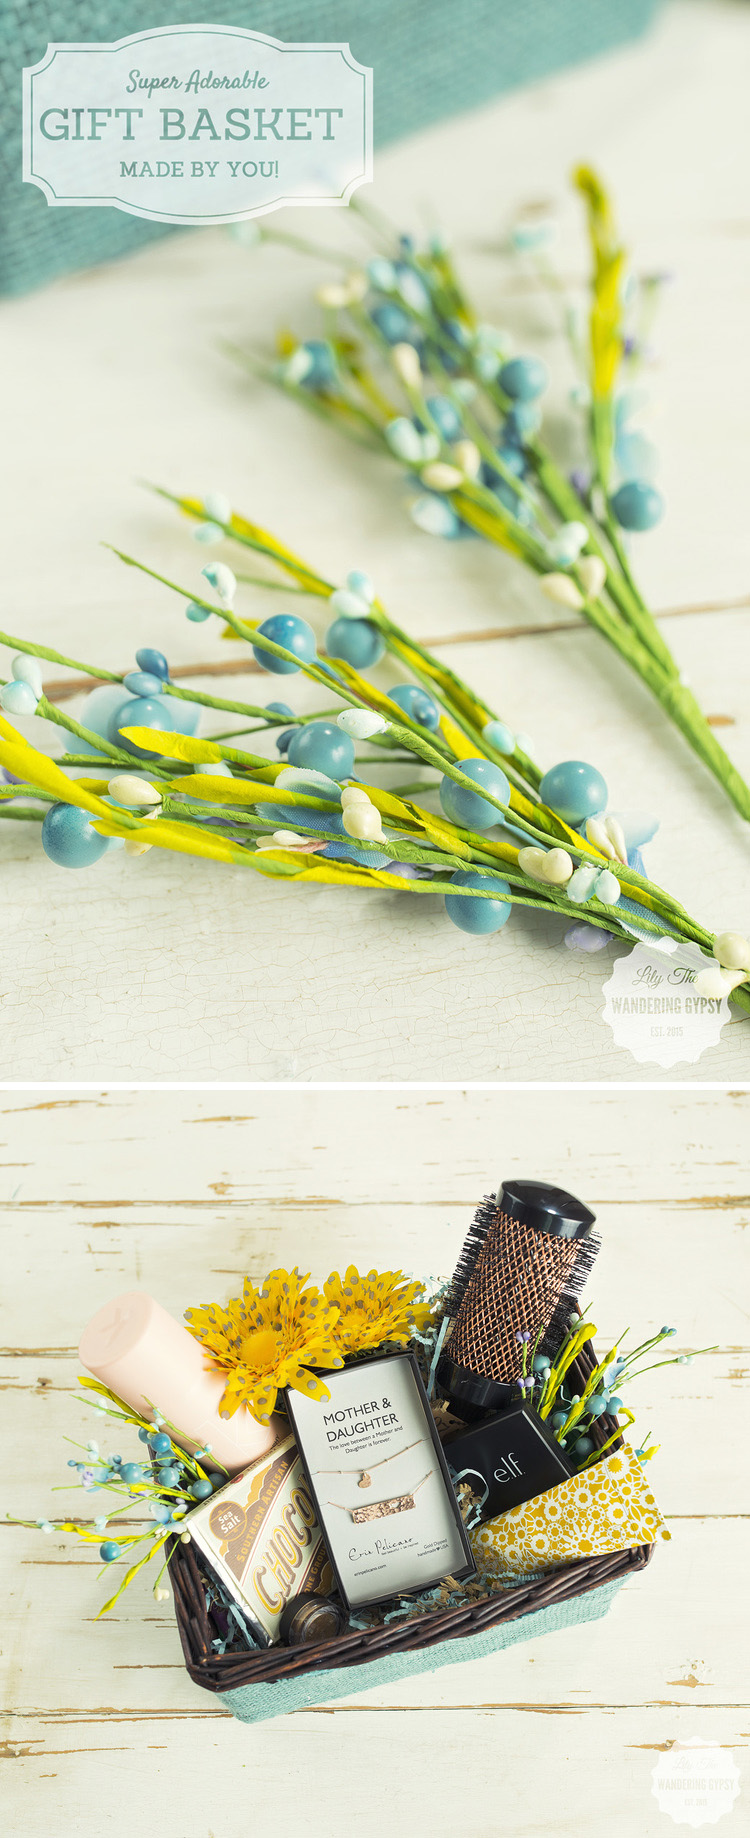
I hope you enjoyed my previous gift basket post, here. I had so much fun putting that basket together, that I created yet a second gift basket. These are so perfect for Mother's Day (and for gifting at just about any time of the year). The reason why I like the style of this gift basket so much, is because after you gift this beautiful creation, someone can then use the basket as store in a closet, bathroom, pantry, and more.
GIFTS FOR SOMEONE SPECIAL
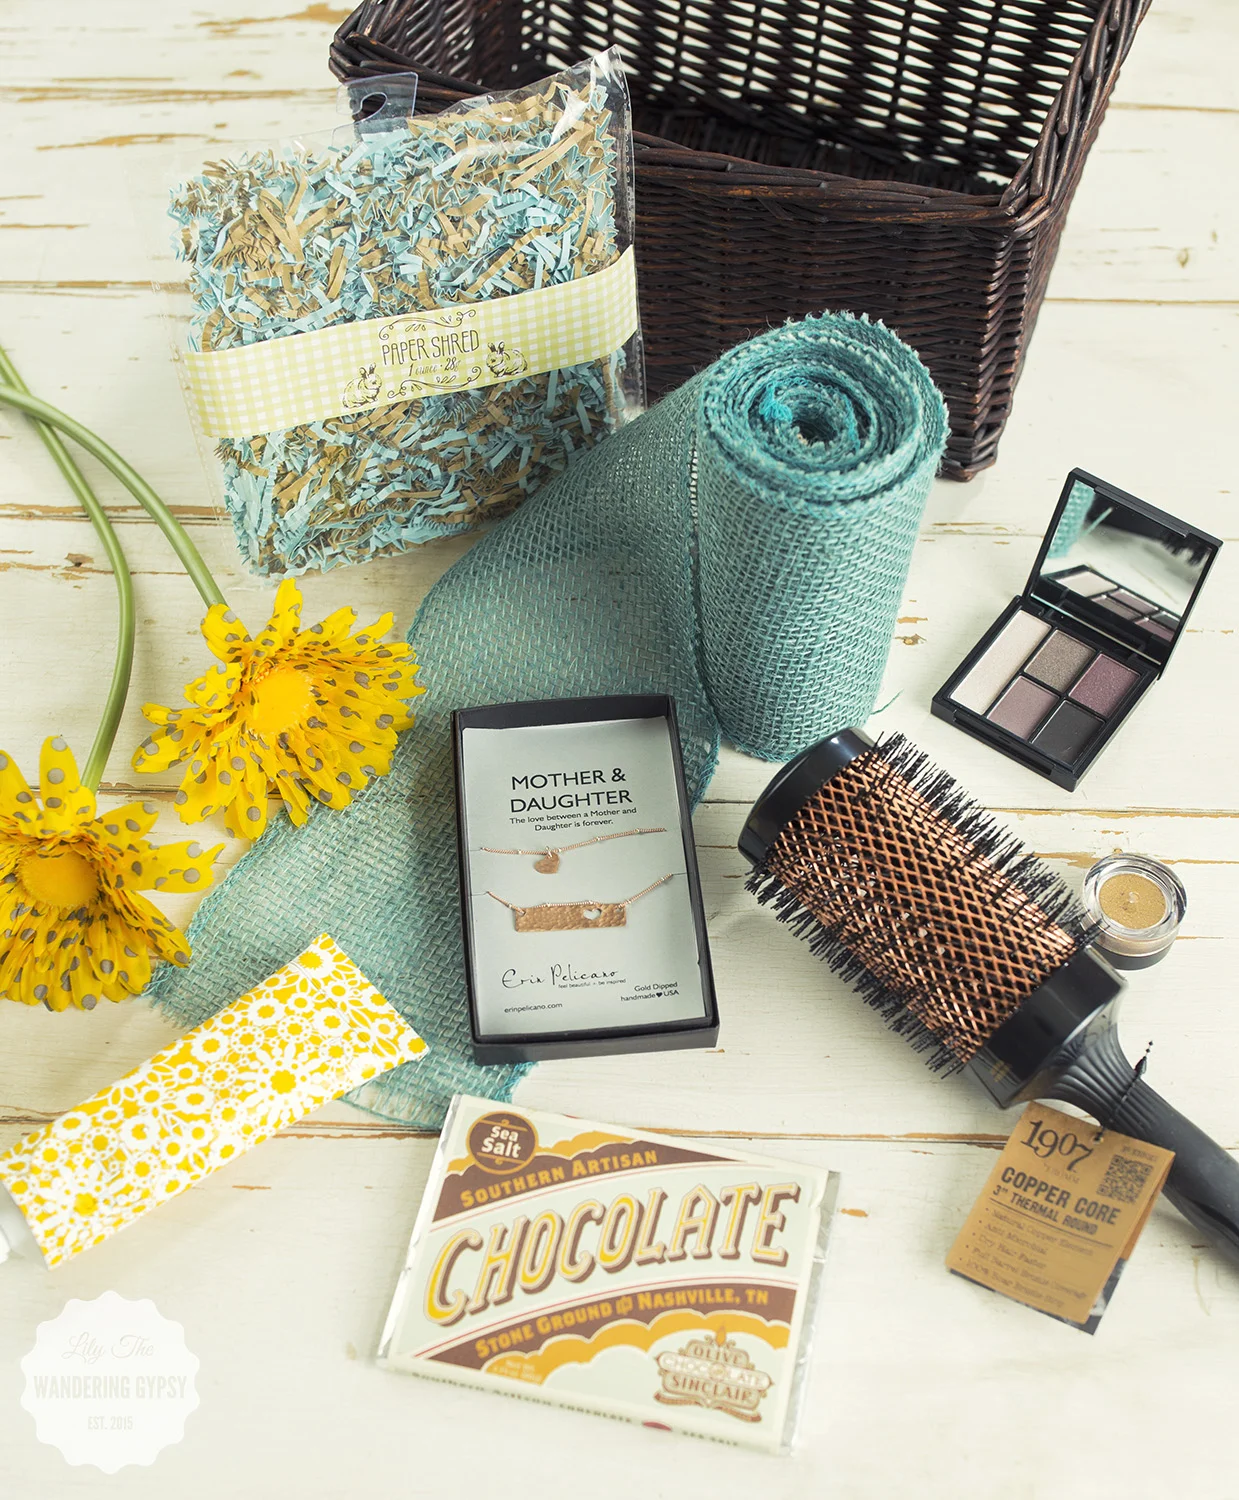
The items in this gift basket include: Mother & Daughter Necklace by Erin Pelicano, White Petals & Rice Flower Lotion by Lollia, 3" Copper Thermal Round Brush by 1907 by FROMM , Doo.Over Dry Shampoo by Kevin Murphy, Eye Palette and Eyeshadow by e.l.f., and the Sea Salt Southern Artisan Chocolate by Olive and Sinclair Chocolate. Read more about this chocolate in my previous post about Chocolate + Cashmere, here.
MATERIALS:
1 Wicker Basket
1 Roll of ribbon to wrap around the basket (not wired)
Hot Glue Gun + Glue (I used about 12 sticks, so it takes a lot)
2-3 Silk Flower Heads
Tissue Paper
Paper Crinkles
Fun Goodies To Fill Basket
INSTRUCTIONS:
1.) Cut a piece of ribbon, long enough to wrap around the basket and overlap about 3" in back.
2.) Glue the ribbon to the basket. I was pleasantly surprised at how easy it was to work with this burlap ribbon roll. It just seemed to mold to the shape of the basket so well. Starting at the back of the basket, glue the top of the ribbon and the cut end of the ribbon to the basket. Continue to wrap the ribbon around, and glue it/secure it every few inches. I glued up the basket where the vertical basket pieces were.
Gotta love that glue gun :)
3.) When you have glued the ribbon all the way around the basket, make sure the ribbon is attached well throughout the entire basket. Feel free to touch up any spots that may be loose. Fold the remaining cut end of ribbon over, to make sure loose edges are not showing. Then, glue that in place. Yay! The "hard part" is done.
Here is what your gift basket should look like...(below)
4.) Now, fill the bottom half of the basket with tissue paper.
5.) Then, add your paper crinkles. They should mold to the shape of the basket pretty well. These were from Target for $1.00 - I just love the color combo!
I wanted to make this cute gift basket like a floral arrangement of sorts, and I found these adorable berries (below), that really were the absolute perfect colors. So, it made me really happy to find these at JoAnn's during their recent Daffodil Dash sales :)


