Puppy Updates! And a Serta Dog Bed Review

Porter turned 9 weeks this past Tuesday, and she is doing so well! She gets so warm when she sleeps that she has taken a liking to our A/C vents. She still loves to bite, but we have been working diligently with her to make sure she knows that biting is not good. I read that if puppies are biting a lot, you can kind of let out a yelp, and walk away from them, and almost immediately, they will realize that they did something wrong. It is really working well. I also like that the bed has a lot of support because of the couch design, and it seems to be extremely comfortable for them. They both fit in the bed, actually :) Really happy with this purchase! 

I got her this awesome dog bed recently, too. It's the Serta Deluxe Couch Pet Bed, and I got it over the Serta Deluxe Cudler, because I thought she could grown into it. The Delux Cudler seems amazing for dogs around 45 lbs and under. Well, our Cabbie, who's is a full-blooded Chocolate Lab even fits in this bed we got! I know this bed is going to last for a vey long time, and also keep its shape. It's not memory foam, but there is a super thick piece of egg crate foam that you can unzip the bottom part, and just remove the foam, wash the pieces, and put is all back together. 

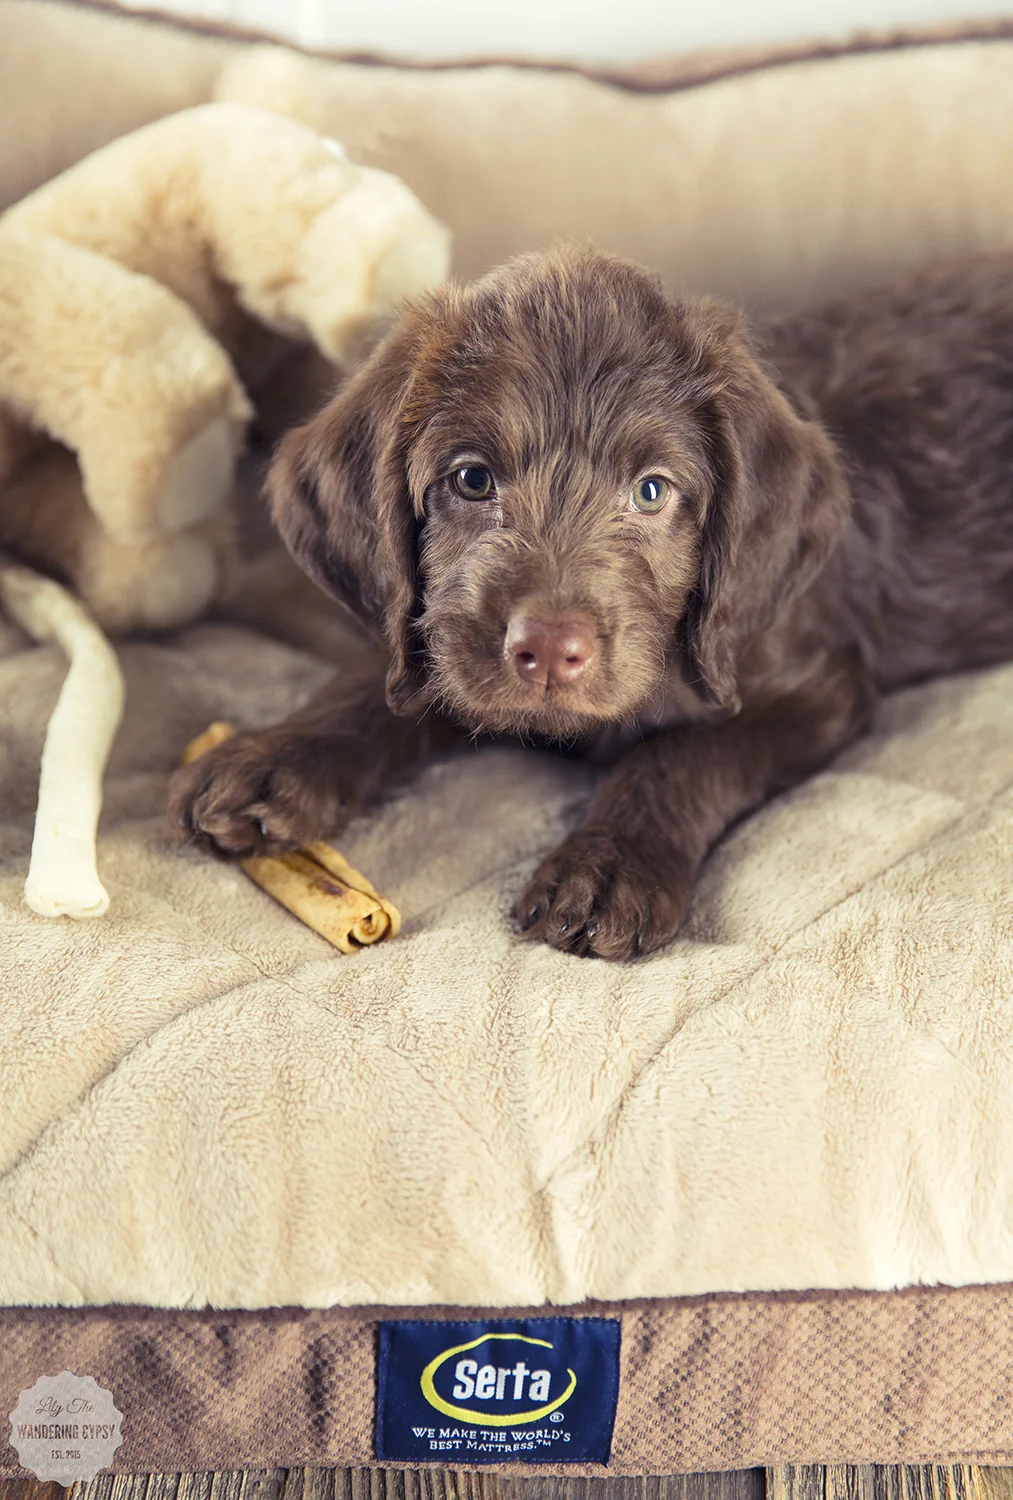
Her hair is also getting so long, and she loves going on walks. The weather has been like 95% humidity in the 90s, but very, very soon, (like tomorrow), it's supposed to be getting cooler. 

Also, we shot this photo of her a couple of weeks ago, but she has really grown SO much since even this photo! I will add more updates soon :) Porter will be helping me on a Halloween photo project soon too. Looking forward to sharing!! 

Photography Field Trip: Flamm Orchards

Last week, spur of the moment, I drove out to visit Flamm Orchards, in Cobden, IL. I had been wanting to go back for a while now, and I even called ahead to make sure they still had peaches. The peach season has pretty much come to an end, and the apples are almost ready to be picked. It is still a million degrees and also a million % humidity right now, so I am glad I took advantage of the cooler weather we had this day. Heading into September, I always feel like it should be cooling down and feel like Fall, but it sure doesn't just yet. Soon, though! My fingers are crossed that I get to take way more of these Photography Field Trips around southern Illinois soon! 

Here is one gem that we have in southern Illinois. It's super easy to get to, and the drive out there is gorgeous around sunset - rolling hills, orchards upon orchards of fruit trees, and just lots of green space. The day I went, the sky was bright blue with puffy, white clouds everywhere. 

I bought a jar of this Peach Jam, and cannot wait to use it with puff pastry and fresh peaches. What a good time to test out this recipe! Below, you will see their peach pie, a la mode. I snapped a photo of someone else's dessert at the pickup window, but I bought myself a couple of brownies and a couple of slices of the best Zucchini bread I have ever had in my life! I got therm all to-go, and Bobby made an exception to not liking to even eat sweets, and helped me eat them :)

Flamm Orchards already have lots of beautiful gourds and pumpkins!

And, if it had been a little bit cooler out, I would have enjoyed this little outdoor eating area that Flamm offers. All of the flowers looked so wonderful! (below)

Grilled Flank Steak Fajita Nachos Recipe ~ Outdoor Grilling Inspiration

This shop has been compensated by Collective Bias, Inc. and its advertiser. All opinions are mine alone. #AuthenticSalsaStyle#CollectiveBias

A delicious summer grilling recipe, filled with authentic flavor and fresh ingredients! These BBQ Flank Steak Fajita Nachos are the perfect meal to serve at a party, during outdoor grilling season! Read on to learn more about this wonderful recipe and some cute ideas of how to decorate for your next outdoor grilling party. 

 I just love the colors of this outdoor party table setup. I used mainly blues and whites in my design (dishes, napkins, utensils, table covering fabric, etc). I just let the bright, beautiful food shine with a more subtle color scheme.

Also, I love the idea of using large glass jars with lids to hold chips (found in the kitchen section at Walmart). It's eye-catching, and keeps chips fresh while your serving guests. Use small scoops or tongs for guests to serve themselves

By offering self-serve topping, guests can use as many or as few ingredients as they like. If someone is vegetarian or even vegan, they can opt out of the steak, and just use lots of veggies!

Even More Recipe Inspirations, Here: AuthenticSalsaStyle.com.

And, if you are looking for more beef-based recipes, look no further: BeefItsWhatsForDinner.com.

MARINADE:

Olive Oil, Lemon Juice, Taco Seasoning (use half here), Chopped Fresh Onions & Garlic, Pinch of Salt.

FOR THE MEAL:

- HERDEZ® Salsa Casera

- 1 lb. Flank Steak (per 2 people)

- 1 bell pepper each in green, red, orange, and yellow

- 1 purple onion

- Tortilla Chips

- Shredded Cheddar Cheese (We shredded a block of extra sharp cheddar)

- Jalapeños

- Taco Seasoning (use the other half of the package here)

- Limes and/or Lime Juice

- Sour Cream

- Cilantro 

- Grill and Skillet


1.) Prepare the marinade in a 9x9 baking pan (I used my brownie pan) by chopping 1/4 of the onion + 1-2 heads of garlic, and mix it with all of the other marinade ingredients. Stir well.

2.) Add steak, cover with plastic wrap or foil, and place in the fridge to and marinade for at least 1-2 hours.

3.) Preheat grill to high heat after steak is done marinading.

4.) Cut up all 4 bell peppers, and most of the onion, and set aside. Get out a large skillet, and heat a small amount of olive oil. Wait until the oil starts to thin a bit, and add your onions and rest of the taco seasoning. Cook until slightly browned, and then add your peppers. Let these simmer on medium low heat, and let's grill some steak! 

5.) While your peppers are cooking, bring steak out to the grill on a tray of some sort, with tongs and a spatula. Place the marinated steam right onto the grill. After about 4-5 minutes, if you want those pretty grill marks, rotate the steak 90 degrees, and grill for another 1-2 minutes. Flip the steak over and grill for another 2-3 minutes. This timing left a bit of pink but not much - it was perfect! Take it off the grill and let's make some nachos!

6.) Turn heat off of the peppers and onions when they're cooked, and slice steak into bite-sizes slices or pieces. 

7.) To make your nachos - on a plate, add: chips, cheese, corn, sour cream, grilled steak, cilantro, and top with HERDEZ® Salsa Casera. This has been my go-to nachos recipe, and everyone always loves it! 

I went to Walmart to pick up some of my ingredients and party supplies - you can find the HERDEZ® Salsa Casera and the Beef at Walmart, as well as the jars that I used for holding those tortilla chips. Get recipe inspiration and beef nutrition information at “Beef. It’s What’s For Dinner".

HERDEZ® provides #AuthenticSalsaStyle and it's oh, so good! Thank you so much for checking out my latest recipe, I hope you are inspired by it!! What is your favorite meal to make on the grill? What do you usually grill when you have a crowd? Let me now in the comments, below. 

Elegant Chocolate-Dipped Patriotic Oreos

Have you noticed that most candy/chocolate stores offer chocolate-dipped Oreos among their other chocolate bon-bons and other confections? I have always been amazed by this, because they are SO incredibly easy to make. I figure, why not just make some of my own at home! I also wanted an excuse to check out the Oreo Thins that I have been seeing everywhere, so I thought this would be the perfect project!

Without further ado, here are my Elegant White Chocolate-Dipped Oreos, perfect for Labor Day Celebrations, and other times when you just wanna decorate some desserts!

- 1-2 packages of Oreo Thins (find them here)

- Ghirardelli Classic  White Melting Wafers or White Chocolate Chips (find them here)

- Red Food Coloring Gel (this is the set I have) or red candy melts

- Blue Sprinkles (similar here

- Glass jar to dip Oreos into (mine was the 8 oz. size, I believe)

- Skewer Stick

- Parchment Paper


1.) Melt white chocolate in a double boiler method or in the microwave, stirring regularly to make cure it's smooth and fully melted. 

2.) Line a baking sheet with parchment paper.

3.) Transfer a portion the melted white chocolate to a jar that is about as deep as the Oreo Thins are wide. Leave about 1/2" of room from the chocolate to the top of the jar.

4.) Dip each Oreo Thin into the white chocolate, and dip in little over half way, leaving space at top.

5.) As you pull the cookie out of the jar of white chocolate, use a skewer stick to scrape excess chocolate off the back of the cookie, and around the sides. This is a great tip, that makes your cookies look way better and less gloppy as they dry.

6.) Put each cookie onto the parchment, and let cool completely. 

7.) After you have dipped every cookie, pour more white chocolate into a jar, and add lots of red gel food coloring. This could also be done with red melting wafers. 

8.) Transfer to Ziploc bag, and cut a tiny opening in one corner. ***Working one cookie at a time, add lines of red chocolate, then a few blue start sprinkles to each cookie. Practicing first helps!

9.) Enjoy your cookies! These would be perfect for a party or just enjoying at home!!!

An Easy Treat For Labor Day And Beyond

I have an awesome, tasty, and amazingly easy dessert idea for Labor Day festivities and beyond. Definitely want to admit that I did not make my own cupcakes, though - I got some delicious pre-made Red Velvet Cupcakes from our local Schnuck's grocery store, and also found the berries there too. But, the little special touches always make people smile, so you can recreate your own by simply adding some blueberries and raspberries to some cupcakes of your own. You could even grab the 3 ingredients on your way to a party, and decorate the desserts when you arrive! I also love how the seersucker fabric and little silver stars confetti makes for a patriotic yet elegant decor idea for any holiday that's red, white, and blue! 

If you do want to make your own Naturally Colored Red Velvet Cupcakes, Food52 has an awesome recipe that uses beets (instead of red food coloring) - which is incredible! 


NATURALLY DYED RED VELVET RECIPE FROM FOOD52:

For the cake:

  • 1 cup beet purée, from fresh red beets (not cooked)
  • 3/4 cup buttermilk
  • 1 tablespoon white wine vinegar
  • 2 tablespoons lemon juice
  • 1 tablespoon vanilla extract
  • 2 1/2 cups cake flour
  • 3 tablespoons cocoa powder, not Dutch-process
  • 2 teaspoons baking powder
  • 1 teaspoon cream of tartar
  • 1 teaspoon salt
  • 1/2 cup neutral-flavored oil
  • 1/2 cup unsalted butter, softened
  • 2 cups granulated sugar
  • 3 large eggs

For the cream cheese frosting:

  • 8 ounces cream cheese, at room temperature
  • 8 ounces unsalted butter
  • 2 tablespoons crème fraîche
  • 1 pound confectioners' sugar
  • 1/2 teaspoon lemon zest
  • 1 teaspoon vanilla extract
  • 1 pinch salt

Instructions:

Add the beet purée, buttermilk, vinegar, lemon juice, and vanilla extract to a food processor fitted with the steel blade and process until very smooth.

Sift the cake flour, cocoa powder, baking powder, cream of tartar, and salt together in a bowl. Beat the sugar, oil, and butter together in a large bowl until creamy, then add the eggs one at a time, mixing for 30 seconds after each addition.

Alternate adding the flour mixture and beet mixture to bowl, beginning and ending with the flour mixture. Divide between the cupcake papers and bake until a cake tester inserted into the center of the cake comes out clean, 20 to 22 minutes.

Cool the cupcakes on a rack for 20 minutes or more. Then, get the icing ready. 


To make the frosting, beat the butter and cream cheese together on high speed until fluffy and smooth, then add the crème fraîche. Turn the mixer to low and gradually add the confectioners' sugar until just combined, then turn the mixer up to medium-high and beat until fluffy and smooth, making sure to stop the mixer and scrape down to the bottom of the bowl so everything is evenly mixed. Add the lemon zest, vanilla extract, and salt. Enjoy!