Love to customize gifts? Here's an idea to spruce up a non-perishable food item in less than 10 seconds.
Read MoreCompany's Coming! Welcoming Guests with Cute Room Decor from Big Lots (And A DIY Room Diffuser)
This shop has been compensated by Collective Bias, Inc. and its advertiser. All opinions are mine alone. #BigLotsHome #CollectiveBias
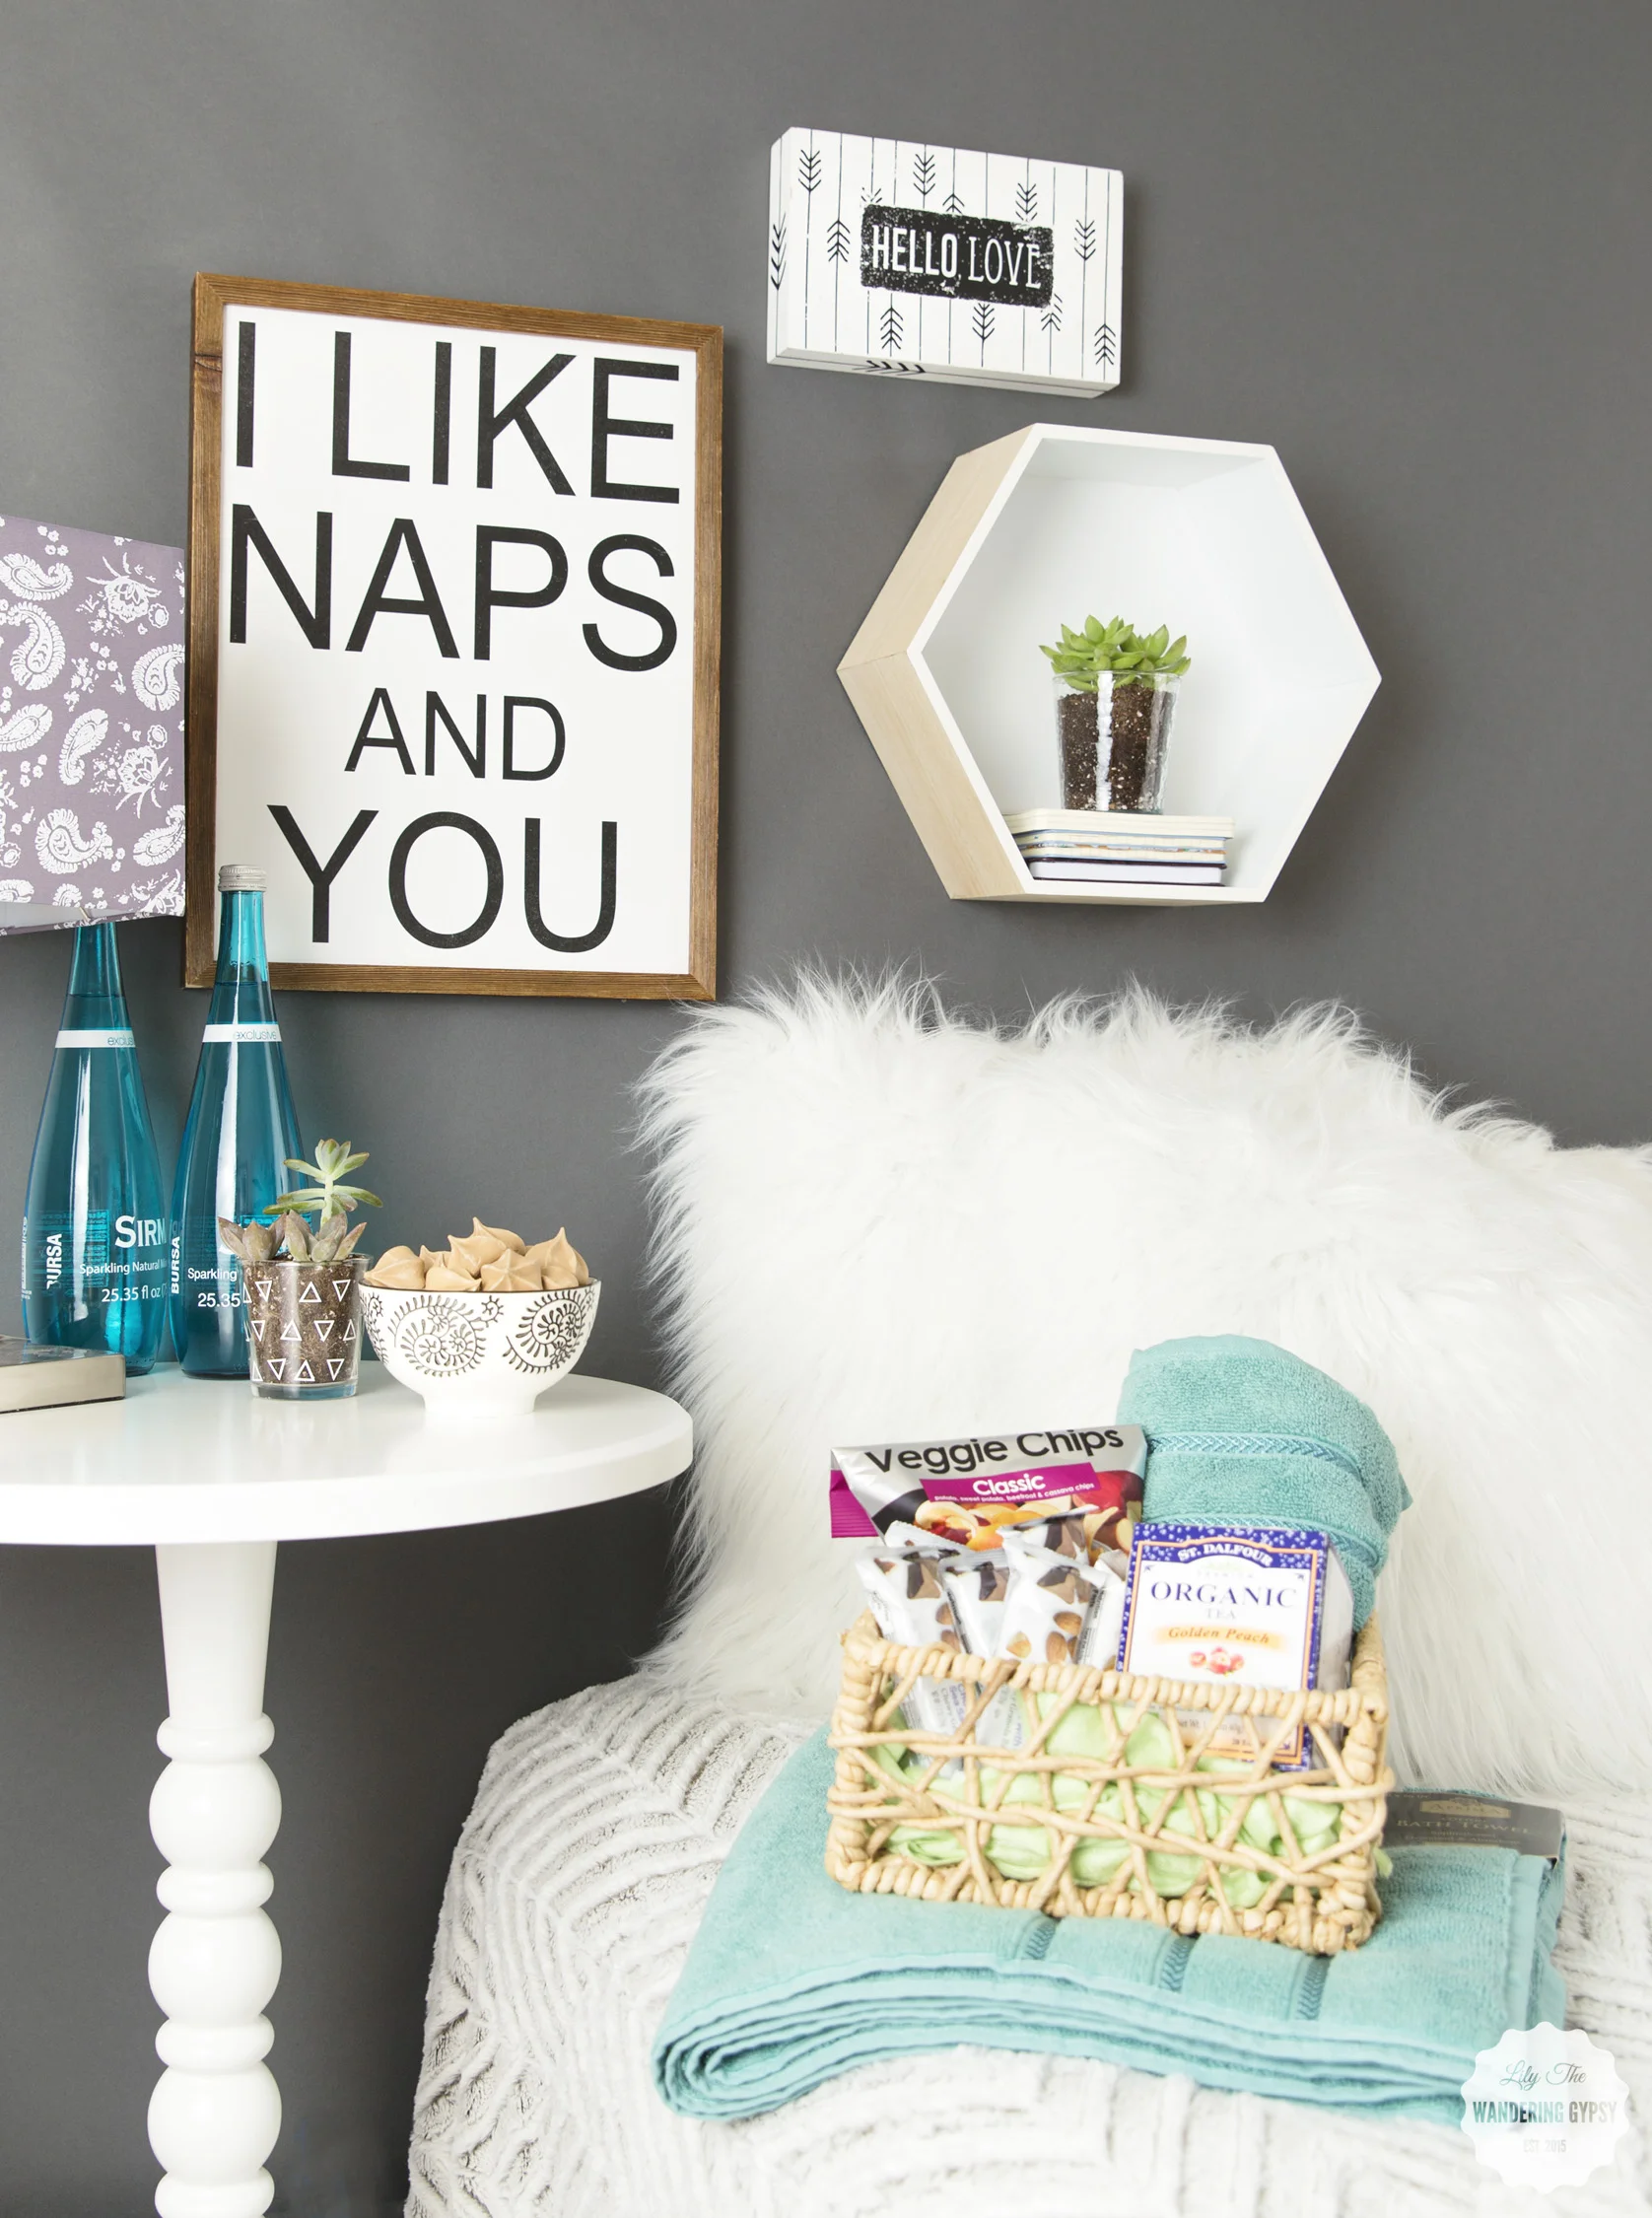
Looking to spruce up your guest room? I sure was! My guest room was so bad before this little mini makeover. The walls were light, faded, pale pink, and the only bedding I had was grey or purple - not the most flattering or welcoming color scheme, of you wan even call it that. If you follow my blog, you will know that we welcomed a new puppy into our home recently. She is amazing, and we and love her SO much. Because of the new puppy, more friends and family visiting and staying the night (or nights). I was so excited to get the chance to spruce up our guest room, thanks to my friends at Big Lots! Our guests take time out of their busy schedules to visit, so they deserve a nice place to call their own while they are in town.
Company is coming and Big Lots has everything that you need to prepare for family and other visitors in the coming months. You can find everything there from mattresses and bed frames, to other furniture like accent tables, lamps, accent pieces, other home decor and furniture items, toiletry items, snacks, fresh foods, and more.
TOP 5 THINGS THAT WILL HELP YOU SPRUCE UP YOUR GUEST ROOM
1.) Fresh Bedding
2.) New Towels
3.) Accent Furniture
4.) Snacks and Water
5.) Scented DIY Room Diffuser (See Below)
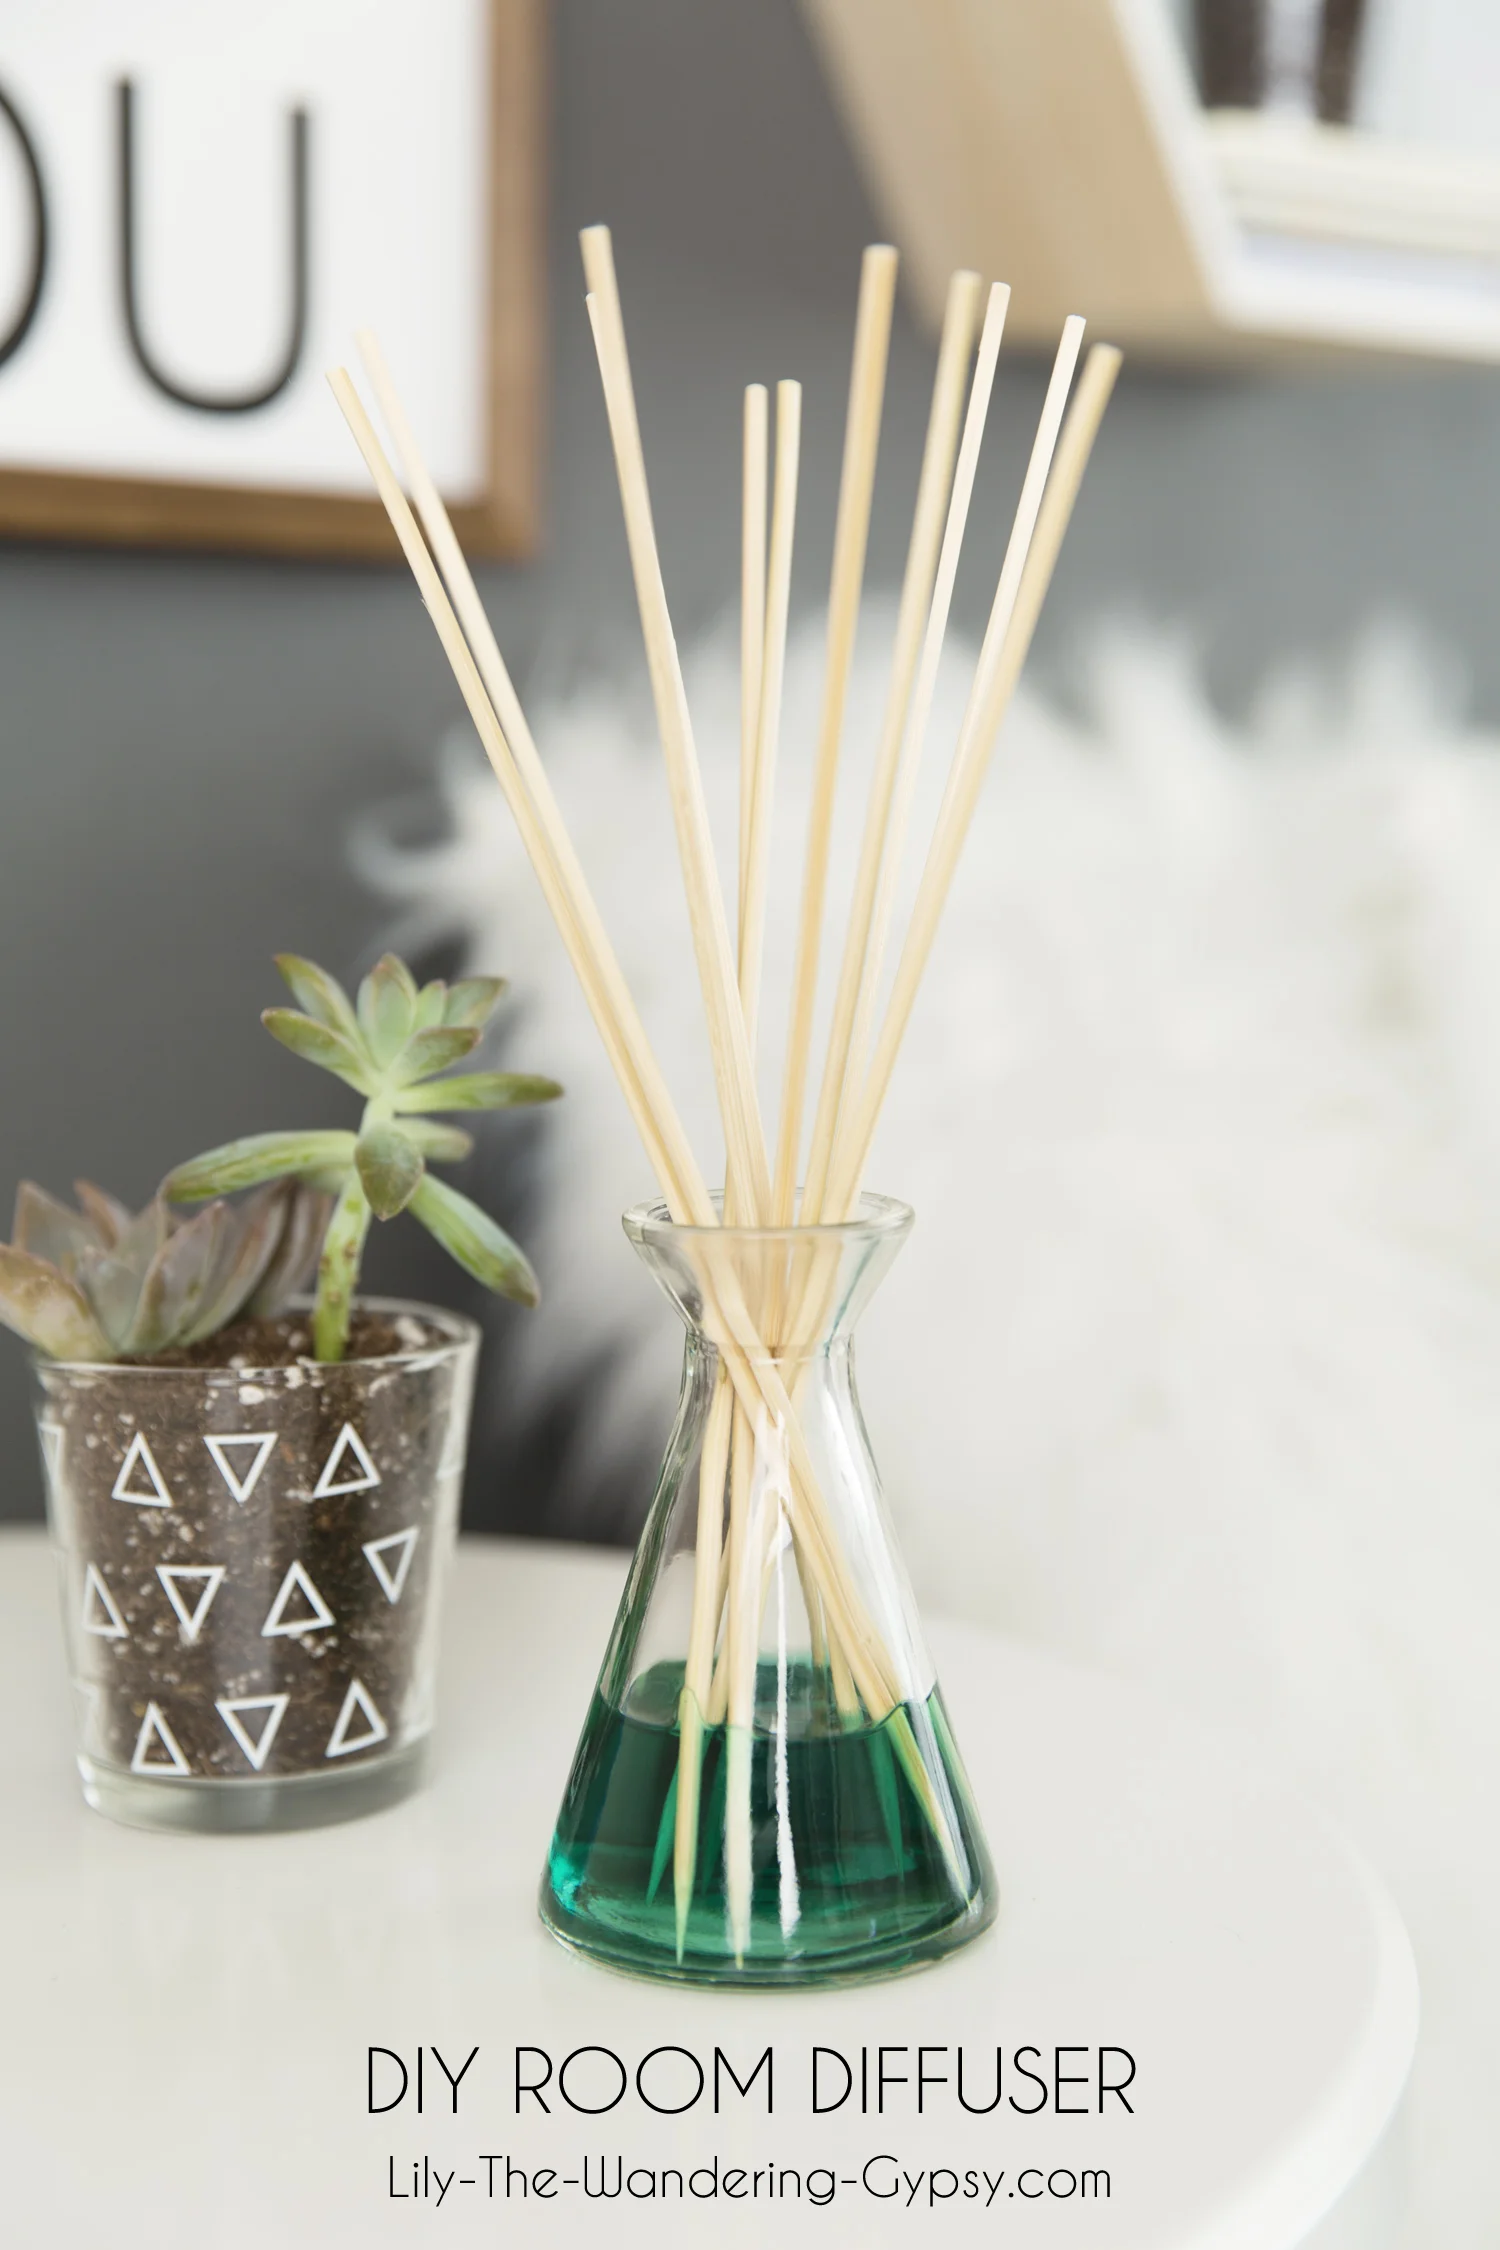
DIY ROOM DIFFUSER
I grabbed this inexpensive glass jar at a craft store, and filled it with a mixture of witch hazel, a bit of food coloring, and any essential oil you prefer. You could flat some dried lavender or other herbs in the diffuser, too. I love the idea of using some food coloring in the liquid, because eventually, the skewer sticks would begin to get an ombre effect from soaking up the colored liquid. Place as many skewer sticks in the jar as will fit, and enjoy!
From small scale items to large scale items, Big Lots carries a wonderful assortment of high quality home decor items that are fashionable and trend right!
Big Lots has a variety of items, from home decor to food, and is a one-stop-shop that will allow you to better prepare for the busy last few months of the year.
Big Lots on Facebook
On Google +
On Twitter
And On Instagram
LET'S GO SHOPPING!
I always have such a nice experience in Big Lots. The employees are beyond helpful, and I like that I can find a little bit of just about everything I need for my home. I was thrilled with the latest products from Big Lots, like these $18 Faux Fur Throw Blankets (shown below). I LOVE this blanket so much, because it's more like a comforter, and was such a good jumping off point for this guest room re-do. These blankets some in lots of varieties of textures, and are all more neutral colors, which I really like. The back of the throw blanket is a soft brown material, and I am really looking forward to cozying up on the couch with it when it gets chillier. My guests will also enjoy this beautiful blanket.
I also loved the selection of guest room furniture that I found at Big Lots. I grabbed this amazing, round, white table (which I put together myself in about 15 minutes). I didn't get an in-store photo of it, but in addition to the furry blanket, it ties the room together SO well!
How will you prepare your guest room for friends and family who visit in the coming months? I loved sticking to a sort of white and grey color scheme while adding pops of light blues and aquas. I think that's a pretty calming atmosphere for someone who traveled far and wide to visit you!
My Most Popular Posts In October 2016
Since the month is almost over, and the season change is in full swing, I wanted to look back at some of the posts that brought me the most traffic this past month.
I created so many fun recipes and ideas this past month, and I am so happy to be able to share it with you here on Lily The Wandering Gypsy!
Those posts gained me nearly 70% of my total traffic, which is so great! I love checking back to see what people are enjoying. Until next time!
How To Host A Clothing Swap Party!
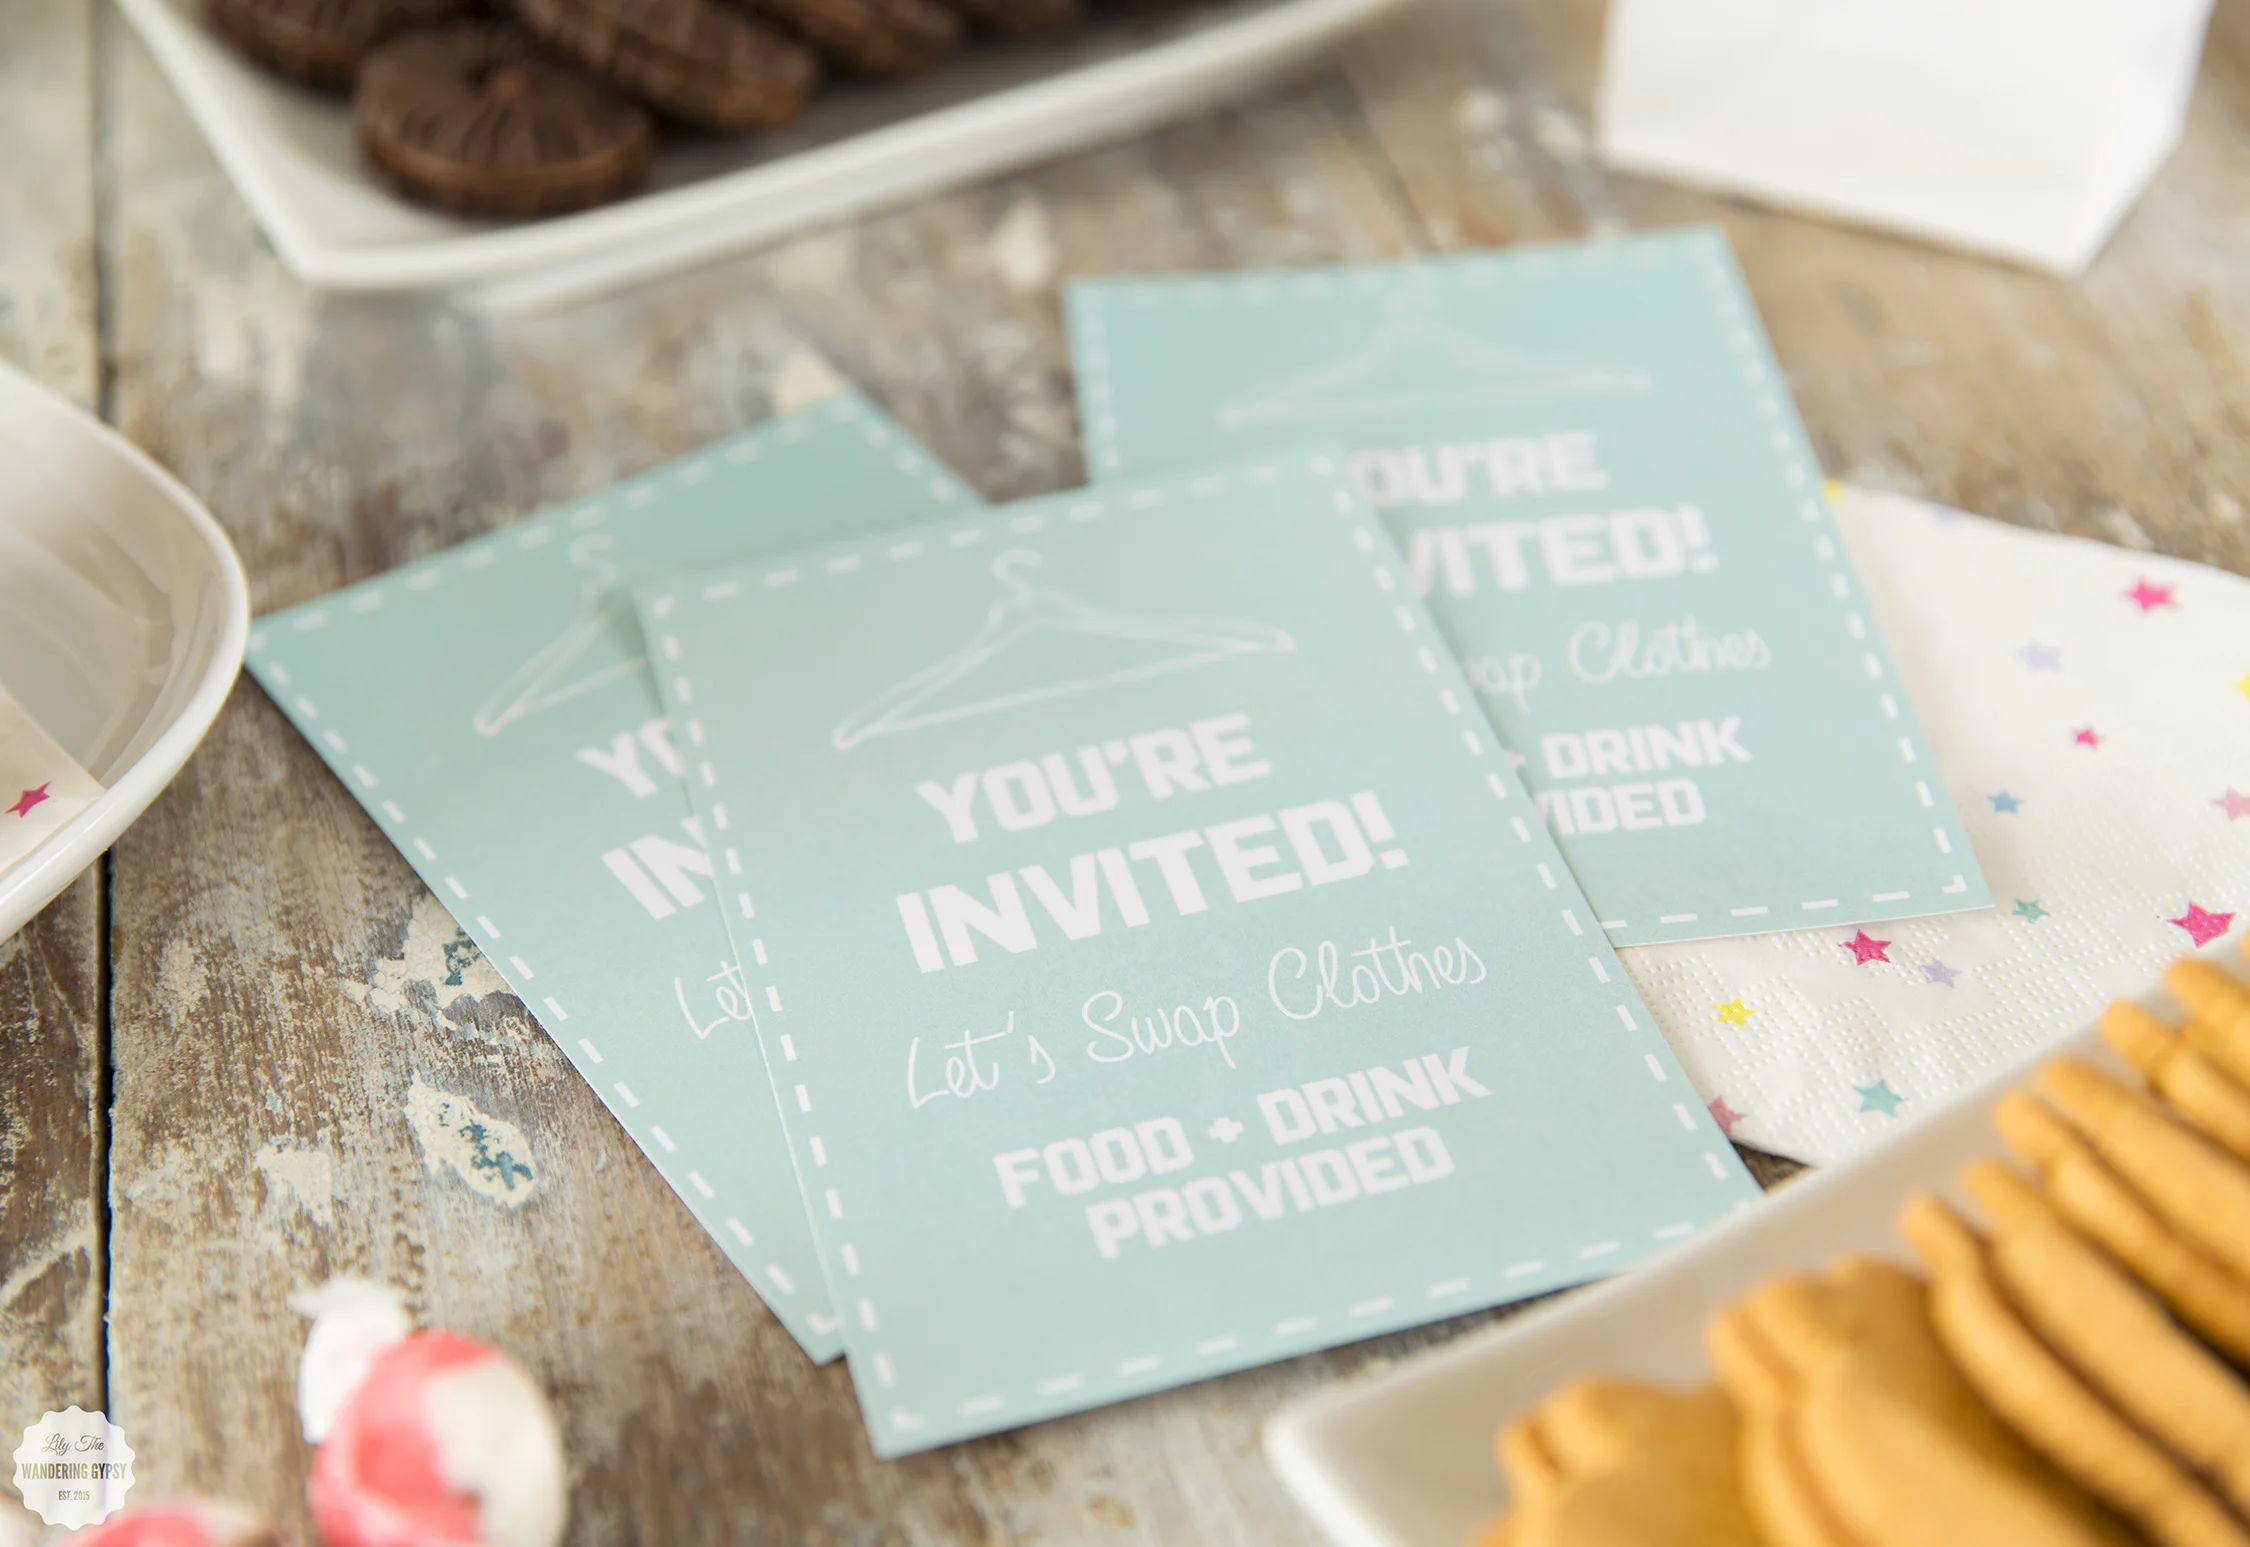
I'm super excited to bring you this fun idea! Since Fall is my favorite season, and it's definitely a fun time to transition into Fall garb, now is a great time to host a Clothing Swap Party with friends and family members. Have some of your favorite ladies over and serve some tasty coffee drinks and provide lots of snacks. This would be an amazingly fun way to spend an afternoon or evening with those who you enjoy spending time with.
HERE'S HOW:
1.) Gather any clothes you are willing to part with. I love this swap party idea, because I tend to be able to pass along much nicer items if I have a friend in mind.
2.) Send an invite or e-vite to friends, using this graphic. Feel free to save or even screenshot the image, and just send it to anyone who you want to invite.
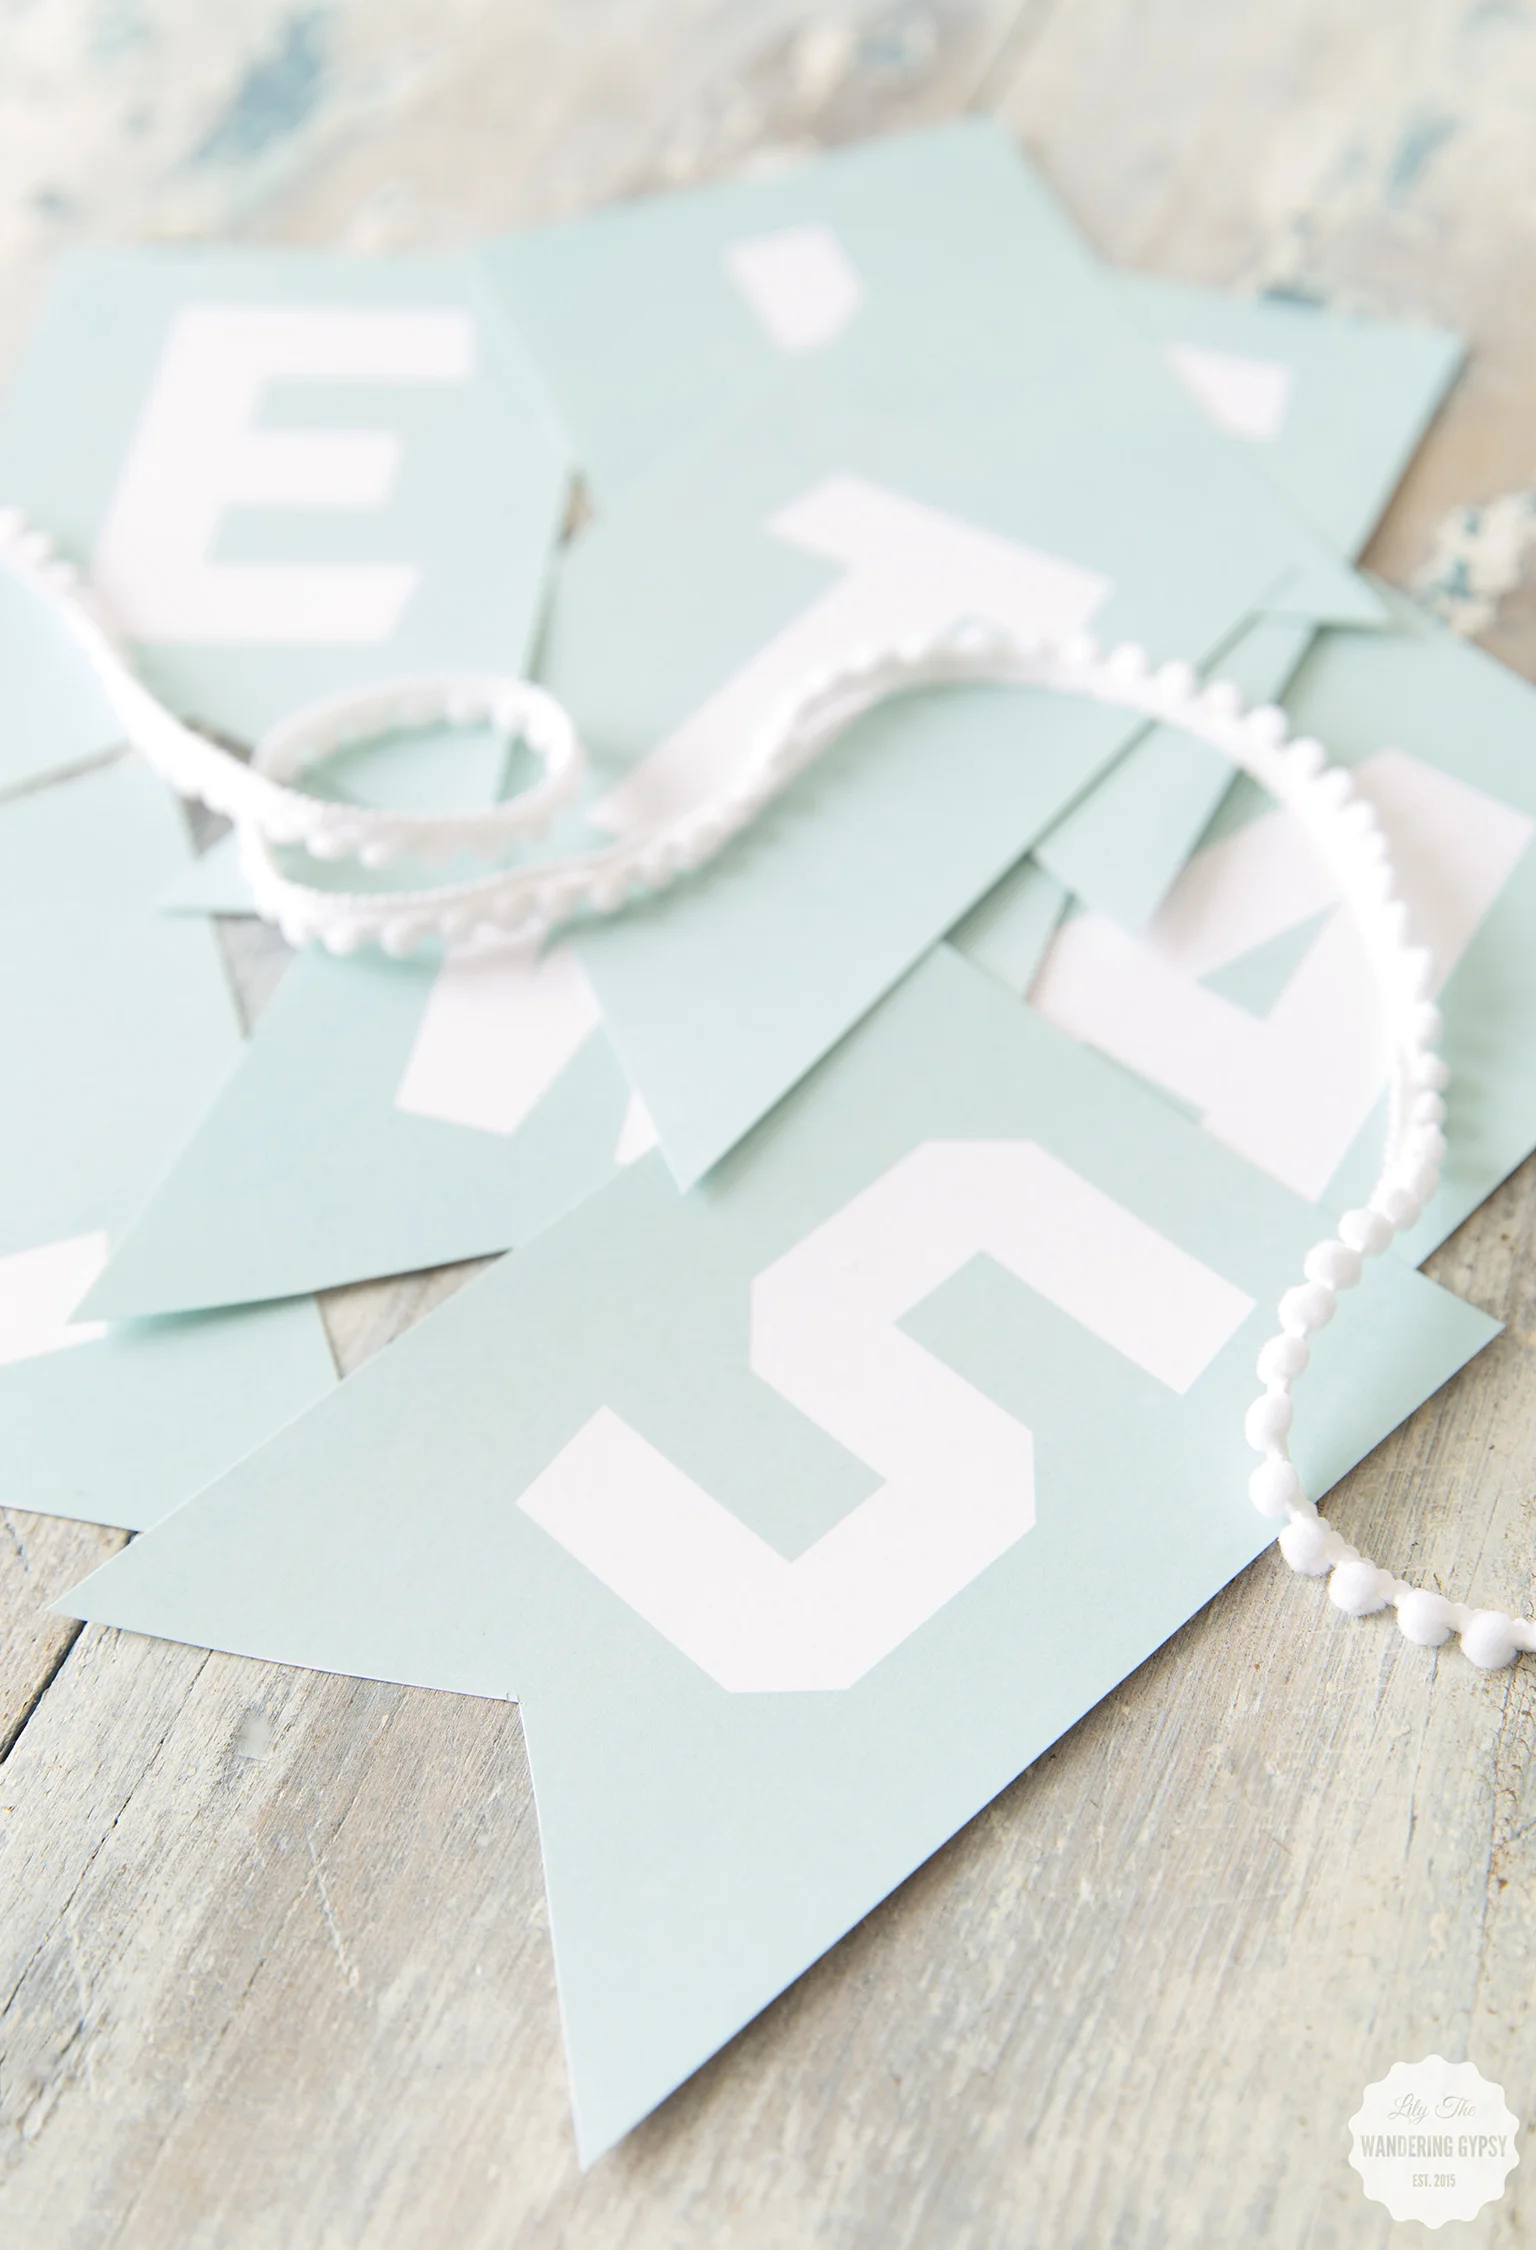
3.) To Make The Banner: Print the 5 pages of provided files (below) in color, and cut out each letter. I used a paper cutter and a pair of scissors. Glue ribbon or decorative pom pom trim to the top of each letter flag, and then tape a length of rope to the back of the letters. Tape to the wall behind your party table - I just love how this turned out!
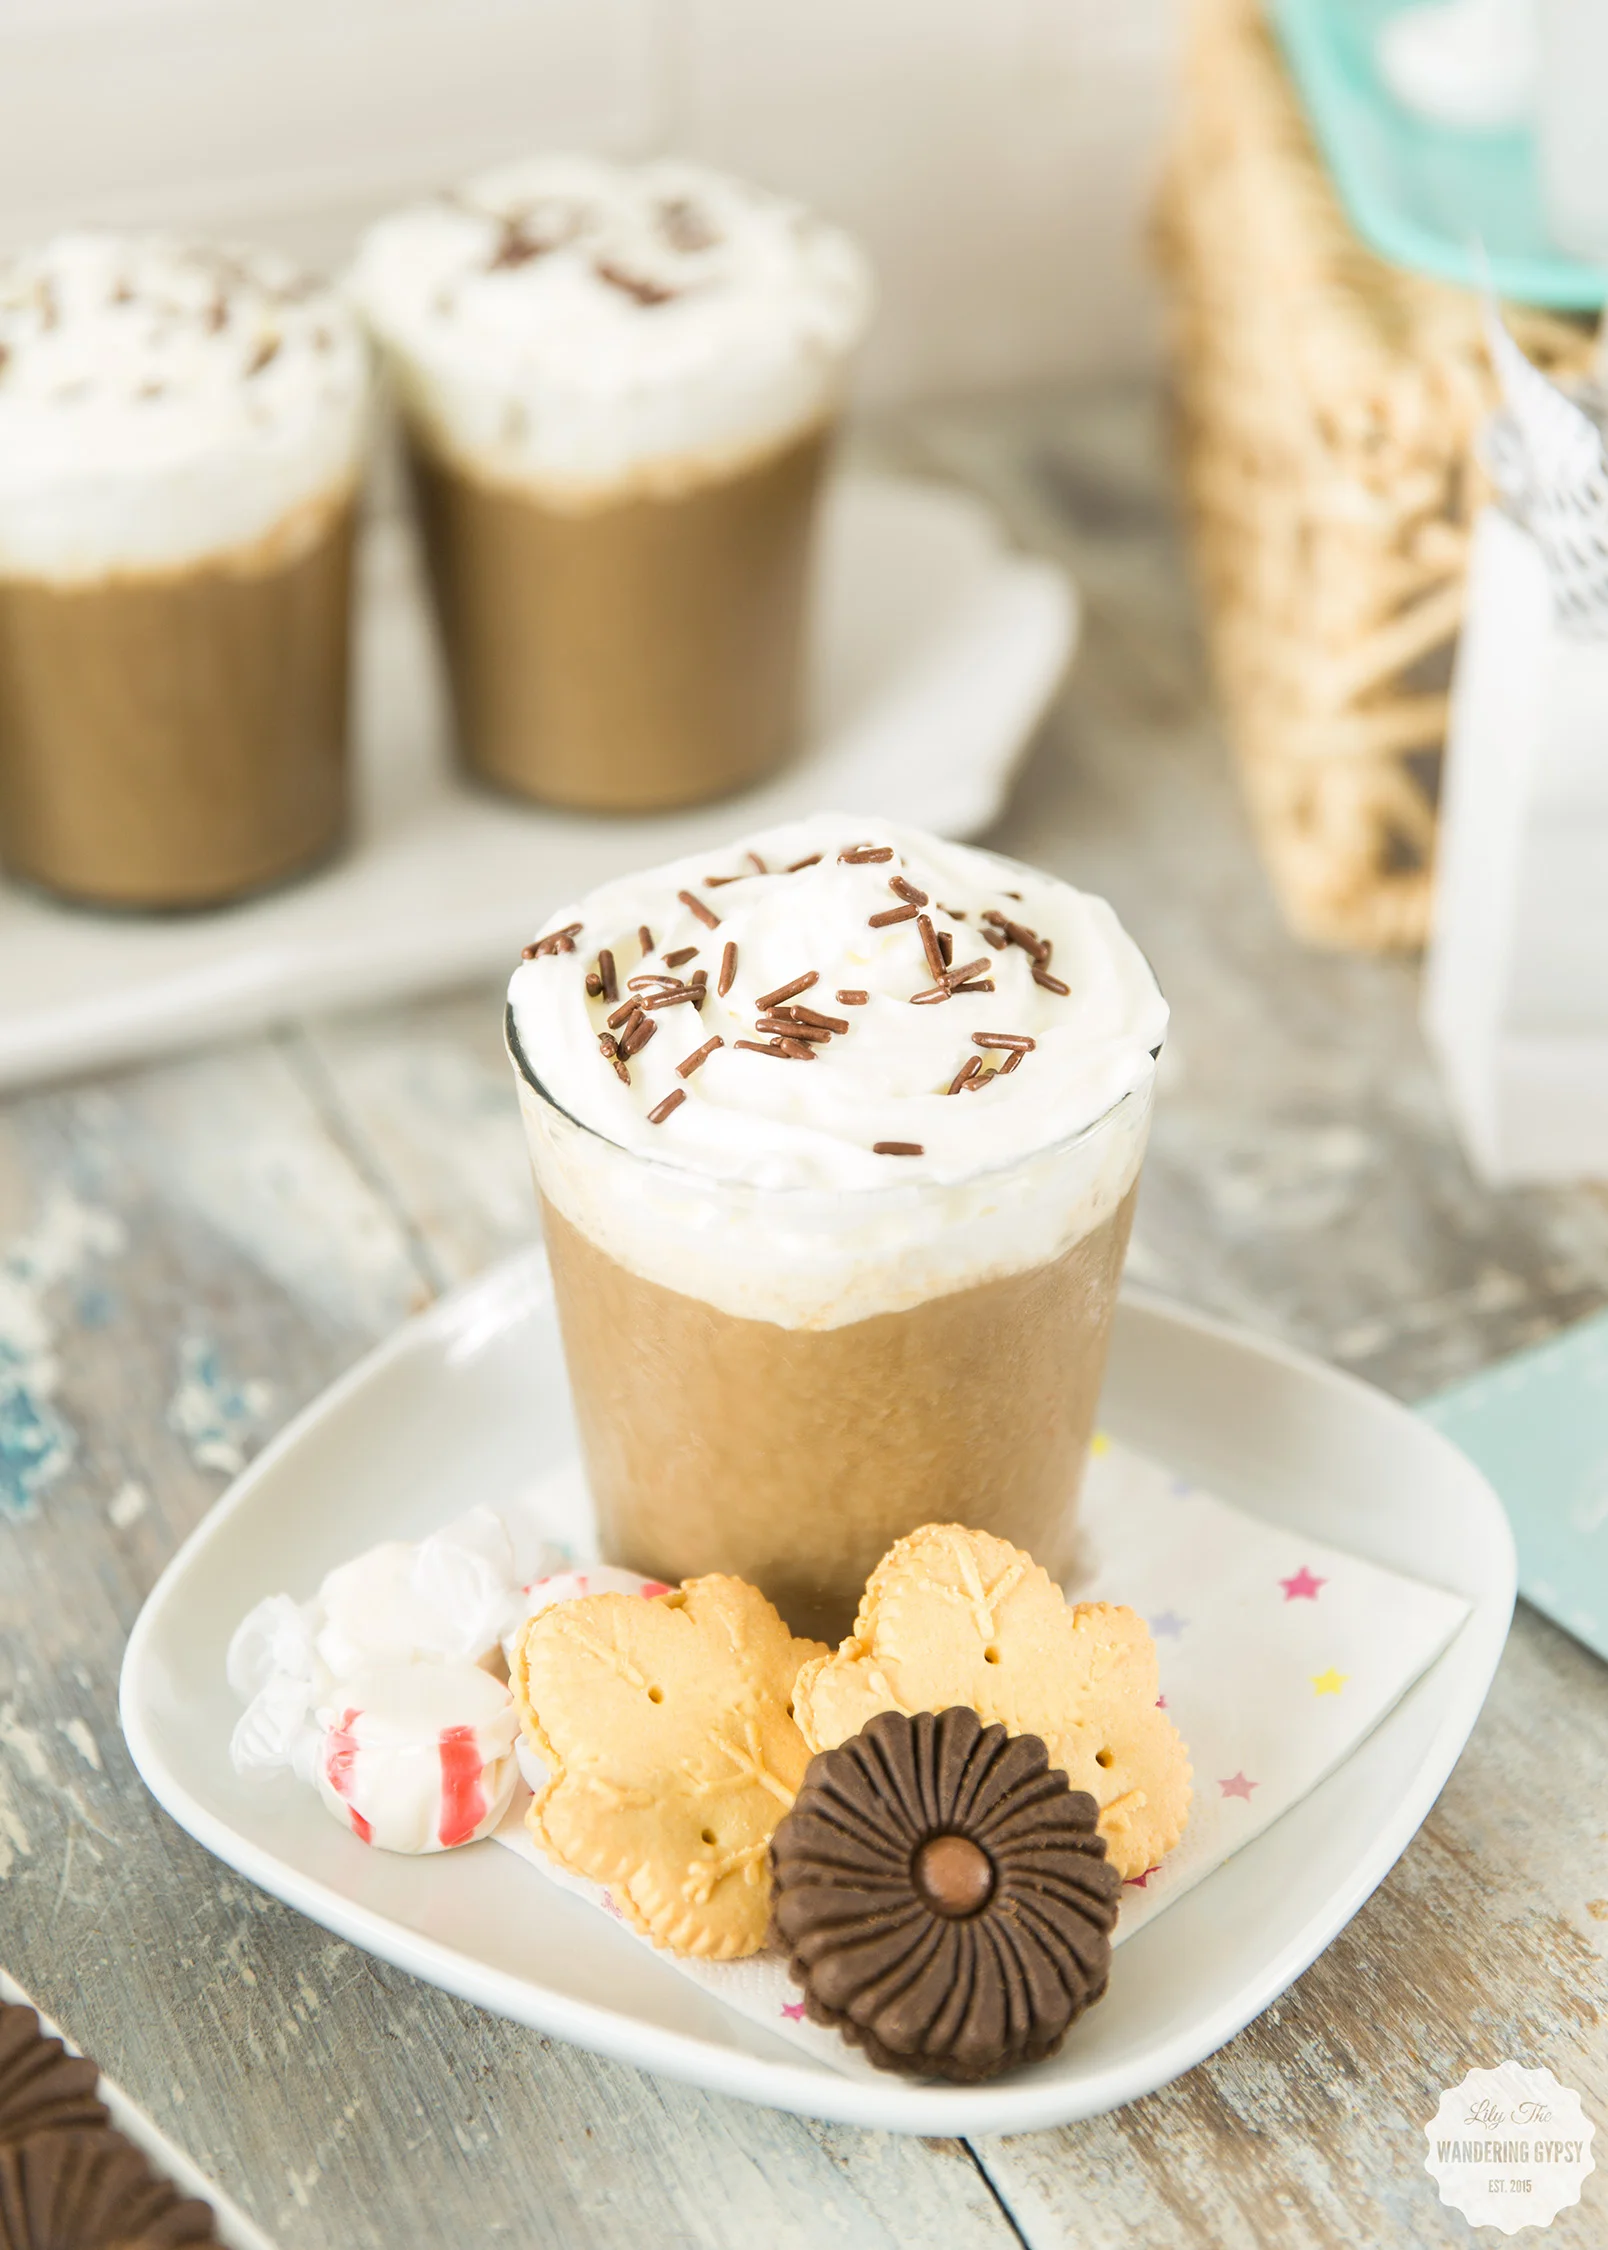
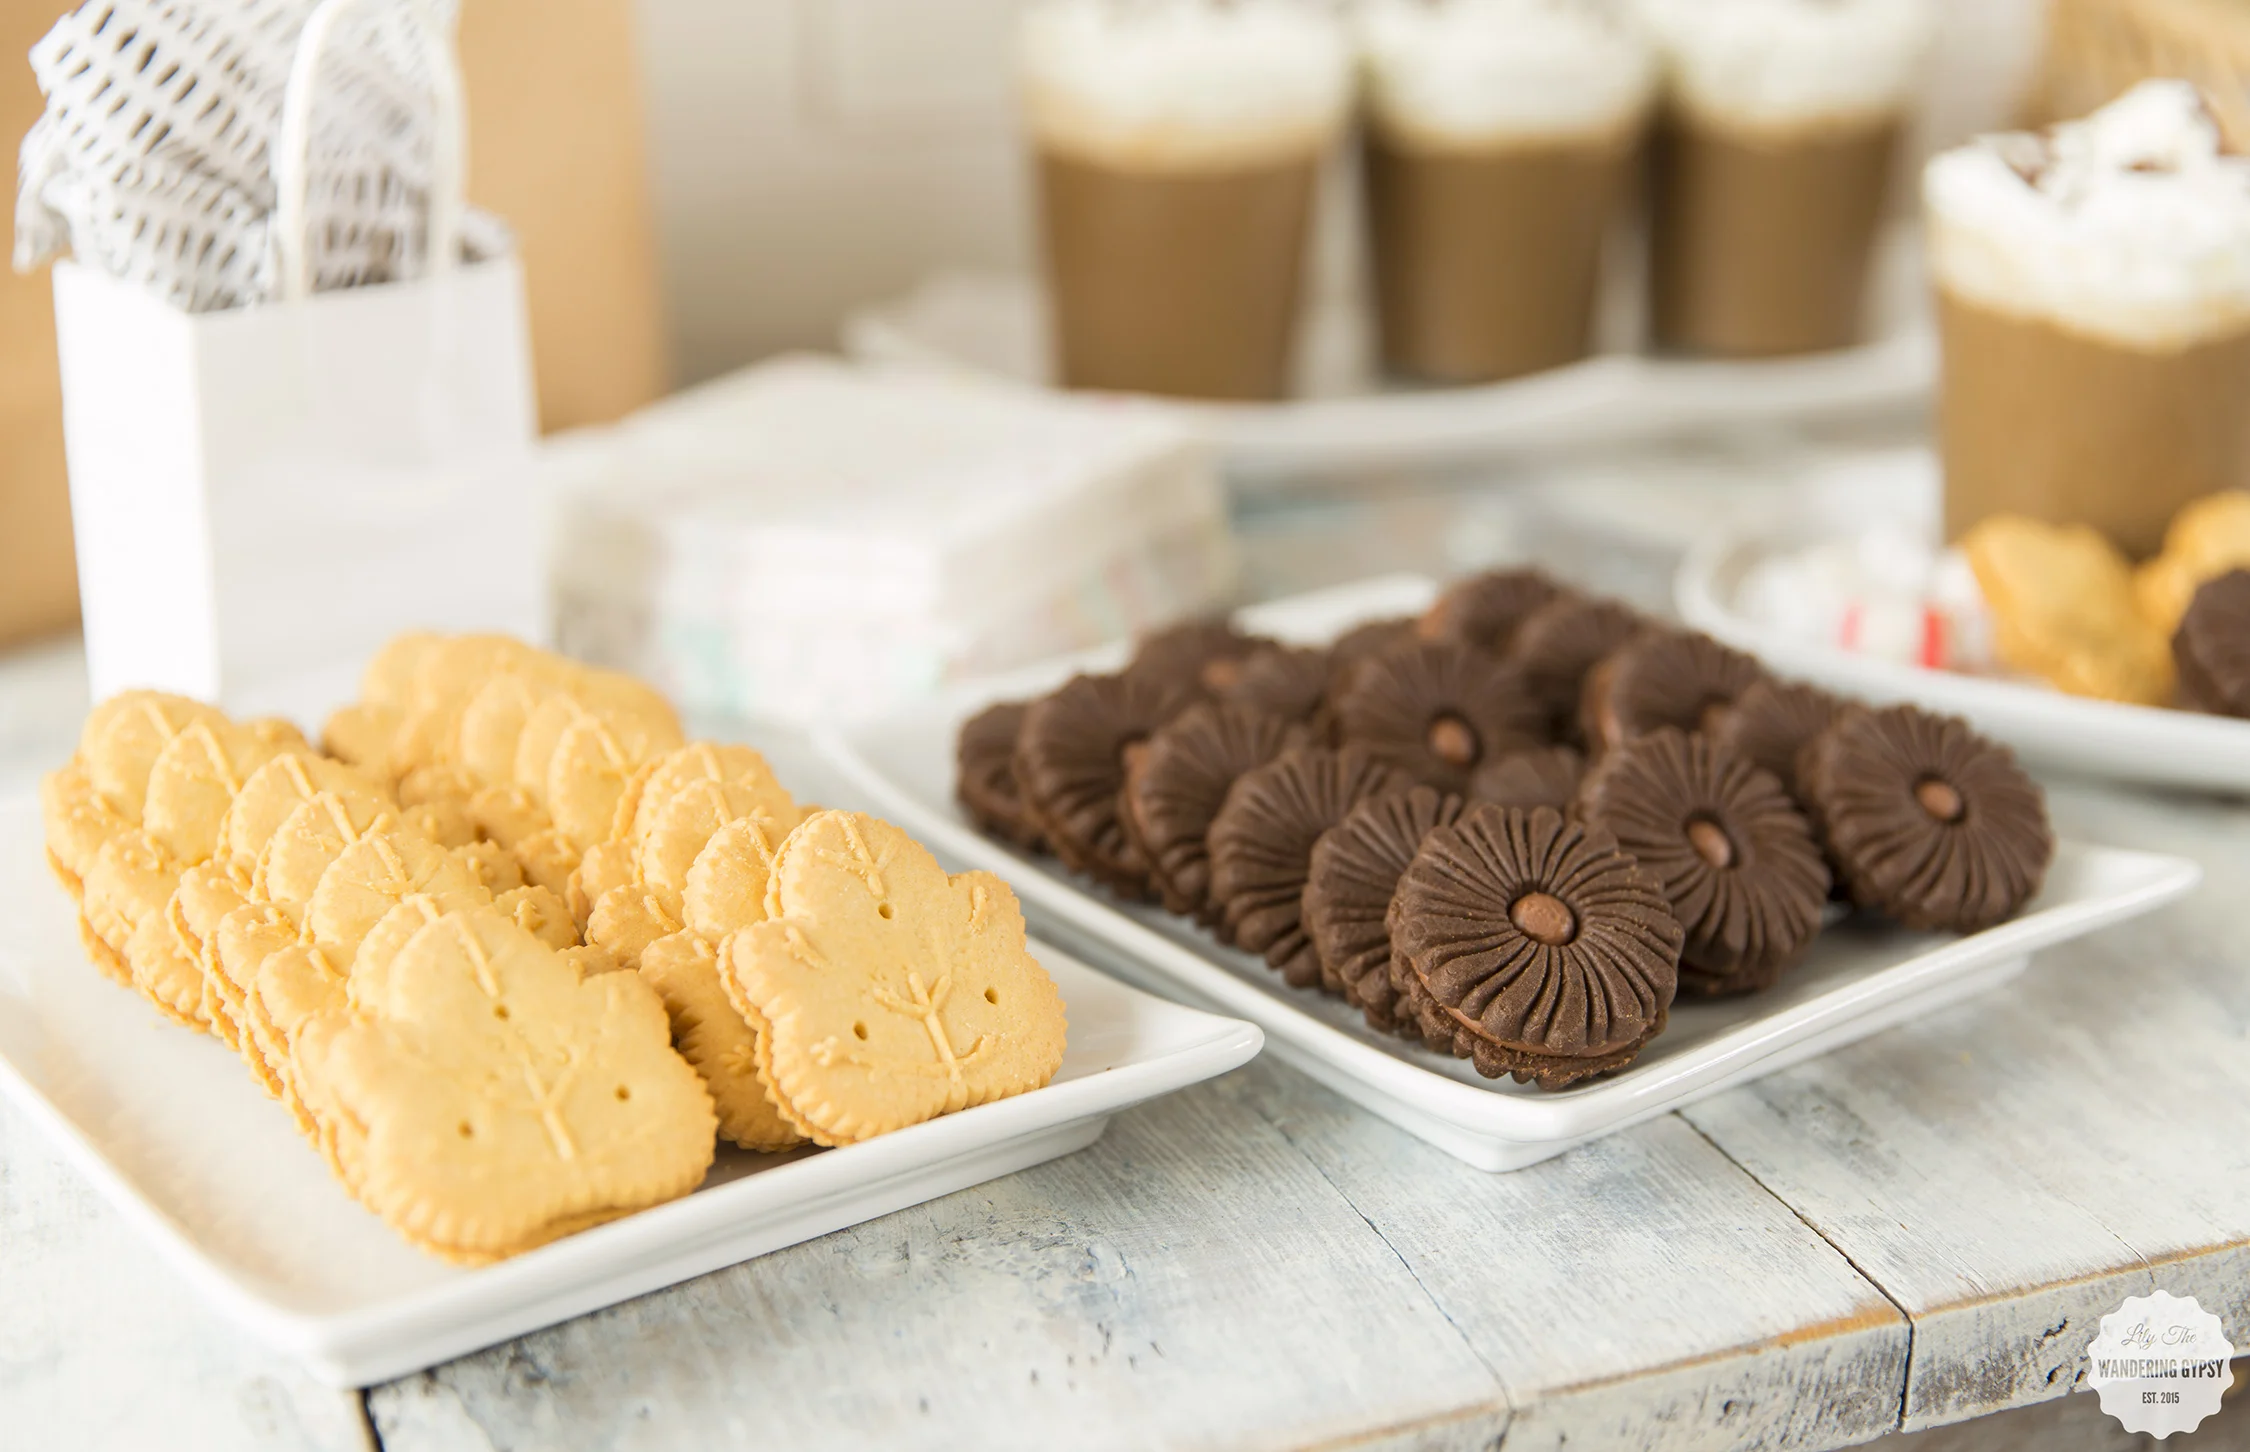
4.) Next, gather up food and drinks. I chose to provide some chocolate cookies, maple cookies, other snacks, AND iced coffee drinks! Feel free to use whatever you want here - the sky is the limit!
PARTY DECOR PRINTABLES:
Print each of these 5 pages once, in color on card stock. Save these images to your computer then print at home or at a copy shop. This costs less than $5 to print on traditional 8.5 x11" card stock.
Page 1
Page 2
Page 4
Page 3
Page 5
MAKING THE BUNTING
I love the how cute these letter flags looked with the pom pom ribbon trim on top.
SWAPPING CLOTHES...
When everyone arrives, have them place their clothes on a table or in a corner of your room. I would suggest mixing everyone's clothes together, then basically sorting everything by type (pants, dresses, shirts, etc) so it's more of an anonymous way to select new clothes.
I thought it would be fun to greet guests with this beautiful party tablescape, then after people have grabbed their snacks and coffee, pile the table with everyone's clothes. You can of course let people spread out in your living room or a guest bedroom, and have everyone sit in comfy chairs and on floor pillows. This way, guests can have a comfy seat while swapping out for friends' clothes.
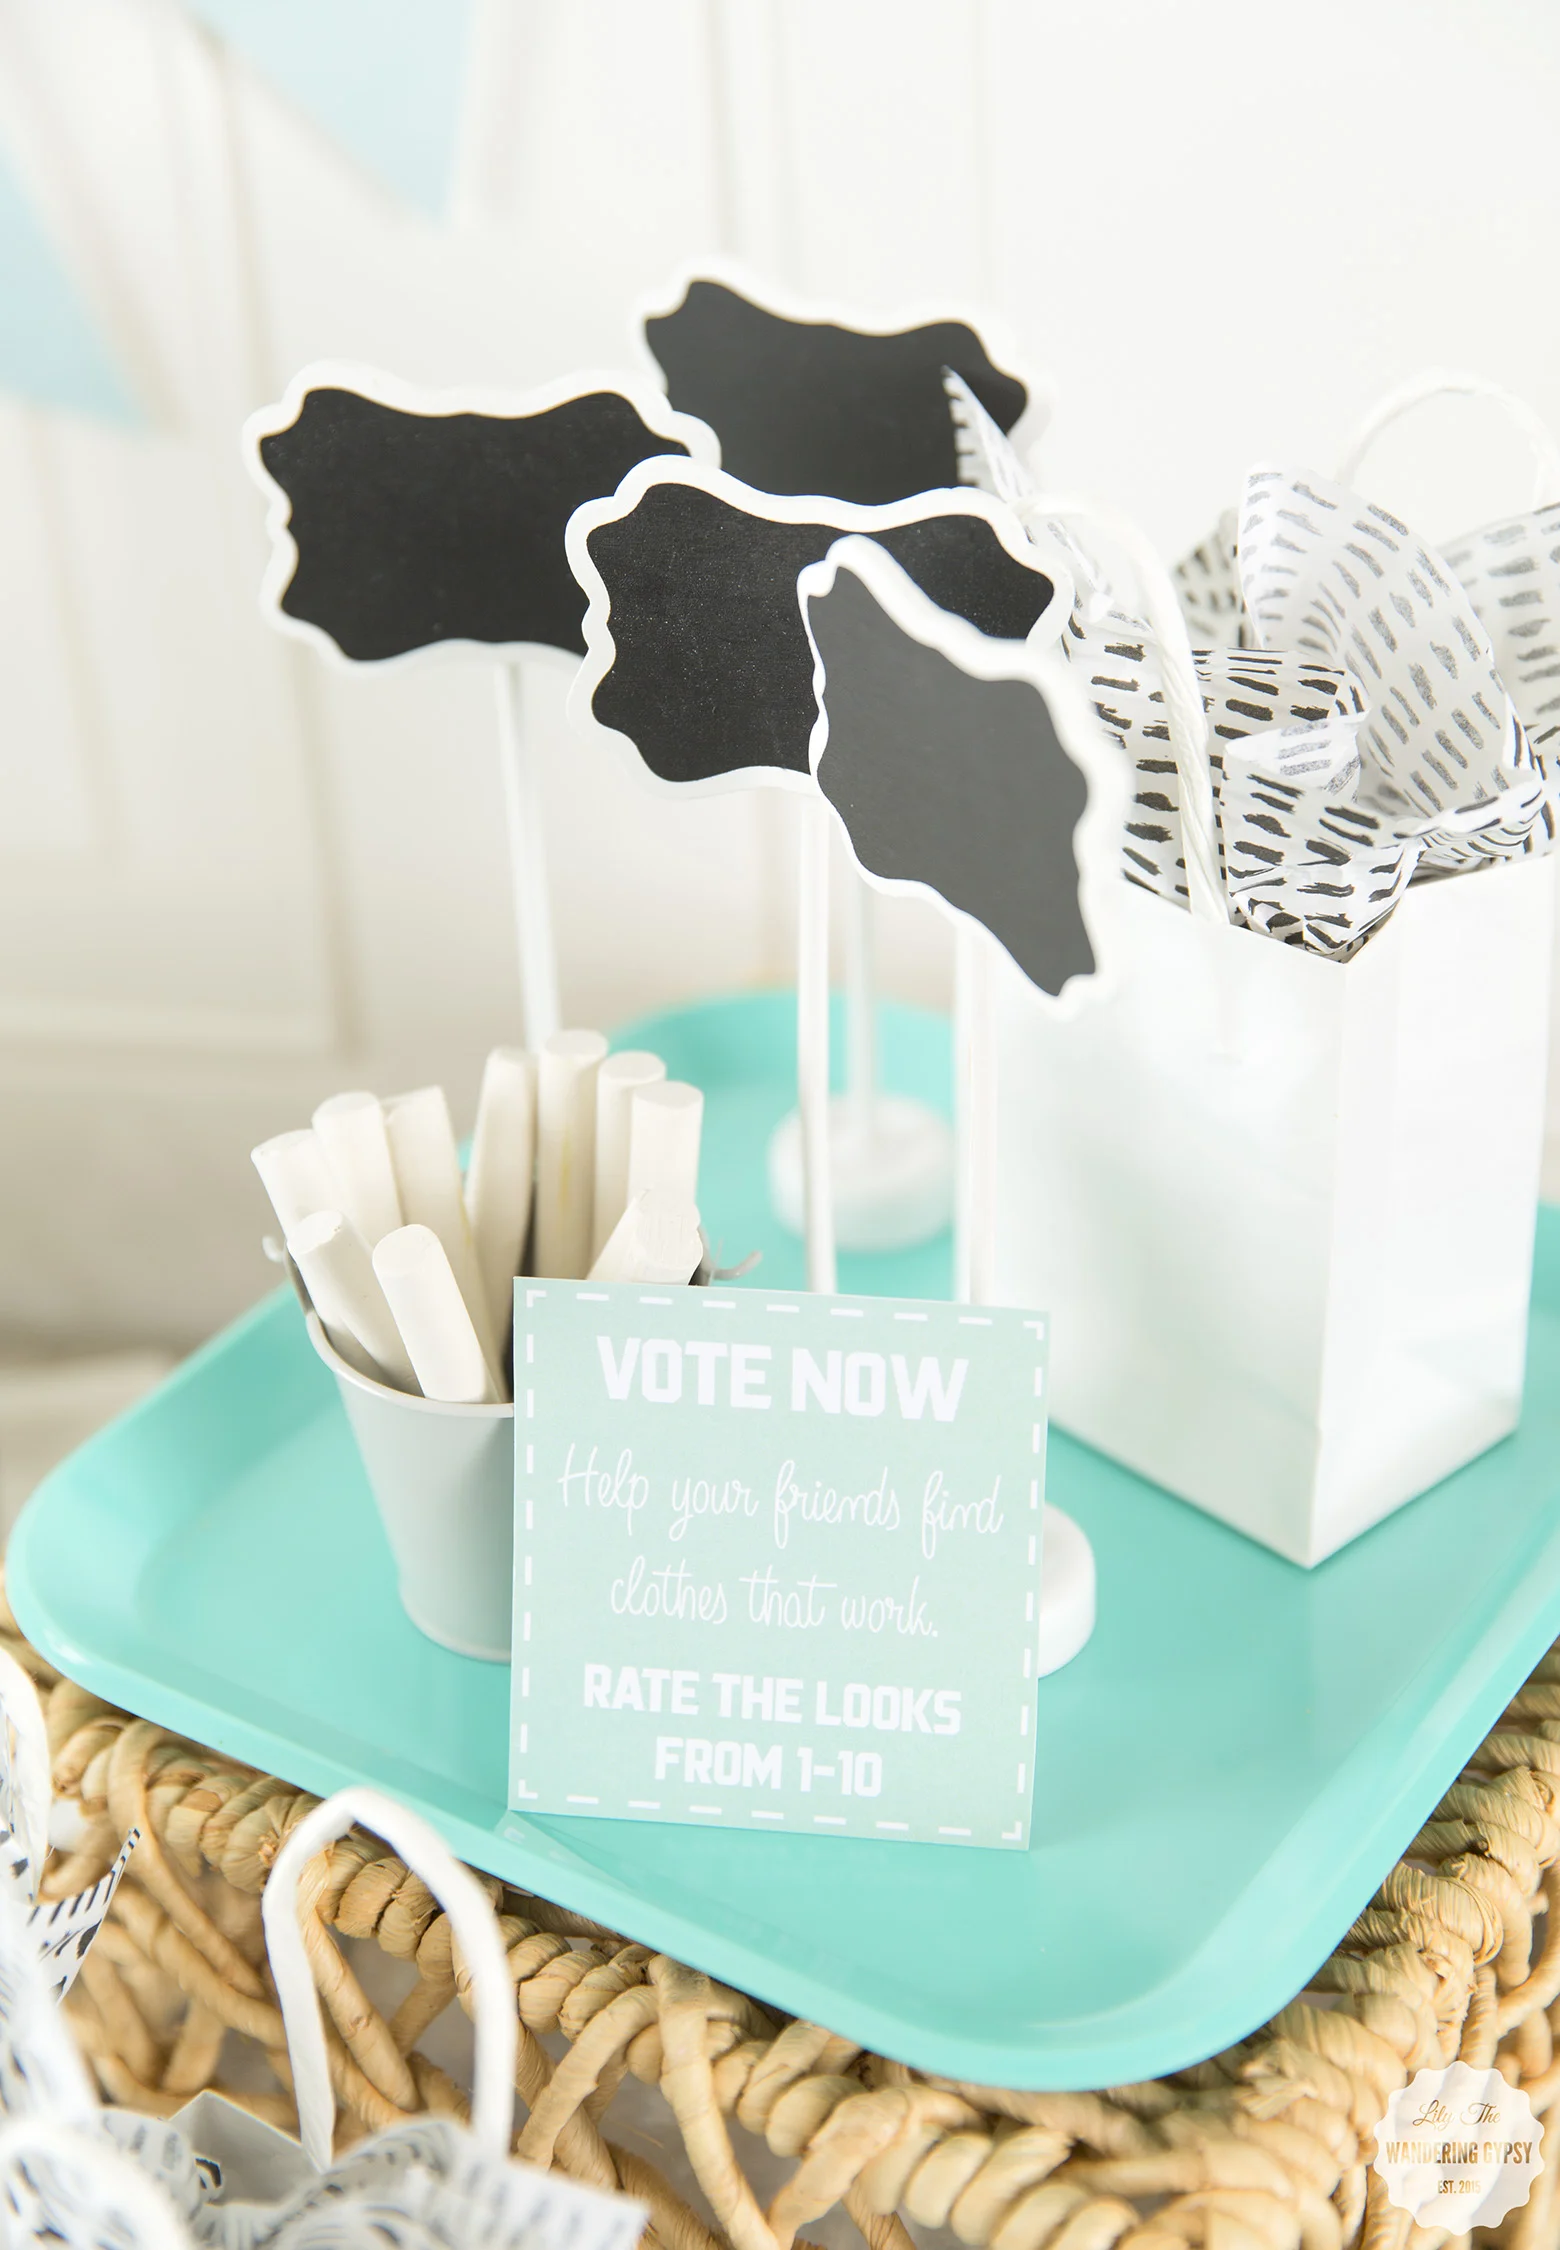
RATE THE LOOKS:
I thought it would be so fun to let guests rate each other's new clothes they have chosen. By writing a 1-10 on the chalkboard signs, you can help your friends decide whether the clothing they chose honestly looks good or not. Kind of like scoring at the Olympics, ya know?!
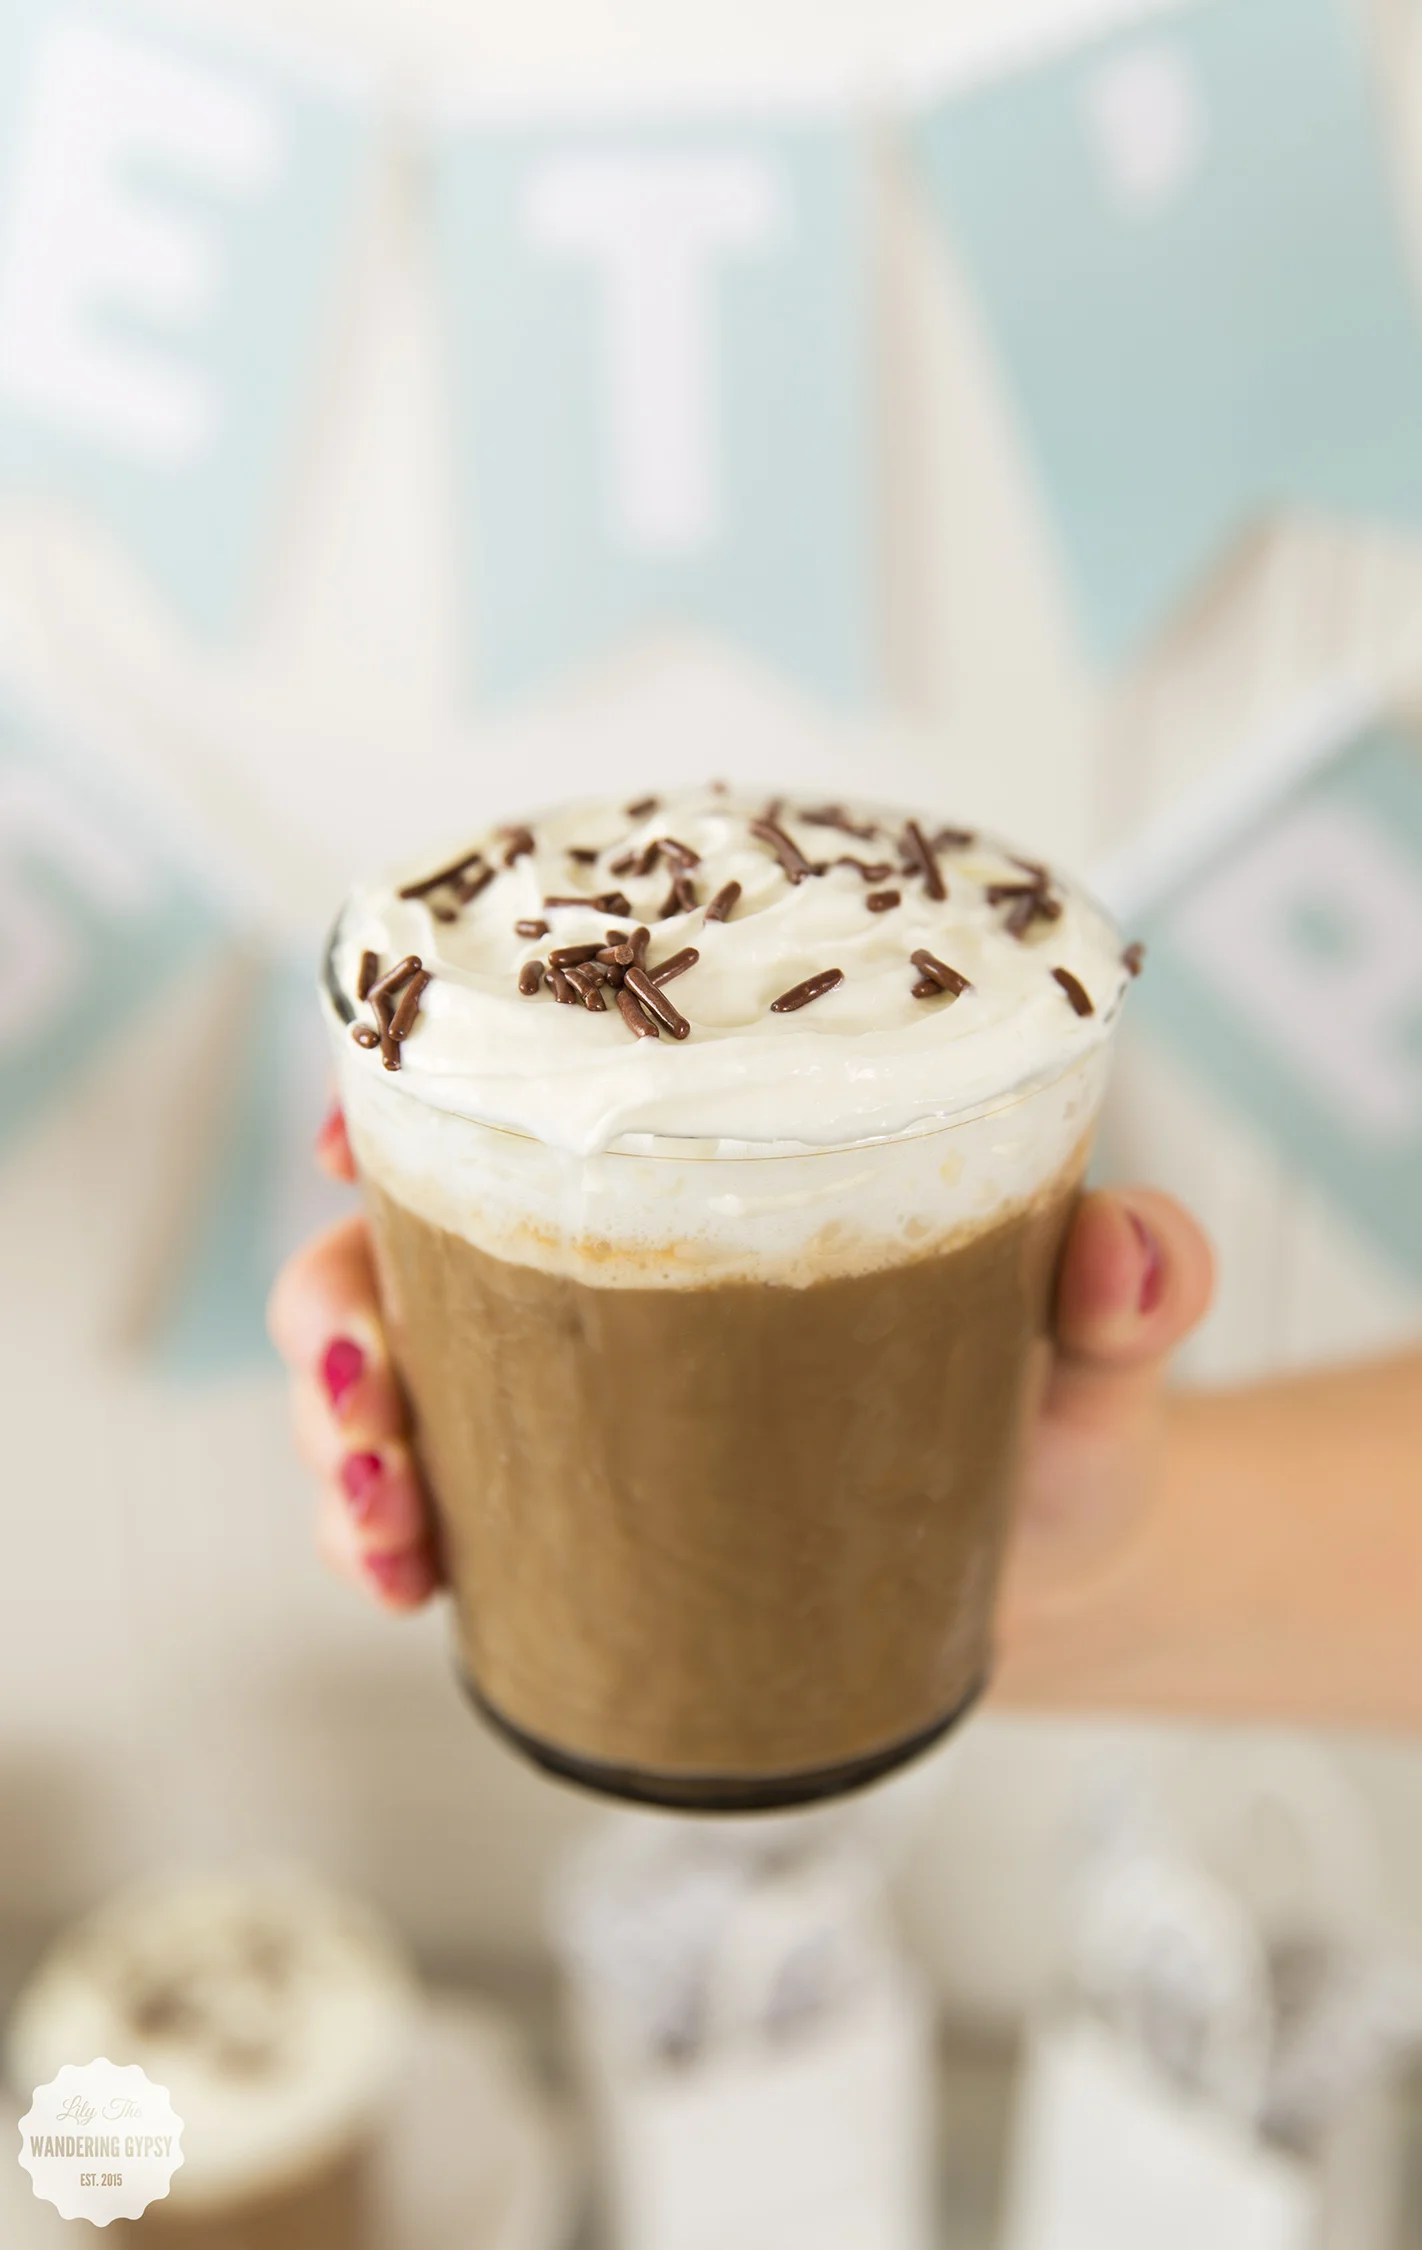
An extremely easy refreshment is pre-made iced coffee from the grocer store, topped with whipped cream and chocolate sprinkles.
I also decorated with smaller paper shopping bags and adorable tissue paper!
How To Create A Halloween BOO Kit (A Dog Gift Basket for Halloween) PLUS 2 DIY Dog Toys
This shop has been compensated by Collective Bias, Inc. and its advertiser, Mars, Incorporated. All opinions are mine alone. #BOOItForward #PawfectBOO #CollectiveBias
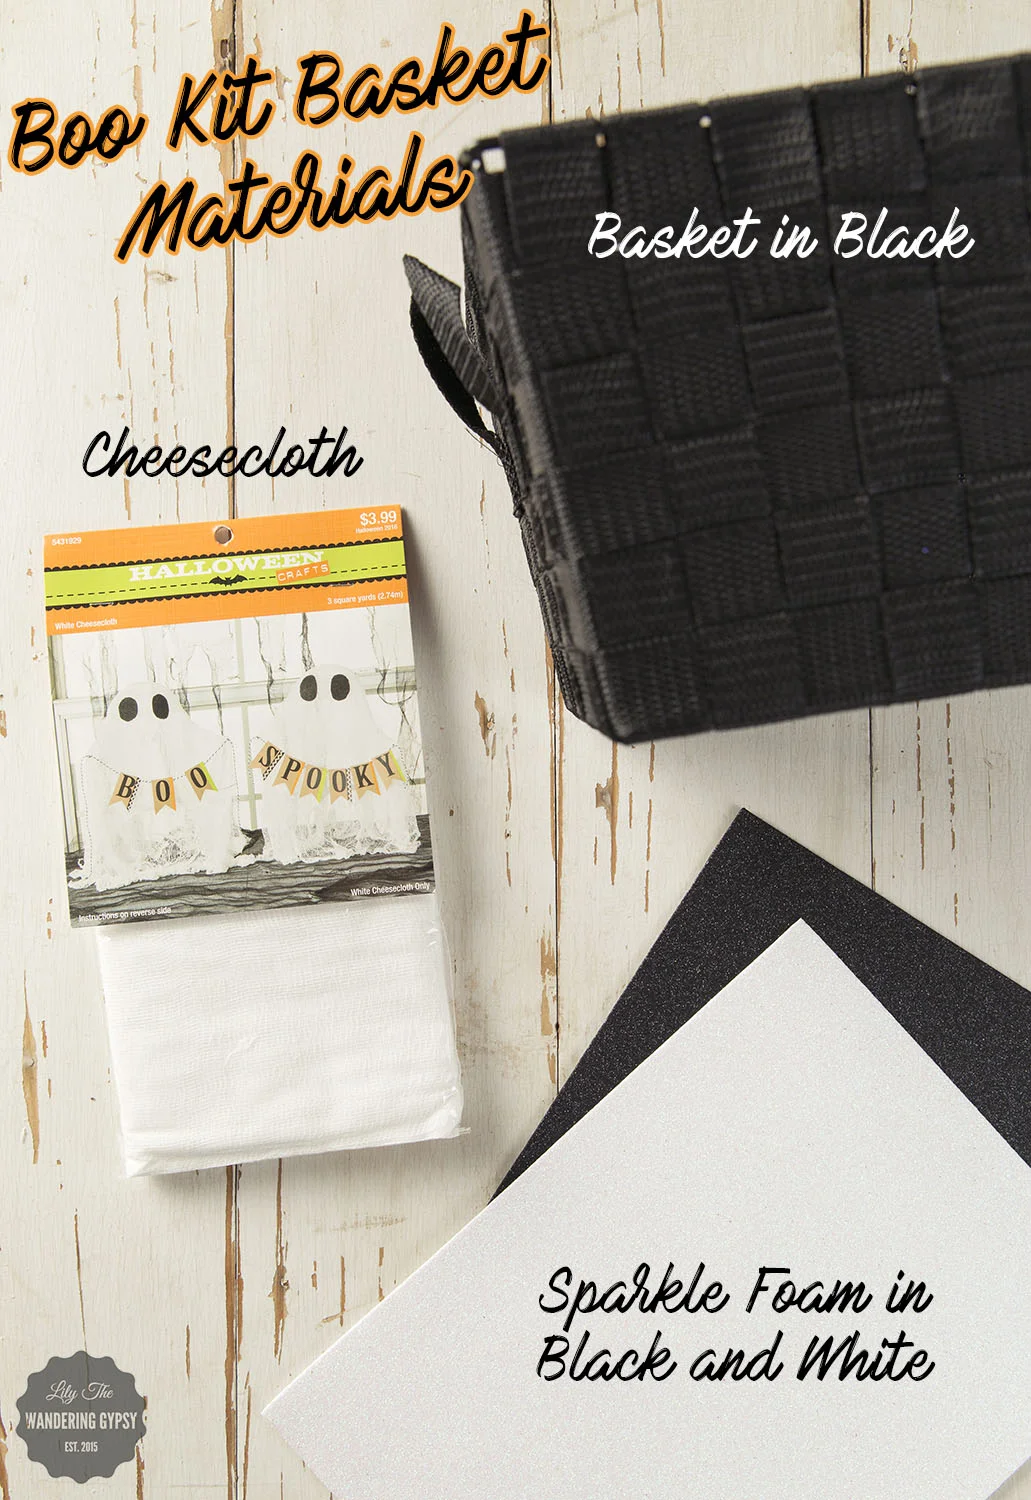
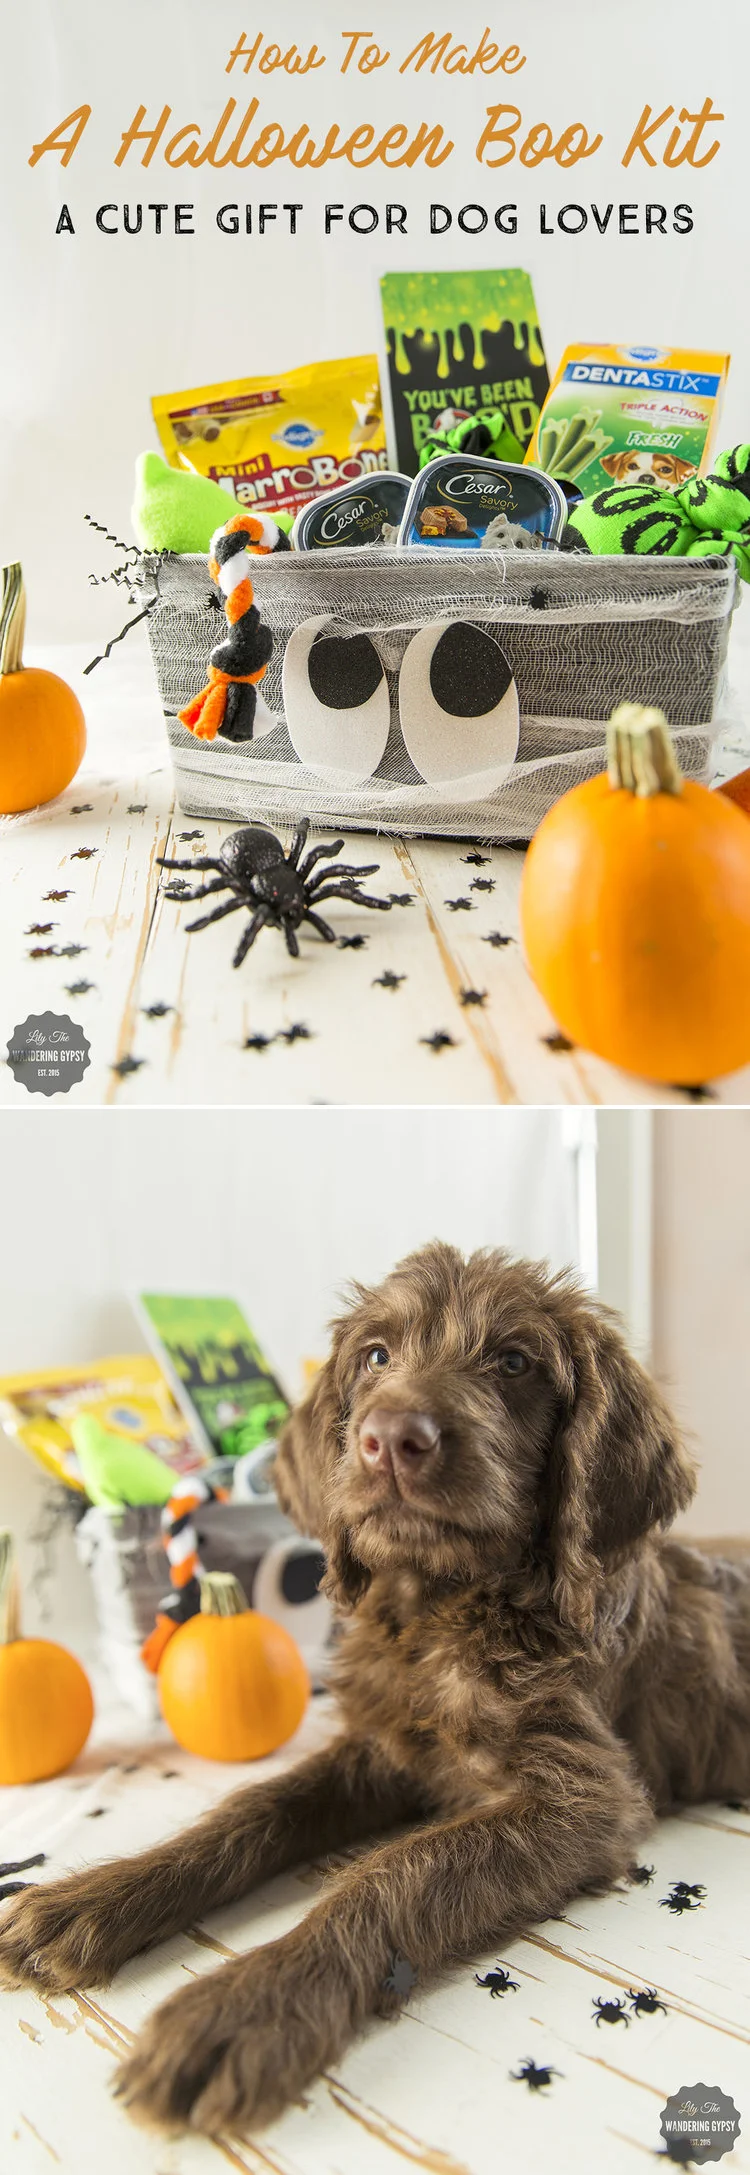
So excited to present you with an adorable Halloween Gift Basket, that can be made with a few simple materials, and then given to someone as a surprise. This is all about gifting a fun, dog-related gift basket and then secretly giving it to someone who deserves it. The person I chose to gift mine to is our long-time family veterinarian, Dr. Tally at Central Hospital for Animals here in Carbondale, IL.
ADD THESE ITEMS TO YOUR BOO KIT BASKET
American Greetings® has a great selection of Halloween Items like treat/candy bags, stickers, tissue paper, gift bags, and Halloween Cards. These would make for adorable and thoughtful additions to fill any BOO Kit Gift Basket!
MY LITTLE HELPER, PORTER
Of course, my little chocolate Labradoodle and Chocolate Lab wanted to help with absolutely every step of this Halloween Boo Basket. They helped me make the toys, and Porter sat still for about 1 minute to help me shoot s few adorable puppy pics :) She just turned 10 weeks and she follows me everywhere.
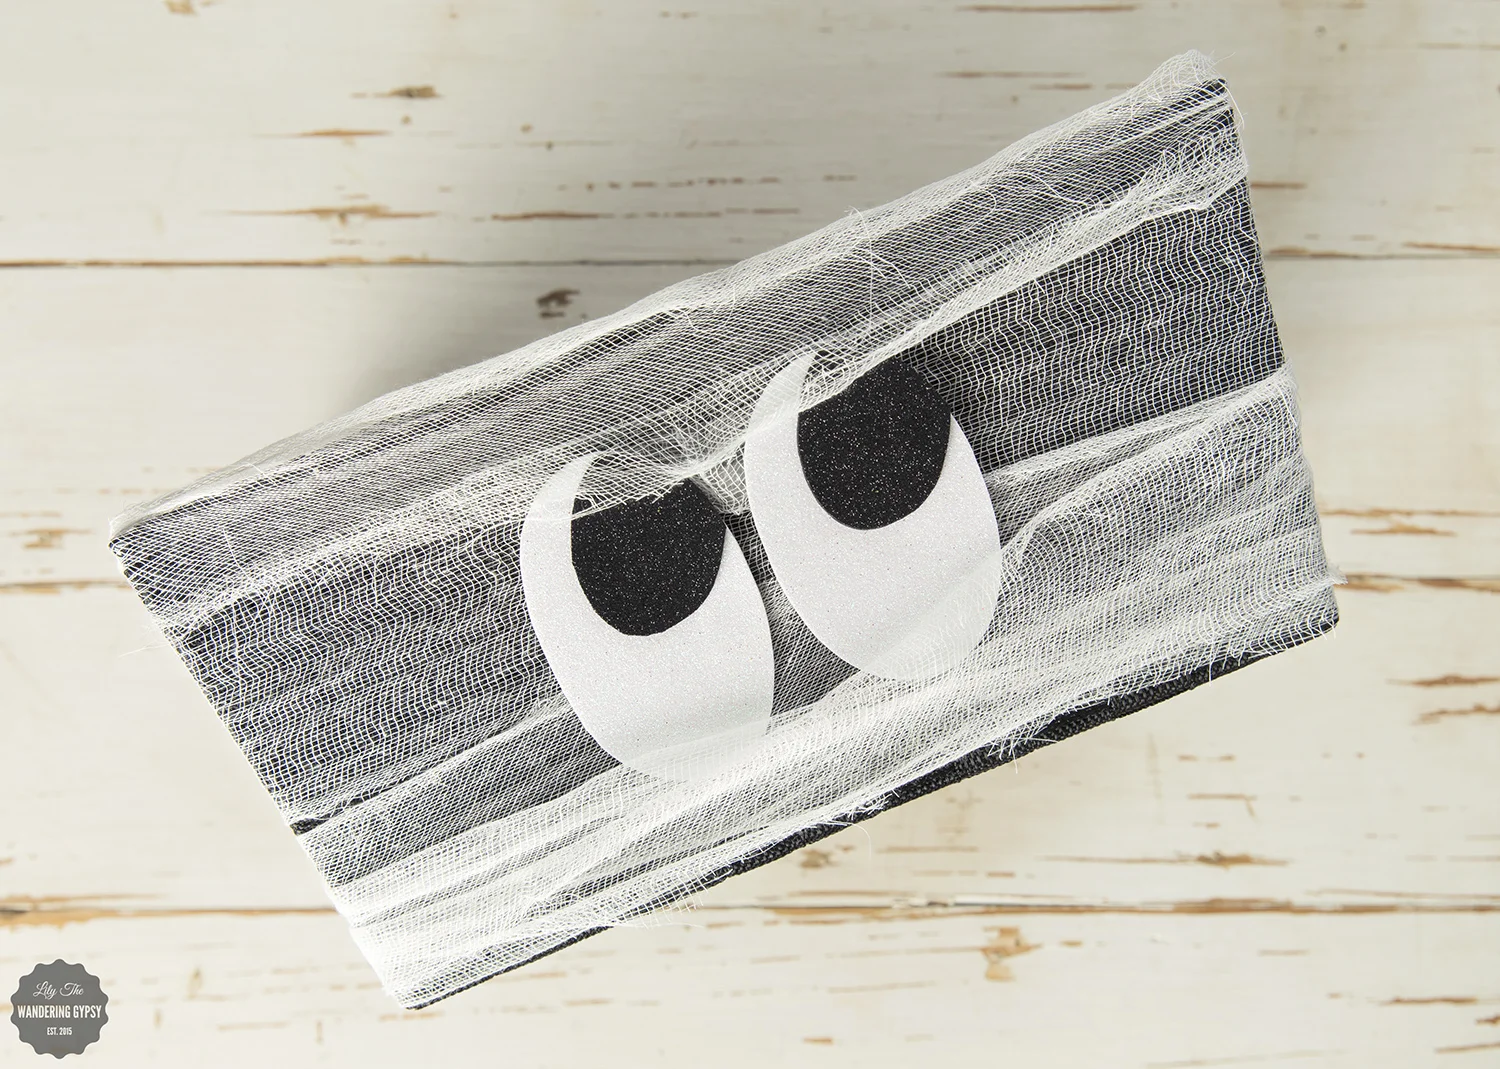
DIY MUMMY GIFT BASKET
MUMMY BASKET HOW TO:
1.) Cut cheesecloth (also called creepy cloth) into 2" strips lengthwise.
2.) Wrap 2-3 strips around the basket and secure with glue in back.
3.) Cut out eyes from the sparkle foam. You will see that I simply cut two ovals out of the white one, then black pupils from the black foam. Glue the eyes to the front of the basket.
4.) Wrap and glue 2-3 more strips of cheesecloth around the basket, making sure to overlap the eyes just a little bit.
5.) Now, you are ready to fill your basket with all sorts of good things! Read on to learn about 2 Dog Toy DIY's, that are so easy!
DIY HALLOWEEN DOG TOY #1
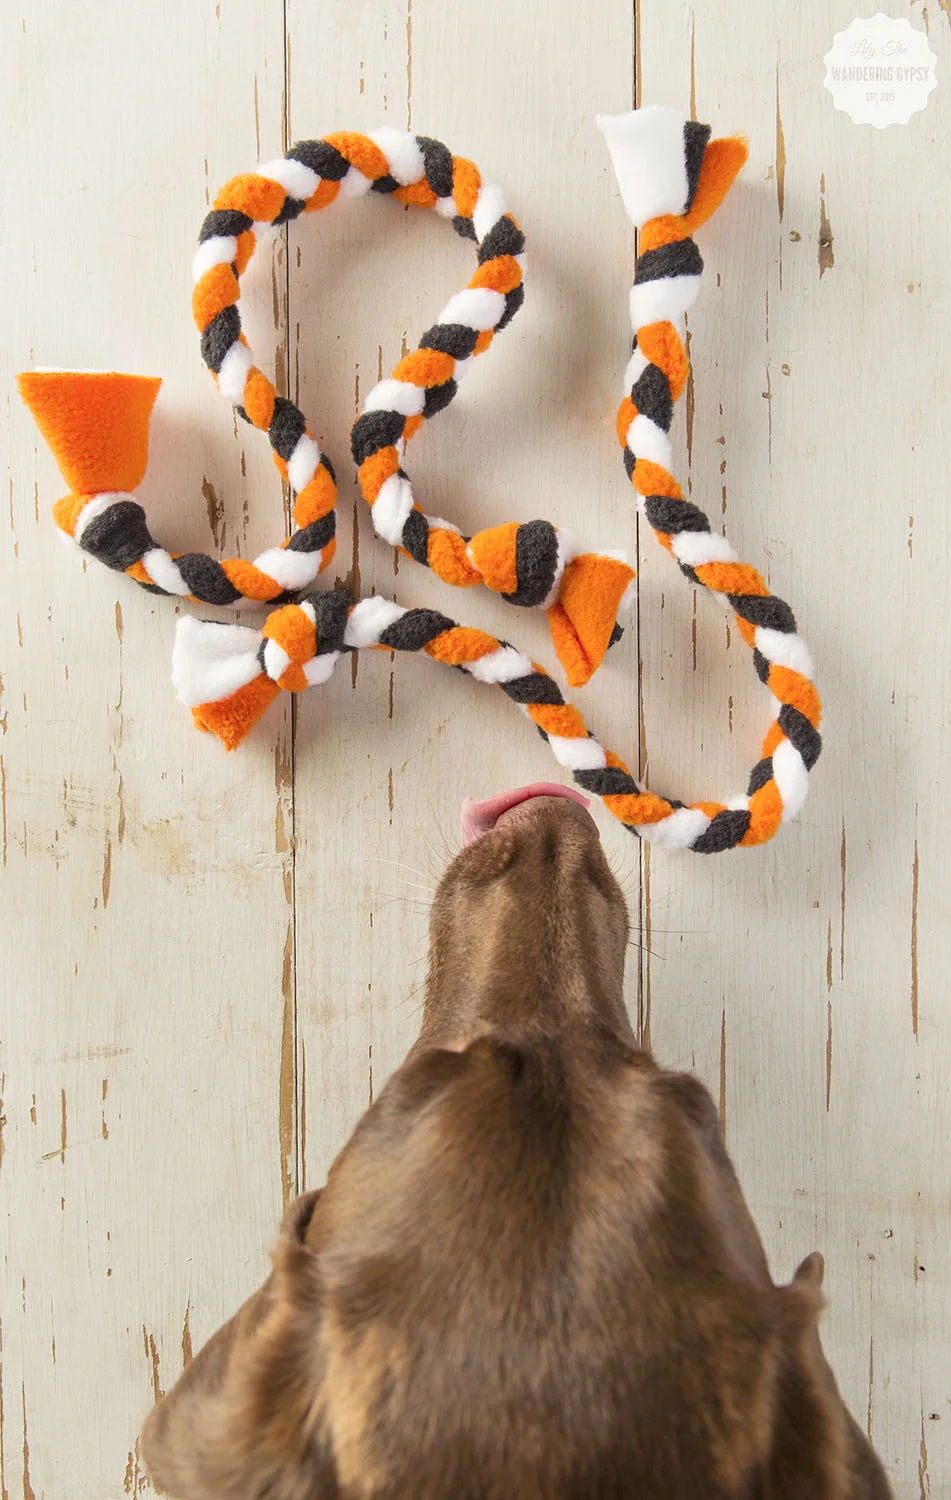
These toys are simple, but my pups really love them. The fleece also cleans their teeth, and this toy gives dogs a really safe toy to play tug with since it's so soft. Here's how to make them:
1.) Cut 3 strips of fleece (any combo of 1-3 colors will do), and stretch the pieces as long as they will stretch.
2.) Tie the 3 pieces of fleece together at the top, and use a clip board to hold the pieces, or ask a friend to hold the pieces while you braid them.
3.) Braid the pieces together, and tie the end up so the braid doesn't come loose. That's it!
DIY HALLOWEEN DOG TOY #2
This simple dog toy requires only two materials - 2 tennis balls, and 2 Halloween Socks. Dogs LOVE these toys so much! Make sure to use supervision when allowing a dog to play with any toy.
SHOPPING FOR BOO KIT SUPPLIES
I found the majority of the materials in this BOO Kit at Walmart. The MARS Pet supplies are all located in the Pet Care aisle at Walmart. I found these items, below, that I added to my BOO Kit.
- PEDIGREE® DENTASTIX™ Fresh Treats Small/ Medium (Doggie Dental Area)
- PEDIGREE® MARROBONE™ Real Beef Flavor Treats Mini (Dog Treats Area)
- CESAR® SAVORY DELIGHTS® ROTISSERIE CHICKEN FLAVOR WITH BACON & CHEESE (In the soft dog food area).
GIFTING THE BOO KIT
I decided to surprise my vet with this fun BOO Kit! I am sure she is going to LOVE it! Who will you surprise with the BOO Kit you create? Please tell me in the links below, and if you make your own BOO Kit, then also share that link too :)
Fall Tailgating + Football Party Tips!
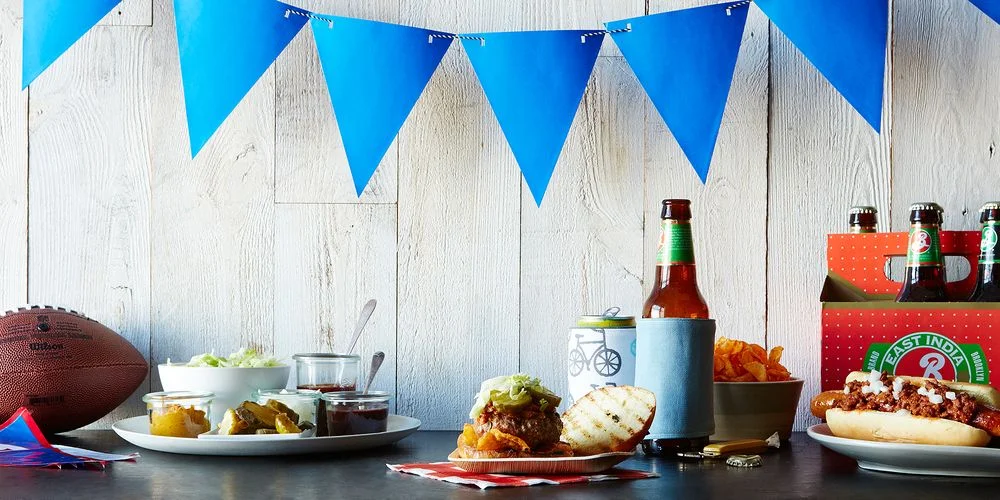
I cannot wait for Fall, and one fun part of Fall is tailgating! Football season, and cooler temperatures make a great excuse to get together with friends and enjoy some good food and drink! Below, are some ideas on making your tailgating and football parties so much more elegant and grown-up. Most of these ideas, from some of my favorite bloggers, are just creative DIY ideas, that don't have to be expensive or time consuming. So, let's get ready for some football...
Serve Drinks From A Pumpkin (Waiting On Martha) - You can simply add some ice to a hollowed-out pumpkin and add beer, or line a smaller pumpkin with a plastic container and add dip for chips or veggies! Learn how Waiting On Martha styled an adorable tailgate party of her own here.
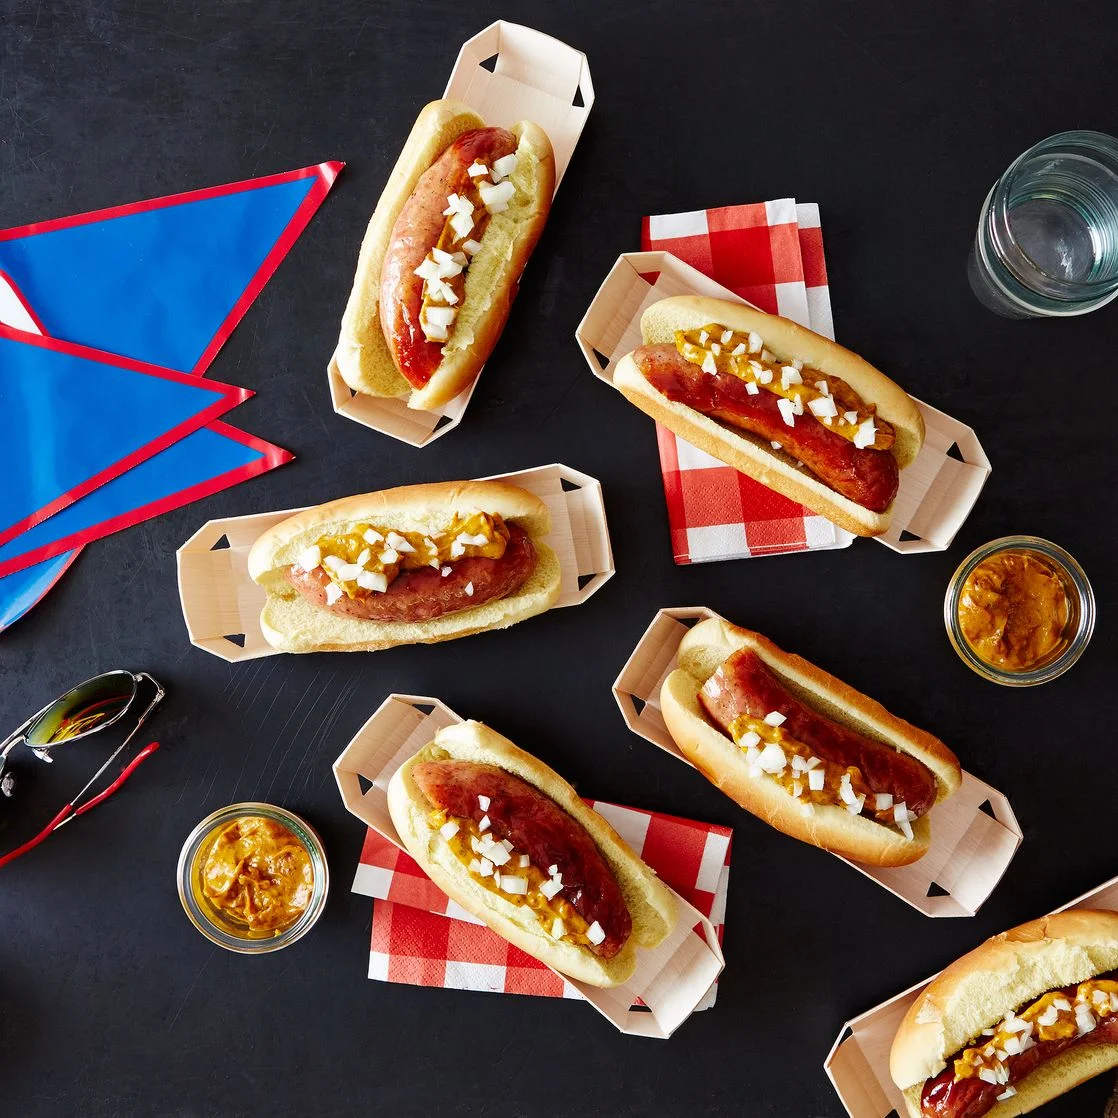
Use Eco-Friendly Plates (Food 52) - If you must use disposable plates and food holders, there are more Eco-friendly options like these compostable wooden hot dog trays and more from Food52.
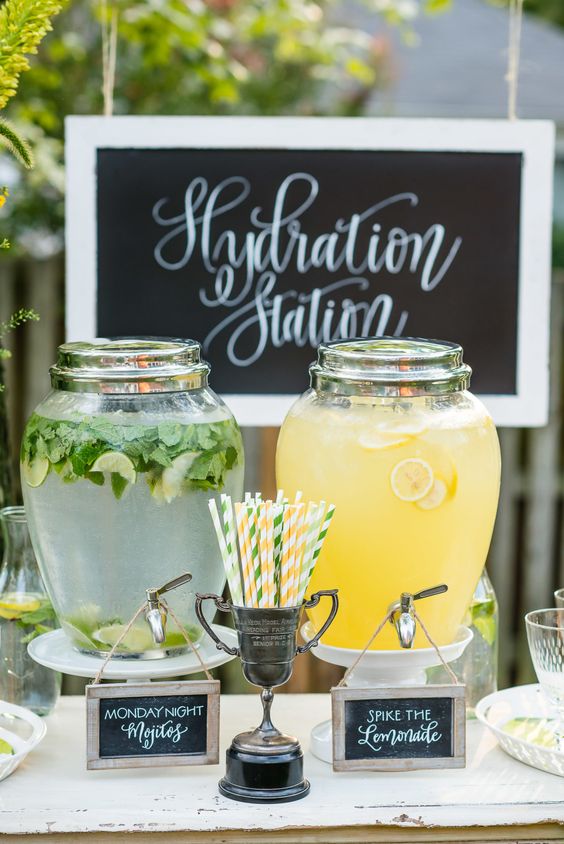
Create A Hydration Station (Style Me Pretty Vault) - Provide guests with inexpensive drinks like fruit-infused water, lemonade, and tea. Learn more about this incredible party, in the Style Me Pretty Vault Files.
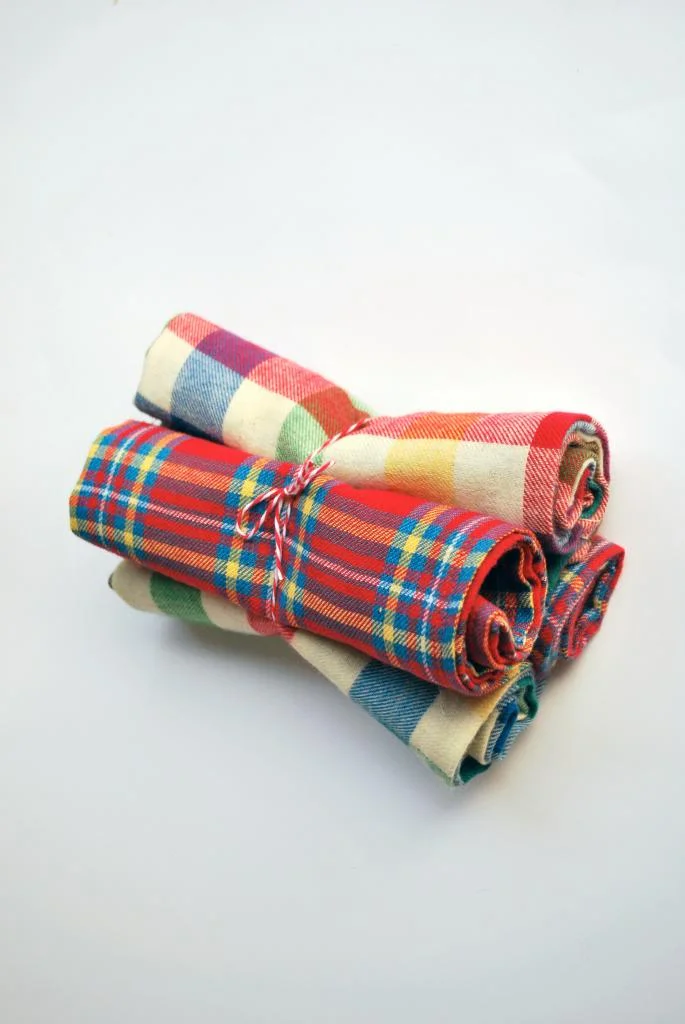
DIY Flannel Napkins (Hey Wanderer) - Follow this cute DIY Tutorial from Hey Wanderer, or simply cut or rip a couple of yards of inexpensive plaid flannel fabric into 16" x 16" squares to provide guests with something more substantial thank those flimsy paper napkins.
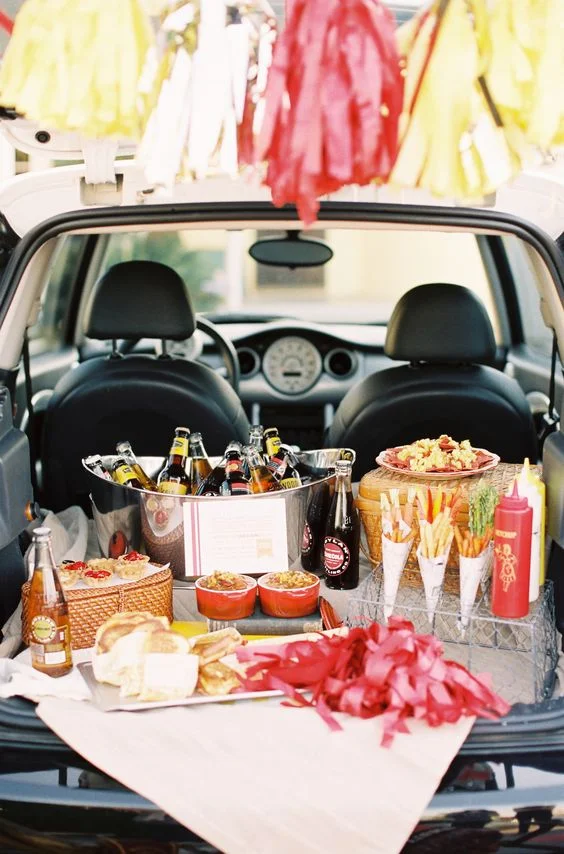
Style Me Pretty & Author Ngoc Nguyen Lay really know how to tailgate in style! This image, below, really shows a great overall party setup! Incorporating vintage items like an ice cream cone holder (used for fries and veggies in the photo), Picnic baskets, metal buckets, and pom-poms makes this setup look elegant instead of over the top. Learn more, here.
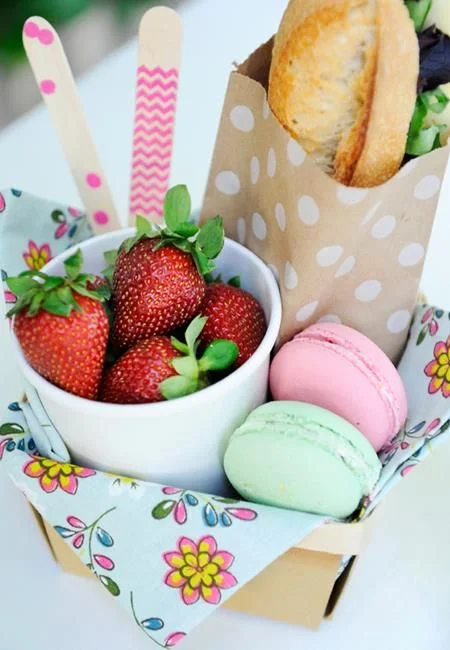
Serve Elegant & Unexpected Treats (Happy Wish Company) - I just love how these macarons, cup of strawberries, wooden utensils, cloth napkin, and sandwich in a spotted paper party favor bag. Find fun party ideas like this one, from Happy Wish Company!
I'm hoping to put together my own set of Tailgating Ideas in an upcoming post, so stay tuned!!
DIY Summer Fun - Washi Tape Everything!
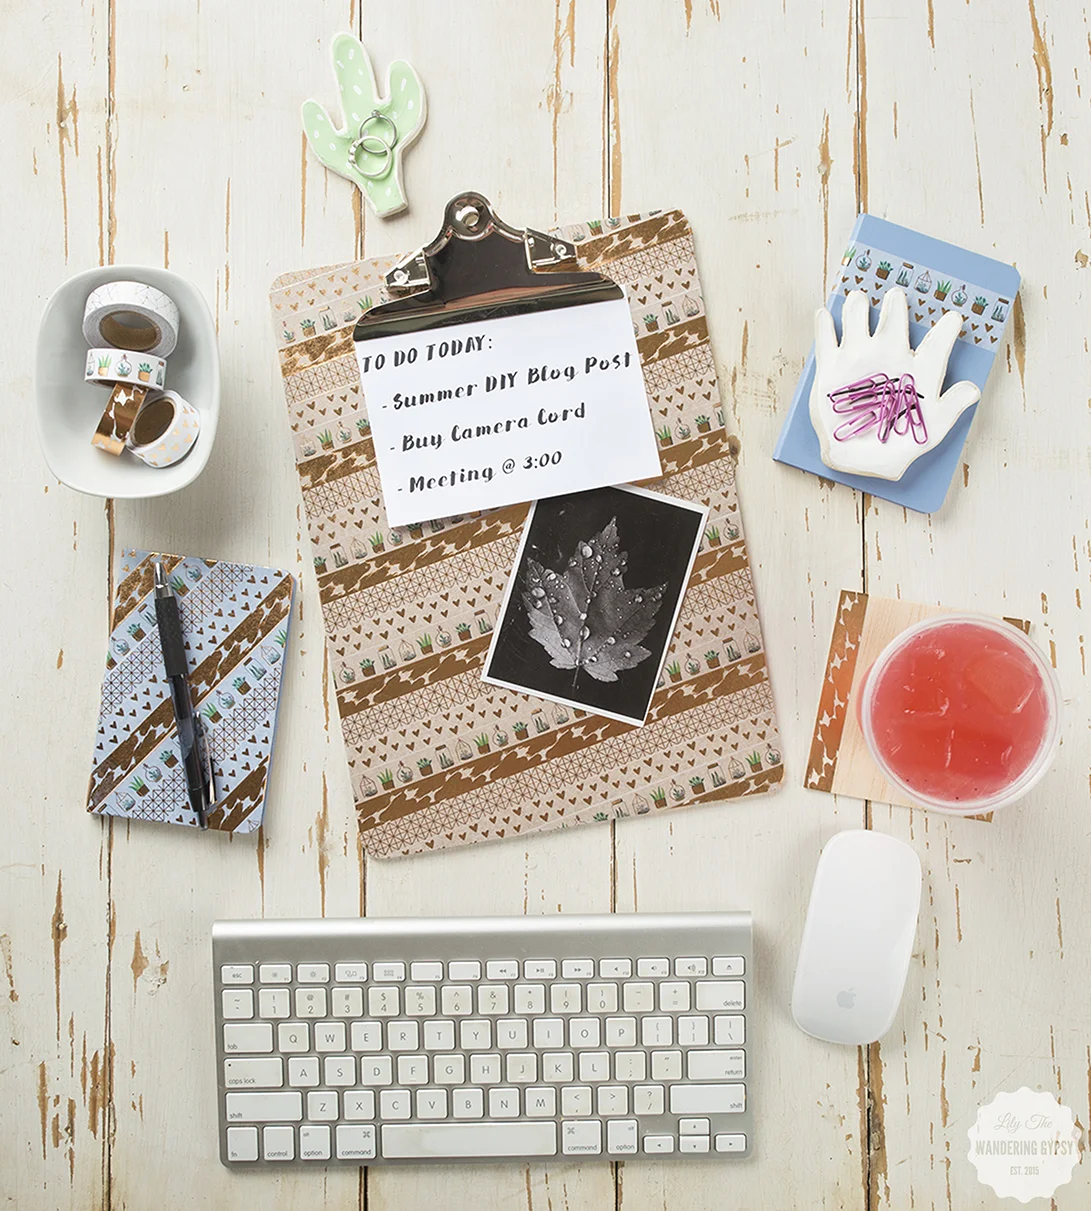
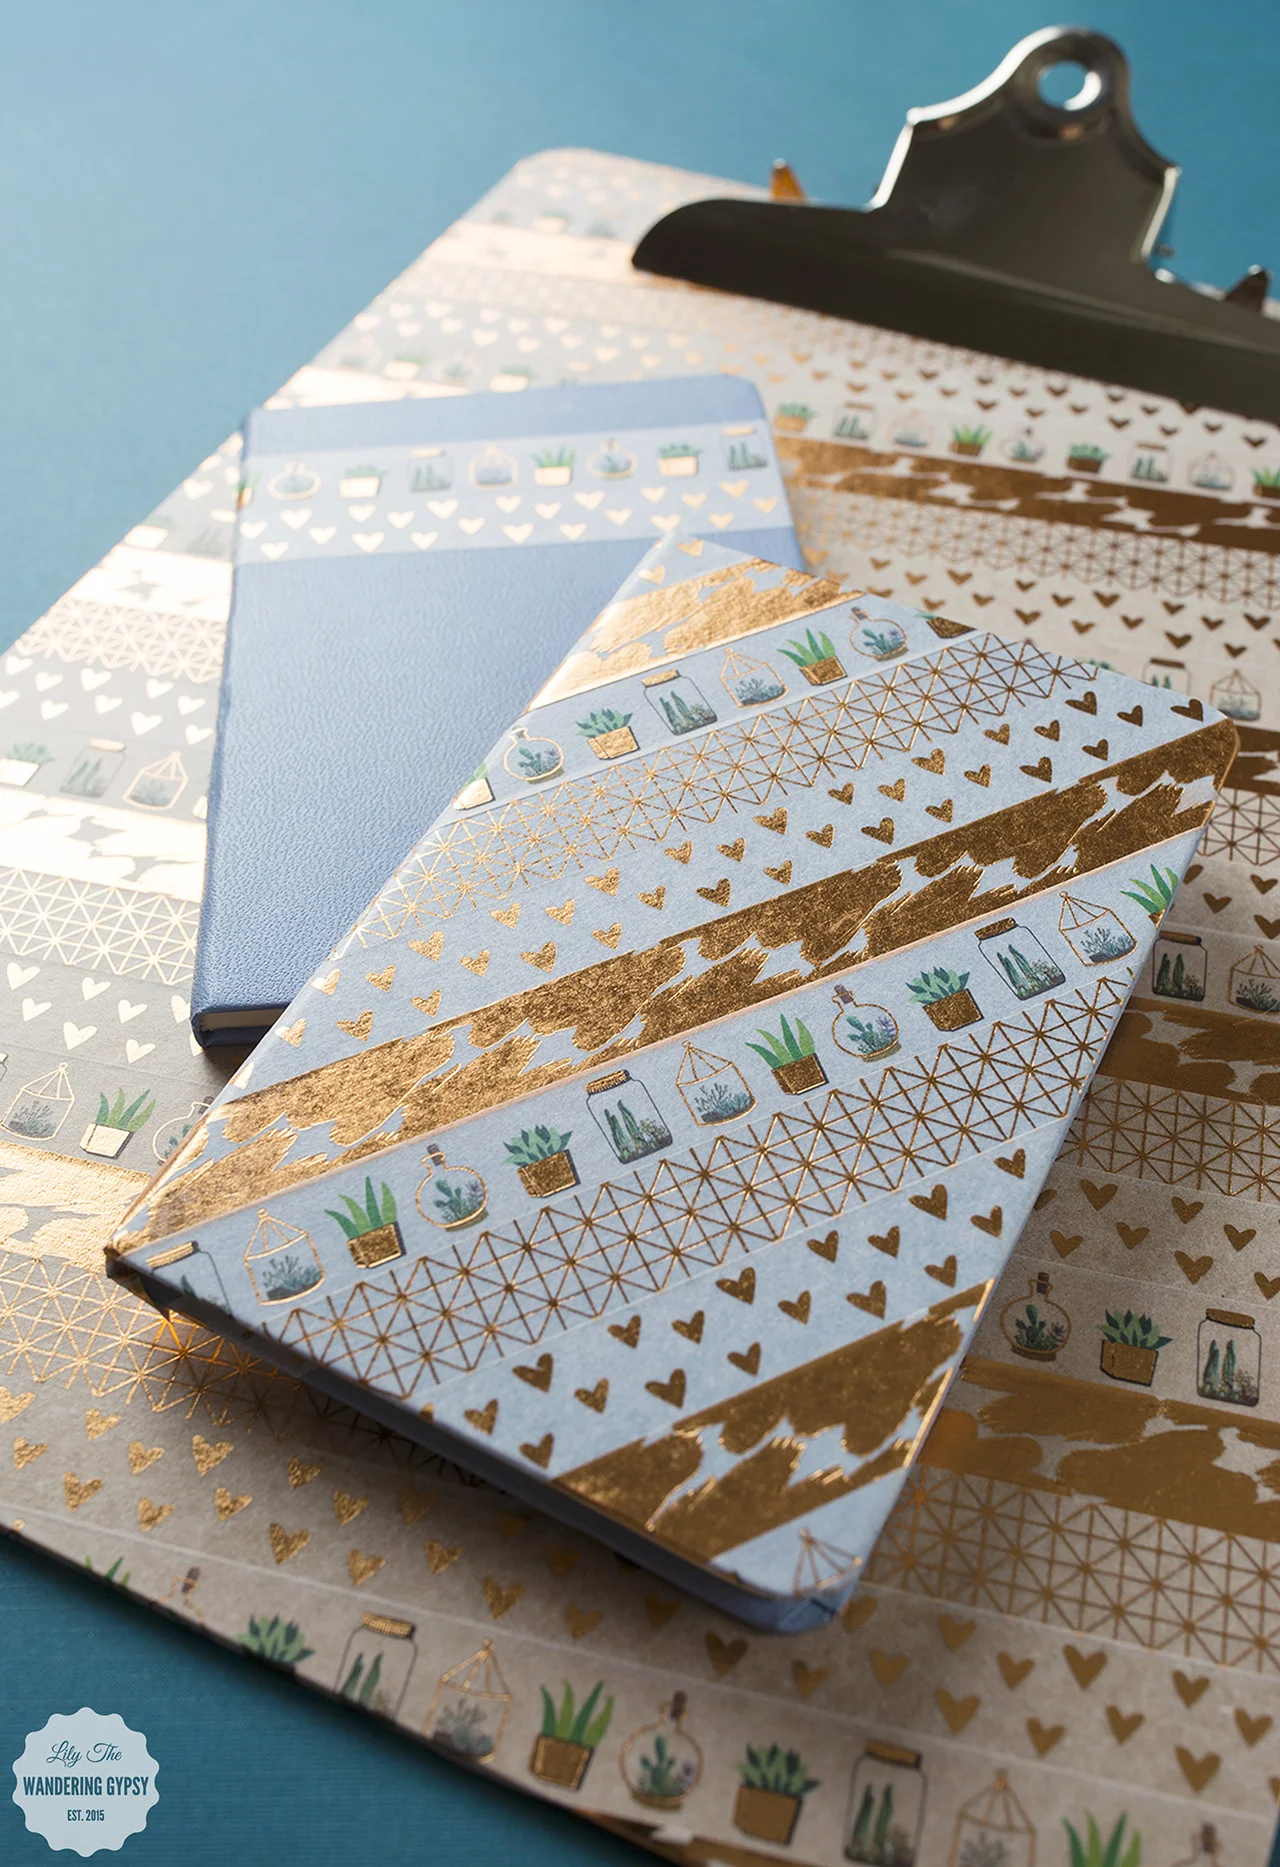
Washi Tape is here to stay, and I absolutely love it! This tape sticks to SO many surfaces, and creates an instant pop of color and a bit of whimsy to anything you adhere it to.
Below, you will find a few items that I covered, to show you how easy it is to update just about anything on your desk and around your home!
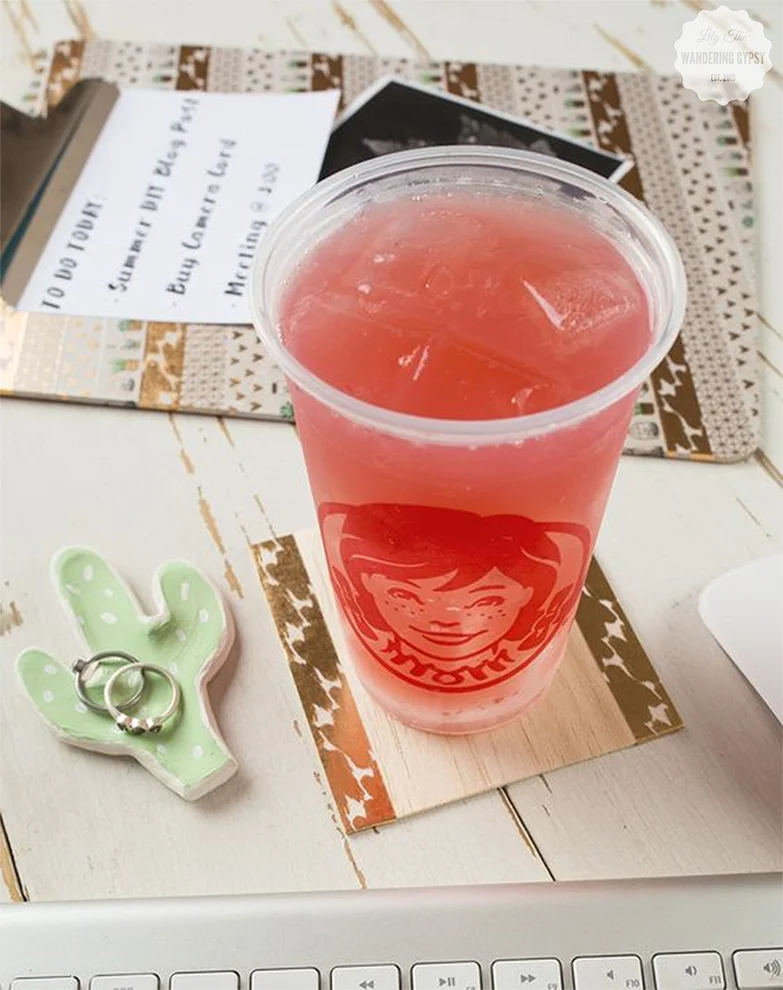
I created these photos for a fun campaign that I helped share for Wendy's Blackberry Lemonade. I loved creating this DIY project for such a well-known brand!
I covered an assortment of items, including: A clip board, wooden utensils, blank journals, and paper gift bags! Seriously, this project was SO fun!!!
DIY Summer Fun - Pineapple Gift Boxes
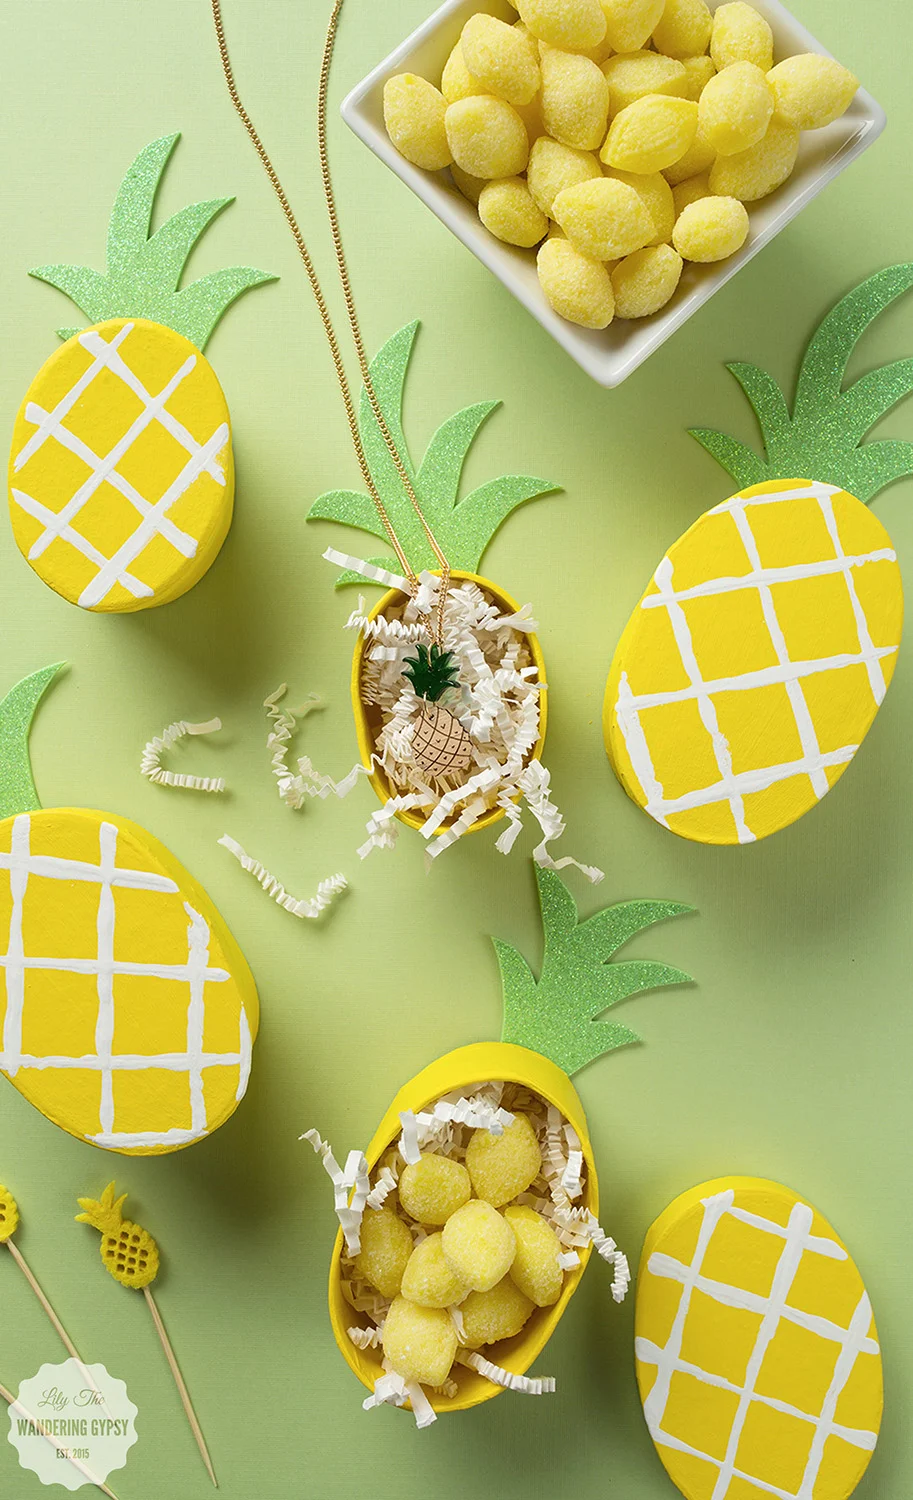
There's no doubt that it's summer, why not embrace it and make something cute inspired by tropical breezes (wishful thinking), and pineapples! Why not make someone smile by creating a gift box that is a present in itself. I made this project a little while back in order to help Wendy's to help promote their Blackberry Lemonade. It was just the right amount of tart and sweet, wrapped up into one pretty drink! What will you be making and gifting this summer?
This post was totally inspired by the amazingly awesome blog, Damask Love!
- Oval-shaped Paper Mache Boxes
- Yellow Paint, White Paint
- Paint Brush (to paint over entire box)
- Wooden Skewer Sticks (to paint white marks on boxes)
- Paint Brush
- Mint Green Sparkle Foam Sheet
- Glue
- Gift Items or Candy to fill boxes
1.) Cover your work surface, and paint your boxes yellow. I used 2 coats, but they dried pretty quickly.
2.) Make sure your yellow paint is 100% dry, then with a skewer stick, draw/paint the lines onto the boxes. I basically put the white paint onto a paper plate, then laid the skewer sticks down, covered the end in paint, then drew the lines across the boxes. This helps you create super straight lines, too!
3.) Now, cut out your green top parts. Feel free to print the photo, below, to get the right shapes. I just sort of free-handed one, and traced it on the non-glitter side of the foam. These were so easy to cut out!
4.) Now, simply glue the little green top pieces onto the boxes, and you're done!! Fill them with paper shreds, and whatever your heart delights!
A Cute Desk Decor DIY & Celebrate Back To College With Big Lots
This shop has been compensated by Collective Bias, Inc. and its advertisers. All opinions are mine alone. #BigLotsReady #CollectiveBias
I am here today with a cute DIY idea, and tips on how to design a space for a woman who is shopping for back-to college items, and wants to learn how to maker her space her own. My sister, Ellen is such a talented person. She is going to be a Junior at the University of Louisville, KY in the nursing program this Fall semester, and I couldn't be more proud of her! She will be receiving her BSN in no time at all! She is my complete inspiration for this post! She is so talented, and she is a gifted artist and designer.
Read on to see more about the space I designed for a woman who is in college and needs a beautiful space to work! The directions for a DIY Background Inspiration Board are below.
Get tons more inspirations, and shop all of the Back-To-College items here. And, click around on the image below, it's shoppable!
Meet my sister, Ellen!
I shopped at my local Big Lots for many of these items, and I could not believe hoe friendly and helpful everyone was! The main cashier knew exactly right where everything was, and I was happy to find so many of the items available in-store. I also found lots of items that coordinated with my coral and mint theme, so I grabbed a few extra items while there. Another option is to shop on biglots.com, if you want an even broader selection of colors or want to see the entire line of back to college gear.
No matter what your style, Big Lots has some super cute home decor items that will inspire a cute color combo, or even an overall theme to your new space, from college dorms, new apartments, or any work space. In addition to the items I featured here, Big Lots also has: mattresses, furniture, small appliances, bedding, sheets, pillows & throws. These items will fit into lots of popular decor trends, for both guys and girls.
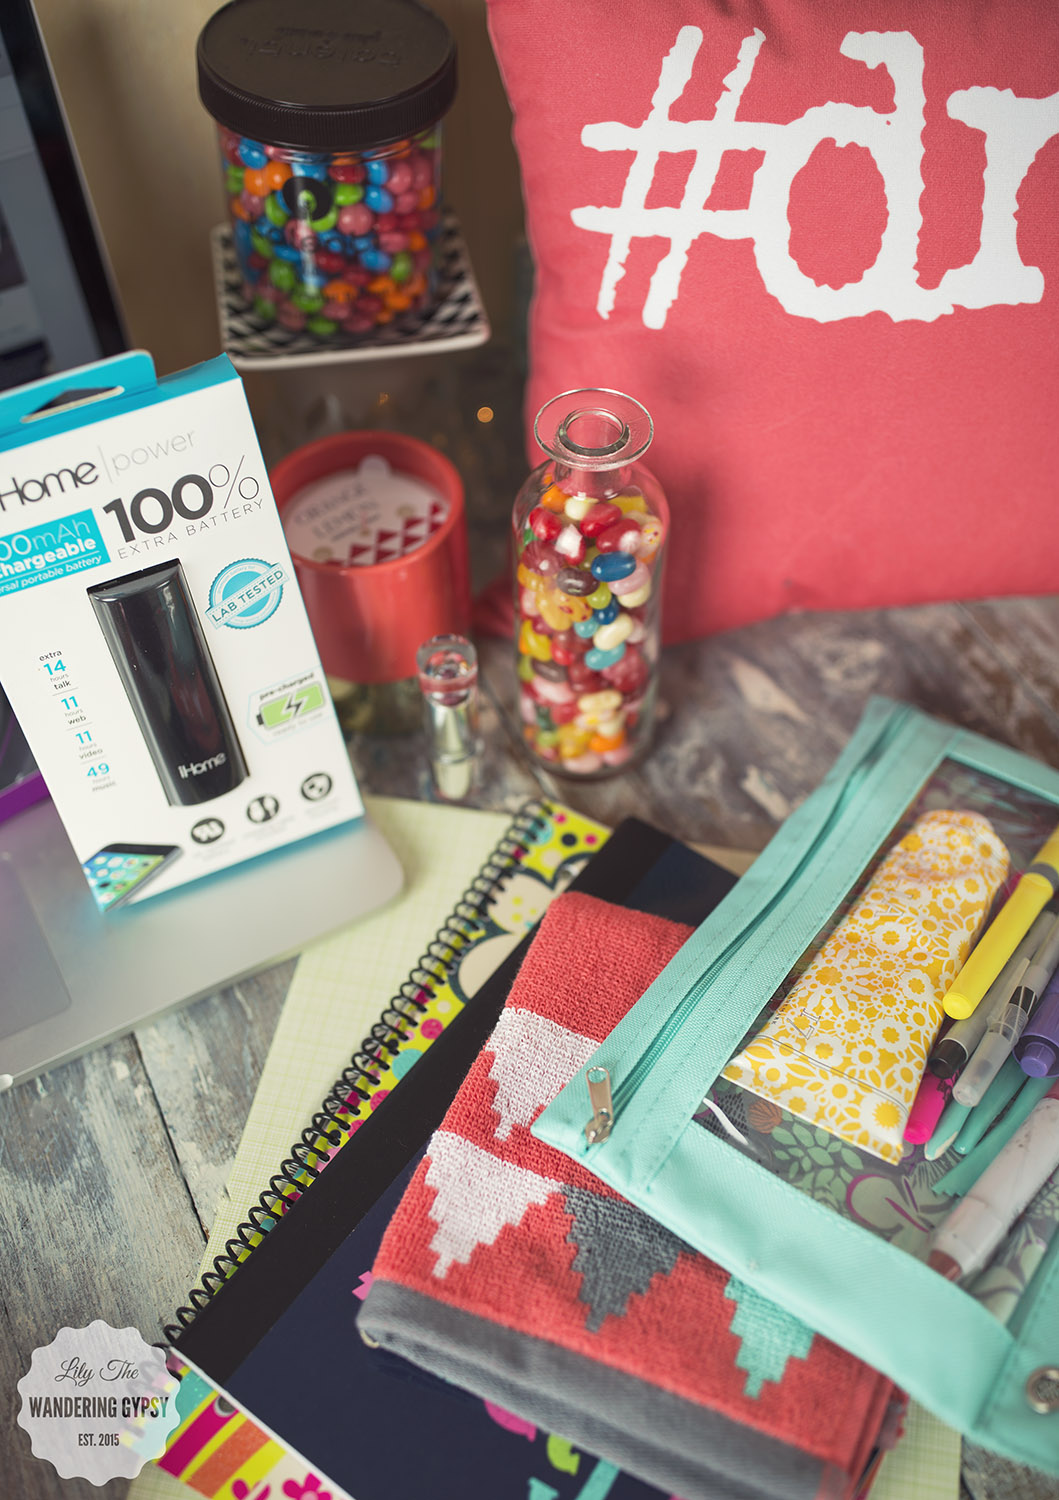
And, there were way more electronics than I could have imagined! They're all stocked up on items like extra battery packs for charging your phone and small devices (see photo, right), as well as cute headphones in literally every color imaginable.
I also found a ton of other apartment/dorm/new place ready items like Ninja blender, lots of vacuums, toasters, pots and pan sets, plates, dishes, cups, silverware sets, and a good selection of curling irons, and other bathroom items. I always like checking out the beauty aisle, you never know what sorts of hair products, lotions, and even gift items for your new roomies!
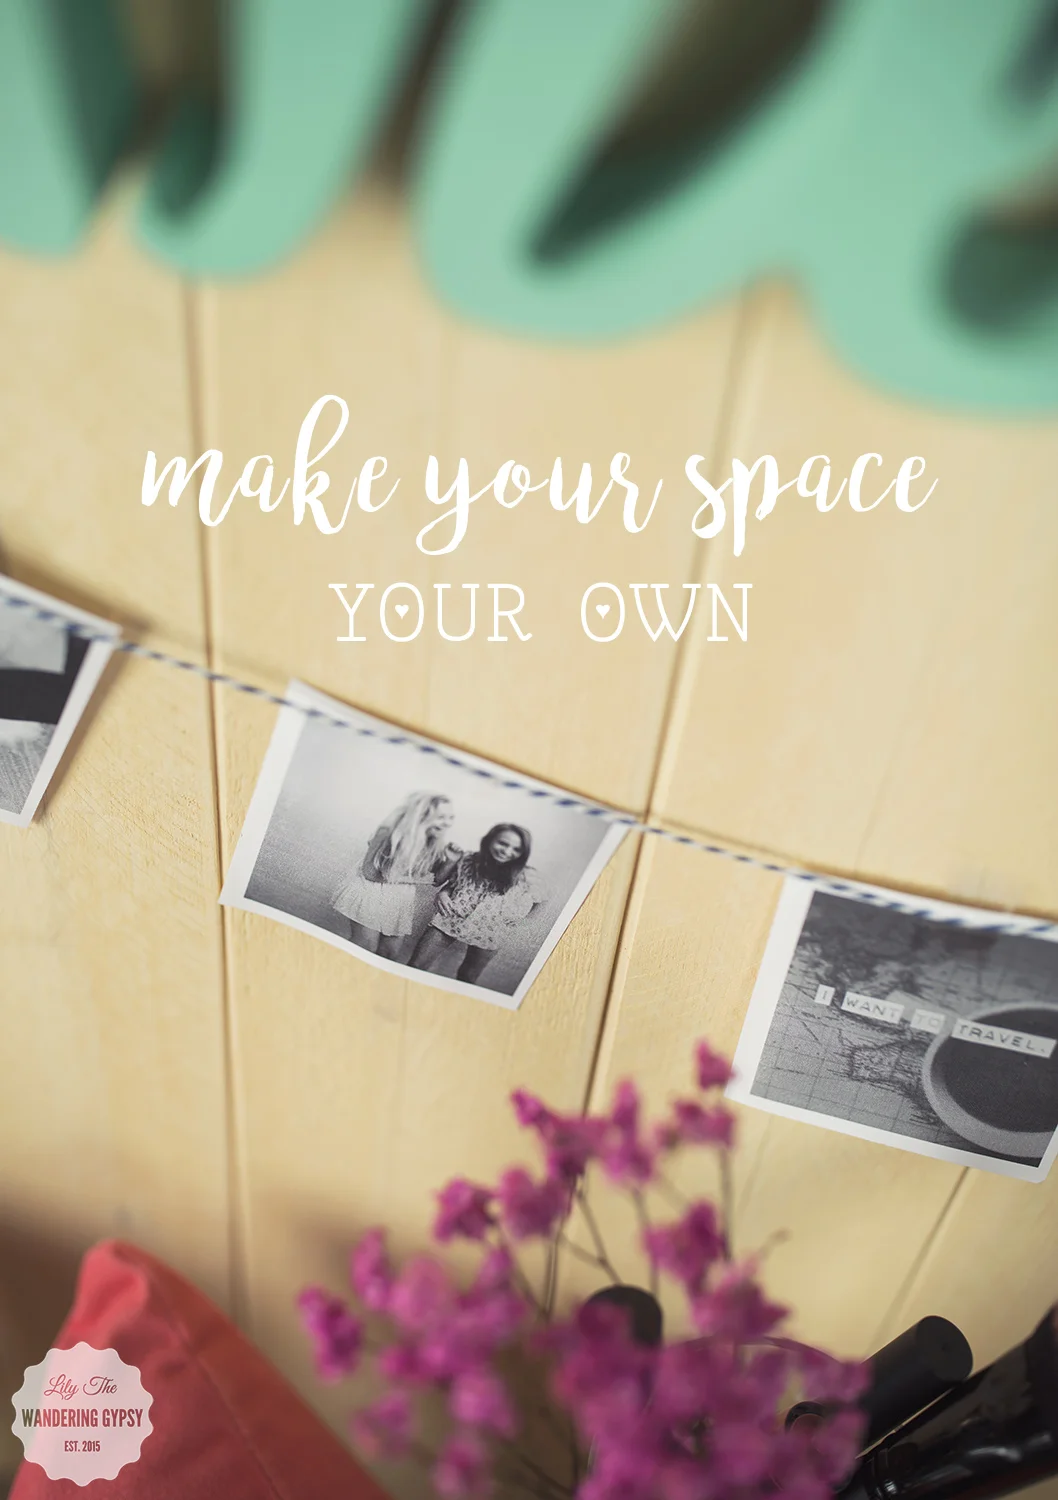
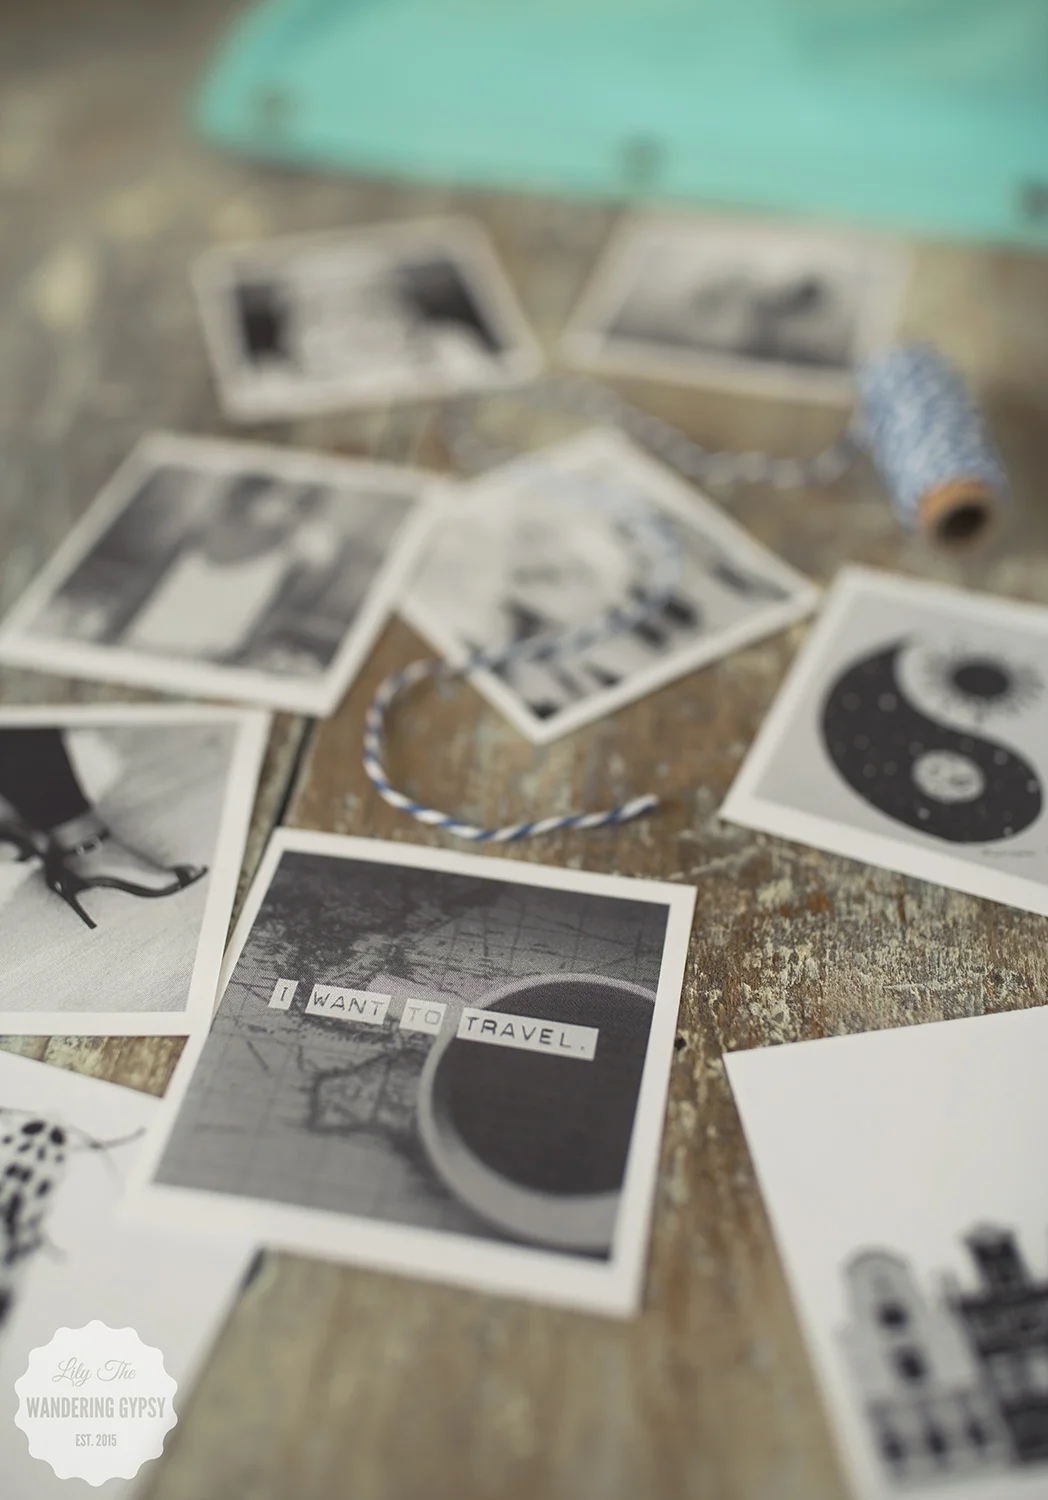
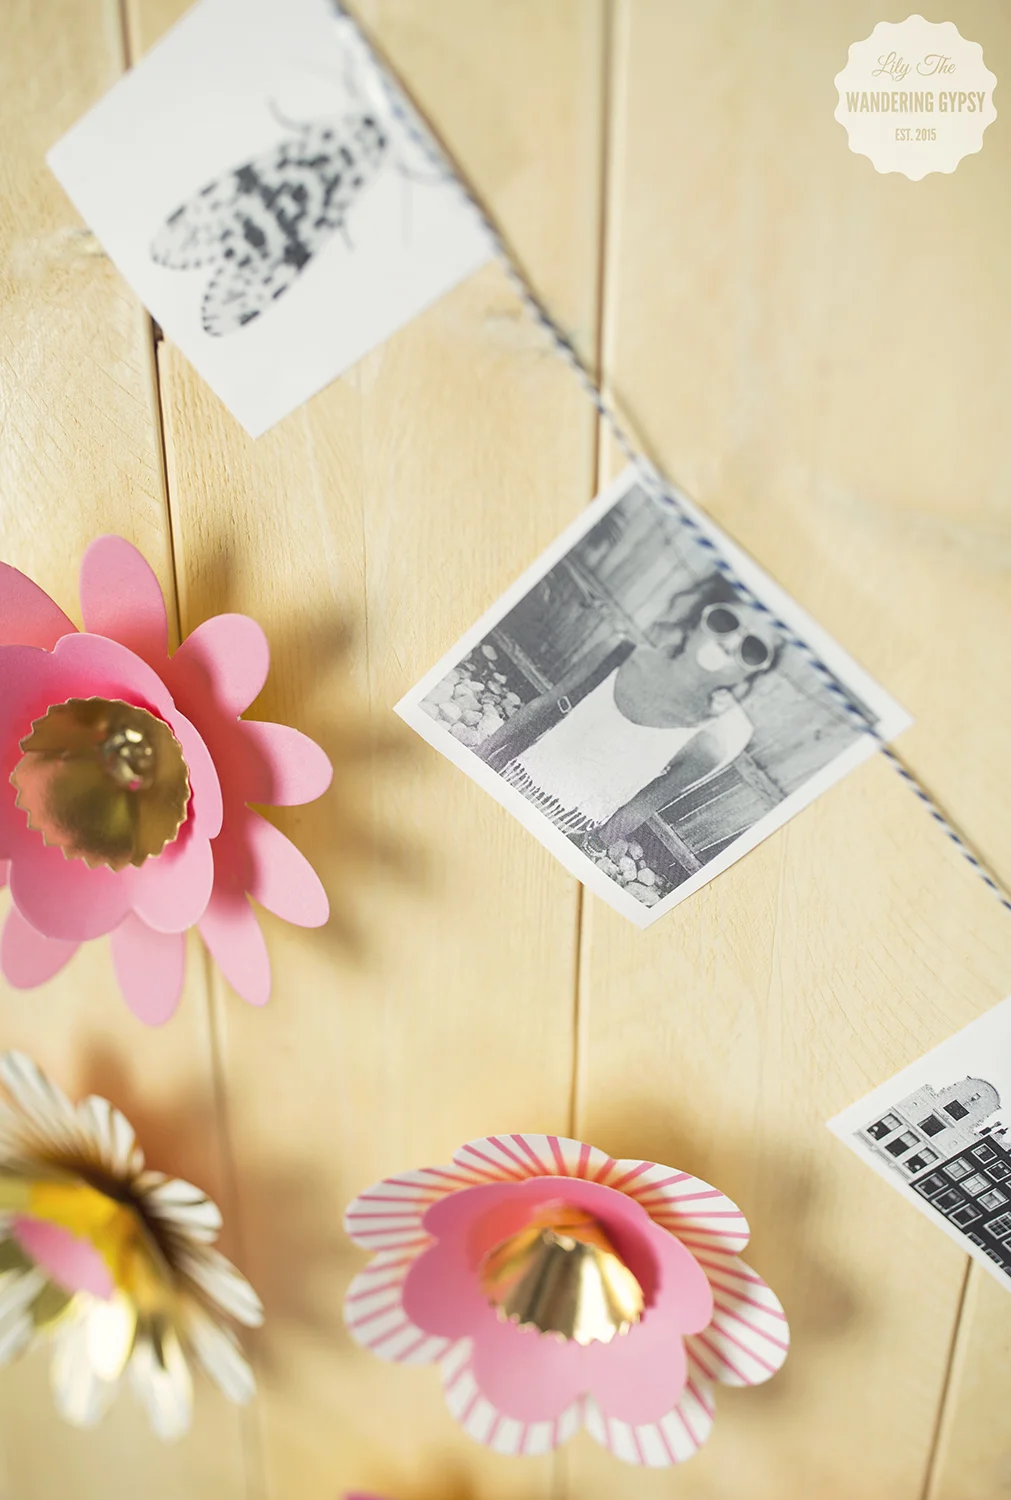
Rather than staring at a blank wall while you type away at your term papers, decorate the wall behind your computer with something cute and meaningful! All you need is some black and white photos. You can use your own photos and print them in black and white), or you can grab some from Tumblr, like I did! I used a bit of colorful twine and clear tape, to adhere the decor to the wall.
TO DIY YOUR SPACE:
1.) Cut a length of twine and drape it in a wide U-shape across the wall, behind your computer.
2.) Tape up the twine on both ends. Now, tape each photo to your wall with clear tape, then tape the twine down onto it, making it appear as if the photos are strung from the twine.
3.) Add 3-D paper flowers (which I found at a craft store) - you can also make these from scrapbooking supplies that you find at Big Lots! That's it! A super simple DIY decor idea for your work space.
Also, creating varied heights on your work surface makes a more visually-pleasing look. You can use a candle holder, or a stack of books to create height, and then add a picture frame, vase full of flowers, or jars full of colorful candy to add inspiration. I also really love the idea of using a small candle holder or glass to hold makeup and makeup brushes. Keep the daily essentials at close reach! A mirror would also be a great addition to this design.
And, a scented candle will definitely help keep your space smelling fresh, and could even help you concentrate! Choose a more relaxing scent for studying at night, and a more lively, fresh scented one like this Orange Lemon one, below.
How will you decorate your new space this Fall? Thanks so much for stopping by!!
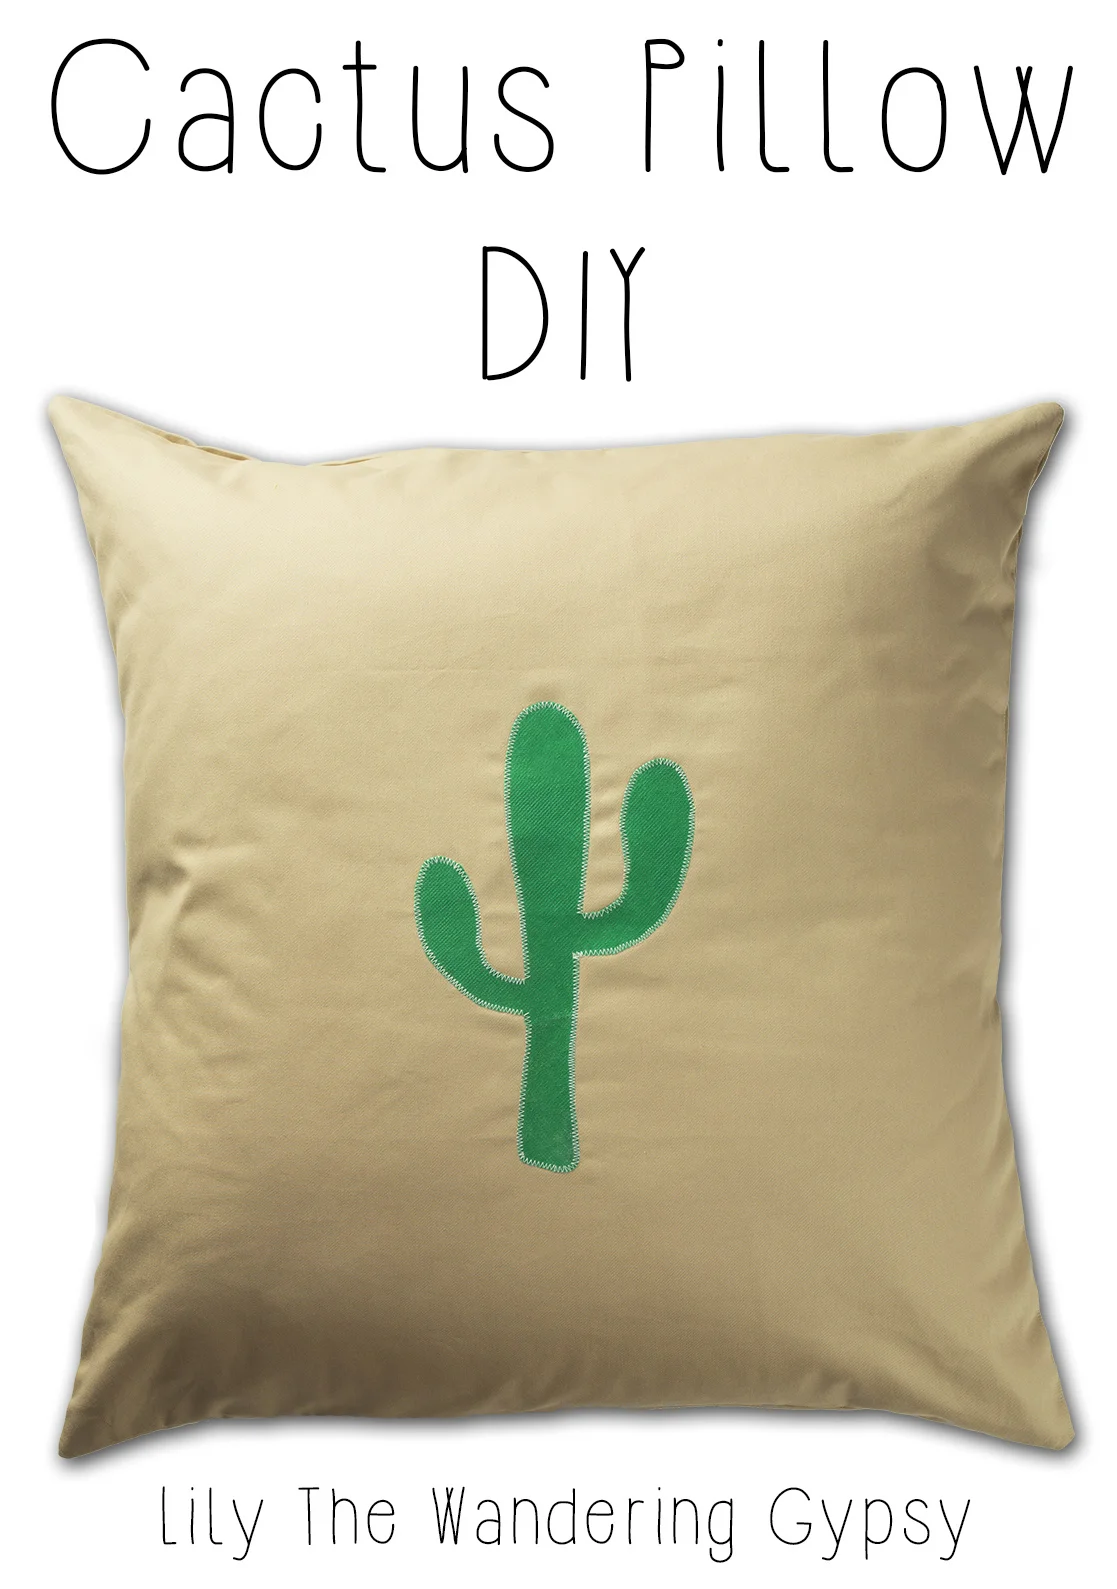
Cactus Pillow DIY
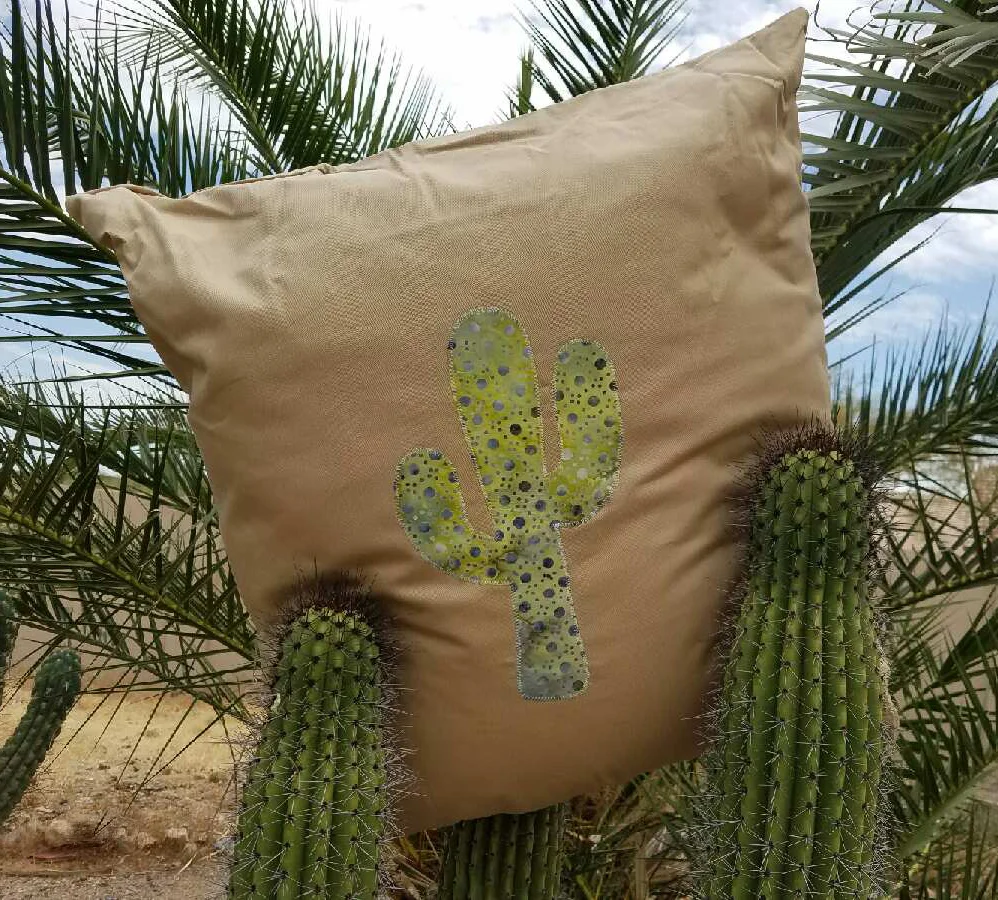
This is an amazingly awesome DIY project! Perfect to make for yourself, or to give to someone else. In this tutorial, I used a pillow form from an existing pillow (which was cheaper than buying a pillow insert by itself! I got a pillow that was on super sale at Hobby Lobby - I thought that was pretty great!
My Step Mom was kind enough to take photos of a similar pillow, that I sent to my dad for Father's Day
MATERIALS NEEDED:
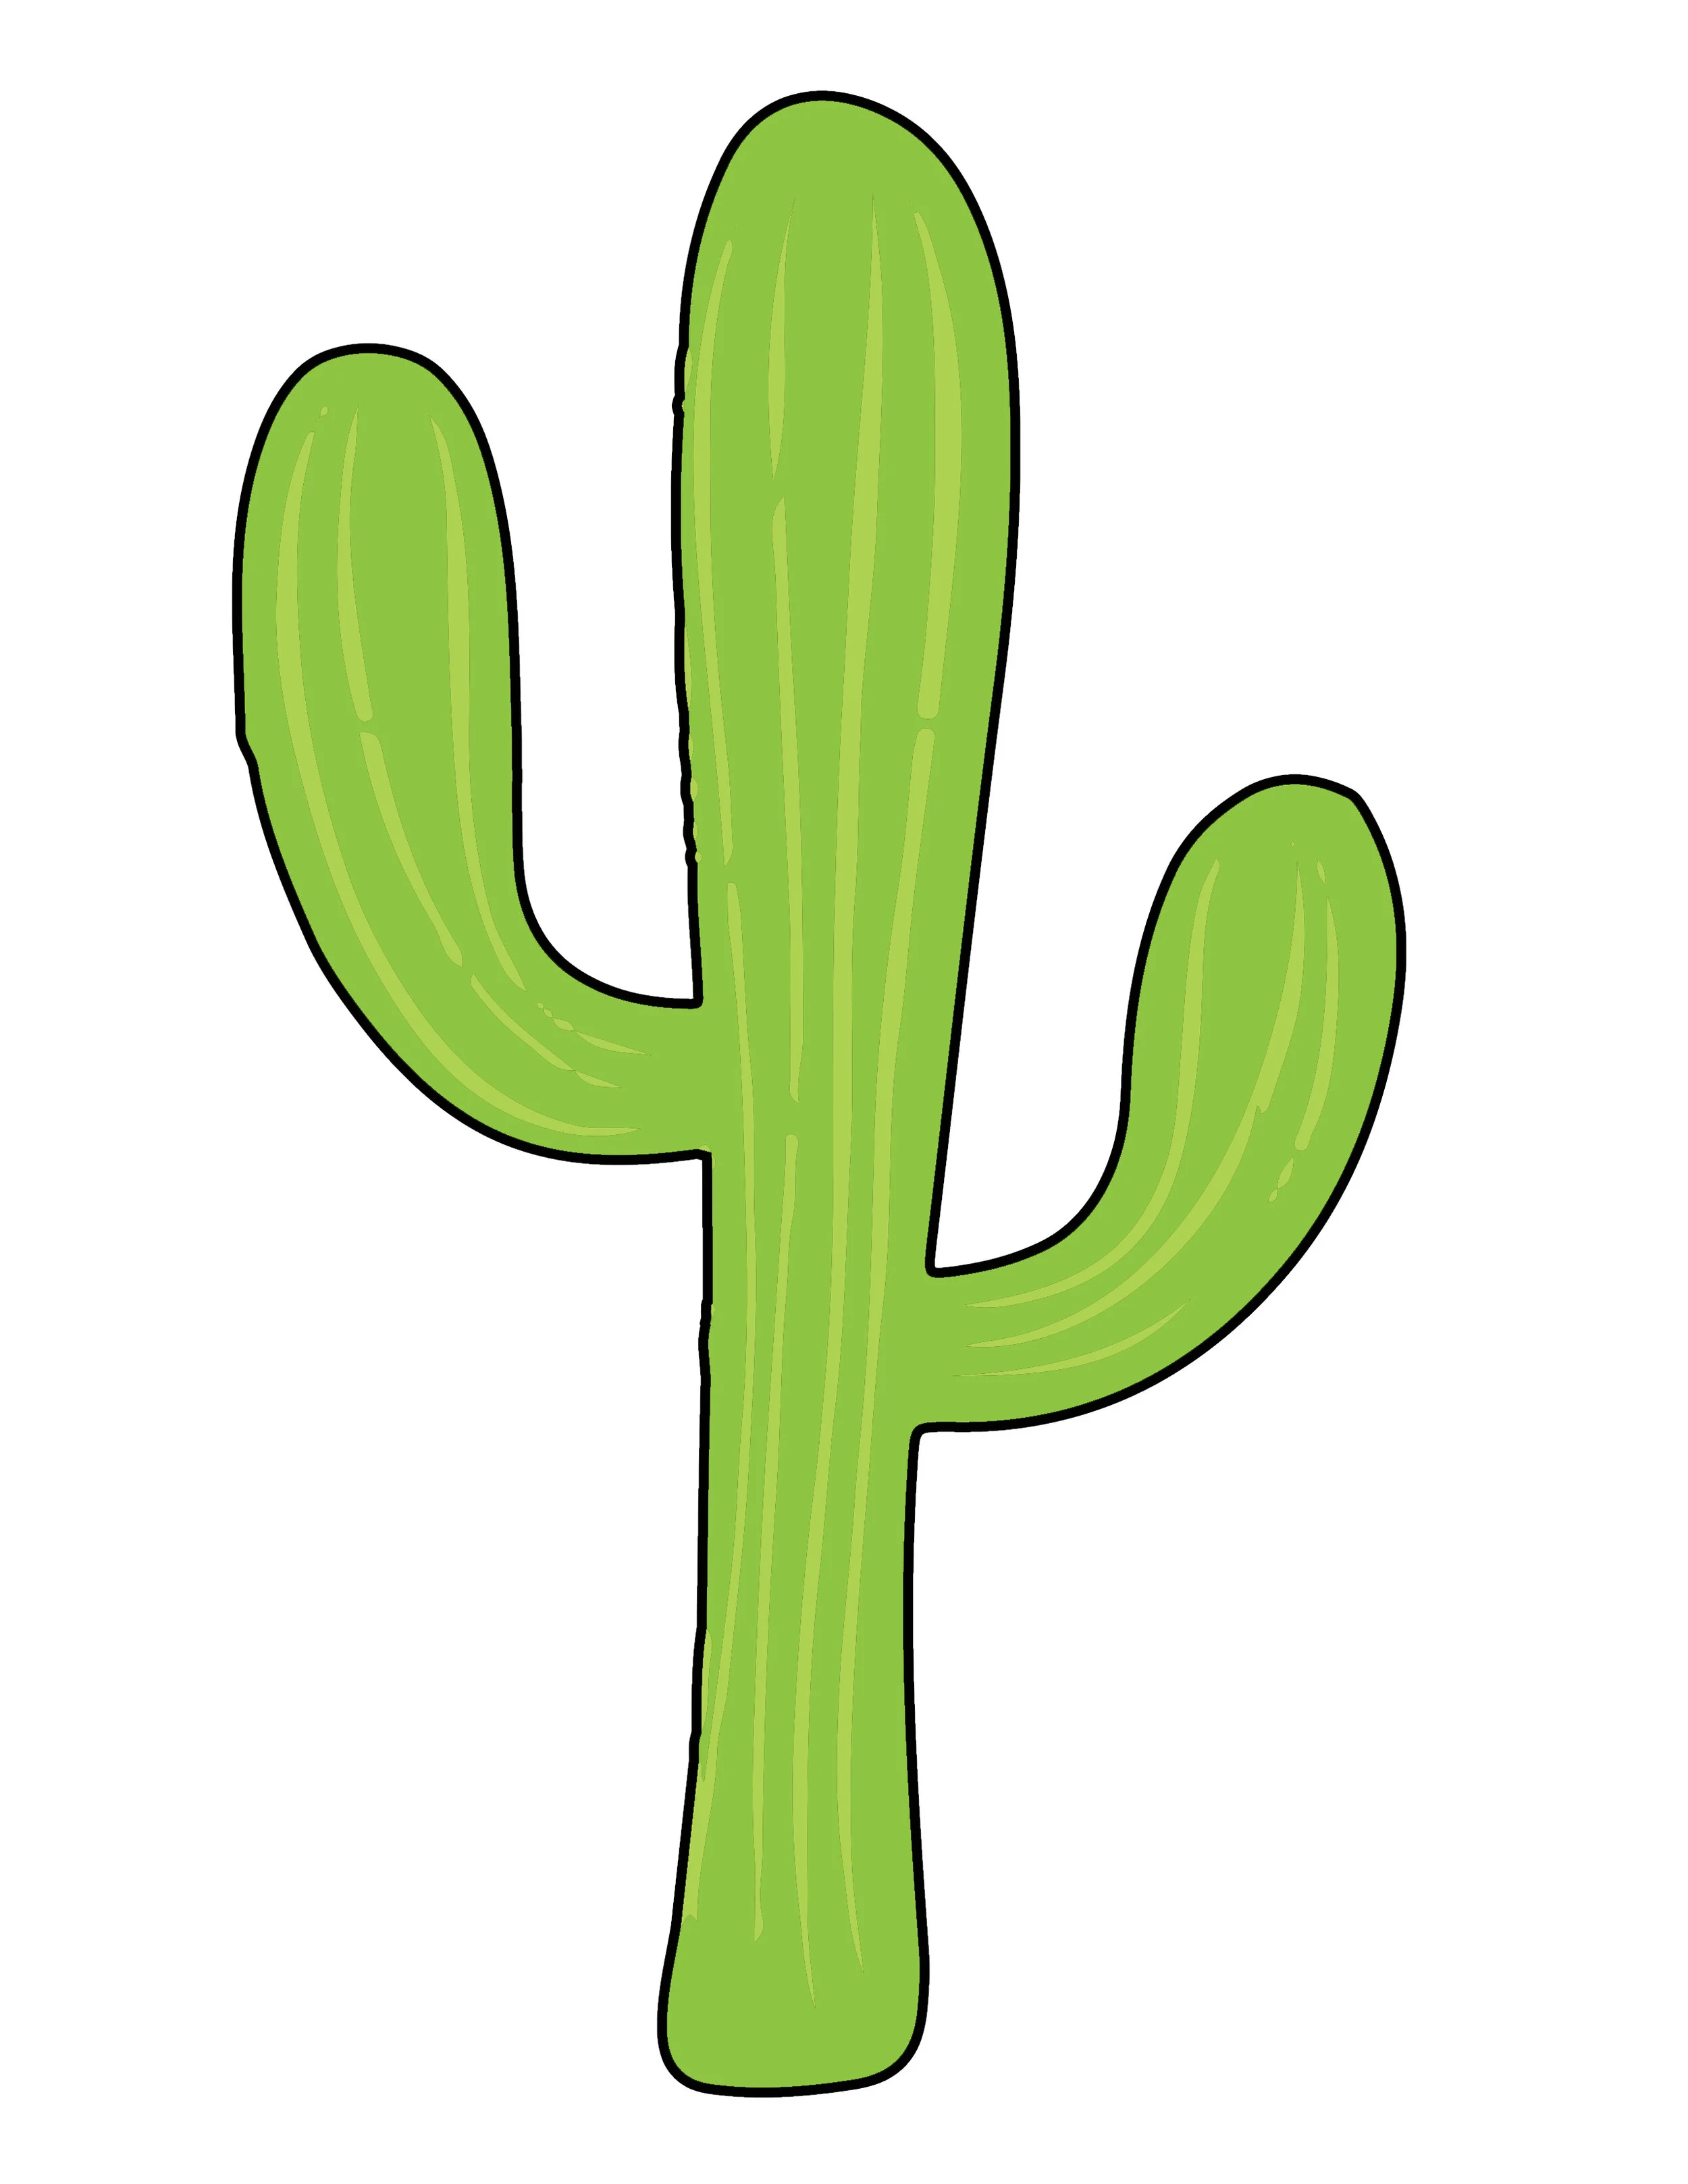
Right click this image to save it, then print at 100%.
- Pillow Form
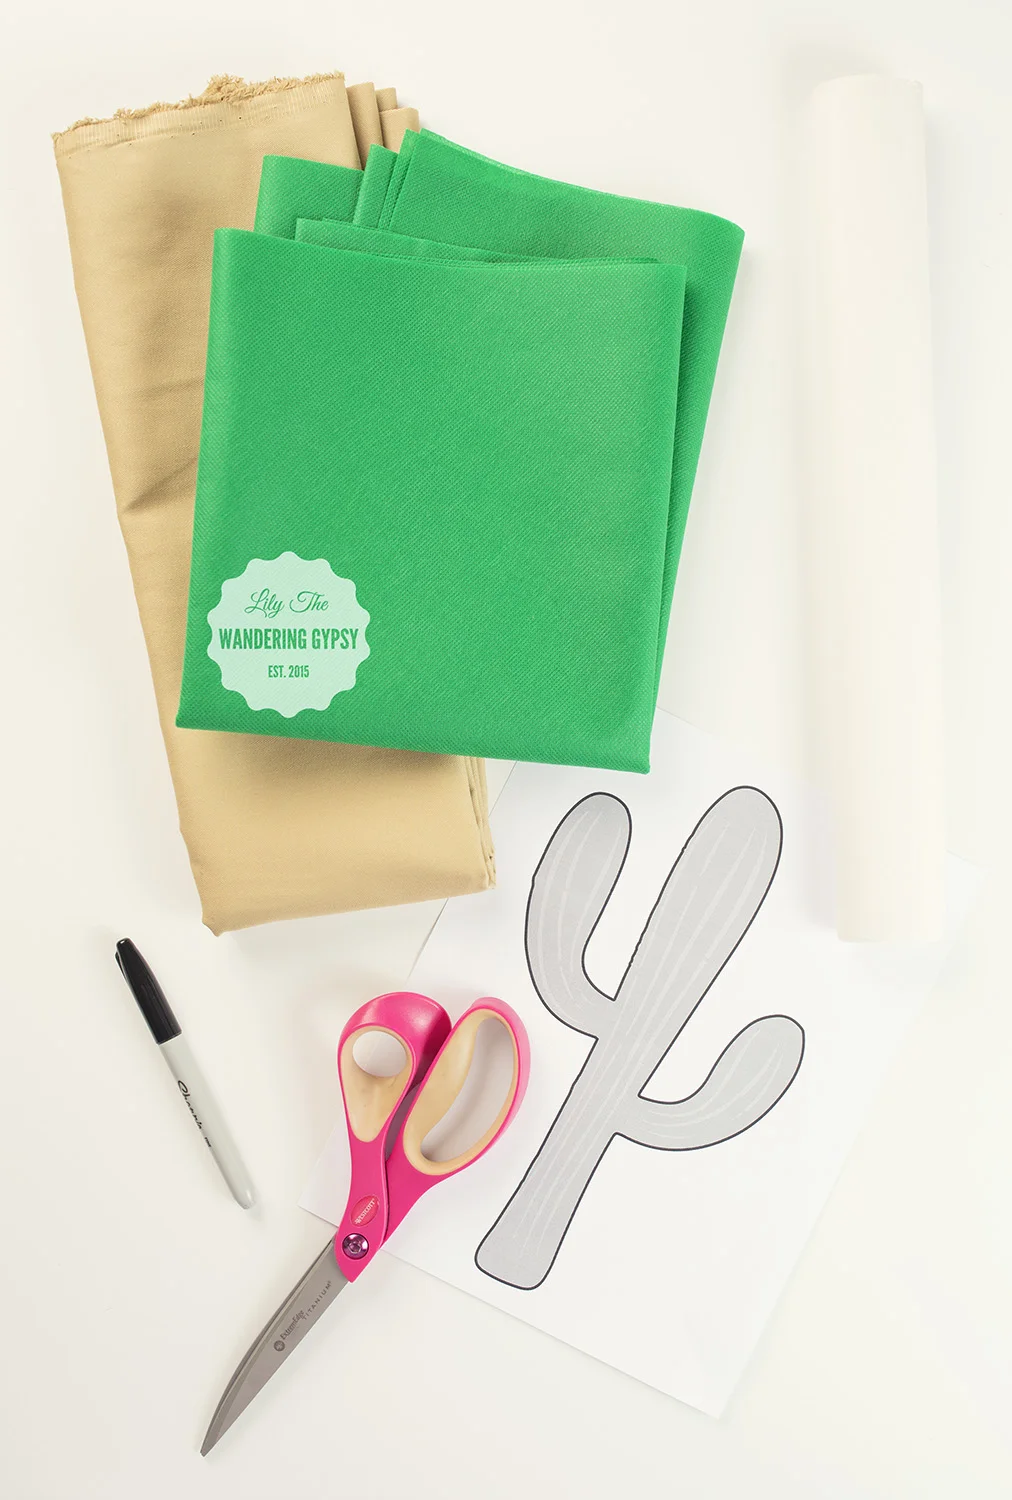
- Solid Tan Canvas (or similar) material That will cover your pillow 1.5 times (I will explain below)
- Green Cotton Fabric (for cactus) - Note - Only 100% Cotton Material works, because you will be ironing it.
- Fusible Webbing (the only kind I would EVER suggest would be Heat N Bond Lite Iron-On Adhesive. It's hard to see, but it's the paper-like material in the top right of the image, right.
- Iron + Ironong Board
- Sewing Machine, Thread, Scissors
- Printed out image of cactus, right.
INSTRUCTIONS:
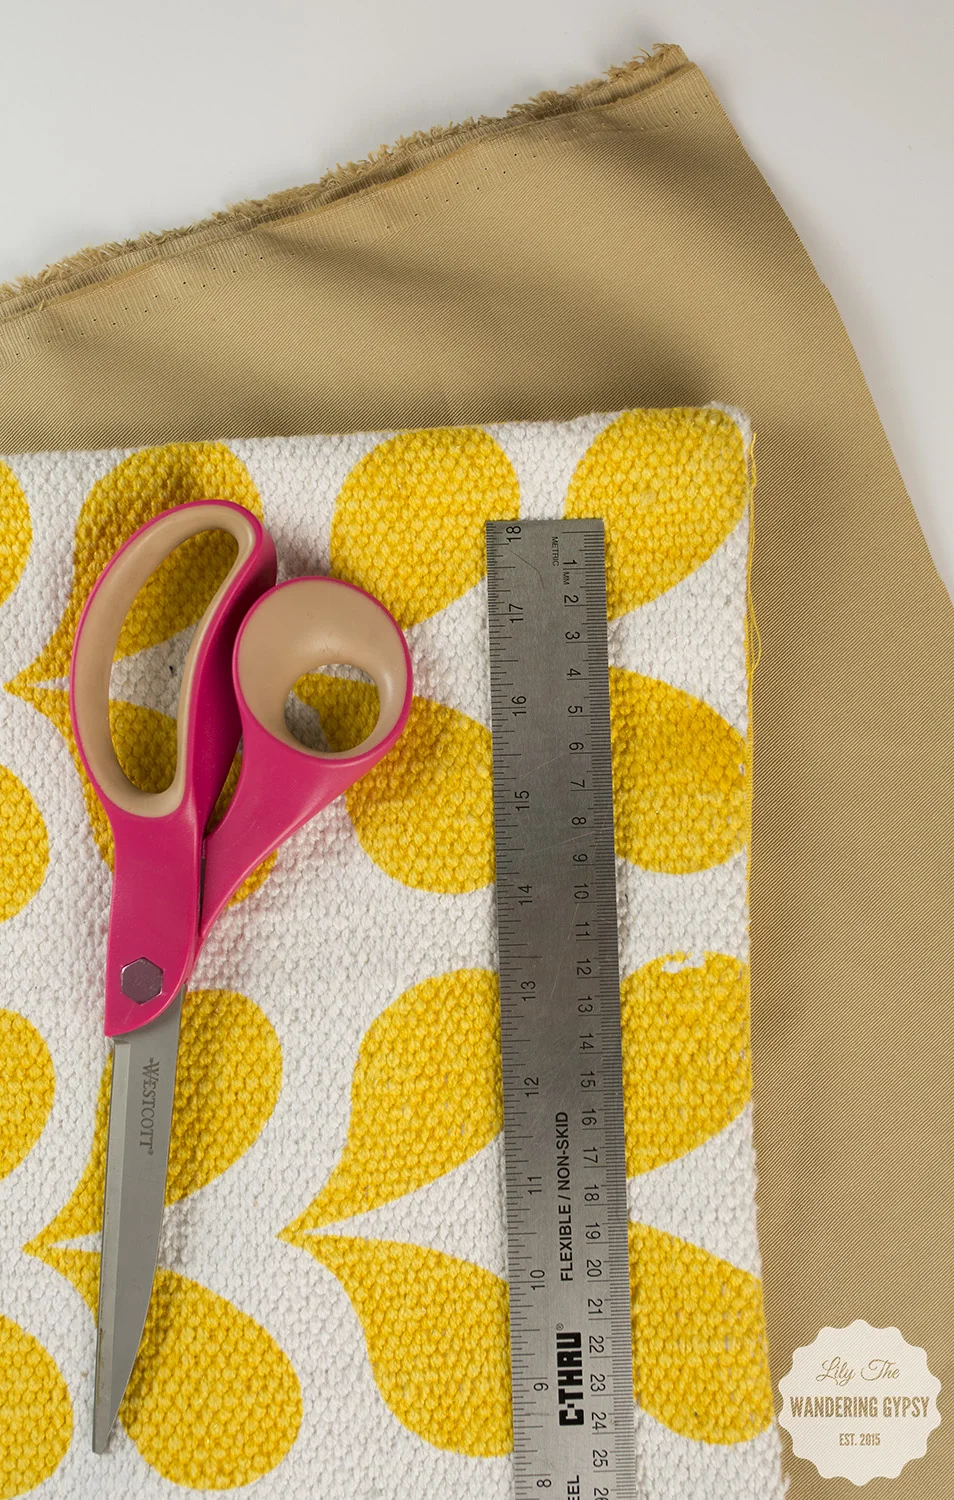
1.) Iron canvas material if needed. Remove pillow case from pillow form, and lay it down onto the canvas fabric. Cut one piece the exact same shape as the pillow case - this will be the front of your pillow. Alternately, measure your pillow form, and use those measurements instead.
- Next, to cut the back part of the pillow, you need two pieces to create the envelope flaps.
- Using the same width as the front piece, cut a second piece of fabric about 1.5 times the length of the front piece. For instance - if my front piece measured 10" x 10", my second fabric piece would measure 10" x 15".
- Cut the long piece into two pieces, a bit off center, so one piece is longer then the other by a few inches.
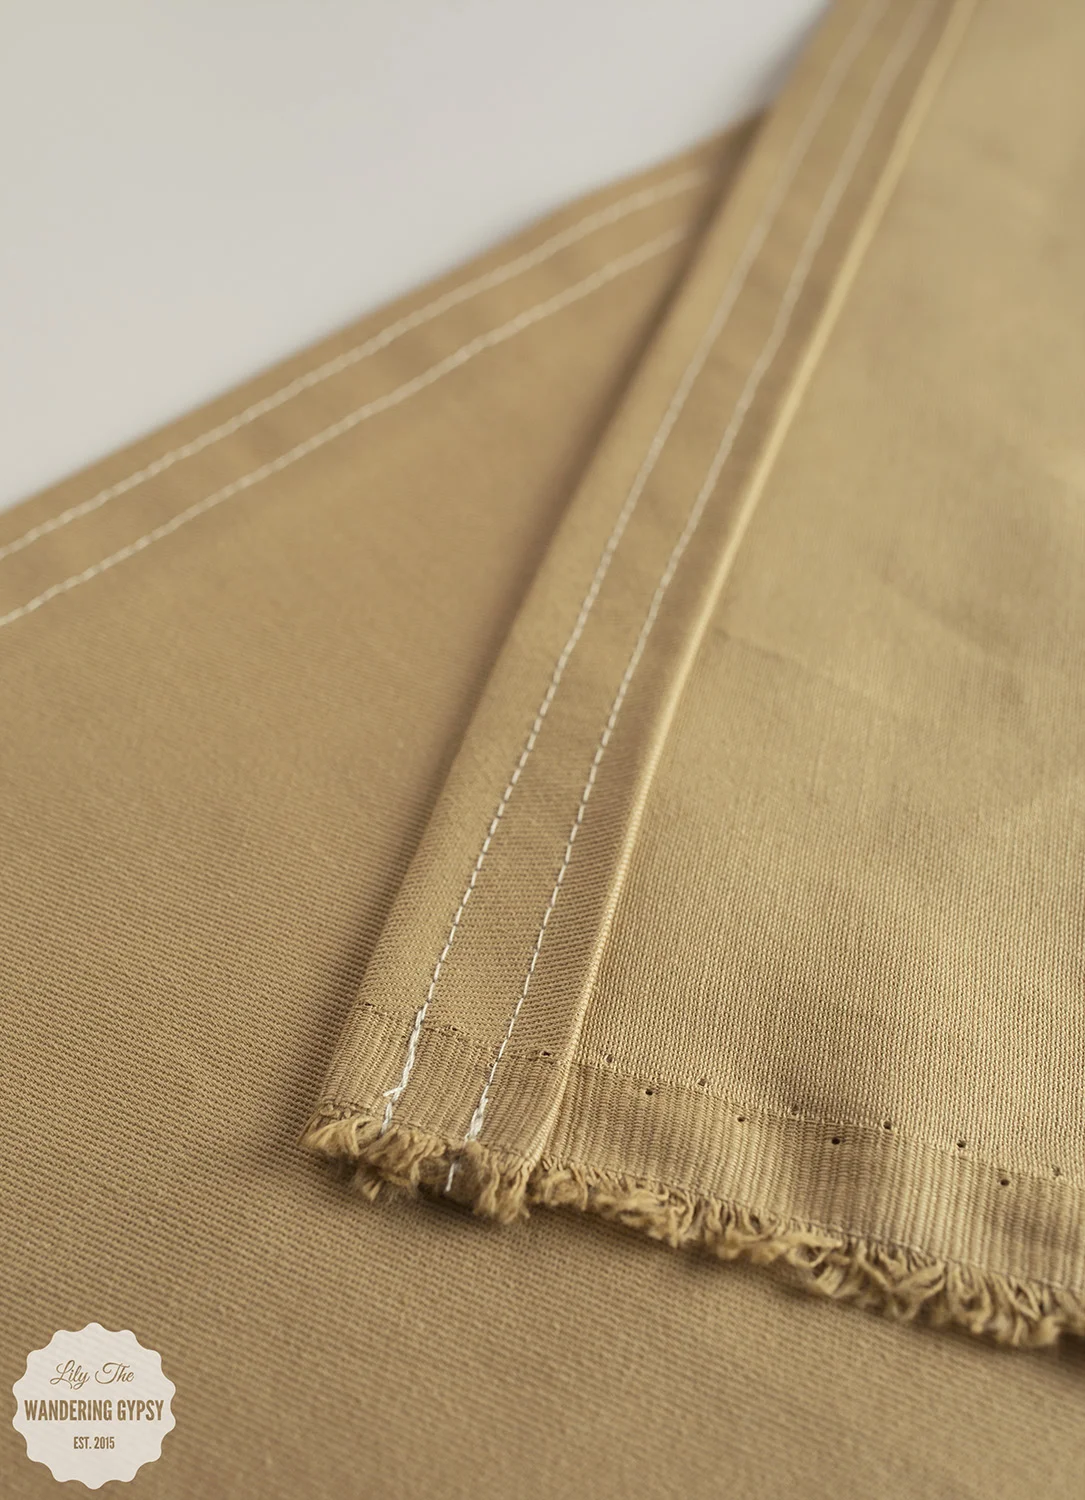
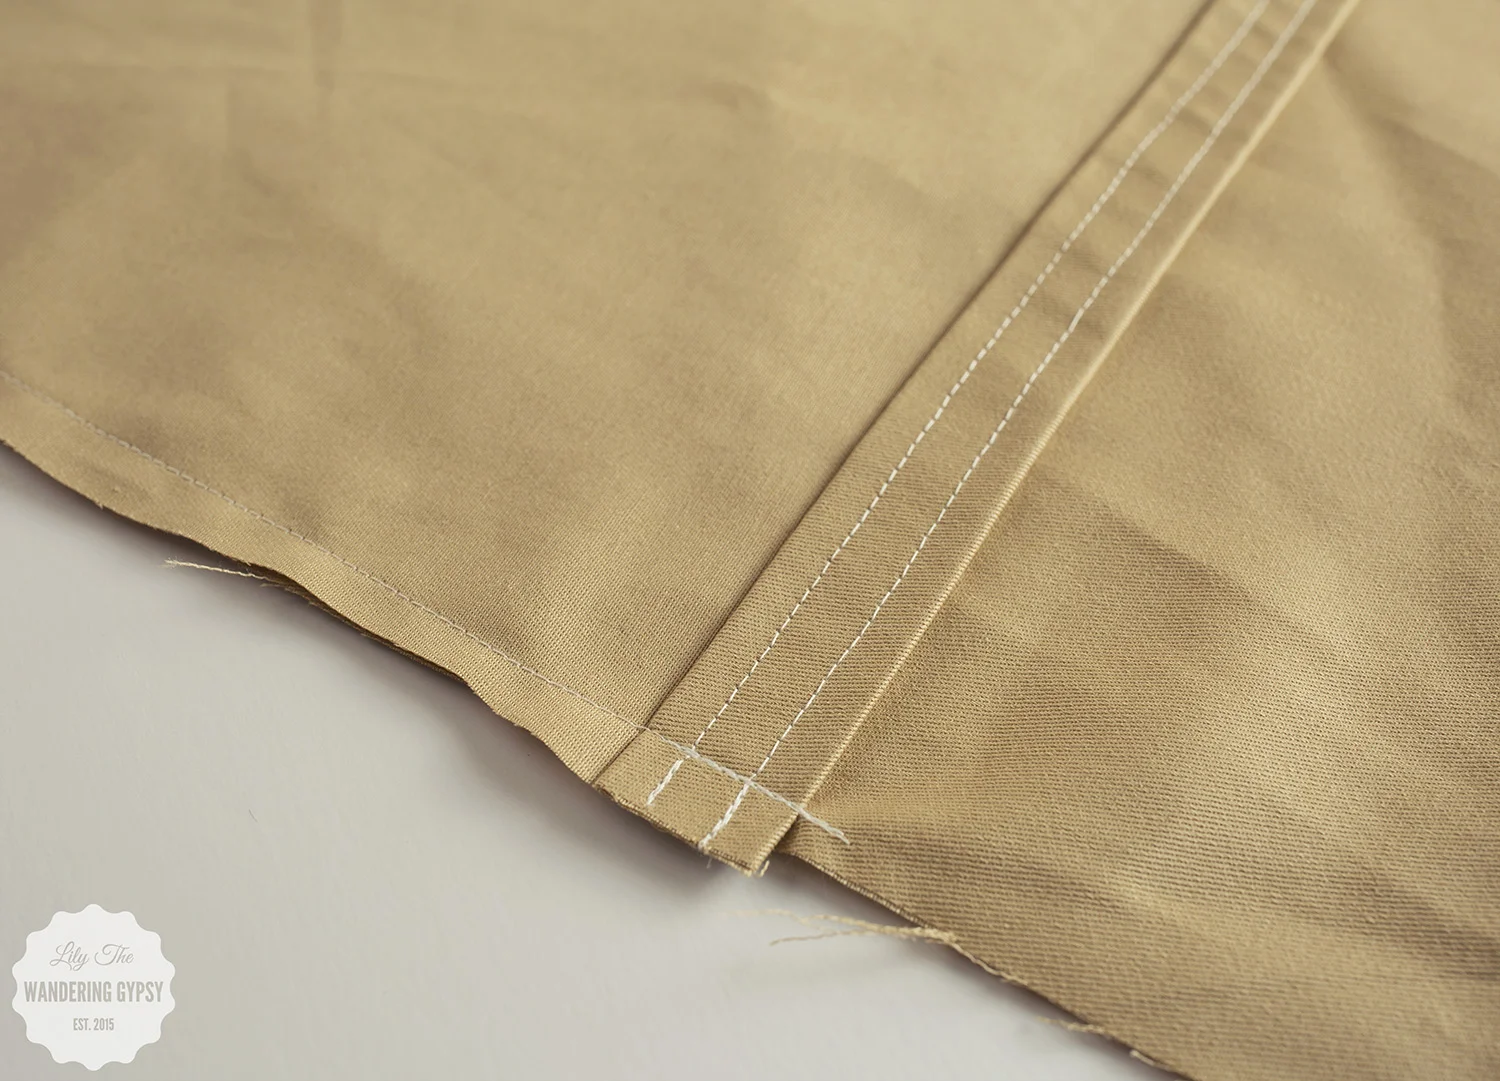
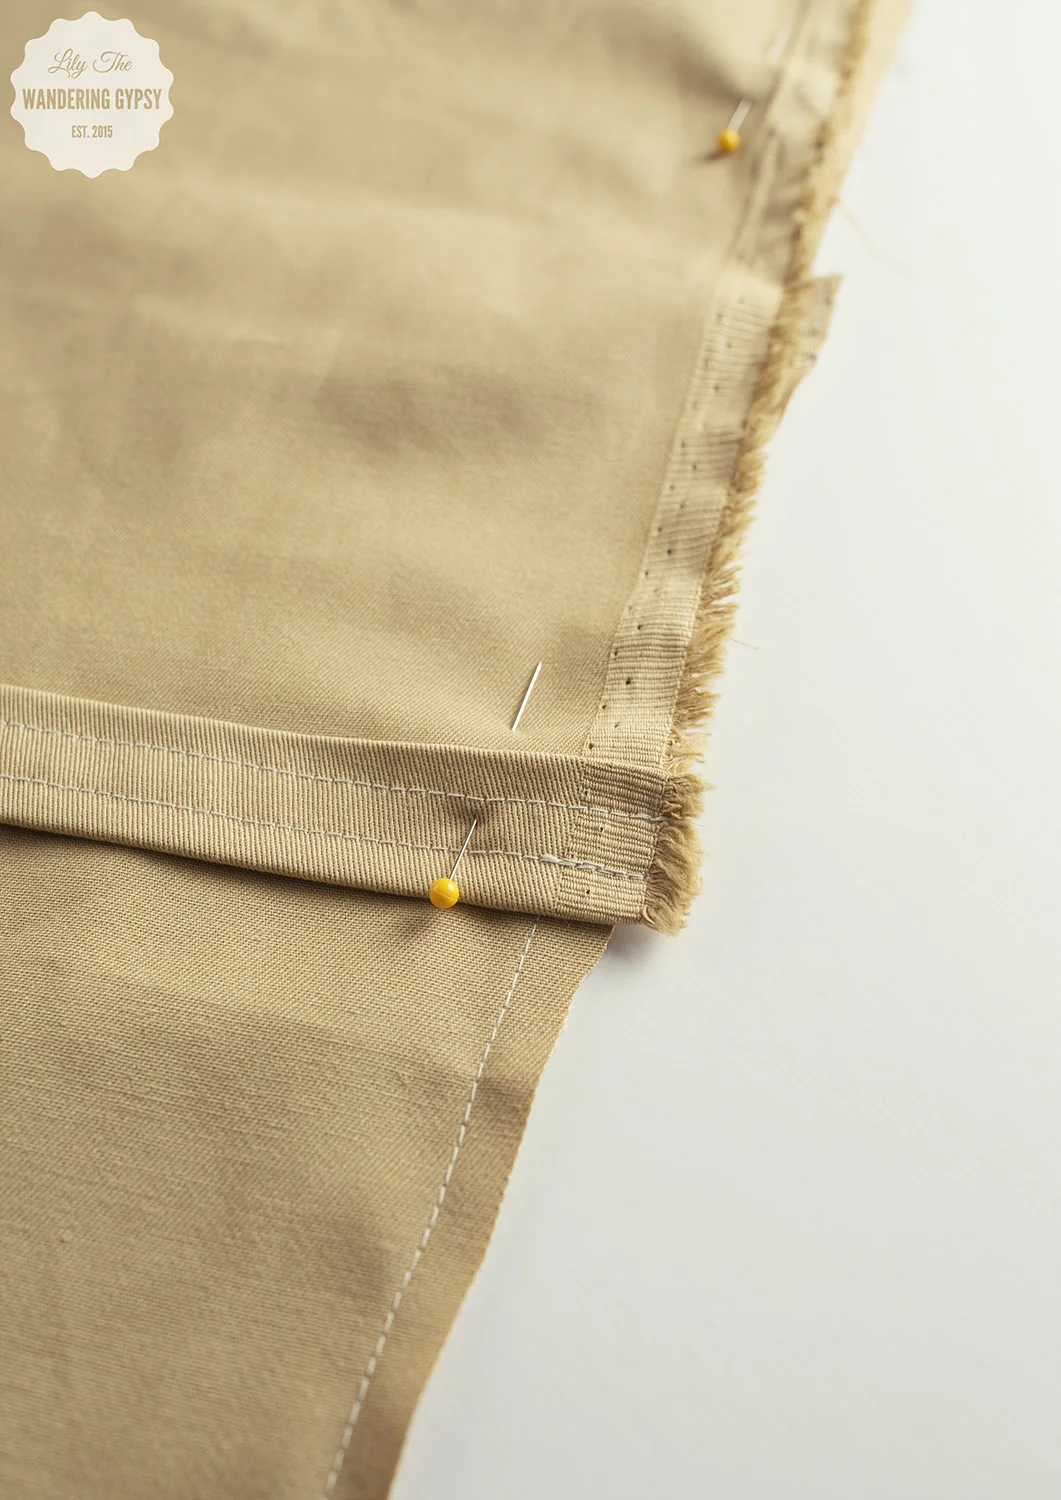
2.) Next, you will create a nice hem line for the two back pieces. With an iron, fold down one edge of each piece (going horizontally), over twice. This will create a nice finished edge. Sew the hem line down a couple of times to secure it. Iron again, if you want.
3.) Now, let's make an applique!!
- Trace the cactus shape onto the paper/smooth side of the fusible webbing material with a permanent marker.
- Cut out the cactus shape you drew, and iron it onto the green fabric. Like I mentioned before, only 100% cotton can be used for this! The green material I chose wound up being 10% polyester and got stuck to my iron, and melted! No fun!
- Cut out the cactus shape you ironed onto the green fabric, and peel the paper backing off of the shape. One trick I use, is to slightly score the paper backing, to start the "peeling" process :)
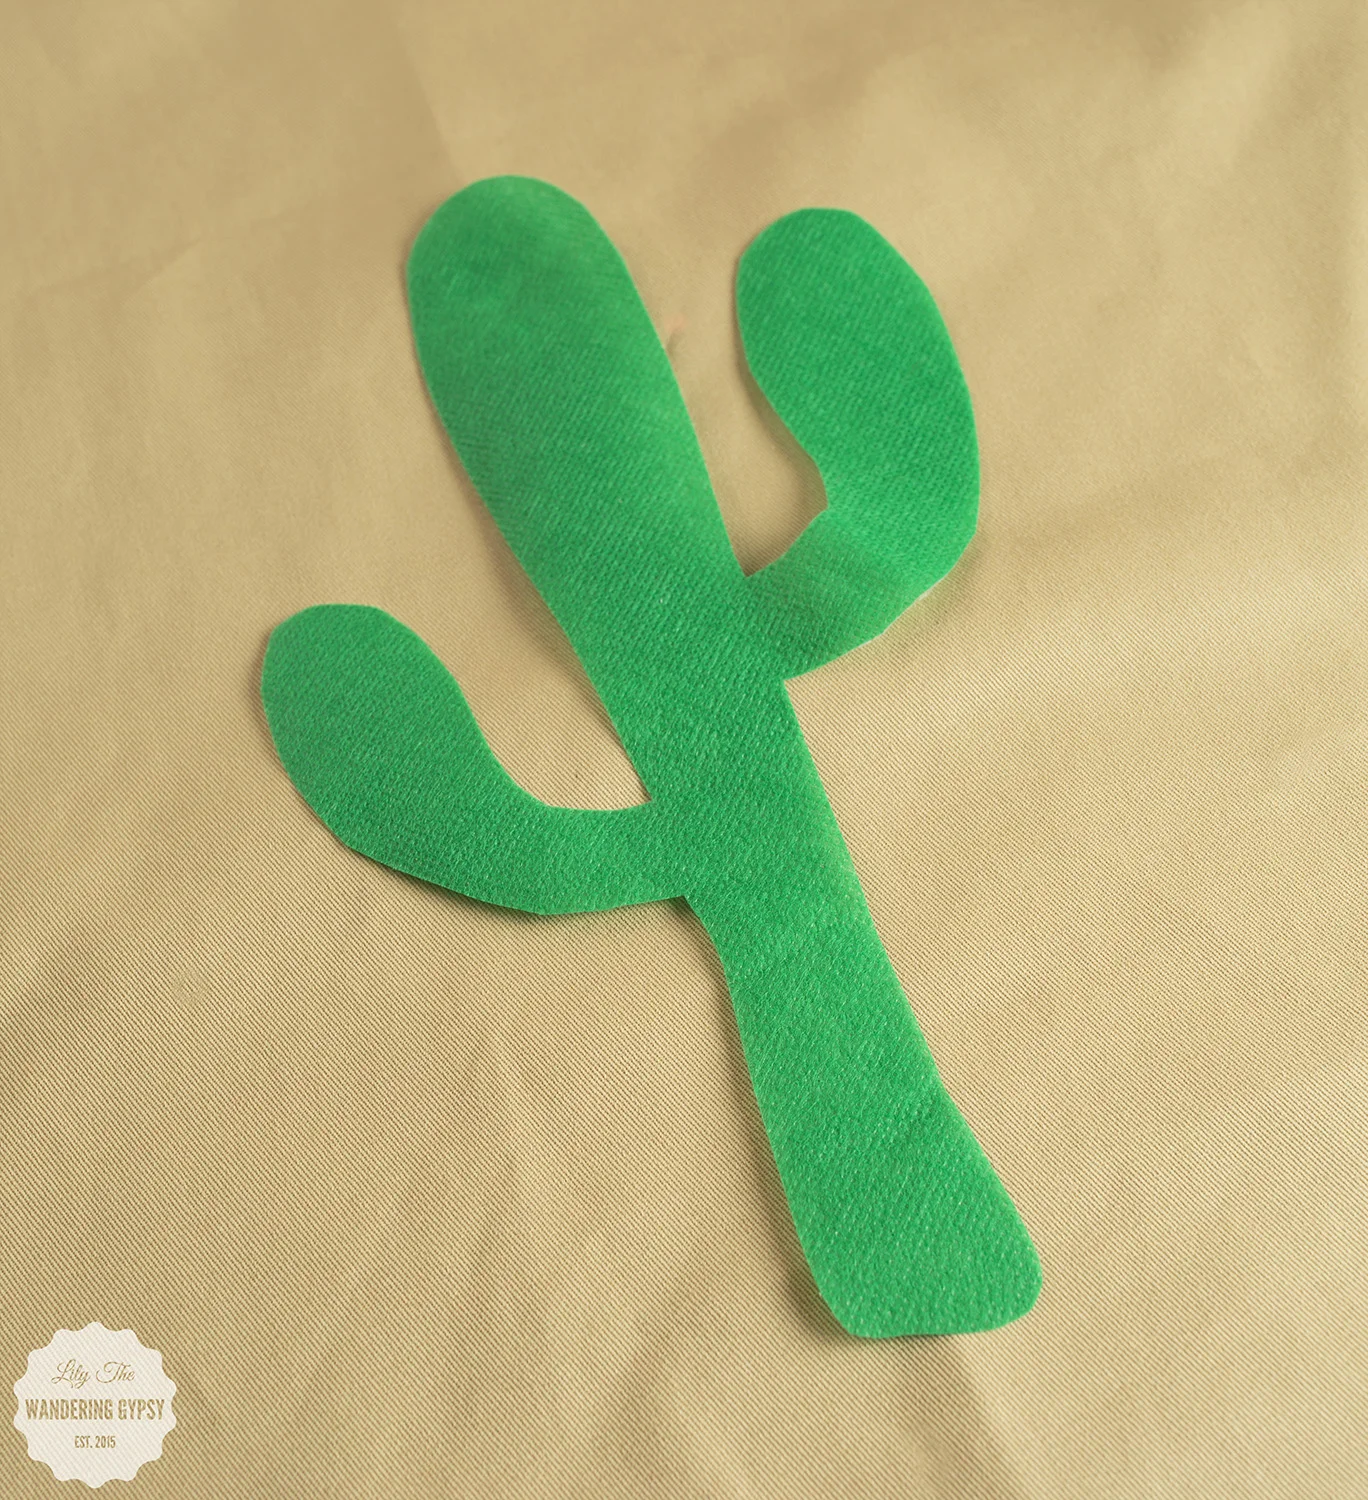
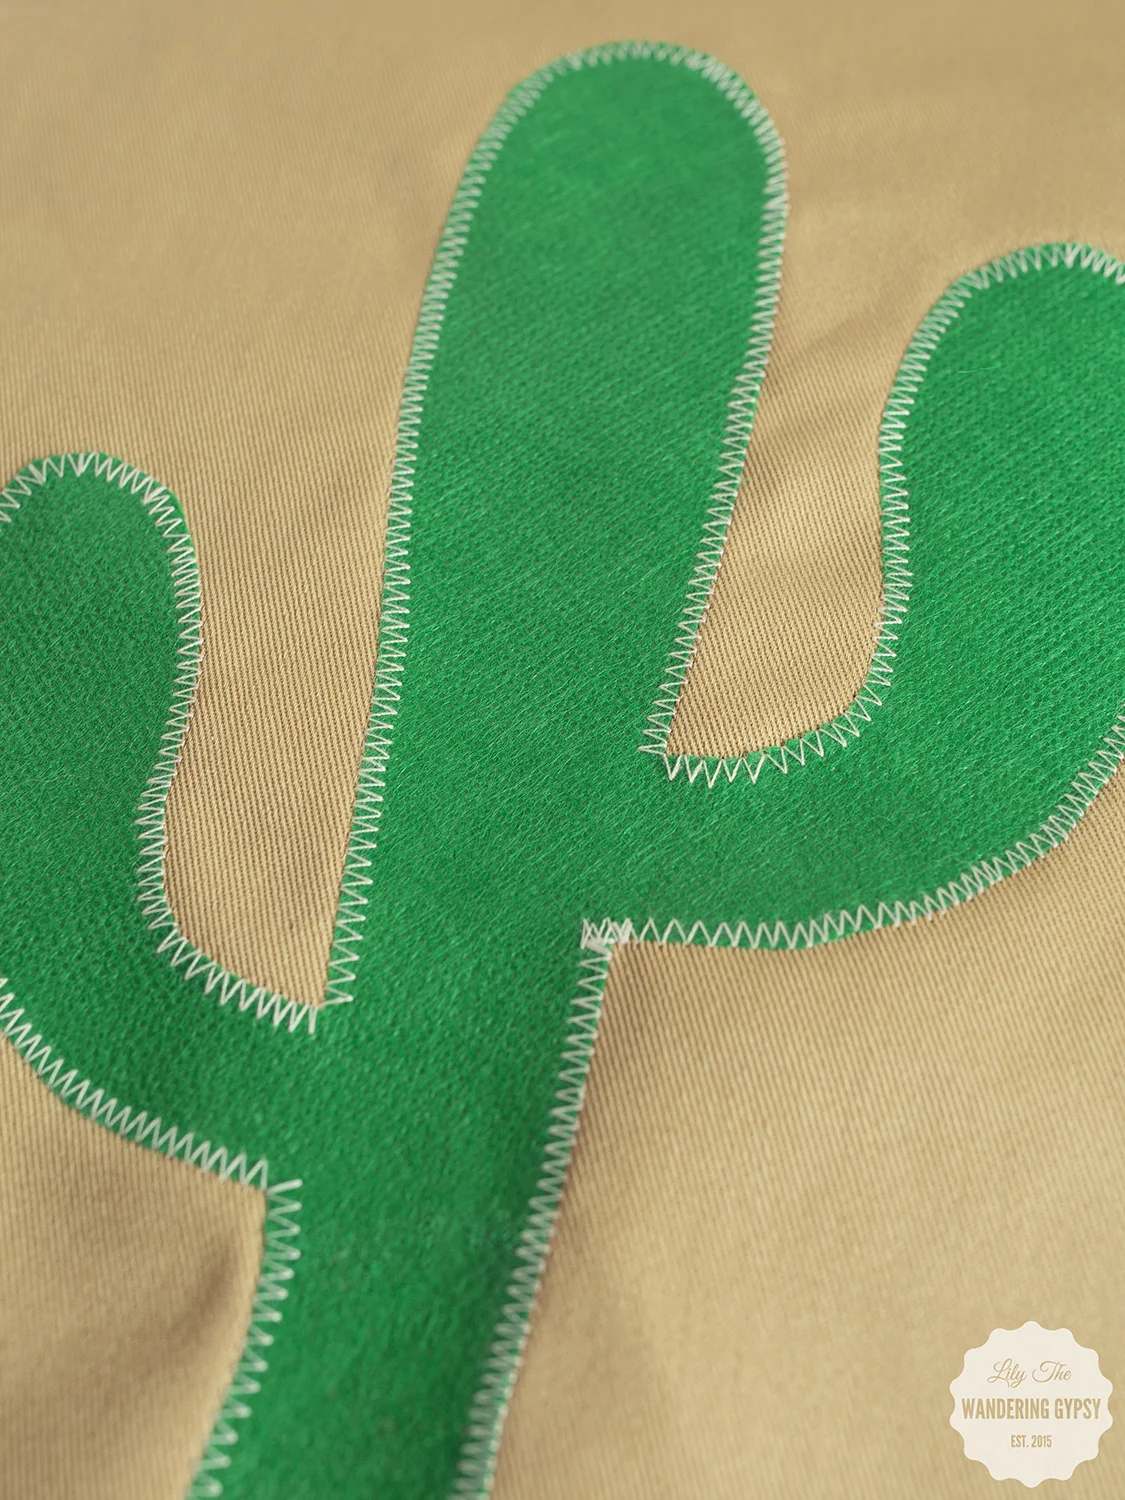
4.) Time to iron on the cactus. Fold the front piece of tan material in half and then half again, to find the center. Use this to line up your cactus shape. Then, iron the shape onto the front of the fabric. Iron the whole piece of fabric, and get ready to sew on the applique!
5.) Using a zig zag stitch or a straight stitch, sew all around the cactus shape. Tie any loose thread ends on the back side of the fabric.
6.) Time to sew and construct the pillow case! This is such a great way to make a pillow case - it's removable and washable, too!
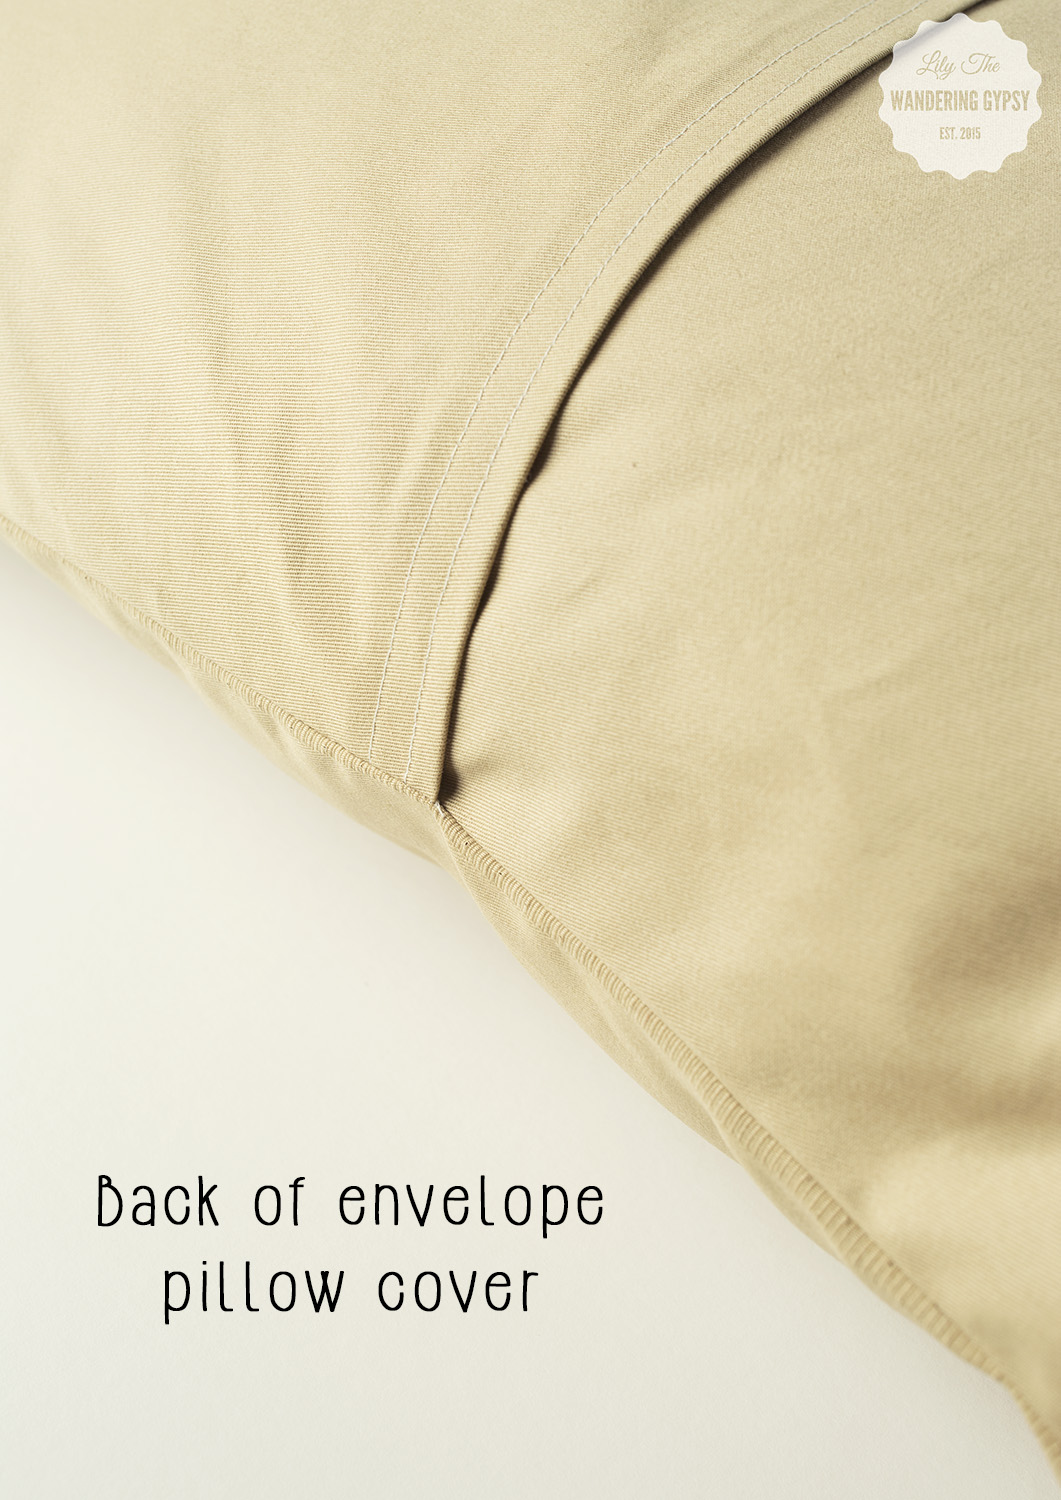
- Pin the shorter back piece with the hem line going horizontally in the middle. Pin the front panel and the first back section together - right sides together. Pin, and sew around the edges. Clip loose threads.
7.) Now, pin the longer back piece up to the ones you just sewed. Line raw edges up, and again, pin and sew around the edges
8.) Trim any excess fabric around the edges, and turn your pillow right side out. Iron, if you want, and you're DONE!!!
I hope you enjoyed this tutorial! If you wind up making one of your own, please link to it in the comments below! Happy Sewing, friends!!
DIY Summer Clutch Purse - 20 Minutes Or Less "Give Extra, Get Extra"
I have an absolutely incredible DIY project for you today! Here is a fun way to spruce up your summer wardrobe. This shop has been compensated by CollectiveBias, Inc. on behalf of its advertiser. All opinions and ideas are my own. #GIVEEXTRAGETEXTRA #Walgreens #CollectiveBias
I always have this problem - I have a great outfit picked out to wear to visit friends or family, and am happy with my jewelry, then I have NO purse to match my outfit! Sure, I have my every day purse, that would work, but I always want something a bit more suited for the occasion.
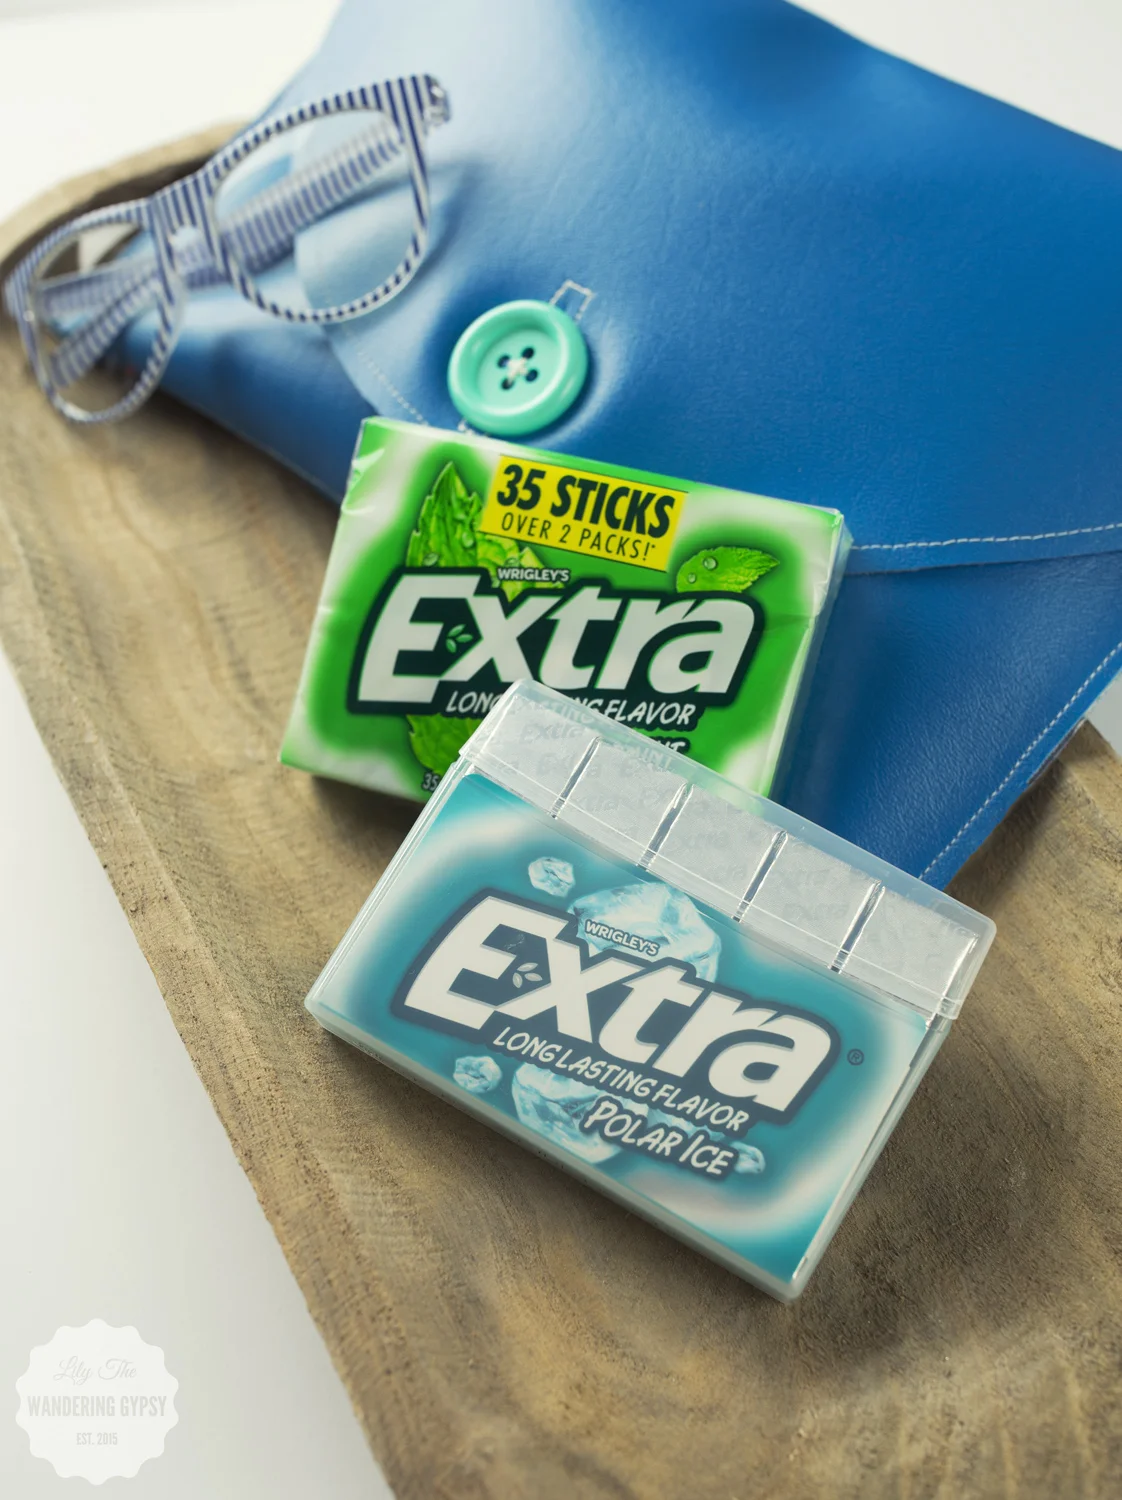
It's always a good idea to bring along a pack of gum with you for a night out, so your breath is fresh! Fun Fact - these new Extra® 35-stick packs have lots of gum to supply your friends as well. You never know what conversation or new friend you could make by sharing a stick of gum with someone!! By simply giving Extra, you may get Extra!
So, here is one way to solve the problem. Sew yourself a quick and easy clutch purse, that takes less than 20 minutes! If you have never, ever sewn before, it could of course take you a tiny bit longer. But, I am very happy with how quickly this project came together!
The Flavors Featured In This Post Include:
Extra® Gum Spearmint
Extra® Gum Polar Ice®
MATERIALS:
- 1/3 yard of vinyl (found in the home decor area of the JoAnn's)
- 1/3 yard of flannel or felt
- Scissors
- 2 small binder clips
- Sewing Machine with Needle and Thread
- Glue Stick
- Hand Sewing Needle and Thread
- Button For Closure
INSTRUCTIONS:
1.) Cut 1 piece of vinyl and 1 piece of flannel.
* Each piece should be roughly 12" across, and 30" tall.
* To round the top pieces, I folded them each in half lengthwise, and created a rounded edge.
2.) Using a glue stick, carefully glue both pieces together so they line up as well as possible.
3.) Measure roughly 10" from the straight edge of the pieces, and sew a straight line across, to create a crease, where the bottom of the clutch will fold up.
4.) Fold up the flat edge to create an envelope shape, and sew all the way around the outside edges of the materials. I keep the edge of the presser foot right against the right edge of the fabrics. Double stitch where the pieces meet, see below.
5.) Sew along the open edge of the clutch to add yet another crease, on the flap part of the material.
6.) To mark where your button should go, place it onto the flap, and push sewing pins through the layers. This will transfer 4 dots to the layer beneath, which will tell you where to sew your button. Mark the 4 holes with a permanent marker, and sew the button onto the purse.
7.) Sew on your button very securely!
8.) Make your button hole. Here's a tip - fold the flap over the button you just sewed on. Mark how long the button is, and then clip a hole the proper length. Test this out, to make sure the button fits through the button hole without any resistance, but is not too large where it won't hold.
* Sew around the button hole a couple of times, and snip any loose threads.
9.) That's it! Get ready to fill your new clutch purse with some essentials like gum, lipstick, lotion, and other goodies, and you're ready to go!
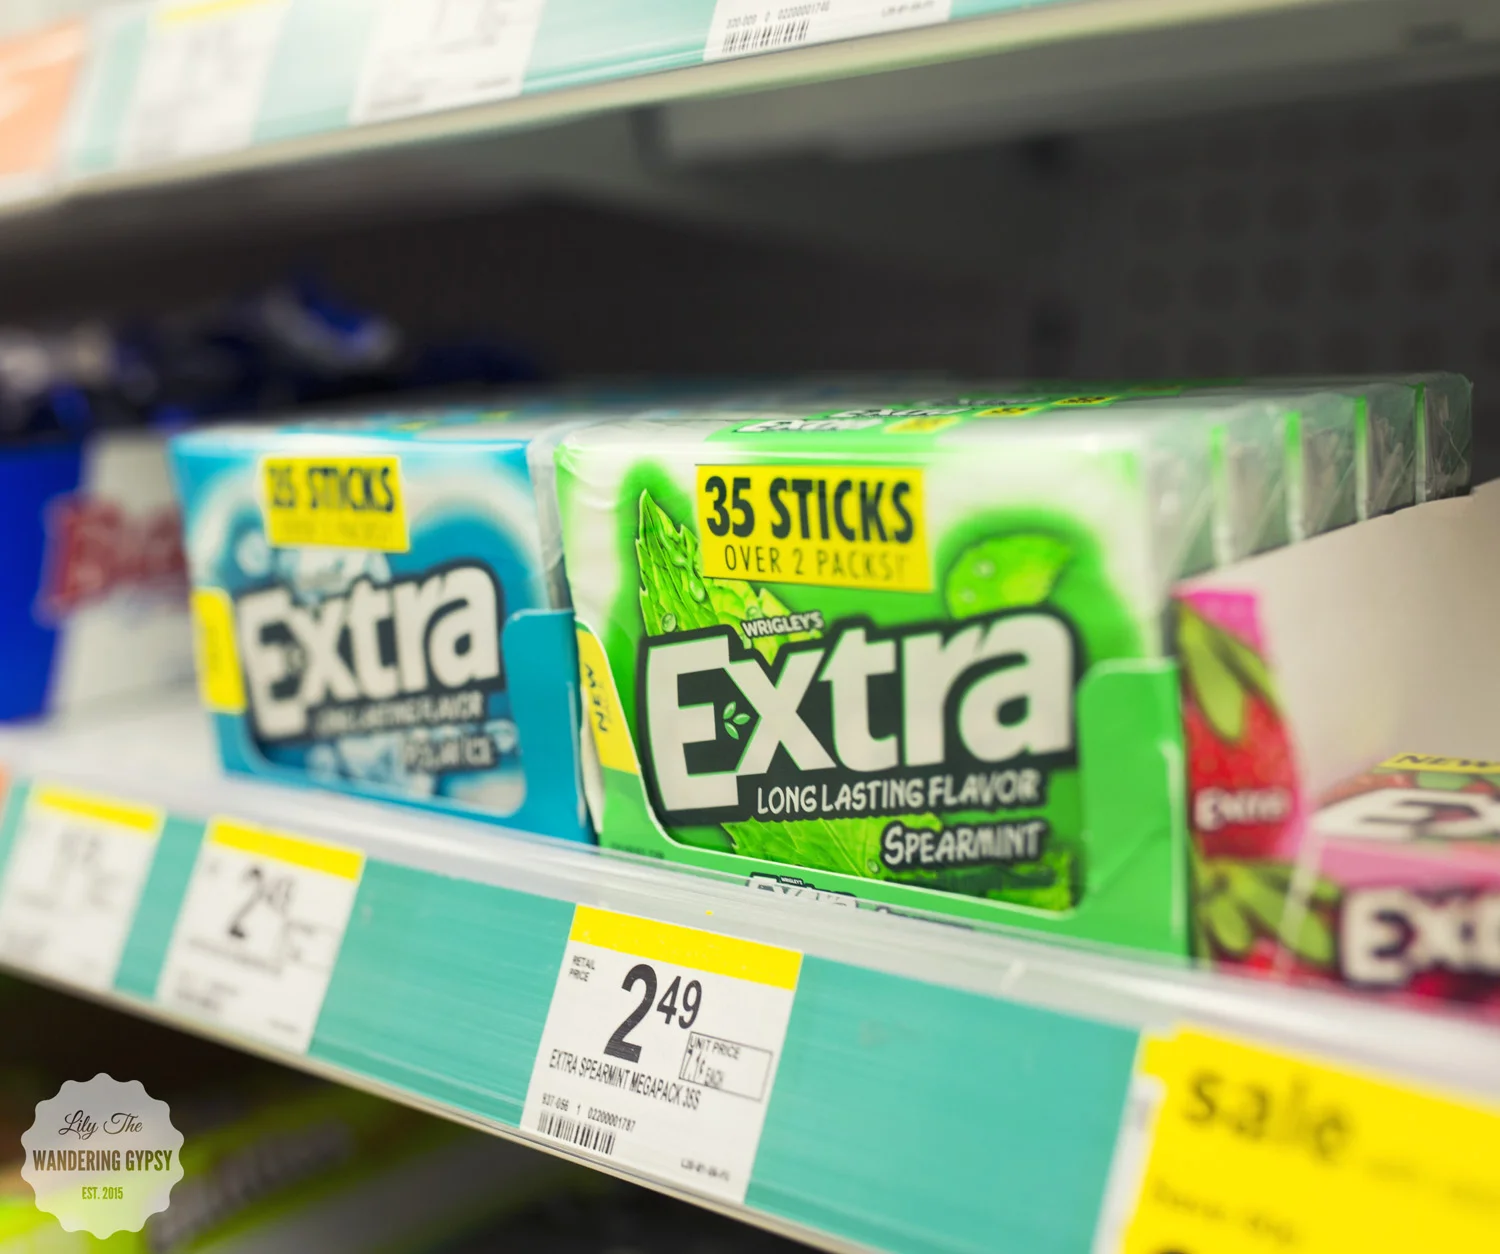
Extra® Gum 35-stick packages at Walgreens have more gum than you may be used to seeing! The case is super durable, and can actually be reused or recycled after you are done with the gum (see the image below). These larger stick packages ensure that you will run out of gum less often, and there is more gum to go around!
DIY Summer Fun - Cookie Cutter Jewelry & Trinket Trays
I recently collaborated with Wendy's to create several Summer Inspired DIY Projects! Throughout the next week or so, I will be sharing instructions to all 5 projects! This project in particular, was inspired by a blog post I found on the Aww, Sam Blog. * Note - this project is kind of messy, so lots of paper towels were needed!!!! So excited to present you with these Cookie Cutter Trinket Trays! Enjoy :)
MATERIALS:
- Air Dry Clay (2 smaller packages will do)
- Cookie Cutters - I got mine here (for 99 cents each!). I got a cactus, hand, lips, pineapple, and teepee.
- CeramCoat Paint in green, white, red, tan, black, and yellow
- Clear Poly waterproof paint-on coating, optional.
- Clay sculpting tools (I found these ones for $2.47 near the clay supplies at Hobby Lobby)
- Water in a small dish to use for smoothing clay with your fingers
- Waxed Paper and Tape to keep surface clean
- 2 Paint Brushes for larger areas, and then one for finer detailed lines
- Paint clean up supplies like water and paper towels
INSTRUCTIONS:
- Prep your work surface. On a smooth, dry table, tape down a piece of parchment paper that will cover the surface well.
- Open your clay, and grab a hand full of clay.
- Roll clay into a smooth ball, and then place it onto the waxed paper. press the clay down with the lid of the clay container, until it is less than 1/2 thick. Alternatively, you can place a second piece of waxed paper on top of the clay, and use your hand and/or a rolling pin to flatten the clay.
- Once flattened, press one shape at a time out of the clay, and carefully remove the clay from the cutter. I wound up using a clay tool to help with the hand space and the top of the pineapple shape.
- Next, you need to flatten and smooth out the clay shape. I did this by setting the clay shape onto the waxed paper, and then using water on my finger tips to smooth the edges. If you wanted raised edges, apply more pressure to the center, and less around the edges. I used a clay tool to kind of give the teepee dish a ridge around the sides.
- Also, you can use a plate and paper straws to shape the sides of the clay while it dries.
- Let dry for at least 3-5 hours, or ideally overnight. I didn't have that much time, so I painted them after about 5 hours and the paint seems to have stuck very well!
- I just LOVE how these turned out! Remember, check back soon to see what other summer DIY projects I have for you! Have a happy and creative summer :)
- A special thanks to Wendy's for inspiring me to create this project! Check out their Blackberry Lemonade ASAP, it's good!!!
- Find more summer DIY Ideas On My Blog and On My DIY Pinterest Board.
An Adorable Gift Idea - Spin For Perfect Skin & Coffee Cacao Coconut Sugar Scrub #VPbeauty
I wanted to share a little DIY project with you, and tell you all about a wonderful Mother's Day gift idea from Vanity Planet! Keep reading to learn more about this Shabby Chic Birdcage Gift Basket, the Vanity Planet Spin For Perfect Skin, and the Vanity Planet Coffee + Cacao + Coconut Sugar Scrub. This DIY is SO easy, let's get started!!
Let's Make A Gift Basket!!
Materials Needed -
1 birdcage, large enough to fit your gifts (I found this one at JoAnns)
Silk Flowers (I chose peonies - I used about 4-5)
Pink Paper Crinkles
Vanity Planet Spin For Perfect Skin Brush, Vanity Planet Sugar Scrub
That's it!
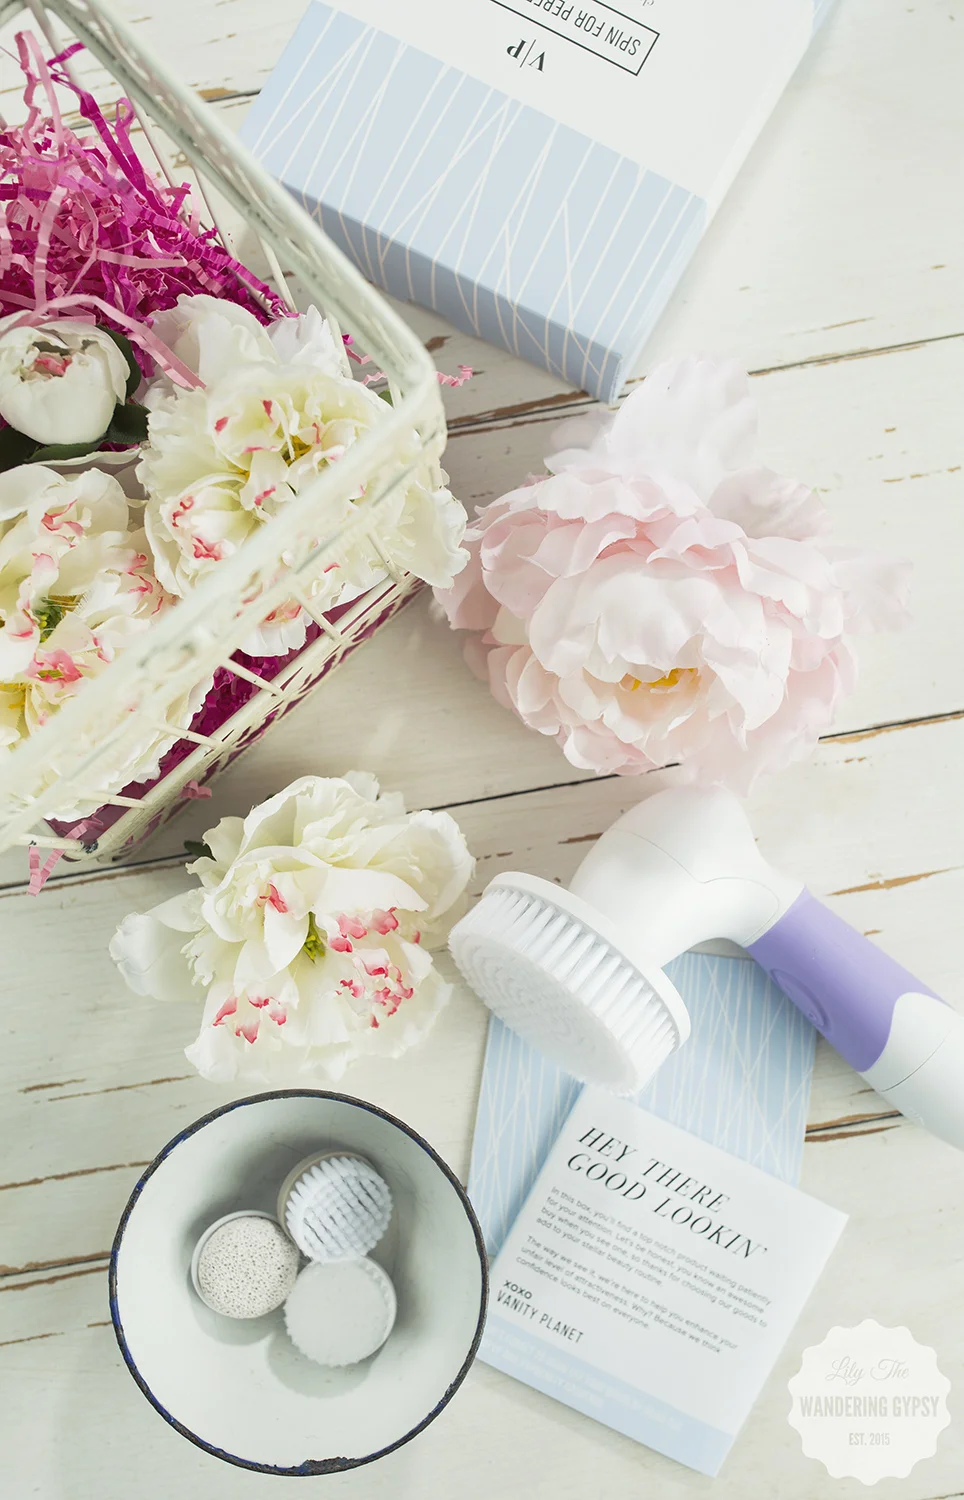
I filled the birdcage with paper crinkles, to make add a pop of color, and to make sure the body scrub and spin brush fit in the birdcage properly. I love how it looks.
Top off the gifts with some silk flower heads to hide them a bit. love how well the presents fit inside of this shabby chic birdhouse.
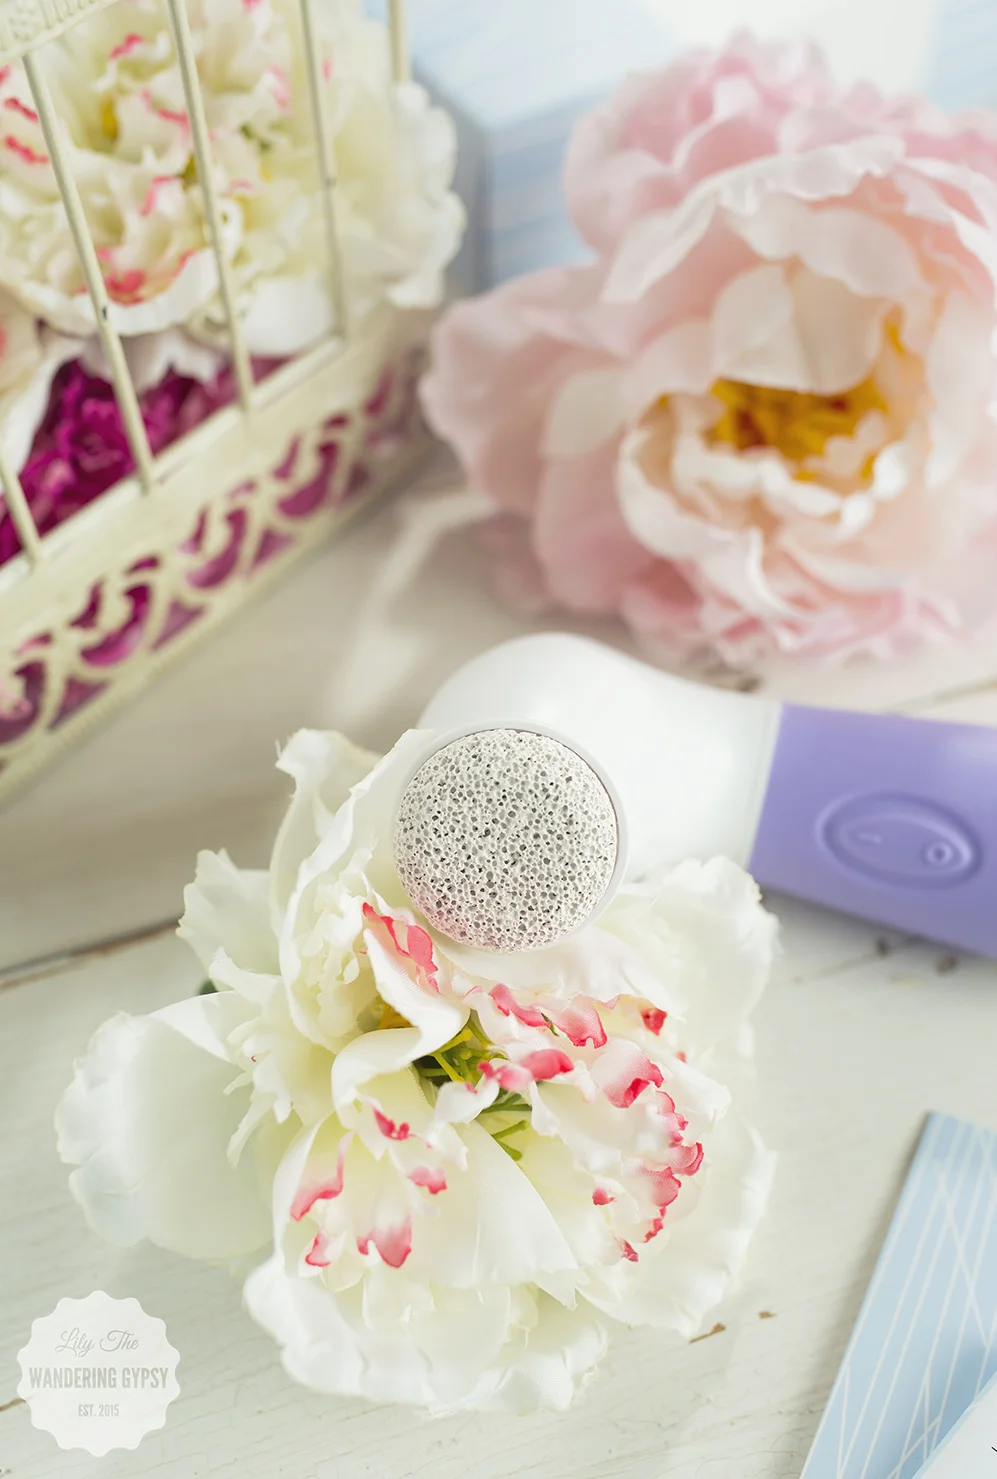
So, here's what is inside of this amazing gift basket. The Spin For Perfect Skin gift set comes with FOUR brush heads, which is awesome! My current spin brush is great, so this set will last w very long time. I love the addition of this larger brush head (it measures a few inches across), because it's perfect for your neck, chest, and back. I think it's a good idea to have a separate spin brush head for your face compared to the rest of your body. I also really like the pumice stone head. This is a bit more than anything I need at this point, but a lot of people would absolutely LOVE this!! Get your skin ready for summer with this awesome gift set. The sugar scrub was nice too. Read more about that below.
Below, you will see the brush head that I have on my current spin brush, as well as an even softer brush head, that might be nice around your eyes.
This Bru Coffee + Coconut Cacao Sugar Scrub contains "dead sea salt, organic kona coffee, organic olive oil, sweet almond oil, organic grape seed oil, coffee arabica seed oil, organic shea butter, and natural fragrance extracts". When I first opened it, I could instantly smell the coffee. It smells very fresh, and not only like coffee, but a very pleasant mix of sweetness as well.
I would definitely recommend opening this over the sink or the tub, because it is a bit messy, but is very easily containable (if that makes sense...). This scrub is more oily than others I have used. I wound up needing to use another soap to fully remove it from my skin. But, it's very luscious, and I am so glad it contains almost 100% organic ingredients. That's very hard to find!
This Essential Body Scrub "hydrates, moisturizes, and stimulates blood flow while targeting cellulite and stretch marks. It exfoliates dead skin" and smooths your skin out very nicely.
Another Adorable Gift Basket With Erin Pelicano Jewelry
I hope you enjoyed my previous gift basket post, here. I had so much fun putting that basket together, that I created yet a second gift basket. These are so perfect for Mother's Day (and for gifting at just about any time of the year). The reason why I like the style of this gift basket so much, is because after you gift this beautiful creation, someone can then use the basket as store in a closet, bathroom, pantry, and more.
GIFTS FOR SOMEONE SPECIAL
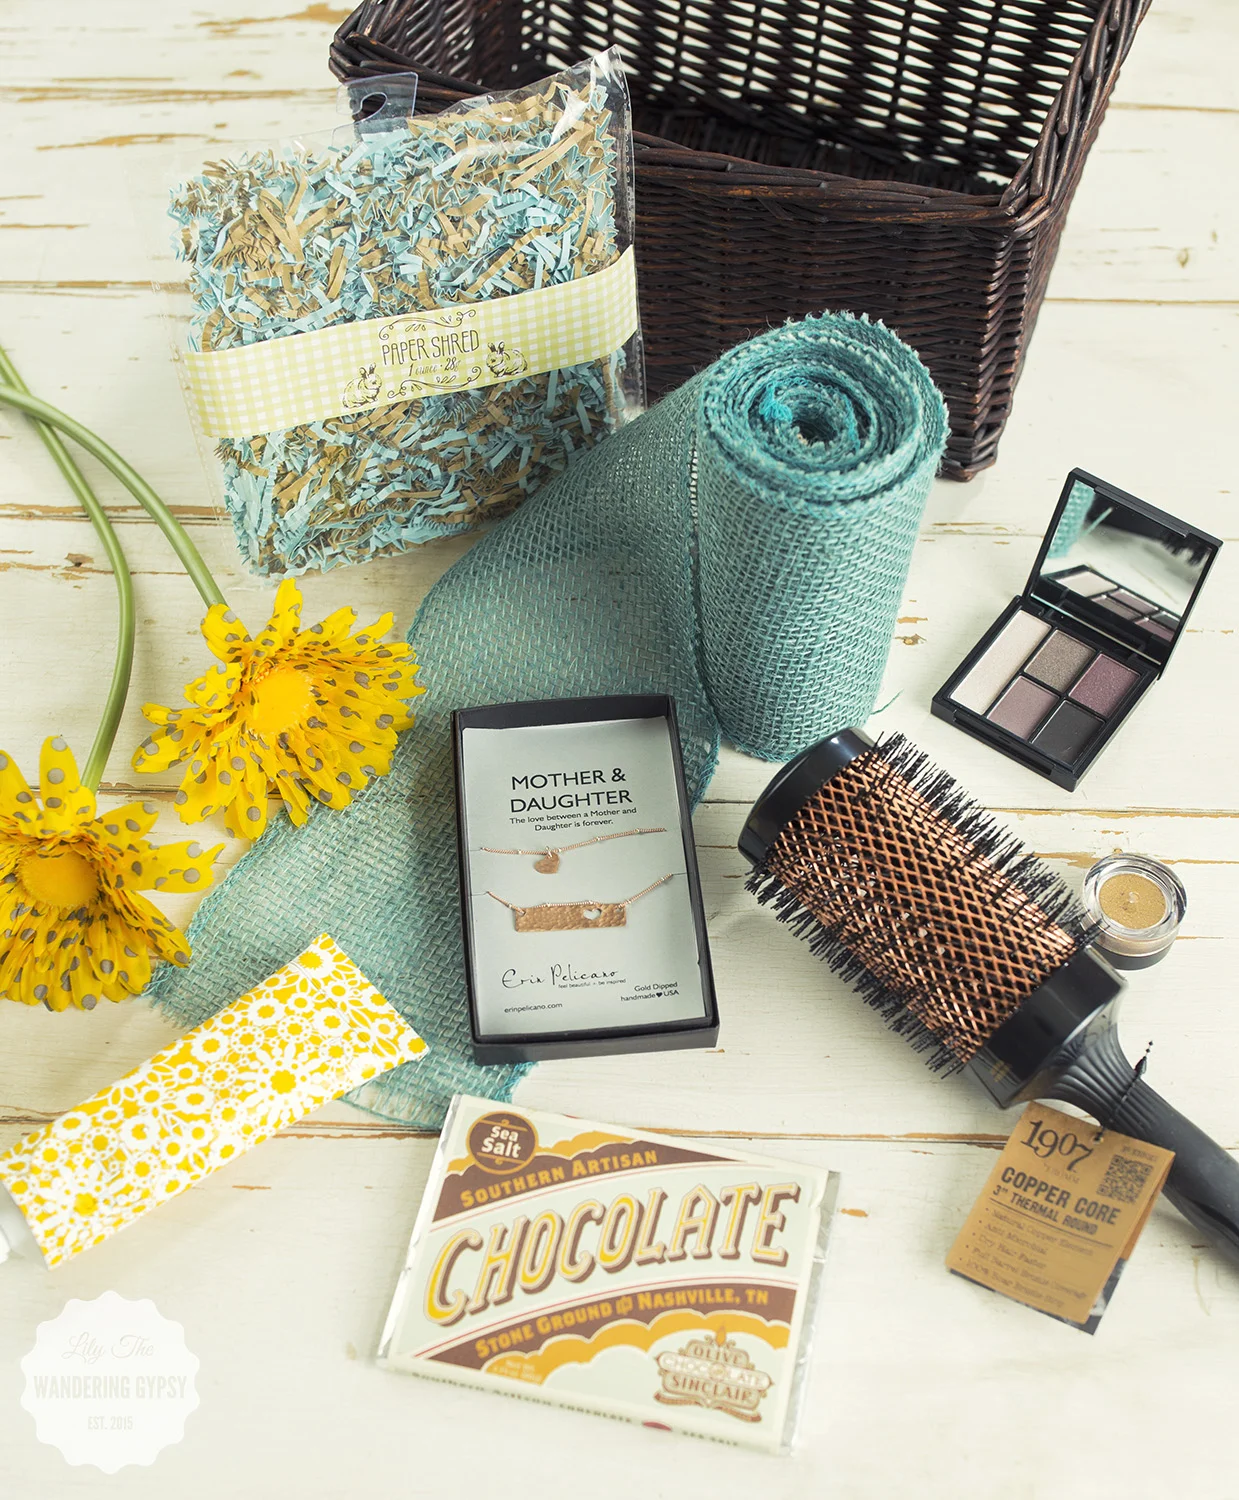
The items in this gift basket include: Mother & Daughter Necklace by Erin Pelicano, White Petals & Rice Flower Lotion by Lollia, 3" Copper Thermal Round Brush by 1907 by FROMM , Doo.Over Dry Shampoo by Kevin Murphy, Eye Palette and Eyeshadow by e.l.f., and the Sea Salt Southern Artisan Chocolate by Olive and Sinclair Chocolate. Read more about this chocolate in my previous post about Chocolate + Cashmere, here.
MATERIALS:
1 Wicker Basket
1 Roll of ribbon to wrap around the basket (not wired)
Hot Glue Gun + Glue (I used about 12 sticks, so it takes a lot)
2-3 Silk Flower Heads
Tissue Paper
Paper Crinkles
Fun Goodies To Fill Basket
INSTRUCTIONS:
1.) Cut a piece of ribbon, long enough to wrap around the basket and overlap about 3" in back.
2.) Glue the ribbon to the basket. I was pleasantly surprised at how easy it was to work with this burlap ribbon roll. It just seemed to mold to the shape of the basket so well. Starting at the back of the basket, glue the top of the ribbon and the cut end of the ribbon to the basket. Continue to wrap the ribbon around, and glue it/secure it every few inches. I glued up the basket where the vertical basket pieces were.
Gotta love that glue gun :)
3.) When you have glued the ribbon all the way around the basket, make sure the ribbon is attached well throughout the entire basket. Feel free to touch up any spots that may be loose. Fold the remaining cut end of ribbon over, to make sure loose edges are not showing. Then, glue that in place. Yay! The "hard part" is done.
Here is what your gift basket should look like...(below)
4.) Now, fill the bottom half of the basket with tissue paper.
5.) Then, add your paper crinkles. They should mold to the shape of the basket pretty well. These were from Target for $1.00 - I just love the color combo!
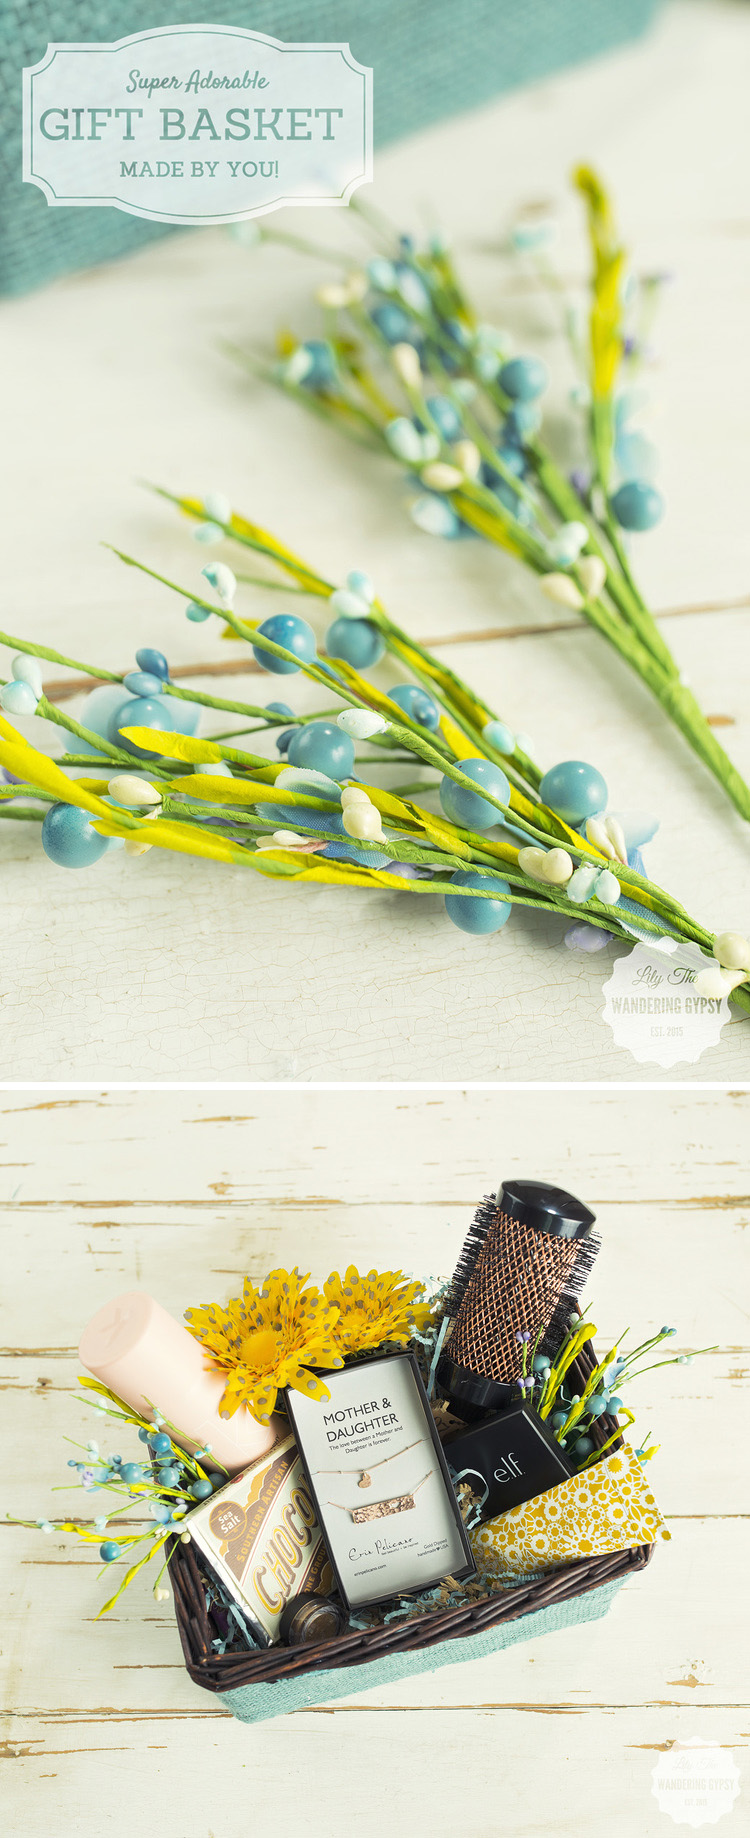
I wanted to make this cute gift basket like a floral arrangement of sorts, and I found these adorable berries (below), that really were the absolute perfect colors. So, it made me really happy to find these at JoAnn's during their recent Daffodil Dash sales :)
Cactus DIY Project!
We had a blast while we were in Arizona and throughout the southwest. There were literally cacti everywhere. I was constantly in awe of their beauty. I know why cacti are so popular in home decor, party decor, and DIY projects these days! I wanted to share an idea I created to display in a recent recipe post for Hunt's Canned Tomatoes (see it here).
These little decorations were so easy and pretty inexpensive. I love how the ribbon really dressed up these terra cotta pots so well.
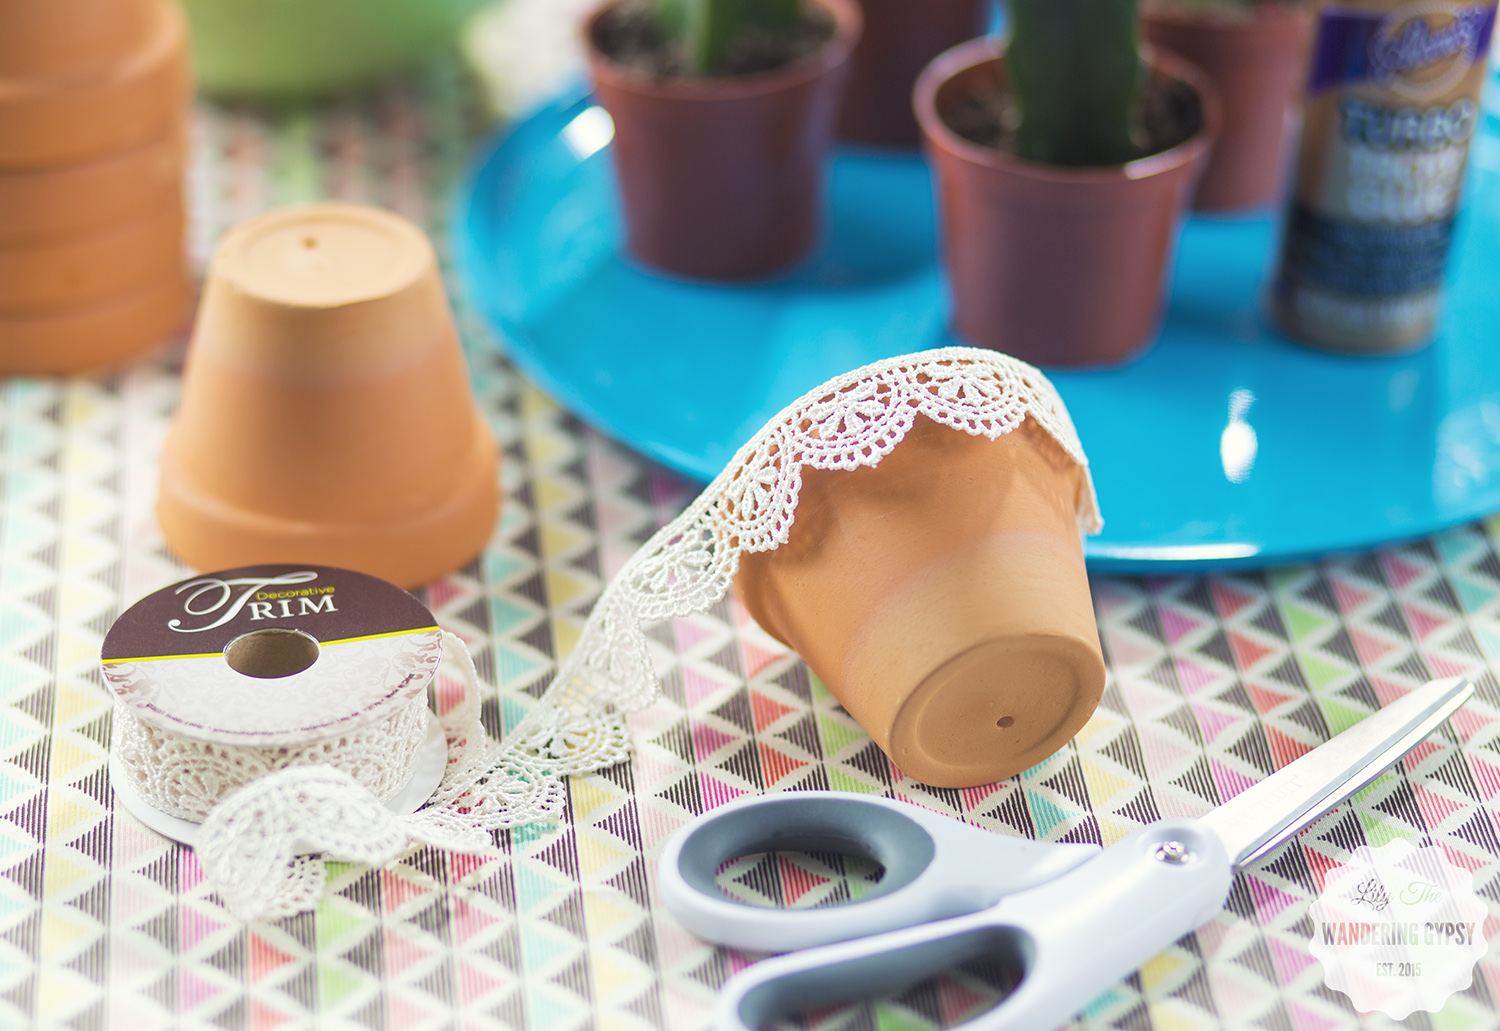
2.75" - 4" Terra Cotta Pots
Lace Ribbon (found here)
Tacky Glue
Cacti
Small Amount Of Potting Soil & Small Measuring Cup
1.) Measure Your Ribbon - See how much ribbon you need by wrapping the ribbon/lace around the terra cotta pots, and cutting the ribbon where it meets the other end without overlapping.
2.) Add a small line of glue around the top rim of the pot, and press ribbon pieces all the way around the top of the pot. Make sure you wipe any excess glue that seeps out. Next, we plant the cacti in their new homes.
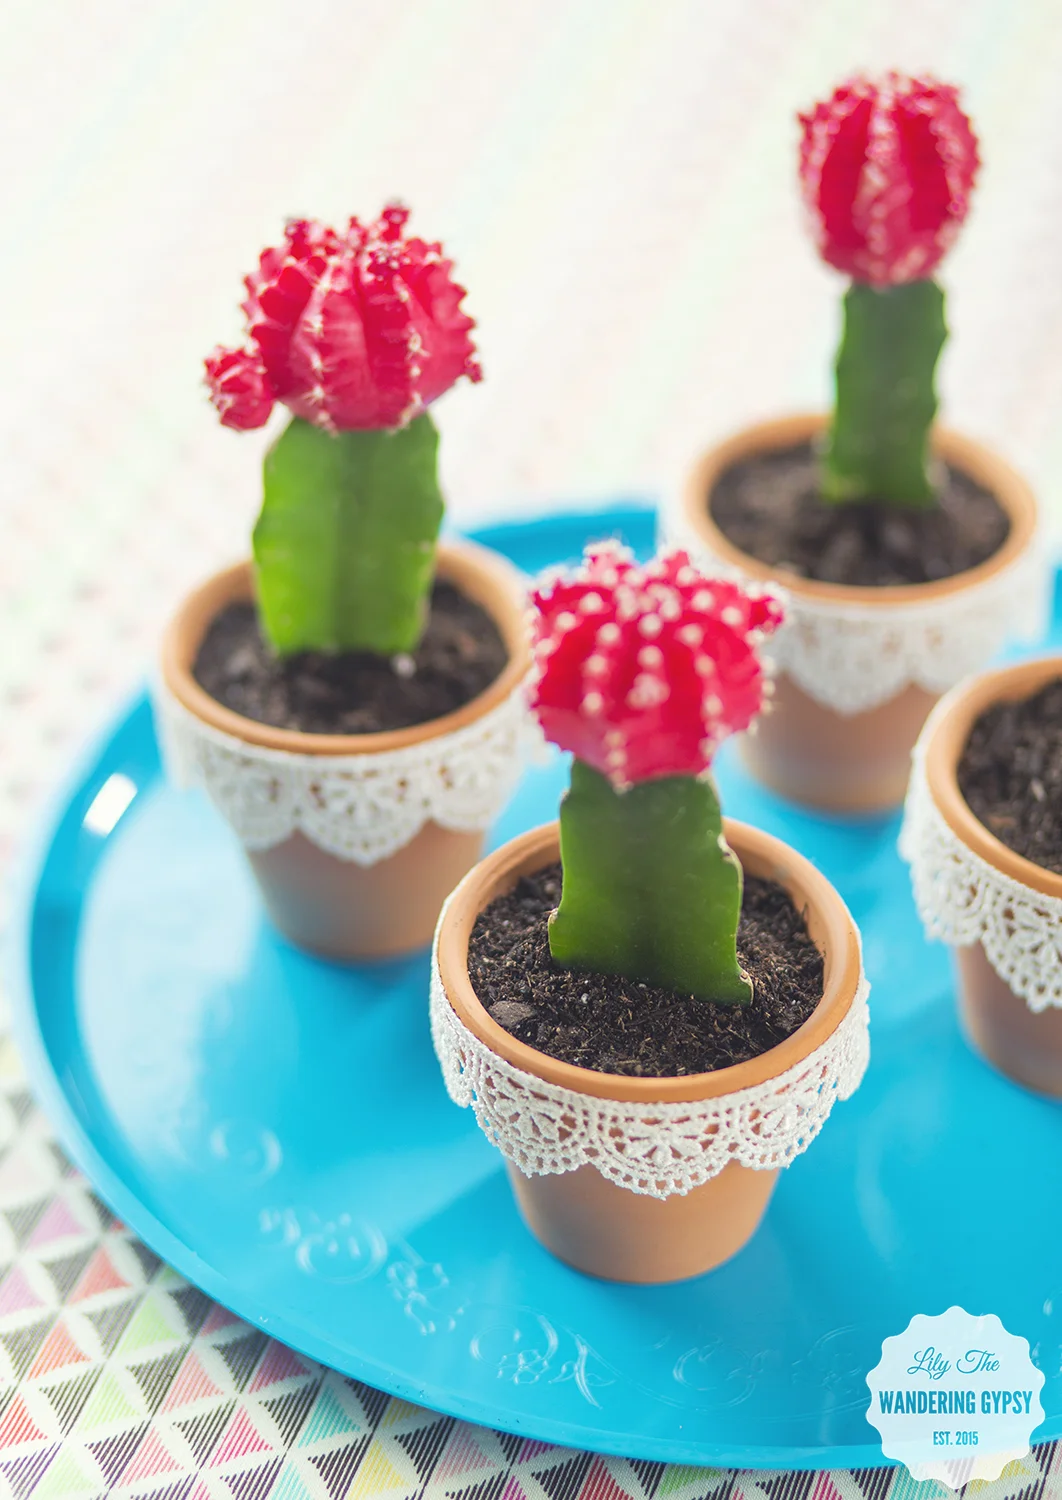
Aren't they pretty?! I think the would be lovely for a Cinco de Mayo celebration, wedding, shower, and more!
3.) Next, we will plant our cacti in their beautiful new pots. Make sure your cacti will fit!
4.) Now, take the cacti and its dirt out of the plastic pot it came in. Knock off any loose dirt into a container or trash can, and allow the roots to loosen up a bit.
5.) Place the cactus into its new home!
6.) Add a bit of new dirt on top of the cactus, and pat down to secure into place. Make sure it's not leaning too far to one side, and there you have it! A new little addition to your party decor ideas, or your home!
Aren't they cute...
Summer On-The-Go & Entertaining With Black Box Wines! - Plus 2 DIY Wine Party Tutorials
This shop has been compensated by Collective Bias, Inc. and its advertiser. All opinions are mine alone. #BlackBoxSummer #CollectiveBias The following content is intended for readers who are 21 or older.
Be sure to visit the Simple Entertaining Social Hub for more details about ways to entertain this summer.
These wines are eco-friendly, because the bag and box are recyclable! Black Box Wines taste good, and they are about half the price of bottled wines. Also, they can stay fresh up to 6 weeks, and contain 750 ml - the equivalent of 4 bottles. Imagine trying to carry 4 bottles of wine, which is way more to juggle than this one awesome box of tasty goodness! 50 gold Metals for quality can't be wrong!
A SUMMER PARTY RECIPE - WINE & CHEESE PAIRING SKEWERS
I love the idea of a wine and cheese party, but if guests can carry the appetizers around, it prevents anyone from being left out, or everyone having to hover over one plate of food. Instead, offer guests skewers, and a plentiful plate of meats and cheeses, and let them decide what they want! I also like the idea of having grapes and as many fresh fruits and veggies as possible. I liked using these cardboard food containers I got at a craft store. They hold so much, and are coated to avoid any messes.
Cut up salami, summer sausage, and various cheeses and let guests use skewers to create their own Wine & Cheese Pairing Skewers!!
Let your guests choose their own adventure, and add whatever type of meats and cheeses they want! Less food will be wasted with this method, which saves money.
 Be sure to visit the Simple Entertaining Social Hub for more details about ways to entertain this summer.
FABRIC WINE GLASS MARKERS
INSTRUCTIONS:
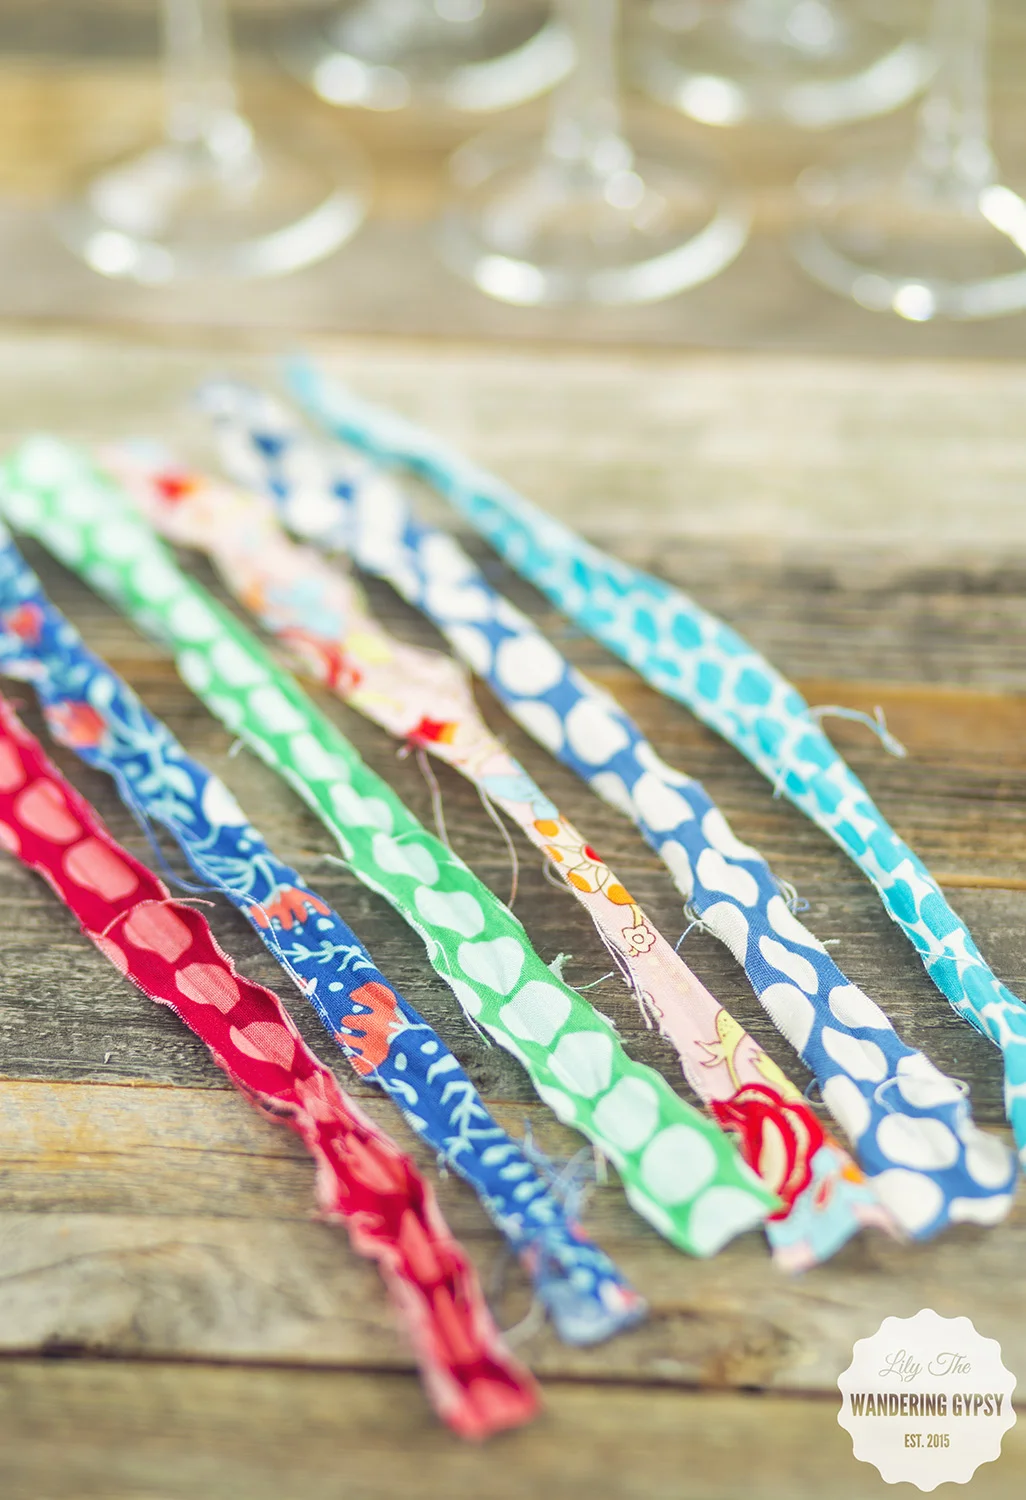
1.) These are super simple and can be made for FREE! Just cut your fabric strips that are 12" long x 1" wide. I just freehanded these, but a rotary cutter could always be used.
2.) Now, to get the rough edges on the fabric pieces, pull them and stretch them as much as possible. Keep pulling from both ends until you get a more frayed look.
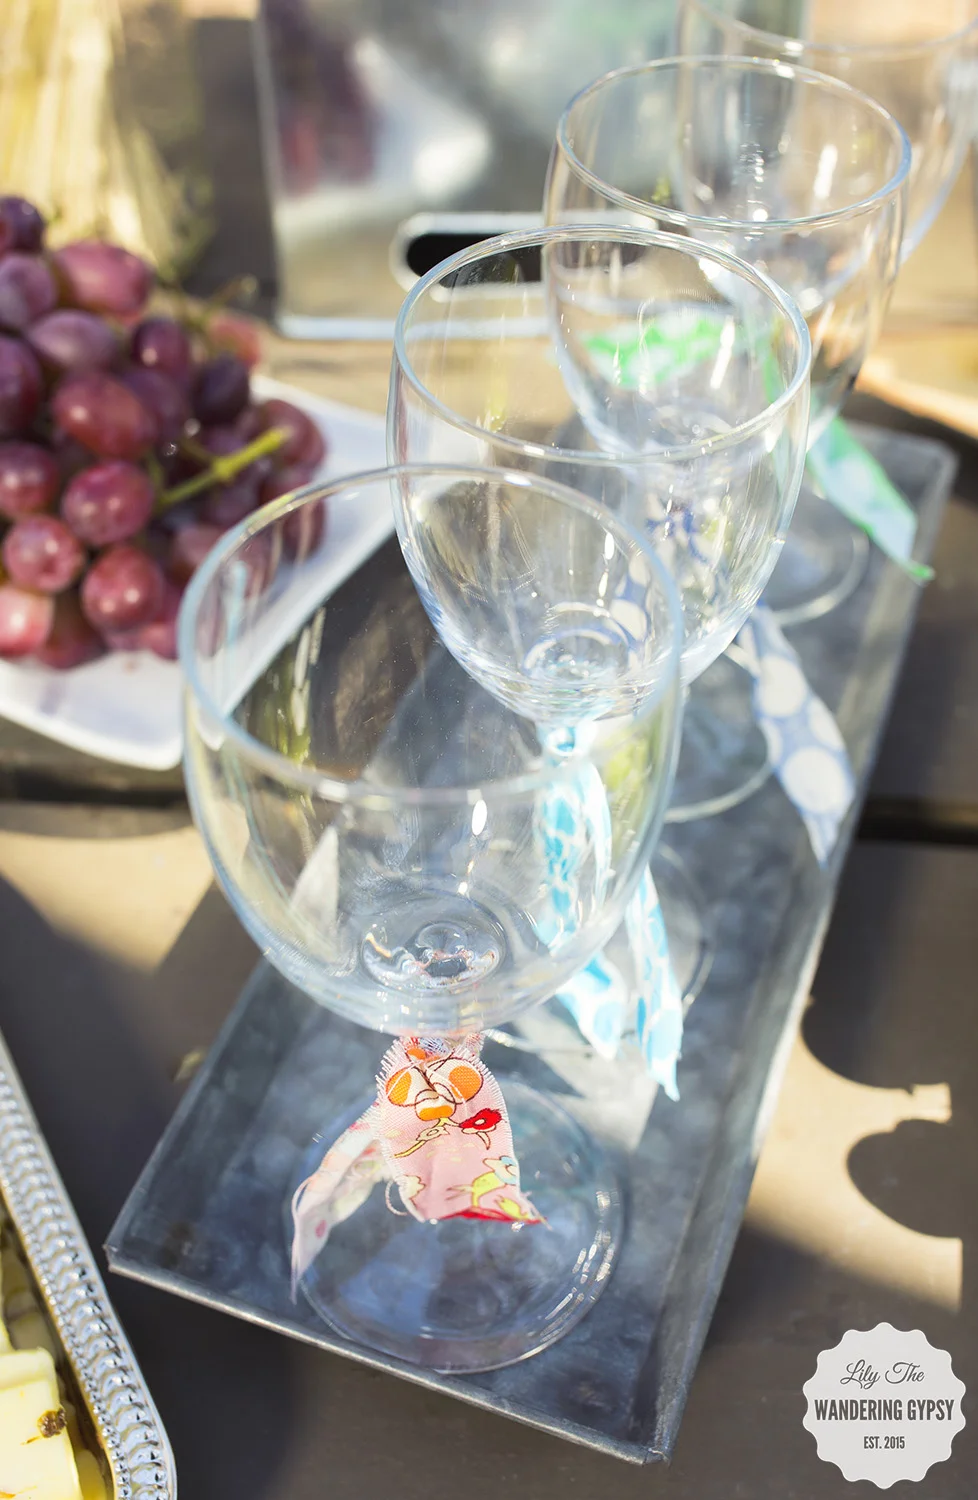
3.) Tie the distressed fabric strips around the top of the wine glass stem, and double knot.
4.) I found that cutting about 1" off of each of the long ends at a diagonal was best. That's it!
WINE PARTY TIP!
To ensure guests can reach the boxes of wine, elevate them onto something like a glass vase or metal box. This also adds visual interest to your party table.
DIY WINE SIGN TUTORIAL
This little project came together so well! It was one of the easiest party decor projects ever.
WHAT YOU NEED:
All you need is a few materials and about 15 minutes, and you can make this cute DIY Wine Sign! Perfect for summer parties On-The-Go!
4 Galvanized letters - found at a fabric store, Birch Round (or Rectangle) - found at that same fabric store, and a hot glue gun with glue. Super Glue / Krazy glue did NOT work at all, just a warning :)
1.) Plug in your glue gun, and begin to do a sample placement of your letters onto the birch round. This birch round actually has a twine hanger attached, but you can cut it off.
2.) I found that the best way to securely attach the letters was to mark where each letter went with a dot of pencil, then apply hot glue and quickly re-attach your letters.
3.) Glue all letters in place and you are DONE! This project only took about 15 minutes!
Miracle Gro - Grow Together - A Cute Terrarium DIY
Super excited to share my latest project with you! I have teamed up with Miracle Gro and HelloSociety to bring you some pretty amazing Spring Inspirations. I planted the terrarium arrangement about 2 weeks ago, and it's still as happy as ever!
I had so much fun working on this project while visiting my family in Arizona. The timing couldn't have been more perfect, because the Cave Creek, AZ Home Depot has SO many amazing succulents and cacti to choose from.
My plants obviously love their new home in Miracle Gro Cactus, Palm, and Citrus Potting Mix. The instructions for this terrarium are at the bottom of this post.
Check back soon to see more photos as they go live on my Dedicated Board.
MATERIALS:
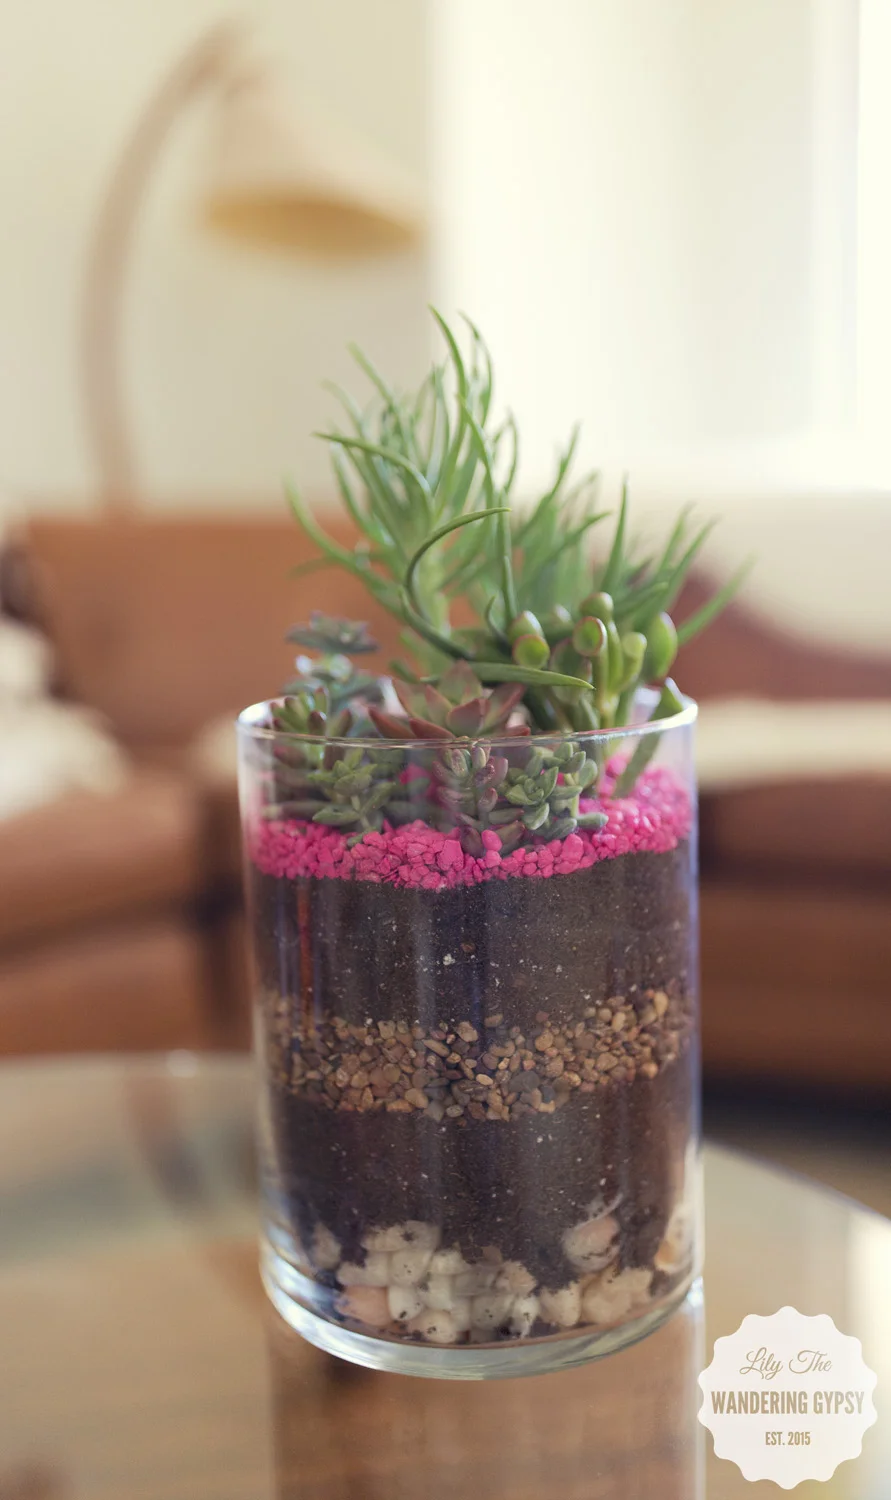
Various succulents and cacti (varied heights are good), Miracle Gro Cactus, Palm, Citrus Potting Mix, natural colored pebbles, white or brown aquarium rocks, neon pink aquarium rocks, activated charcoal (optional), gardening gloves, shovel, funnel, tall glass container (Walmart has the best prices that I've found).
INSTRUCTIONS:
In a tall glass container , or glass container of your choice, add an optional layer of activated charcoal. Next, add about 2 inches of larger pebbles. Add a layer of dirt on top, then pat the dirt down with the back of your hand, to create a flat surface. Next, add white or brown colored aquarium rocks, and flatten them with your hand. Add a bit more dirt, almost to the very top, but leaving about 1-2" of space at top. Do a test arrangement by placing the potted succulents into the container. Feel free to break apart plants if it looks like there are multiples in one container. Once you have a layout that you like, take the succulents out of their container (over a bucket or similar), and knock off as much loose dirt as you can. Place plants into dirt and add a bit more dirt on top. Now, using a funnel, add pink rocks around plants, to hide all dirt. That's it! A fun project you can create in an hour or so!
#LOVE Candles DIY Tutorial
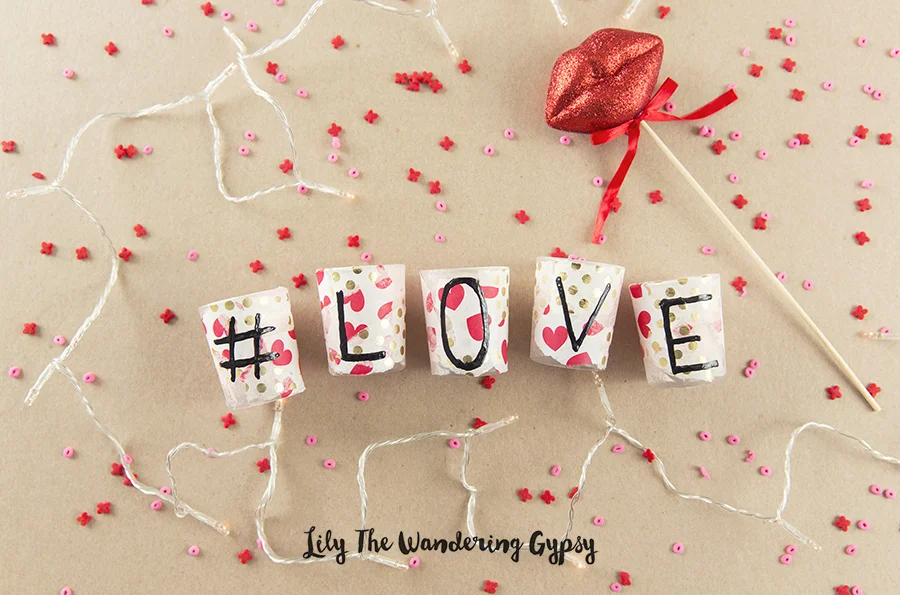
Happy Valentine's Day! I have this adorable project idea that will last you long after the holiday is over. These #LOVE candles make such an adorable gift idea, and I can't believe how cute these are!
MATERIALS:
- 5 glass votive candles with wax in them
- various colors of festive tissue paper
- Mod Podge
- Paint Brushes & A Pencil
Paint a bit of the Mod Podge onto your first votive candle, and begin alternating paper pieces.
Brush more Mod Podge over top of the tissue paper for a smooth finish.
Repeat this with each votive candle, covering every side of the candles. Let these dry for a few hours, or overnight on a piece of white scrap paper. These may stick a little bit, so white paper worked best.
Now, you can stop here, or you can customize the candles with your message of #LOVE :)
*** Draw your letters onto the votives with pencil first!!!
And then paint over the pencil with black puffy paint. Carefully go back over the edges so they are smooth.
Itty Bitty Donuts + A Gift Box DIY
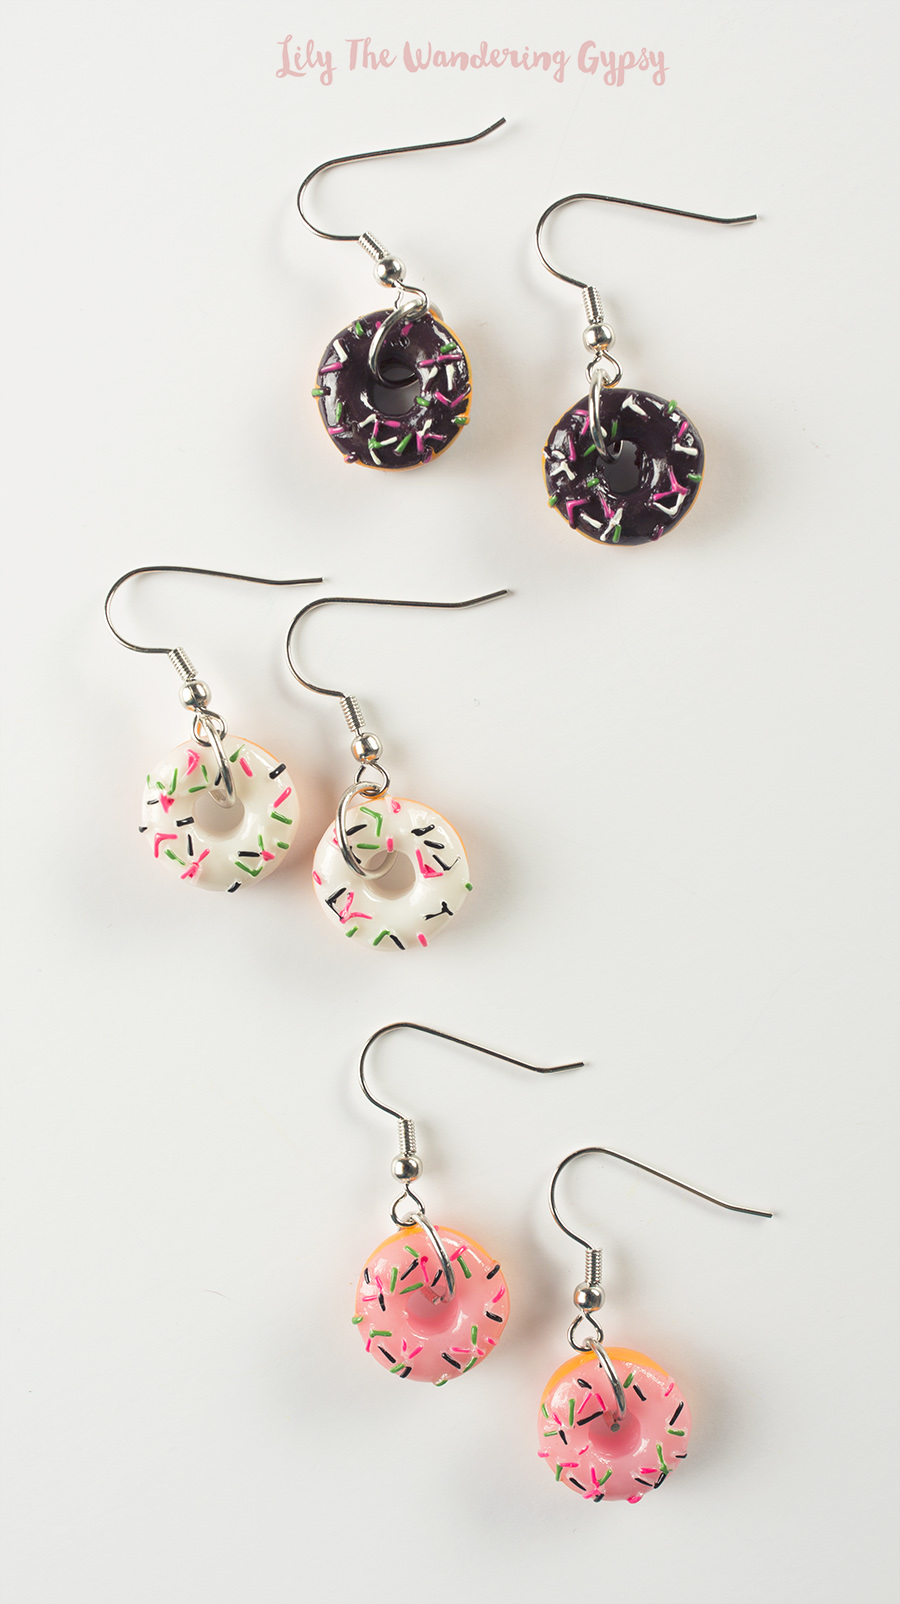
I have been wanting to make these Donut Earrings for the longest time, and I figured that Valentine's Day was the perfect day to share them!
MATERIALS:
- Mini Donuts From Dollhouse Section
- Jump Rings (Size =
- Matching Earring Hooks
- Pliers
READY THE DONUTS
OPEN THE JUMP RINGS
Take your pliers, and rather than opening the jump rings wider, just twist them up. This helps them go back together better in the end. Open them wide enough to fit around the donuts.
Close the Jump Rings around the donuts, and make sure they are secure. That's it!
AND YOU HAVE DONUT EARRINGS!
A GIFT BOX DIY
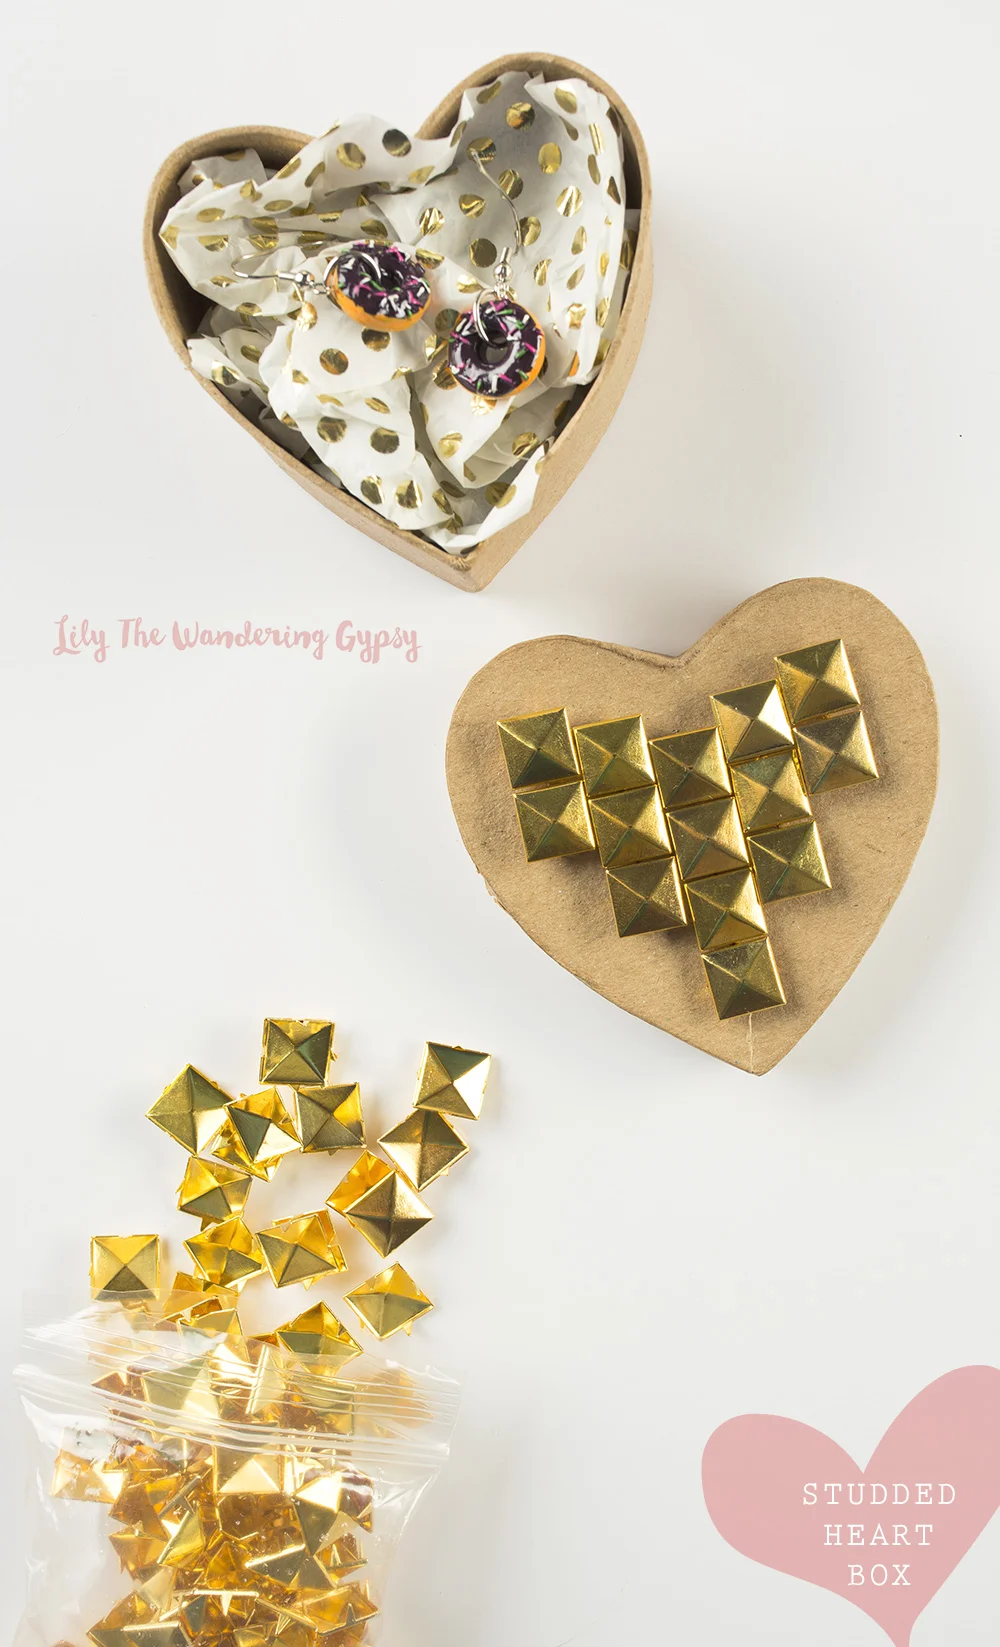
- I also had this cute paper mache box that was heart shaped, so I stuck some studs into the top of the box, added some tissue, and put the Donut Earrings inside! How cute :)
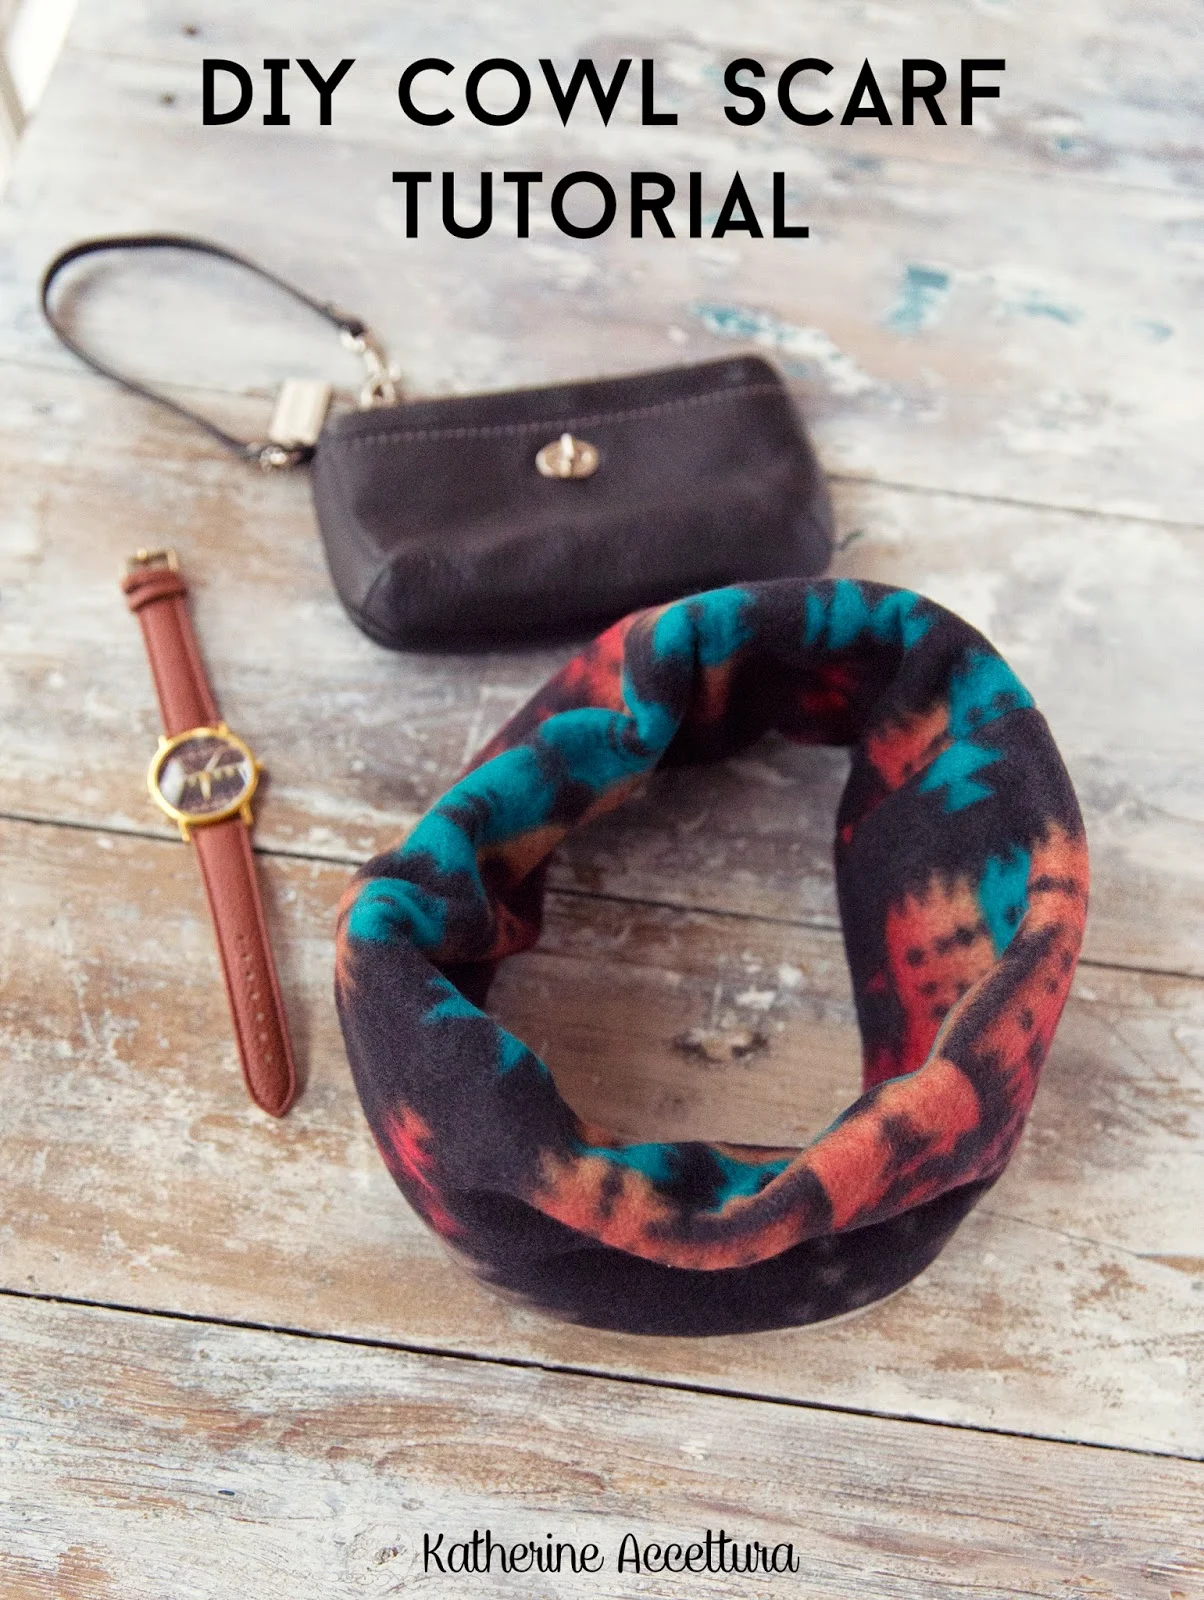
How To Make A Cowl Scarf - Fun & Easy!
Let's face it, it is COLD as heck out there and having warm layers make it a little bit easier to endure. When I created this Cowl Scarf tutorial, I envisioned someone riding their bike to and from work or school, without any protection from the cold on their face. Well, this double layer fleece cowl scarf is lightweight but still blocks that wind pretty well, and looks super stylish! You can just keep wearing it to work or school, and even looks cute a little bit more dressed up! Enjoy :)
MATERIALS
2 Pieces of Fleece (10" x 30"), Sewing Pins, Sharp Scissors, Sewing Machine, Thread.
Choose your fleece fabrics! Hobby Lobby had some lovely fleece prints, and I know JoAnn's does too.
Pin up both long sides.
Sew up the sides, leaving a hole in one of the longer sides to turn the cowl right side out.
Trim off excess seam allowance.
Put your arm through the tube, and pull both short sides together, inside out.
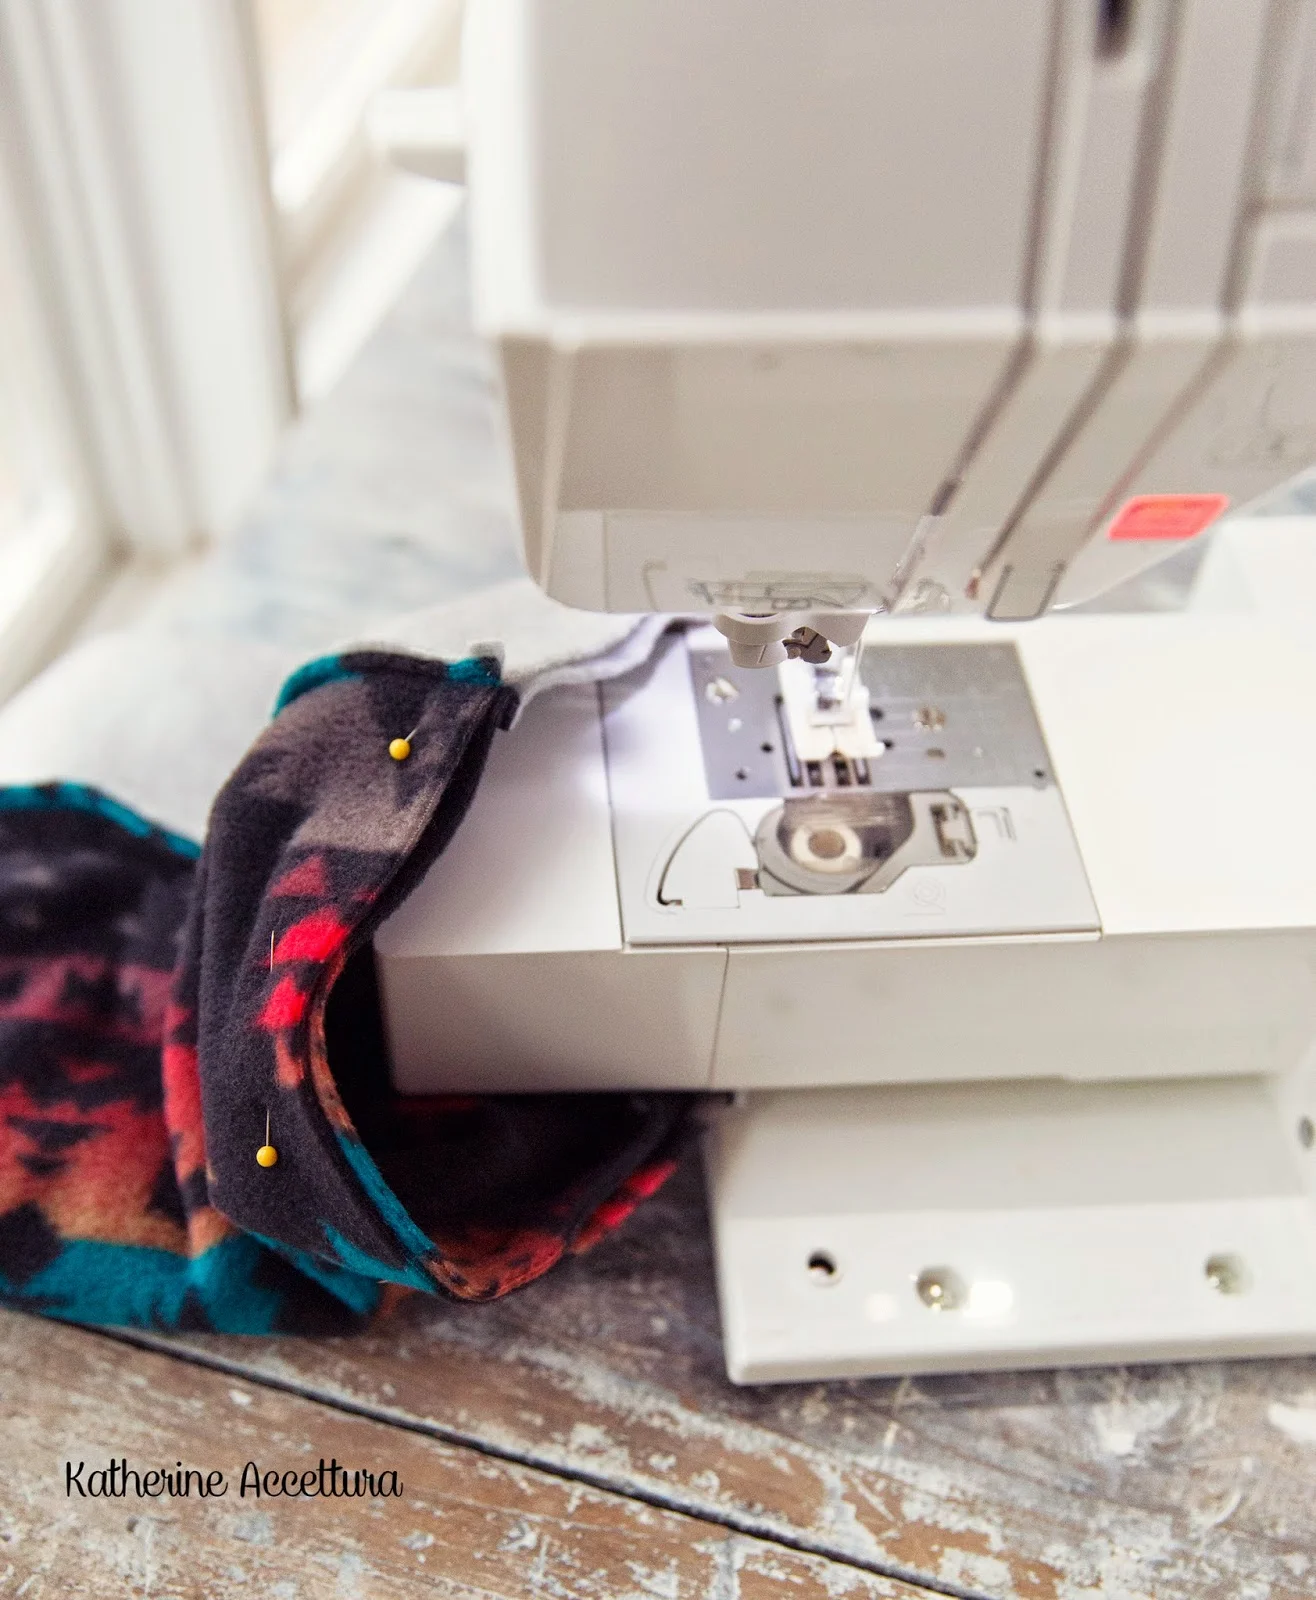
Pin the short sides together in a tubular shape.
Sew up the short sides, in a tube shape. I was able to remove a part of my sewing machine that allowed me to slide the tube onto the machine easier.
Here is the tube, sewn up on the short sides.
Flip the scarf right sides out, through the hole on the long sides, and pin the hole up. You're getting ready to sew the final stitches!
Here is what the final stitches look like! Trim extra threads, and you're DONE!


